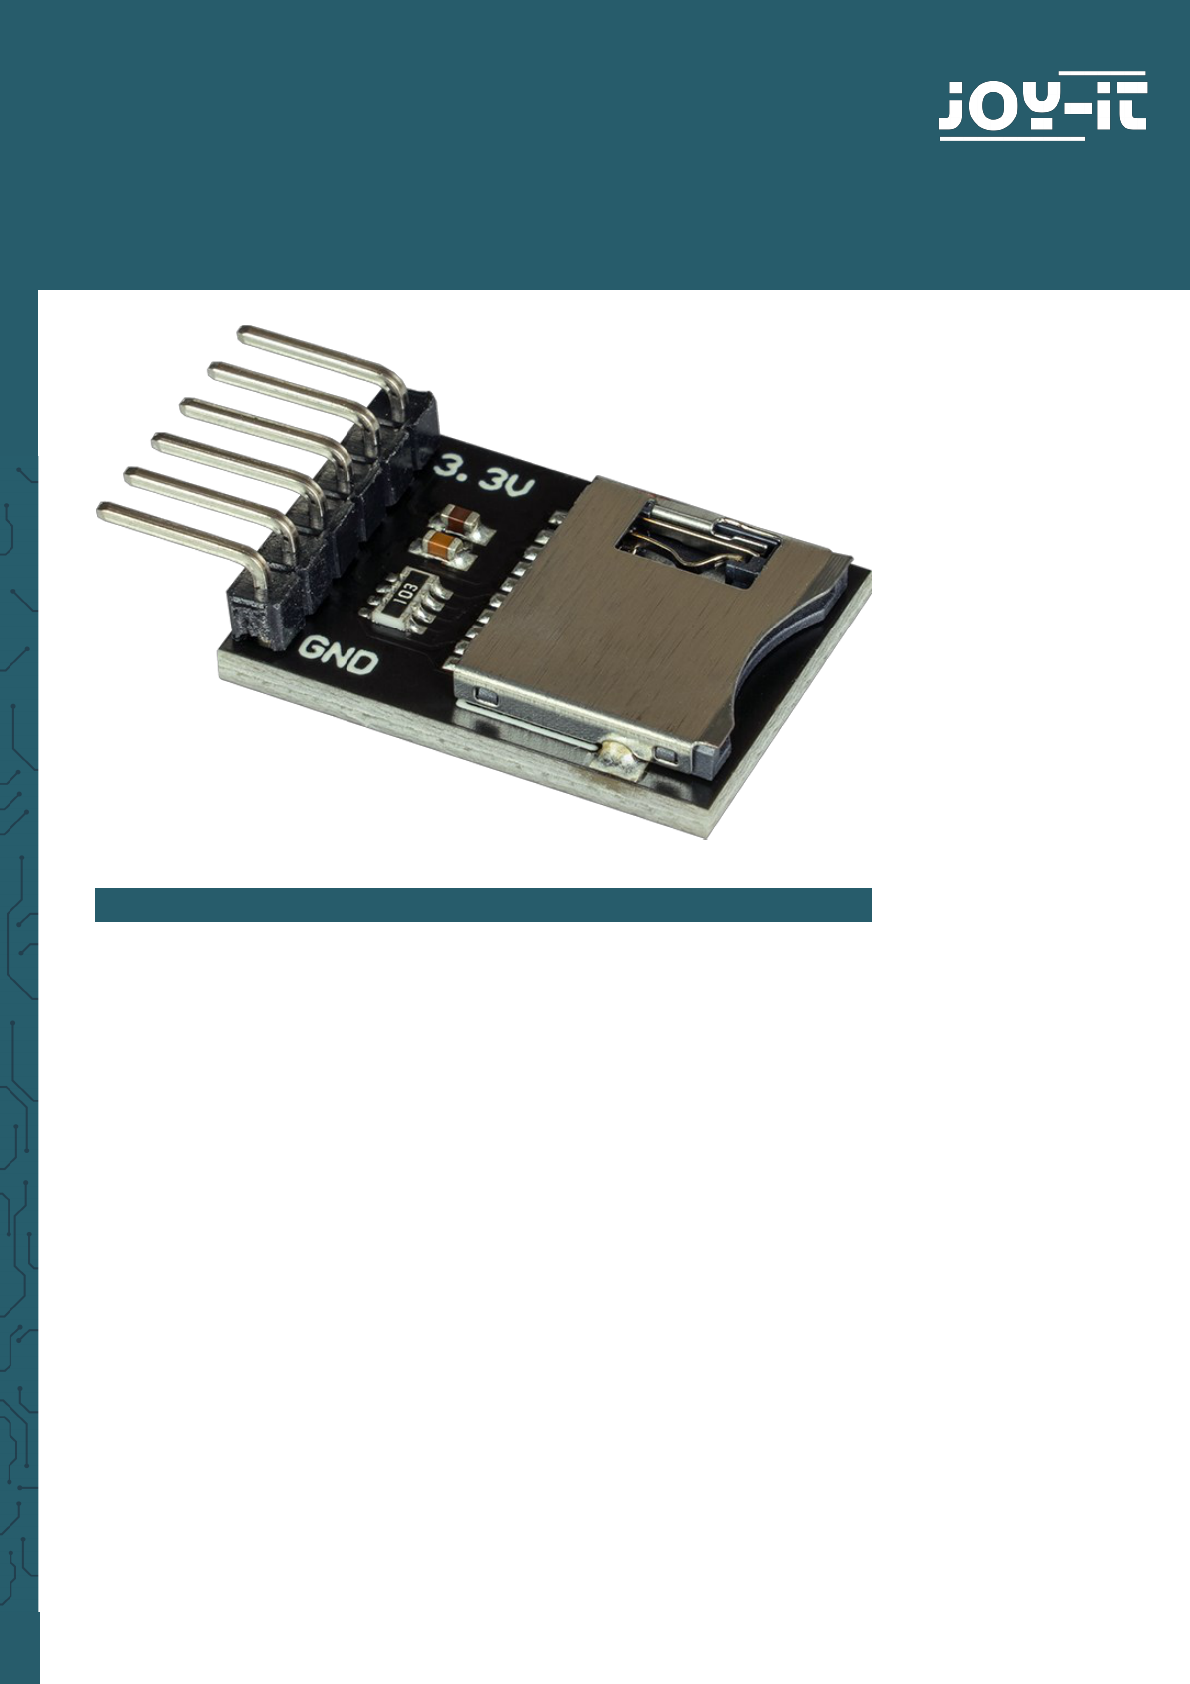
MICRO-SD BREAKOUT BOARD
COM-MSD
1. GENERAL INFORMATION
Dear customer,
thank you very much for choosing our product.
In following, we will introduce you to what to observe while starting up
and using this product.
Should you encounter any unexpected problems during use, please do
not hesitate to contact us.

2. USE WITH THE ARDUINO
2.1 Wiring
Connect your Micro-SD module to your Arduino as shown in the diagram
and table below.
Note that you need a logic level converter because the module works
with a 3 V logic level unlike the Arduino.
In this example we use the COM-KY051VT from Joy-IT.
Arduino Voltage SD-Module
3,3 V VCCa 3v3
5 V VCCb -
GND GND GND
13 B3 -
12 B4 -
11 B2 -
4 B1 -
- A1 CS
- A2 MOSI
- A3 CLK
- A4 MISO

2.2 Library installation
To install the required library, open the library manager in your Arduino
IDE under Sketch -> Include Library -> Manage Libraries....
There enter SD in the search field and install the SD library by Arduino,
SparkFun
2.3 Code example
Now you can go to File -> Examples -> SD to open the ReadWrite examp-
le and load it onto your Arduino.
Alternatively you can copy the code out here:
#include <SPI.h>
#include <SD.h>
File myFile;
void setup() {
// Open serial communications and wait for port to open:
Serial.begin(9600);
while (!Serial) {
; // wait for serial port to connect. Needed for native USB port only
}
Serial.print("Initializing SD card...");
if (!SD.begin(4)) {
Serial.println("initialization failed!");
while (1);
}
Serial.println("initialization done.");
// open the file. note that only one file can be open at a time,
// so you have to close this one before opening another.
myFile = SD.open("test.txt", FILE_WRITE);
// if the file opened okay, write to it:
if (myFile) {
Serial.print("Writing to test.txt...");
myFile.println("testing 1, 2, 3.");
// close the file:
myFile.close();
Serial.println("done.");
} else {
// if the file didn't open, print an error:
Serial.println("error opening test.txt");
}
// re-open the file for reading:
myFile = SD.open("test.txt");
if (myFile) {
Serial.println("test.txt:");
// read from the file until there's nothing else in it:
while (myFile.available()) {
Serial.write(myFile.read());
}
// close the file:
myFile.close();
} else {
// if the file didn't open, print an error:
Serial.println("error opening test.txt");
}
}
void loop() {
// nothing happens after setup
}

3. USE WITH THE RASPBERRY PI PICO
2.1 Wiring
Connect your Micro-SD module to your Raspberry Pi Pico as shown in the
diagram and the table below.
Raspberry Pi SD-Module
3,3 V 3v3
GND GND
GP9 CS
GP11 MOSI
GP10 CLK
GP8 MISO

import machine
import sdcard
import uos
# Assign chip select (CS) pin (and start it high)
cs = machine.Pin(12, machine.Pin.OUT)
# Intialize SPI peripheral (start with 1 MHz)
spi = machine.SPI(1,
baudrate=1000000,
polarity=0,
phase=0,
bits=8,
firstbit=machine.SPI.MSB,
sck=machine.Pin(10),
mosi=machine.Pin(11),
miso=machine.Pin(8))
# Initialize SD card
sd = sdcard.SDCard(spi, cs)
# Mount filesystem
vfs = uos.VfsFat(sd)
uos.mount(vfs, "/sd")
# Create a file and write something to it
with open("/sd/test01.txt", "w") as file:
file.write("Hello, SD World!\r\n")
file.write("This is a test\r\n")
# Open the file we just created and read from it
with open("/sd/test01.txt", "r") as file:
data = file.read()
print(data)
2.2 Library installation
To program the Raspberry Pi Pico, we use the Thonny IDE with Micropy-
thon in this example.
First of all, you must download the required Micropython library. You can
find this here.
Open the sdcard.py in your IDE and save the file on your Raspberry Pi Pi-
co in the lib folder. If necessary you have to create this folder before.
2.3 Code example
Now you can create a new file and insert the following code there to test
the module:
Now you can run the script on your Raspberry Pi Pico.

www.joy-it.net
Pascalstr. 8 47506 Neukirchen-Vluyn
www.joy-it.net
SIMAC Electronics GmbH
Pascalstr. 8, 47506 Neukirchen-Vluyn
4. ADDITIONAL INFORMATION
Our information and take-back obligations according to
the Electrical and Electronic Equipment Act (ElektroG)
Symbol on electrical and electronic equipment:
This crossed-out dustbin means that electrical and electronic appliances
do not belong in the household waste. You must return the old appliances
to a collection point.
Before handing over waste batteries and accumulators that are not en-
closed by waste equipment must be separated from it.
Return options:
As an end user, you can return your old device (which essentially fulfils
the same function as the new device purchased from us) free of charge for
disposal when you purchase a new device.
Small appliances with no external dimensions greater than 25 cm can be
disposed of in normal household quantities independently of the pur-
chase of a new appliance.
Possibility of return at our company location during opening hours:
SIMAC Electronics GmbH, Pascalstr. 8, D-47506 Neukirchen-Vluyn, Germa-
ny
Possibility of return in your area:
We will send you a parcel stamp with which you can return the device to
us free of charge. Please contact us by email at Service@joy-it.net or by
telephone.
Information on packaging:
If you do not have suitable packaging material or do not wish to use your
own, please contact us and we will send you suitable packaging.
5. SUPPORT
If there are still any issues pending or problems arising aer your purcha-
se, we will support you by e-mail, telephone and with our ticket support
system.
Email: service@joy-it.net
Ticket system: http://support.joy-it.net
Telephone: +49 (0)2845 9360-50 (10-17 o‘clock)
For further information please visit our website:
www.joy-it.net
Published: 16.03.2022
