
This Quick Reference Guide will help get you started in OSCAR, including navigating
and managing your:
• Home Page
• Recommendation Requests
• Recommendation Letters
• Documents
• Prole
Visit https://oscar.uscourts.gov/help for more detailed instructions on using OSCAR.
If you need assitance accessing your account, please contact the OSCAR Program Oce.
https://oscar.uscourts.gov
8
7
6
5
4
3
2
1
8
7
6
5
432
1
OSCAR Statistics: An overview of your current recommendation requests.
Upcoming Events: A quick view of upcoming events including training opportunities.
User Information: A summary of your account type and general information.
Recommendation Requests: A quick view of your most recent recommendation requests.
User Dropdown: Quick access to your account and preferences.
Notications: System notications, such as pending recommendation requests, display here.
Search Box: Search for content across the site. Type in your criteria and press “Enter” to search.
Left Navigation: Access your recommendations, documents, prole, training, and help.
Your Home Page
From your account home page, you’ll nd quick and easy access to anything you need in OSCAR.
Quick Reference Guide
Recommenders
Recommender Accounts in OSCAR
Recommenders do not register for their own accounts in OSCAR. To get a recommender account, applicants or law schools
must generate an electronic request for a recommendation letter. When the applicant or law school creates an application in
OSCAR, they include the recommender’s name and email address, and OSCAR sends the recommender an automated email
message containing a secure link that can be used to ll the recommendation request. As a recommender, you can ll the
recommendation request without creating an account or you can create a password in Prole > My Account for future use.
If you did not receive the email (from [email protected]ts.gov) with the link to submit the recommendation, check
your spam folder or use the Forgot Username and Forgot Password features on the OSCAR homepage.
How Recommendations Work in OSCAR
Recommendation Requests
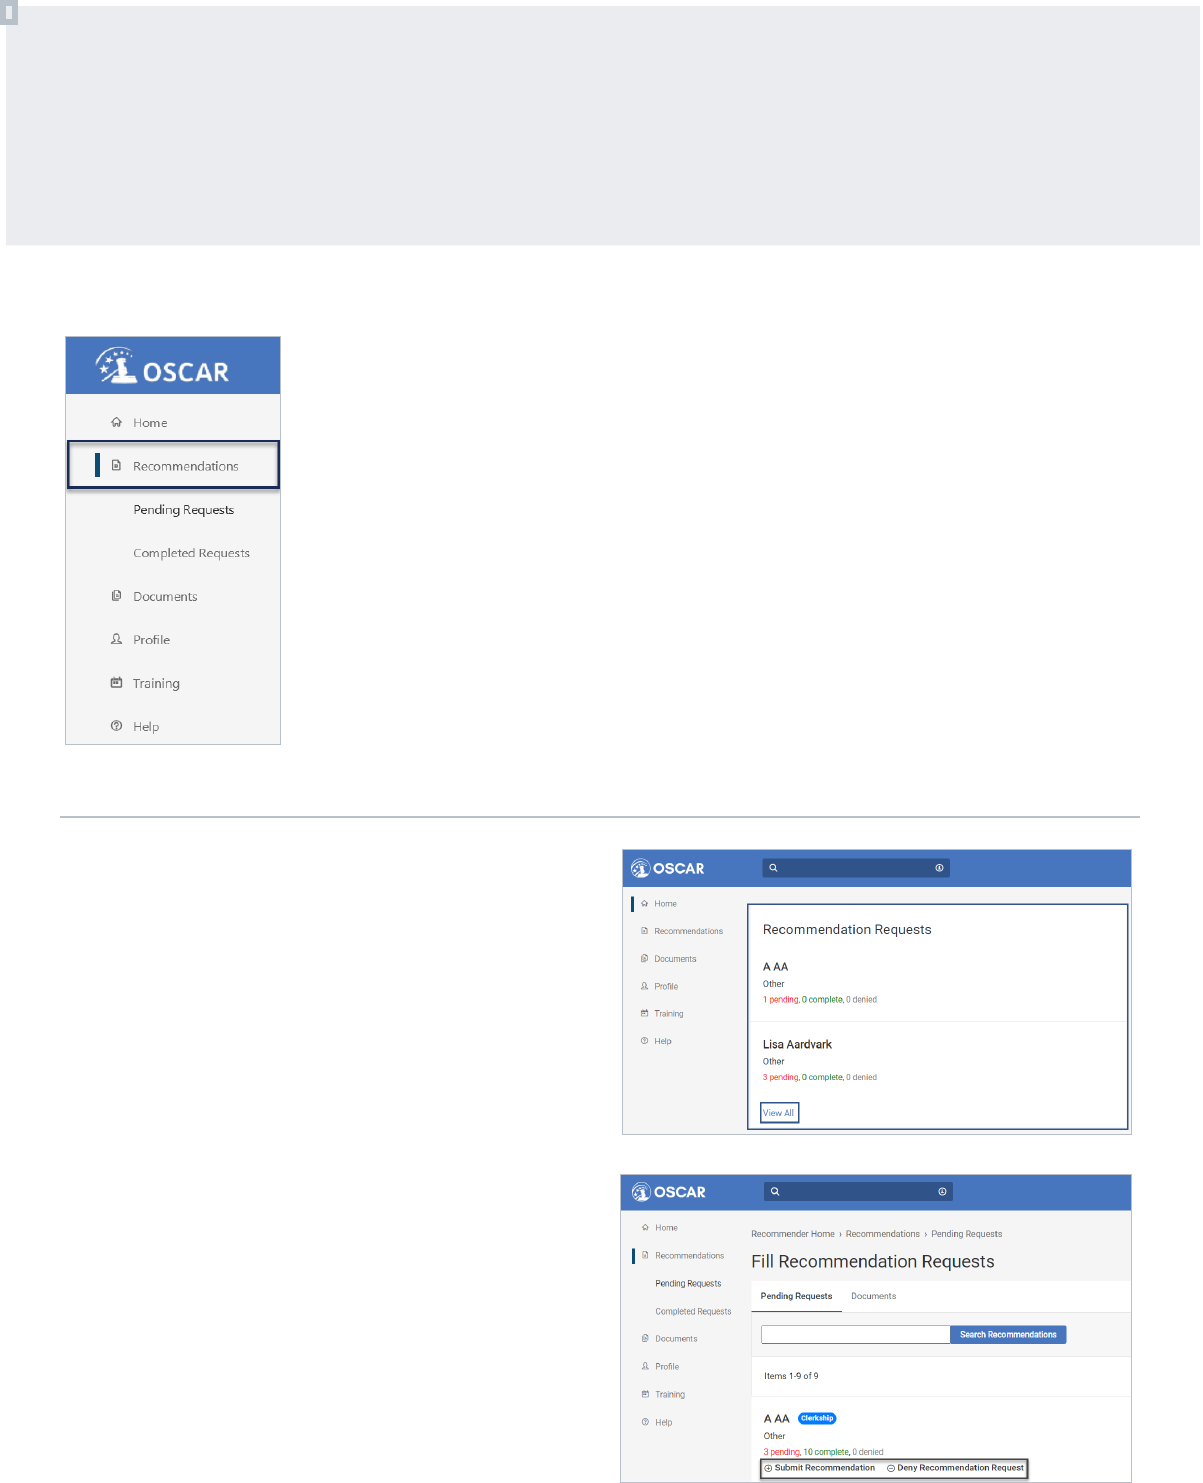
View Pending Recommendation Requests
When you click the link in the email from OSCAR or log into your
OSCAR account, you will see your pending recommendation
requests. The Recommendation Requests box on your home
page displays your most recent recommendation requests.
1. Under Recommendation Requests on your home page,
click View All or click Recommendations > Pending
Requests in the left navigation.
2. View the list of all pending recommendation requests.
Fill a Recommendation Request
1. Under Recommendations > Pending Requests, click the
Submit Recommendation button.
2. Complete the 3-step process to submit the
recommendation letter.
Deny a Recommendation Request
1. Click Recommendations > Pending Requests.
2. Locate the request.
3. Under the applicant’s name, click Deny Recommendation
Request. OSCAR displays a pop-up window with names
of judges or staff attorney oces the applicant requested
recommendations for
4. Choose the requests you would like to deny and click Deny
Recommendation Request.
Electronic letters of recommendation in OSCAR mimic paper letters of recommendation where
an applicant requests a recommendation letter, and the recommender writes the letter and sends
it directly to the judge on behalf of the applicant. In OSCAR, an applicant generates an electronic
request for a recommendation letter. The recommender creates/uploads an electronic letter, and
OSCAR sends it to the judge as part of an application. The applicant sees that a recommender
submitted the requested recommendation letter but is never able to view its content.
Electronic recommendation letters are condential. Applicants generate individual requests
for recommendation letters for each application they create. If an applicant creates 25
clerkship applications with you listed as a recommender, OSCAR will send you 25 requests for
recommendation letters. An applicant cannot attach your letter to additional applications.
However, you can use OSCAR to automatically add your recommendation letter to any additional
requests from an applicant for up to one year. If you do not select this option, OSCAR will continue to
send you requests for letters of recommendation for any additional applications an applicant creates.
You can also choose to deny any recommendation request.
All of these options are available from the Recommendations tab of your OSCAR account.
Note: Once a position closes, there is a 30-day grace period for the recommender to submit a letter,
although the judge or staff attorney oce may make a hiring decision during this time.
Submit or deny a recommendation request.
View your most recent recommendation requests from your home page.
Find your recommendations
tab in the left navigation.

Select your recommendation type.
Recommendation Letter Formats in OSCAR
OSCAR provides two options for submitting recommendation letters:
• Upload your letter as a PDF or Word le
• Use the Online Editor to create a letter with customizable merge elds
If using the Online Editor, you can create a template for future recommendation letters
using merge codes to automatically include information such as the letter’s date and
the name and address of the judge. Merge codes appear as text surrounded by square brackets, e.g., [honorable_judgename].
Upload a PDF/Word File
1. Click Recommendations > Pending Requests.
2. Locate the request and click Submit Recommendation.
3. OSCAR will open the 3-step process for lling the request.
Complete the elds in Step 1.
4. Under Recommendation Type, select Select File.
5. Choose a recent le from the dropdown or click Upload File
to upload a new le.
6. Click Next: Review and review the recommendation letter.
7. Under “Do you want this letter to attach automatically to
future applications?” select Yes or No.
8. Click Submit Recommendation.
Note: Step 3 will conrm your submitted recommendation.
Type/Copy a Letter Into the Online Editor
1. Click Recommendations > Pending Requests.
2. Locate the request and click Submit Recommendation.
3. Complete the elds in Step 1. Under Recommendation
Type, select Online Editor.
4. Select a recent letter from the dropdown or click Create
Template.
5. If creating a new template, enter the information in the pop-
up screen and click Create when complete.
6. Click Next: Review and review the recommendation letter.
7. Under “Do you want this letter to attach automatically to
future applications?” select Yes or No.
8. Click Submit Recommendation.
Note: Step 3 will conrm your submitted recommendation.
Update Automatic Attachment Settings
1. Click Recommendations > Pending Requests.
2. Locate the name of applicant requesting the letter.
3. If you have set the letter to auto-attach to new requests, it
will display the expiration date. Click the expiration date.
4. OSCAR displays a pop-up window. You can change the
expiration date or select No to stop the letter from auto-
attaching to new requests.
5. Click Submit.
View a Letter of Recommendation
1. Click Recommendations > Completed Requests.
2. Locate the recommendation.
3. Under the name, click Preview to view the recommendation.
Edit a Letter of Recommendation
1. Click Recommendations > Completed Requests.
2. Locate the name of the recommendation.
3. Under the name, click Edit to view the recommendation.
4. Make your edits in the 3-step process to edit, review, and
submit your recommendation letter.
Delete a Letter of Recommendation
1. Click Recommendations > Completed Requests.
2. Locate the recommendation.
3. Under the name of the applicant, click Delete.
4. A pop-up window will appear asking, “Are you sure you want
to delete this recommendation?” Click OK.
Note: You cannot edit/delete letters attached to closed positions.
Recommendation Letters
Create a Template
1. Click Documents.
2. Click Add New.
3. Enter a Template Name and click Select File to upload a
document or select to use the Online Editor.
4. Click Upload to save the template and return to your list of
templates, or Save to save your work and continue.
Edit a Template
Note: You cannot edit a PDF or Word document template in
OSCAR. To update these templates, delete the original le from
OSCAR and upload a replacement.
1. Click Documents.
2. Locate the template you want to edit and click the template
name to open it.
3. Make your edits by uploading a new le or using the online
editor.
4. Click Upload to save the template and return to your list of
templates, or Save to save your work and continue.
Documents
Edit an existing recommendation letter template.

QRG-113023
https://oscar.uscourts.gov
The OSCAR website is maintained by the Administrative Oce of the United States Courts on behalf of the Federal Judiciary.
Contact the OSCAR Program Office
The OSCAR Program Oce provides live support Monday - Friday 8:00 AM to 5:00 PM Eastern Time.
Email: [email protected]ts.gov
Phone (toll free): 1-866-666-2120
Training
OSCAR’s training web page (https://oscar.uscourts.gov/training) provides centralized access to a variety of resources.
Help
The OSCAR help section (http://oscar.uscourts.gov/help) contains help articles with step-by-step
instructions. Use the index and search bar to nd instructions for anything you need.
More Information
Update Your Profile
1. Click Prole > My Account.
2. Under Change Prole, make your changes to the name,
phone, email, and assistant information elds.
3. Click Update Prole.
Change Your Password
1. Click Prole > My Account.
2. Scroll down to Change Password.
3. Enter and verify your new password.
4. Click Save Password.
Allow Law Schools to Fill Recommendations
If you are a non-faculty recommender, you can choose to allow
law schools to upload letters for their applicants on your behalf.
1. Click Prole > My Account.
2. Scroll down to Recommendation Settings.
3. Under Allow Law Schools to Fill Recommendation Requests,
make your selection.
4. Click Save Recommendation Settings.
Manage System Notification Preferences
1. Click Prole > Notication Preferences.
2. Check/uncheck the boxes for each notication type to
select if you want to receive them on your dashboard when
logged into the system and/or by email.
Note: OSCAR will automatically save your preferences.
Manage Email Notification Preferences
Choose how often you want to receive email notications for new,
pending, completed, and auto-attached recommendation letters.
1. Click Prole > My Account.
2. Scroll down to Email Settings.
3. Make your selections and click Update Email Notications.
Prole
Select your system notication preferences.
