
Oracle Fusion
Cloud Financials
Implementing Receivables Credit to
Cash
24C

Oracle Fusion Cloud Financials
Implementing Receivables Credit to Cash
Contents
Get Help ................................................................................................................................ i
1
Define Common Accounts Receivable Configuration
1
Overview of Oracle Receivables ................................................................................................................................................... 1
Simple Configuration to Operate Receivables ......................................................................................................................... 2
Predefined Receivables Data in Subledger Accounting ......................................................................................................... 3
Receivables Accounting Event Model ...................................................................................................................................... 16
Reference Data Sets in Receivables .......................................................................................................................................... 18
Translated Display of Transaction Type, Transaction Source, and Receipt Method ....................................................... 19
Ledger and Legal Entity Document Sequencing .................................................................................................................. 20
Receivables Activities .................................................................................................................................................................. 25
AutoCash Rule Sets ..................................................................................................................................................................... 28
Approval Limits ............................................................................................................................................................................. 37
Credit Memo Workflow ............................................................................................................................................................... 38
Statements .................................................................................................................................................................................... 40
FAQs for Standard Messages .................................................................................................................................................... 45
FAQs for Distribution Sets ......................................................................................................................................................... 45
FAQs for Define Common Accounts Receivable Configuration ......................................................................................... 46
2
Manage Receivables System Options
47
Guidelines for Receivables System Option Settings ............................................................................................................ 47
Example of Header Level Rounding ........................................................................................................................................ 48
AutoInvoice Tuning Segments .................................................................................................................................................. 49
AutoInvoice Log File Message Levels ..................................................................................................................................... 50
FAQs for Manage Receivables System Options ..................................................................................................................... 51
Email Delivery ................................................................................................................................................................................ 53
Multifund Accounting ................................................................................................................................................................. 57
3
Define Customer Billing Configuration
71
AutoInvoice ..................................................................................................................................................................................... 71
Payment Terms ............................................................................................................................................................................. 78

Oracle Fusion Cloud Financials
Implementing Receivables Credit to Cash
AutoAccounting ............................................................................................................................................................................ 85
Transaction Types ......................................................................................................................................................................... 91
Transaction Sources .................................................................................................................................................................... 95
Memo Lines .................................................................................................................................................................................. 101
Prepayments ................................................................................................................................................................................ 102
Balance Forward Billing ............................................................................................................................................................ 106
Remit-to Addresses ..................................................................................................................................................................... 113
FAQs for Salesperson Reference Accounts ............................................................................................................................ 115
B2B XML ........................................................................................................................................................................................ 115
OAGIS 10.1 XML ............................................................................................................................................................................ 119
UBL 2.1 XML ................................................................................................................................................................................. 133
4
Define Customer Payments
141
Create a Shared Service Model in Receivables ..................................................................................................................... 141
Application Rule Sets ................................................................................................................................................................. 143
Receipt Classes and Methods ................................................................................................................................................. 149
Lockbox ......................................................................................................................................................................................... 154
Transmission Formats for Lockbox ........................................................................................................................................ 174
AutoMatch Rule Sets ................................................................................................................................................................. 185
Application Exception Rule Sets .............................................................................................................................................. 191
Customer Paying Relationships ............................................................................................................................................... 193
FAQs for Receipt Sources ......................................................................................................................................................... 195
5
Configure Payment System Connectivity
197
Options for Validations .............................................................................................................................................................. 197
How You Set Up Formats ......................................................................................................................................................... 198
Transmission Protocols ............................................................................................................................................................. 201
Transmission Configurations ................................................................................................................................................... 202
How You Set Up Transmission Configurations ................................................................................................................... 202
Considerations for Environment Cloning ............................................................................................................................. 204
How You Configure Pretty Good Privacy (PGP) Encryption and Digital Signature for Outbound and Inbound Messages
......................................................................................................................................................................................................... 205
How You Configure Two-Factor Authentication Using A Security Key File ................................................................... 210
How You Test the Transmission Configuration .................................................................................................................... 211
How You Configure a Communication Channel to a Payment System .......................................................................... 213
How You Set Up a Payment System ...................................................................................................................................... 214
Payment System Accounts ....................................................................................................................................................... 217

Oracle Fusion Cloud Financials
Implementing Receivables Credit to Cash
How You Set Up Payment System Connections for Multiple Business Units ................................................................ 218
Import and Export Tokenization Setup Data ....................................................................................................................... 222
Import a Security Credential File ............................................................................................................................................ 224
FAQs for Configure Payment System Connectivity ............................................................................................................ 225
6
Define Funds Capture
227
Funds Capture Process Profiles .............................................................................................................................................. 227
External Settlement of Credit Card and Bank Accounts ................................................................................................... 228
Examples of Settlement Grouping Rules .............................................................................................................................. 229
Routing Rules .............................................................................................................................................................................. 230
Reevaluate Routing Rules During Receipt Remittance ....................................................................................................... 231
How You Use Oracle Analytics Publisher to Modify Templates for Use with Formats ................................................ 232
FAQs for Define Funds Capture .............................................................................................................................................. 233
7
Define Payments Security
237
Options for System Security .................................................................................................................................................... 237
Enable Encryption of Sensitive Payment Information ....................................................................................................... 240
PCI DSS Credit Card Processing Requirements .................................................................................................................. 240
How You Enable Credit Card Tokenization ........................................................................................................................... 241
How Imported Legacy Credit Cards Are Processed ........................................................................................................... 242
Removal of Personally Identifiable Information .................................................................................................................. 246
8
Define Customer
253
Define Customer Account ........................................................................................................................................................ 253
Manage Receivables Customer Profile Classes ................................................................................................................... 257
Manage Customers .................................................................................................................................................................... 261
Manage Customer Data Uploads ........................................................................................................................................... 264
Manage Data Import ................................................................................................................................................................. 276
9
Define Bills Receivable
287
Enable System Options for Bills Receivable ......................................................................................................................... 287
Create a Bills Receivable Creation Receipt Method ............................................................................................................ 287
Prepare Transactions for Bills Receivable Batches ............................................................................................................. 289
Create a Bills Receivable Remittance Receipt Method ....................................................................................................... 291
Create a Remittance Bank Account for Bills Receivable .................................................................................................... 292
FAQs for Define Bills Receivable ............................................................................................................................................. 293

Oracle Fusion Cloud Financials
Implementing Receivables Credit to Cash
10
Define Revenue Management Configuration for Receivables
295
Guidelines for Defining Revenue Policies ............................................................................................................................. 295
How Event-Based Revenue Management Works ............................................................................................................... 296
Revenue Contingencies ............................................................................................................................................................ 297
Payment-Based Revenue Contingencies .............................................................................................................................. 298
Revenue Contingency Removal Events ................................................................................................................................ 300
Revenue Contingency Assignment Rules ............................................................................................................................. 301
FAQs for Define Revenue Management Configuration for Receivables ........................................................................ 302
11
Define Credit Management
305
Components of the Credit Profile .......................................................................................................................................... 305
Credit Analysts and Credit Managers ................................................................................................................................... 307
Create a Scoring Model ............................................................................................................................................................ 309
How You Define a Scoring Model Calculation ...................................................................................................................... 311
Create a Credit Case Folder Template ................................................................................................................................... 314
How You Maintain the Summary Tables for Data Points ................................................................................................... 315
How You Import Third-Party Credit Data for Data Points ................................................................................................. 316
How You Import Credit Management Data Points .............................................................................................................. 318
Descriptive Flexfields in Credit Case Folders ....................................................................................................................... 319
FAQs for Define Credit Management .................................................................................................................................... 320
12
Define Cash Management and Banking Configuration
323
How Bank, Branch, and Account Components Work Together ....................................................................................... 323
Considerations When You Create Accounts ........................................................................................................................ 324
Cash Management Profile Options ........................................................................................................................................ 326
Overview of Parse Rule Sets ................................................................................................................................................... 328
Overview of Transaction Type Mapping ............................................................................................................................... 329
Overview of Tolerance Rules ................................................................................................................................................... 330
Reconciliation Matching Rules ................................................................................................................................................. 331
Overview of Reconciliation Rules Sets .................................................................................................................................. 337
Overview of Bank Statement Transaction Codes ............................................................................................................... 338
How You Map Configurable BAI2 Transaction Codes ........................................................................................................ 338
How You Set Up Wildcard Support for Bank Statement Processing Using UCM Protocol ......................................... 339
Overview of Bank Statement Transaction Creation Rules ................................................................................................ 339
Create Banks, Branches, and Accounts in Spreadsheet ................................................................................................... 340
Set Up Cash Positioning and Forecasting ............................................................................................................................ 341
Bank Account Validation .......................................................................................................................................................... 345

Oracle Fusion Cloud Financials
Implementing Receivables Credit to Cash
13
Define Advanced Collections Configuration
427
Manage Collections Preferences ............................................................................................................................................ 427
Manage Aging Methods ........................................................................................................................................................... 433
Manage Collectors ..................................................................................................................................................................... 436
Manage Dunning Configuration ............................................................................................................................................ 446
Define Scoring ............................................................................................................................................................................ 449
Define Strategy ........................................................................................................................................................................... 461
Manage Collections Scoring and Strategy Assignments .................................................................................................. 469
14
Define Bill Management
473
Set Up Bill Management .......................................................................................................................................................... 473

Oracle Fusion Cloud Financials
Implementing Receivables Credit to Cash

Oracle Fusion Cloud Financials
Implementing Receivables Credit to Cash
Get Help
Get Help
There are a number of ways to learn more about your product and interact with Oracle and other users.
Get Help in the Applications
Use help icons to access help in the application. If you don't see any help icons on your page, click your user image
or name in the global header and select Show Help Icons.
Get Support
You can get support at My Oracle Support. For accessible support, visit Oracle Accessibility Learning and Support.
Get Training
Increase your knowledge of Oracle Cloud by taking courses at Oracle University.
Join Our Community
Use Cloud Customer Connect to get information from industry experts at Oracle and in the partner community. You
can join forums to connect with other customers, post questions, suggest ideas for product enhancements, and watch
events.
Learn About Accessibility
For information about Oracle's commitment to accessibility, visit the Oracle Accessibility Program. Videos included in
this guide are provided as a media alternative for text-based topics also available in this guide.
Share Your Feedback
We welcome your feedback about Oracle Applications user assistance. If you need clarification, find an error, or just
want to tell us what you found helpful, we'd like to hear from you.
You can email your feedback to oracle_fusion_applications_help_ww_grp@oracle.com.
Thanks for helping us improve our user assistance!
i

Oracle Fusion Cloud Financials
Implementing Receivables Credit to Cash
Get Help
ii

Oracle Fusion Cloud Financials
Implementing Receivables Credit to Cash
Chapter 1
Define Common Accounts Receivable Configuration
1 Define Common Accounts Receivable
Configuration
Overview of Oracle Receivables
Oracle Receivables provides integrated functionality to perform day-to-day accounts receivable operations. Receivables
functionality is managed from these Overview work areas: Billing, Receivables Balances, Revenue Management, and
Credit Management.
All work areas provide access to general ledger account activities, including creating accounting, creating manual
journal entries, and reviewing journal entries.
Billing Work Area
Use the Billing work area to perform tasks related to customer billing activities. Monitor and review incomplete
transactions, and approve and research pending adjustments. Use AutoInvoice to import transactions from other
systems and generate invoices and credit memos automatically according to your requirements. You can review and
correct AutoInvoice import errors and resubmit AutoInvoice. Create new invoices, debit memos, credit memos, and on-
account credit memos. Perform related activities to manage your transactions: update, duplicate, credit, adjust, dispute,
and preview a transaction. You can also create a new customer record and manage existing customers from the Billing
work area.
Receivables Balances Work Area
Use the Receivables Balances work area to perform tasks related to customer payment activities and the management
of accounts receivable balances. Review actionable items, including open receipts and receipt batches, unapplied and
on-account receipts and credit memos, receipt remittance batches, and funds transfer errors. Create receipts manually,
import receipts using lockbox or spreadsheet, or create automatic receipts. Perform related activities to manage your
receipts: apply, unapply, reverse, delete; create invoice adjustments or chargebacks during receipt application; and
remit, clear, or risk eliminate factored receipts. You can manage receipt remittances: create, modify, and approve
receipt remittance batches. You can also perform tasks related to managing accounts receivables balances, including
reconciling receivables to the general ledger and managing receivables accounting period statuses.
Revenue Management Work Area
Use the Revenue Management work area to perform tasks related to revenue recognition and revenue adjustments.
Run the Recognize Revenue program to generate revenue distribution records for invoices and credit memos that
use invoicing and revenue scheduling rules. Perform revenue adjustments on one or more transactions, including
scheduling and unscheduling revenue; reviewing, adding, and expiring revenue contingencies; and transferring sales
credits. You can also manage revenue policies, revenue contingencies, and rules that assign revenue contingencies to
transactions automatically.
Credit Management Work Area
Use the Credit Management work area to create credit profiles for your customers. The credit profile contains key
information for establishing the creditworthiness of each of your customers, including credit classifications, credit
1

Oracle Fusion Cloud Financials
Implementing Receivables Credit to Cash
Chapter 1
Define Common Accounts Receivable Configuration
limits, and credit review cycles. Review and evaluate specific credit authorization requests; run periodic reviews of the
creditworthiness of your existing customers; review customer credit scores, and provide recommendations for customer
credit. Build scoring models that calculate a credit score based on credit data specific to a customer; maintain detailed
information about customer financial and accounting history; and create templates for different types of credit reviews
that are automatically assigned to specific credit scenarios.
Customer Information
From either the Billing or Receivables Balances work area, you have access to manage both customer information
and customer account activities, in summary and in detail. You can review customer account information by a single
business unit, bill-to site, or across all business units and bill-to sites. For each customer account, you can review
transactions and receipts, dispute and adjust transactions, and drill down to current or historical customer account
activity.
Simple Configuration to Operate Receivables
You can create an operational Receivables environment with seven configurations. The remaining configurations are
either optional or have predefined values.
If applicable, your Receivables configuration must include a plan to migrate your customer information from your legacy
system.
Receivables Configuration Tasks
There are seven configuration tasks necessary to create an operational Receivables environment. Before you perform
these tasks, you must ensure that you have completed all of the required implementation tasks for Oracle Financials.
Perform these seven tasks in the order indicated:
1. Set Receivables System Options
Set Receivables system options to define your Receivables environment. During Receivables setup, you specify
your accounts, customer and invoice parameters, and how the AutoInvoice and Automatic Receipts programs
operate.
2. Define Receivables Activities
Define receivables activities to create default accounting for all activities other than transactions and receipts,
including, for example, miscellaneous cash, discounts, late charges, adjustments, and write-offs.
3. Define AutoAccounting Rules
Defining AutoAccounting is a required configuration task for processing customer billing.
Define AutoAccounting to specify how you want Receivables to determine the default general ledger accounts
for transactions. Receivables creates default accounts for revenue, receivable, freight, tax, unearned revenue,
unbilled receivables, late charges, and AutoInvoice clearing (suspense) accounts using your AutoAccounting
setup.
4. Define Receipt Classes and Methods
Defining receipt classes and receipt methods is a required configuration task for processing customer
payments.
2

Oracle Fusion Cloud Financials
Implementing Receivables Credit to Cash
Chapter 1
Define Common Accounts Receivable Configuration
Receipt classes determine the required processing steps for receipts to which you assign receipt methods with
this class. These steps include confirmation, remittance, and clearance. Receipt methods specify accounting
for receipt entries and applications, determine customer remittance bank account information, and configure
automatic receipt processing and fund transfer error handling.
5. Define Remit-to Addresses
Define remit-to addresses to let your customers know where to send payment for open receivables. Receivables
uses the addresses to provide default remit-to information when you enter transactions.
You must provide a remit-to address to complete a transaction.
If you use AutoInvoice, but you haven't defined a remit-to address for a particular customer site, AutoInvoice
rejects all transactions for which it couldn't determine a remit-to address.
6. Define Approval Limits
Define approval limits to determine whether a Receivables user can approve adjustments or credit memo
requests. You define approval limits by document type, amount, and currency.
7. Define Statement Cycles
Define statement cycles to control when you create customer statements. You assign statement cycles to
customer profiles.
Related Topics
•
How can I use remit-to addresses?
•
Guidelines for Receivables System Option Settings
•
AutoAccounting Account Types and Segment Values
•
Receivables Activity Types
Predefined Receivables Data in Subledger Accounting
Oracle Receivables provides predefined data for Oracle Subledger Accounting that you can use to integrate the two
applications.
When you run Create Receivables Accounting, the program accepts the default accounting information from
AutoAccounting without change and uses the predefined data to create accounting in the subledger. Subledger
Accounting transfers the final accounting to General Ledger.
Note: You can optionally define your own subledger accounting rules to overwrite the default accounts from the
accounting events.
Receivables predefines one application in Subledger Accounting named Receivables. Most of the data that Receivables
predefines for Subledger Accounting is associated with the Receivables application.
This table shows the attribute values that Receivables predefines for the Receivables application:
3

Oracle Fusion Cloud Financials
Implementing Receivables Credit to Cash
Chapter 1
Define Common Accounts Receivable Configuration
Field Value
Application Name
Receivables
Drill-down Procedure
AR_DRILLDOWN_PUB_PKG.DRILLDOWN
Use Security
Yes
Policy Function
XLA_SECURITY_POLICY_PKG.MO_POLICY
Journal Source
Receivables
Third Party Control Account Type
Customer
Subject to Validation
No
Calculate Reporting Currency Amounts
Yes
This table lists the setup information that Receivables predefines for the event entities:
Application Entity Name Description Gapless Event Processing
Receivables
Adjustments
Adjustments
No
Receivables
Receipts
Receipts
No
Receivables
Transactions
Transactions
No
Receivables predefines process categories for the Receivables application. These process categories are:
• Adjustments
• Miscellaneous Receipts
• Standard Receipts
• Third Party Merge
• Transactions
Additional considerations for Receivables predefined data for subledger accounting include:
• Event Classes and Event Class Options
• Sources, Source Assignments, and Accounting Attribute Assignments
• Journal Line Rules
• Account Rules
• Journal Entry Rule Set
• Accounting Method
4

Oracle Fusion Cloud Financials
Implementing Receivables Credit to Cash
Chapter 1
Define Common Accounts Receivable Configuration
Event Classes and Event Class Options
Receivables predefines event classes for each event entity that belongs to the Receivables application.
This table lists the event classes that Receivables predefines for the Receivables application:
Entity Event Class Name
Adjustments
Adjustment
Receipts
Miscellaneous Receipt
Receipts
Receipt
Transactions
Chargeback
Transactions
Credit Memo
Transactions
Debit Memo
Transactions
Invoice
Accounting event class options define attributes of an event class. Receivables defines the accounting event class
options for each predefined event class.
This table lists the accounting event class options that Receivables predefines for the Receivables application:
Event Class Process Category Default Journal Category Transaction View Balance Types
Adjustment
Adjustments
Adjustment
AR_ADJ_INF_V
Actual
Bills Receivable
Bills Receivable
Bills Receivable
AR_TRX_INF_V
Actual
Miscellaneous Receipt
Miscellaneous Receipts
Misc Receipts
AR_CR_INF_V
Actual
Receipt
Standard Receipts
Receipts
AR_CR_INF_V
Actual
Chargeback
Transactions
Chargebacks
AR_TRX_INF_V
Actual
Credit Memo
Transactions
Credit Memos
AR_TRX_INF_V
Actual
Debit Memo
Transactions
Debit Memos
AR_TRX_INF_V
Actual
Invoice
Transactions
Sales Invoices
AR_TRX_INF_V
Actual
5

Oracle Fusion Cloud Financials
Implementing Receivables Credit to Cash
Chapter 1
Define Common Accounts Receivable Configuration
Sources, Source Assignments, and Accounting Attribute Assignments
Receivables predefines sources, source assignments, and accounting attribute assignments for Subledger Accounting.
You can't make changes to predefined sources, source assignments, or accounting attribute assignments. However, you
can define your own sources.
If you choose to define your own journal line rules or accounting methods, you can override the default accounting
attribute assignments.
Use the Manage Subledger Transaction Objects task in Oracle Subledger Accounting to retrieve a list of Receivables
sources for an event class:
1. Navigate to the Manage Subledger Transaction Objects page.
2. Select a Receivables event class: Adjustment, Bills Receivable, Chargeback, Credit Memo, Debit Memo, Invoice,
Miscellaneous Receipt, Receipt.
3. Click the View Source Assignments button.
4. In the View Source Assignments page, review the available sources for the event class.
Journal Line Rules
Receivables predefines journal line rules for each predefined event class. Receivables specifies conditions for the use of
each journal line rule.
This table lists the journal line rules that Receivables predefines for the Receivables application:
Event Class Name Balance Type Side
Adjustment
Adjustment
Actual
Credit
Adjustment
Adjustment Charge
Actual
Credit
Adjustment
Adjustment Default Receivable
Actual
Credit
Adjustment
Adjustment Deferred Tax
Actual
Credit
Adjustment
Adjustment Charge
Nonrecoverable Tax
Actual
Credit
Adjustment
Adjustment Nonrecoverable Tax
Actual
Credit
Adjustment
Adjustment Tax
Actual
Credit
Adjustment
Adjustment Transaction Creation
Date
Actual
N/A
Adjustment
Adjustment Transaction Created By
Actual
N/A
6

Oracle Fusion Cloud Financials
Implementing Receivables Credit to Cash
Chapter 1
Define Common Accounts Receivable Configuration
Event Class Name Balance Type Side
Adjustment
Adjustment Transaction Last
Updated Date
Actual
N/A
Adjustment
Adjustment Transaction Last
Updated By
Actual
N/A
Chargeback
Chargeback Default Receivable
Actual
Debit
Chargeback
Chargeback Revenue
Actual
Credit
Credit Memo
Credit Memo Default Deferred Tax
Application
Actual
Credit
Credit Memo
Credit Memo Default Application
Actual
Credit
Credit Memo
Credit Memo Default Tax
Application
Actual
Credit
Credit Memo
Credit Memo Refund Application
Actual
Credit
Credit Memo
Credit Memo Charges
Actual
Credit
Credit Memo
Credit Memo Default Receivable
Actual
Debit
Credit Memo
Credit Memo Default Revenue
Actual
Credit
Credit Memo
Credit Memo Default Tax
Actual
Credit
Credit Memo
Credit Memo Rounding
Actual
Credit
Credit Memo
Credit Memo Unbilled Receivable
Actual
Credit
Credit Memo
Credit Memo Deferred Revenue
Actual
Credit
Credit Memo
Credit Memo Product Type
Actual
N/A
Credit Memo
Credit Memo Transaction Creation
Date
Actual
N/A
Credit Memo
Credit Memo Transaction Created
By
Actual
N/A
Credit Memo
Credit Memo Transaction Last
Updated Date
Actual
N/A
7

Oracle Fusion Cloud Financials
Implementing Receivables Credit to Cash
Chapter 1
Define Common Accounts Receivable Configuration
Event Class Name Balance Type Side
Credit Memo
Credit Memo Transaction Last
Updated By
Actual
N/A
Debit Memo
Debit Memo Charges
Actual
Credit
Debit Memo
Debit Memo Default Receivable
Actual
Debit
Debit Memo
Debit Memo Freight
Actual
Credit
Debit Memo
Debit Memo Revenue
Actual
Credit
Debit Memo
Debit Memo Rounding
Actual
Credit
Debit Memo
Debit Memo Tax
Actual
Credit
Debit Memo
Debit Memo Unbilled Receivable
Actual
Debit
Debit Memo
Debit Memo Deferred Revenue
Actual
Credit
Debit Memo
Debit Memo Product Type
Actual
N/A
Debit Memo
Debit Memo Transaction Creation
Date
Actual
N/A
Debit Memo
Debit Memo Transaction Created
By
Actual
N/A
Debit Memo
Debit Memo Transaction Last
Updated Date
Actual
N/A
Debit Memo
Debit Memo Transaction Last
Updated By
Actual
N/A
Invoice
Invoice Charges
Actual
Credit
Invoice
Invoice Default Receivable
Actual
Debit
Invoice
Invoice Freight
Actual
Credit
Invoice
Invoice Revenue
Actual
Credit
Invoice Invoice Rounding Actual Credit
8

Oracle Fusion Cloud Financials
Implementing Receivables Credit to Cash
Chapter 1
Define Common Accounts Receivable Configuration
Event Class Name Balance Type Side
Invoice
Invoice Tax
Actual
Credit
Invoice
Invoice Unbilled Receivable
Actual
Credit
Invoice
Invoice Deferred Revenue
Actual
Credit
Invoice
Invoice Product Type
Actual
N/A
Invoice
Invoice Transaction Creation Date
Actual
N/A
Invoice
Invoice Transaction Created By
Actual
N/A
Invoice
Invoice Transaction Last Updated
Date
Actual
N/A
Invoice
Invoice Transaction Last Updated
By
Actual
N/A
Miscellaneous Receipt
Miscellaneous Receipt Bank
Charges
Actual
Credit
Miscellaneous Receipt
Miscellaneous Receipt Cleared
Cash
Actual
Credit
Miscellaneous Receipt
Miscellaneous Receipt Confirmed
Cash
Actual
Credit
Miscellaneous Receipt
Miscellaneous Receipt Short Term
Debt
Actual
Credit
Miscellaneous Receipt
Miscellaneous Receipt Factored
Cash
Actual
Credit
Miscellaneous Receipt
Miscellaneous Receipt
Miscellaneous Cash
Actual
Credit
Miscellaneous Receipt
Miscellaneous Receipt Remitted
Cash
Actual
Credit
Miscellaneous Receipt
Miscellaneous Receipt Tax
Actual
Credit
Receipt
Receipt On Account Application
Actual
Credit
Receipt Receipt Application to Freight Actual Credit
9

Oracle Fusion Cloud Financials
Implementing Receivables Credit to Cash
Chapter 1
Define Common Accounts Receivable Configuration
Event Class Name Balance Type Side
Receipt
Receipt Application to Revenue
Actual
Credit
Receipt
Receipt Application to Rounding
Actual
Credit
Receipt
Receipt Application to Suspense
Revenue
Actual
Credit
Receipt
Receipt Application to Tax
Actual
Credit
Receipt
Receipt Application to Unbilled
Revenue
Actual
Credit
Receipt
Receipt Application to Earned
Revenue
Actual
Credit
Receipt
Receipt Bank Charges
Actual
Credit
Receipt
Receipt Cleared Cash
Actual
Credit
Receipt
Receipt Credit Card Chargeback
Application
Actual
Credit
Receipt
Receipt Chargeback Application
Actual
Credit
Receipt
Receipt Confirmed Cash
Actual
Credit
Receipt
Receipt Currency Rounding
Actual
Credit
Receipt
Receipt Short Term Debt
Actual
Credit
Receipt
Receipt Default Application
Actual
Credit
Receipt
Receipt Deferred Tax
Actual
Credit
Receipt
Receipt Earned Discount
Actual
Credit
Receipt
Receipt Earned Discount on Freight
Actual
Debit
Receipt
Receipt Earned Discount
Nonrecoverable Tax
Actual
Credit
Receipt
Receipt Earned Discount on
Revenue
Actual
Debit
10

Oracle Fusion Cloud Financials
Implementing Receivables Credit to Cash
Chapter 1
Define Common Accounts Receivable Configuration
Event Class Name Balance Type Side
Receipt
Receipt Earned Discount on Tax
Actual
Debit
Receipt
Receipt Exchange Gain
Actual
Credit
Receipt
Receipt Exchange Gain Loss
Actual
Gain/Loss
Receipt
Receipt Exchange Loss
Actual
Credit
Receipt
Receipt Factored Cash
Actual
Credit
Receipt
Receipt Payment Netting
Application
Actual
Credit
Receipt
Receipt Prepayment Application
Actual
Credit
Receipt
Receipt Refund Application
Actual
Credit
Receipt
Receipt Remitted Cash
Actual
Credit
Receipt
Receipt Tax
Actual
Credit
Receipt
Receipt Unapplied Cash
Actual
Debit
Receipt
Unapplied Cash
Actual
Debit
Receipt
Receipt Unapplied for Gain Loss
lines
Actual
Debit
Receipt
Receipt Unearned Discount
Actual
Credit
Receipt
Receipt Unearned Discount on
Freight
Actual
Debit
Receipt
Receipt Unearned Discount on
Nonrecoverable Tax
Actual
Credit
Receipt
Receipt Unearned Discount on
Revenue
Actual
Debit
Receipt
Receipt Unearned Discount on Tax
Actual
Debit
Receipt Receipt Unidentified Cash Actual Credit
11

Oracle Fusion Cloud Financials
Implementing Receivables Credit to Cash
Chapter 1
Define Common Accounts Receivable Configuration
Event Class Name Balance Type Side
Receipt
Receipt Write-Off Application
Actual
Credit
Receipt
Receipt Reversed Unapplied for
Unidentified Receipt
Actual
Debit
Receipt
Receipt Reversed Unidentified
Balance Line
Actual
Debit
Receipt
Receipt Unapplied for Unidentified
Receipt
Actual
Debit
Receipt
Receipt Unidentified Balance Line
Actual
Debit
Receipt
Receipt Unapplied Reversed Cash
Actual
Debit
Receipt
Receipt Bill To Site Receivable
Account
Actual
N/A
Receipt
Receipt Bill To Site Clearing
Account
Actual
N/A
Receipt
Receipt Bill To Site Freight Account
Actual
N/A
Receipt
Receipt Bill To Site Revenue
Account
Actual
N/A
Receipt
Receipt Bill To Site Tax Account
Actual
N/A
Receipt
Receipt Bill To Site Unbilled
Receivable
Actual
N/A
Receipt
Receipt Bill To Site Unearned
Account
Actual
N/A
Receipt
Receipt Creation Date
Actual
N/A
Receipt
Receipt Created By
Actual
N/A
Receipt
Receipt Last Updated Date
Actual
N/A
Receipt
Receipt Last Updated By
Actual
N/A
12

Oracle Fusion Cloud Financials
Implementing Receivables Credit to Cash
Chapter 1
Define Common Accounts Receivable Configuration
Account Rules
Receivables predefines account rules. When Subledger Accounting uses the predefined account rules that Receivables
provides, it accepts the default accounting that Receivables generates using AutoAccounting without change.
You can optionally define your own account rules for an Accounting Flexfield or for a segment. In this case, Subledger
Accounting overrides the default accounts that Receivables generates, or individual segment values in the default
accounts, when it creates the draft or final subledger accounting.
The account rules that Receivables predefines for the Receivables application are as follows:
• Credit Memo Distribution GL Account
• Collection Bank Charges Account
• Collection Bank Account Cash Account
• Collection Bank Factoring Charges Account
• Distribution GL Account
• Remit Bank Unapplied Account
• System Gain GL Account
• System Loss GL Account
• Transaction Distribution GL Account
• Transaction Distribution GL Account with reference
Journal Entry Rule Sets
Receivables predefines journal entry rule sets that group the predefined journal line rules and account rules within each
of the predefined event types. Receivables assigns each predefined journal entry rule set to all event types within an
event class.
This table lists the journal entry rule sets that Receivables predefines for the Receivables application:
Event Class Journal Entry Rule Set Name Journal Line Rules
Adjustment
Adjustments - Default Accrual
Adjustment, Adjustment Charge, Adjustment
Charge Nonrecoverable Tax, Adjustment
Default Receivable, Adjustment Deferred Tax,
Adjustment Nonrecoverable Tax, Adjustment
Tax
Chargeback
Chargebacks - Default Accrual
Chargeback Default Receivable, Chargeback
Revenue
Credit Memo
Credit Memos - Default Accrual
Credit Memo Charges, Credit Memo Default
Application, Credit Memo Default Deferred Tax
Application, Credit Memo Default Receivable,
Credit Memo Default Revenue, Credit
Memo Default Tax, Credit Memo Default Tax
Application, Credit Memo Deferred Revenue,
Credit Memo Refund Application, Credit Memo
Rounding, Credit Memo Unbilled Receivable
13

Oracle Fusion Cloud Financials
Implementing Receivables Credit to Cash
Chapter 1
Define Common Accounts Receivable Configuration
Event Class Journal Entry Rule Set Name Journal Line Rules
Debit Memo
Debit Memos - Default Accrual
Debit Memo Charges, Debit Memo Default
Receivable, Debit Memo Deferred Revenue,
Debit Memo Freight, Debit Memo Revenue,
Debit Memo Rounding, Debit Memo Tax, Debit
Memo Unbilled Receivable
Invoice
Invoices - Default Accrual
Invoice Charges, Invoice Default Receivable,
Invoice Deferred Revenue, Invoice Freight,
Invoice Revenue, Invoice Rounding, Invoice Tax,
Invoice Unbilled Receivable
Miscellaneous Receipt
Miscellaneous Receipts
Miscellaneous Receipt Bank Charges,
Miscellaneous Receipt Cleared Cash,
Miscellaneous Receipt Confirmed Cash,
Miscellaneous Receipt Factored Cash,
Miscellaneous Receipt Miscellaneous Cash,
Miscellaneous Receipt Remitted Cash,
Miscellaneous Receipt Short Term Debt,
Miscellaneous Receipt Tax
Receipt
Receipts - Default Accrual
Receipt Bank Charges, Receipt Chargeback
Application, Receipt Cleared Cash, Receipt
Confirmed Cash, Receipt Credit Card
Chargeback Application, Receipt Currency
Rounding, Receipt Default Application, Receipt
Deferred Tax, Receipt Earned Discount,
Receipt Earned Discount Nonrecoverable
Tax, Receipt Exchange Gain Loss, Receipt
Factored Cash, Receipt On Account Application,
Receipt Payment Netting Application, Receipt
Prepayment Application, Receipt Refund
Application, Receipt Remitted Cash, Receipt
Short Term Debt, Receipt Tax, Receipt
Unapplied Cash, Receipt Unearned Discount,
Receipt Unearned Discount on Nonrecoverable
Tax, Receipt Unidentified Cash, Receipt Write-
Off Application, Unapplied Cash
Receipt
Receipt - Basis Journal Entry Rule Set
Receipt Application to Earned Revenue, Receipt
Application to Freight, Receipt Application to
Revenue, Receipt Application to Rounding,
Receipt Application to Suspense Revenue,
Receipt Application to Tax, Receipt Application
to Unbilled Revenue, Receipt Bank Charges,
Receipt Cleared Cash, Receipt Confirmed Cash,
Receipt Currency Rounding, Receipt Earned
Discount, Receipt Earned Discount on Freight,
Receipt Earned Discount on Revenue, Receipt
Earned Discount on Tax, Receipt Exchange
Gain Loss, Receipt Factored Cash, Receipt On
Account Application, Receipt Payment Netting
Application, Receipt Prepayment Application,
Receipt Refund Application, Receipt Remitted
Cash, Receipt Short Term Debt, Receipt
Unapplied Cash, Receipt Unapplied for Gain
Loss lines, Receipt Unearned Discount,
Receipt Unearned Discount on Freight, Receipt
Unearned Discount on Revenue, Receipt
Unearned Discount on Tax, Receipt Unidentified
14

Oracle Fusion Cloud Financials
Implementing Receivables Credit to Cash
Chapter 1
Define Common Accounts Receivable Configuration
Event Class Journal Entry Rule Set Name Journal Line Rules
Cash, Receipt Write-Off Application, Unapplied
Cash
Accounting Method
Receivables provides the predefined Receivables Default Accrual accounting method.
Subledger Accounting provides the predefined Standard Accrual subledger accounting method that groups the
predefined accounting methods for subledger applications. You can optionally create your own subledger accounting
method.
Receivables assigns the predefined Receivables Default Accrual accounting method to the predefined Standard
Accrual subledger accounting method. You can assign this subledger accounting method to your ledgers.
This table lists the assignments for the Receivables Default Accrual accounting method that Receivables predefines for
the Receivables application:
Event Class Assignments Event Type Assignments Create Accounting Journal Entry Rule Set
Assignments
Adjustment
All
Yes
Adjustments - Default Accrual
Chargeback
All
Yes
Chargebacks - Default Accrual
Credit Memo
All
Yes
Credit Memos - Default Accrual
Debit Memo
All
Yes
Debit Memos - Default Accrual
Invoice
All
Yes
Invoices - Default Accrual
Miscellaneous Receipt
All
Yes
Miscellaneous Receipts
Receipt
All
Yes
Receipts - Default Accrual
You can copy the predefined Receivables Default Accrual accounting method and update the accounting method with
new attributes, according to your business requirements.
The following steps provide general guidelines for copying and updating the predefined Receivables Default Accrual
accounting method:
• Create a mapping set for the new attribute values.
• Create an accounting rule based on the mapping set.
• Duplicate the predefined journal entry rule set you want and assign the new accounting rule.
• Duplicate the predefined accounting method assigned to your ledger.
15

Oracle Fusion Cloud Financials
Implementing Receivables Credit to Cash
Chapter 1
Define Common Accounts Receivable Configuration
• In the new accounting method, assign an end date to the applicable predefined journal entry rule set
assignment and assign the new journal entry rule set.
• Activate the new accounting method. This sets the journal entry rule sets to Active.
• Assign the new accounting method to your ledger.
Related Topics
•
Accounting Attribute Assignments
Receivables Accounting Event Model
An accounting event is a business event in Receivables that has an accounting impact. For example, creating or
applying a receipt is an accounting event.
Not all business events have an accounting impact, but you can decide which events you want to monitor as accounting
events. You can modify the accounting setup to create accounting for some events and not for others.
Subledger Accounting categorizes accounting events as event types. Event types are grouped into event classes
that in turn are grouped into event entities. The overall grouping of these components is called an event model. The
Receivables accounting event model is predefined for you, and includes each Receivables event class and its life cycle.
This accounting event model forms the basis for creating subledger accounting.
As the foundation of the event model, Receivables contains predefined event entities. An event entity enables
Subledger Accounting to handle the accounting for similar business events in a consistent manner. The event entities
for Receivables are:
• Transactions
• Receipts
• Adjustments
• Bills Receivable
Each event entity is associated with one or more event classes. An event class represents a category of business events
for a particular activity or document. Event classes group similar event types and enable the sharing of accounting
definitions.
An event type represents a business operation that you can perform for an event class. An accounting event has both
an event class and an event type that affect how the Create Receivables Accounting process determines the subledger
accounting for it. Event types provide the lowest level of detail for storing accounting definitions.
Transactions Event Entity
This table describes the predefined event classes and event types for the Transactions event entity.
Event Class Event Types
Chargeback
Chargeback Created
Credit Memo
Credit Memo Created
16

Oracle Fusion Cloud Financials
Implementing Receivables Credit to Cash
Chapter 1
Define Common Accounts Receivable Configuration
Event Class Event Types
Credit Memo Updated
Debit Memo
Debit Memo Created
Debit Memo Updated
Invoice
Invoice Created
Invoice Updated
Receipts Event Entity
This table describes the predefined event classes and event types for the Receipts event entity.
Event Class Event Types
Miscellaneous Receipt
Miscellaneous Receipt Created
Miscellaneous Receipt Reverse
Miscellaneous Receipt Updated
Receipt
Receipt Created
Receipt Reverse
Receipt Updated
Adjustments Event Entity
This table describes the predefined event classes and event types for the Adjustments event entity.
Event Class Event Types
Adjustment
Adjustment Created
Bills Receivable Event Entity
This table describes the predefined event classes and event types for the Bills Receivable event entity.
Event Class Event Types
Bills Receivable
Bills Receivable Created
Bills Receivable Updated
17

Oracle Fusion Cloud Financials
Implementing Receivables Credit to Cash
Chapter 1
Define Common Accounts Receivable Configuration
Event Class Event Types
Reference Data Sets in Receivables
Use reference data sets to share the values in your Receivables reference data objects either across business units or
within one business unit only.
Receivables includes a predefined Common reference data set. Use the Common set to share reference data that you
want to make available to all business units. For example, you can make the transactions types and transaction sources
created in each business unit available to all other business units.
Create business unit-specific data sets for reference data for use by one business unit only. For example, each business
unit may want to create and maintain its own salespersons and memo lines data.
Note: You must create business unit-specific reference data sets for Customer Sites and Customer Account
Relationships. All other reference data objects can use the predefined Common set.
This tables lists the reference data objects in Receivables that are assigned a reference data set.
Receivables Reference Data Objects
Reference Data Object Method of Sharing
Transaction Types Common Set or BU-Specific
Transaction Sources Common Set or BU-Specific
Payment Terms Common Set or BU-Specific
Remit-to Addresses Common Set or BU-Specific
Memo Lines Common Set or BU-Specific
Salespersons Common Set or BU-Specific
Customer Sites BU-Specific Only
Customer Account Relationships BU-Specific Only
AutoCash Rule Sets Common Set or BU-Specific
AutoMatch Rule Sets Common Set or BU-Specific
Application Exception Rule Sets Common Set or BU-Specific
Revenue Scheduling Rules Common Set or BU-Specific
Revenue Contingencies Common Set or BU-Specific
18

Oracle Fusion Cloud Financials
Implementing Receivables Credit to Cash
Chapter 1
Define Common Accounts Receivable Configuration
Reference Data Object Method of Sharing
Lockboxes Common Set or BU-Specific
Translated Display of Transaction Type, Transaction
Source, and Receipt Method
You can display the translated names of your transaction types, transaction sources, and receipt methods in your local
language on important Receivables pages and windows.
In certain countries it is a requirement to display the names of these objects in the local language.
Use these three lookup types to create lookup codes with the translation in the local language for each corresponding
object:
• Transaction Type: ORA_AR_TRANSLATED_TRX_TYPE lookup type
• Transaction Source: ORA_AR_TRANSLATED_TRX_SOURCE lookup type
• Receipt Method: ORA_AR_TRANSLATED_RCPT_METHOD lookup type
Use these values for each lookup code:
• Lookup Code: Numerical identifier of the object.
• Reference Data Set: Common Set or any custom set.
• Meaning: Translated name of the object in the local language.
• Description: Description of the translated object.
Before you enter lookup codes with translated names under one of these lookup types, complete these prerequisites:
• Collect the numerical identifiers for the transaction types, transaction sources, and receipt methods that you
want to display in translation.
• Create a list of translated names in advance of entering the corresponding lookup codes.
• Log in under the language that you intend to enter lookup codes for.
To find the numerical identifiers for transaction types and transaction sources:
1. Navigate to the Setup and Maintenance work area.
2. Navigate to the Manage Transaction Types page or Manage Transaction Sources page.
3. Click the Search button to display all transaction types or transaction sources.
4. Select View > Columns > Transaction Type Identifier or Transaction Source Identifier to display this column.
5. Make note of the identifiers for the transaction types and transaction sources that you want to translate.
To find the numerical identifiers for receipt methods:
1. Navigate to the Setup and Maintenance work area.
2. Navigate to the Manage Receipt Class and Methods page.
3. Click the Search button to display all receipt classes.
4. Open the first receipt class that you want in the Edit Receipt Class and Methods page.
5. Select the first receipt method that you want.
19

Oracle Fusion Cloud Financials
Implementing Receivables Credit to Cash
Chapter 1
Define Common Accounts Receivable Configuration
6. Select View > Columns > Receipt Method Identifier to display this column.
7. Make note of the receipt method identifier.
8. Repeat these steps for all receipt methods in all receipt classes that you want.
When you have completed translation of the objects you need and collected the corresponding identifiers, use the
Manage Receivables Lookups task to enter the lookup codes under each lookup type.
In this example, you want to display the transaction type Invoice_1 in French. The translated name of this transaction
type is Facture_1. You confirm that the transaction type identifier for Invoice_1 is 001.
To create the lookup code for this translated transaction type:
1. Log in under the French language.
2. Navigate to the Setup and Maintenance work area.
3. Search for the setup task Manage Receivables Lookups.
4. In the Manage Receivables Lookups page, search for the ORA_AR_TRANSLATED_TRX_TYPE lookup type.
5. Enter a new row for the lookup code.
6. In the Lookup Code field, enter 001.
7. In the Reference Data Set field, enter Common Set.
8. If not selected, enable the Enabled option.
9. In the Start Date field, enter the date from which to display the transaction type in French.
10. In the Meaning field, enter Facture_1.
Note: There is no validation on the text you enter in lookup code fields. You must ensure that the translated
name of the object that you enter in the Meaning field matches the original language name exactly.
11. In the Description field, enter French translation of Invoice_1.
12. Save your work.
The French translation of this transaction type will appear on Receivables pages and windows.
Add as many translated name lookup codes that you need for both new and existing transaction sources, transaction
types, and receipt methods. You may want to create a procedure for regular updates to all objects that require translated
display.
You can create lookup codes under the ORA_AR_TRANSLATED lookup types in all the languages your system supports.
You must log in under each language separately and update the translated names and descriptions for each lookup
code in that language.
Ledger and Legal Entity Document Sequencing
Ledger and Legal Entity Document Sequencing in Receivables
You can set up your primary ledger to use document sequencing in Receivables at the ledger level or legal entity level.
If you enable document sequencing at the legal entity level, then if you have more than one legal entity assigned to
the same ledger, you can assign separate document sequences to Receivables transactions, adjustments, and receipts
belonging to each legal entity.
Legal entity level document sequencing helps you conform to local and governmental authority requirements, while still
being able to organize multiple legal entities under the same primary ledger.
20

Oracle Fusion Cloud Financials
Implementing Receivables Credit to Cash
Chapter 1
Define Common Accounts Receivable Configuration
Review these guidelines for document sequencing in Receivables:
• Document Sequencing in Receivables
• Receivables Document Categories
• Chronological Document Sequencing
• Chronological Document Sequencing and Manual Transactions
• Chronological Document Sequencing and AutoInvoice
Document Sequencing in Receivables
To use document sequencing in Receivables, in the Sequencing section of the Specify Options page of your primary
ledger, perform one or both of these tasks:
1. Set the Sequencing By option to Ledger or Legal Entity.
2. Optionally enable the Enforce Document Sequencing option for Receivables.
If you perform step 1 and step 2, then document sequencing is always used in the ledger or all legal entities assigned to
the ledger. You must assign a document sequence to every document category generated by Receivables events.
If you perform step 1 but not step 2, then you can optionally assign document sequences to the Receivables document
categories that meet your business requirements. For example, you can use sequential numbering for receipt
processing only and not for transactions.
Receivables Document Categories
If the primary ledger is enabled for document sequencing at the legal entity level (Sequencing By option set to Legal
Entity), then Receivables creates a document category for each of these Receivables events in all legal entities assigned
to the ledger:
• Invoice transaction type
• Credit memo transaction type
• Debit memo transaction type
• Bills receivable transaction type
• Standard receipt
• Adjustment
To assign a document sequence to a document category:
1. Navigate to the Manage Document Sequence Categories page.
2. Search for the document categories that you want.
You can use the Category Code field to limit your search by entering, for example, Invoice or Receipt.
3. Review the search results to find the document category that you want
4. If necessary, update the category name according to your requirements.
5. Save your changes.
6. Navigate to the Manage Receivables Document Sequences page.
7. Search for the document sequence name that you want, or create a new document sequence.
8. In the Search Results section, update or complete the document sequence setup according to your
requirements.
9. In the Assignments section, select the document category to assign to this document sequence.
10. Save your changes.
21

Oracle Fusion Cloud Financials
Implementing Receivables Credit to Cash
Chapter 1
Define Common Accounts Receivable Configuration
For each Receivables event, the document sequence number is generated when the following related action takes place:
• Transactions: At the time of either saving or completing the transaction, depending on the setting of the
Receivables system option Document Number Generation Level for the applicable business units.
• Adjustments: When the adjustment is submitted.
• Receipts: When the receipt is submitted.
• Bills Receivable: When the bill receivable is completed.
These rules apply to Receivables document sequencing:
• Document sequence date is the accounting date (not, for example, the transaction date or receipt date).
Note: If a bill receivable requires drawee acceptance, then Receivables uses the transaction date instead of
the accounting date to assign the document number. This is because a bills receivable document number is
generated when the bill is completed, not accepted.
• You can't change the legal entity on any transaction that has a document sequence number.
• By default, you can't delete any transaction or receipt that has a document sequence number. If the Receivables
system option Allow payment deletion is enabled, then you can delete receipts and bills receivable
transactions only for the applicable business units.
Chronological Document Sequencing
Document sequencing uses the accounting date as the document sequence date. To help ensure reliable document
sequencing for your transactions, you can enforce the sequencing of document numbers in chronological order.
Note: Chronological document sequencing applies to invoice, credit memo and debit memo transactions only, either
entered manually or imported using AutoInvoice. It doesn't apply to receipts, adjustments, or bills receivable.
To enable chronological document sequencing on Receivables transactions, in the Sequencing section of the Specify
Options page of your primary ledger perform these three tasks:
1. Set the Sequencing By option to Ledger or Legal Entity.
2. Enable the Enforce Document Sequencing option for Receivables.
3. Enable the Enforce Chronological Order on Document Date option.
You must perform all three steps for chronological document sequencing. Enabling the Enforce Chronological
Order on Document Date option enforces the correlation between the document sequence accounting date and the
transaction accounting date. This prevents Receivables from creating a transaction with an accounting date earlier than
the accounting date of the last sequenced document within the same document sequence.
For example, you create an invoice with an accounting date of 01-Jan-2014. This invoice is assigned the document
number 100. The next invoice you create is assigned the document number 101 provided the accounting date of the
invoice is 01-Jan-2014 or later. If the accounting date is earlier than 01-Jan-2014, then Receivables doesn't create the
transaction.
Chronological Document Sequencing and Manual Transactions
If you're using document sequencing and the primary ledger option Enforce Chronological Order on Document
Date is enabled, then you can enforce chronological document sequencing on transactions created manually in your
transaction type setup.
22

Oracle Fusion Cloud Financials
Implementing Receivables Credit to Cash
Chapter 1
Define Common Accounts Receivable Configuration
To enforce chronological document sequencing on transactions created manually:
1. Navigate to the Create or Edit Transaction Type page.
2. Enable the No future dates with chronological document sequencing option.
3. Complete the transaction type setup according to your requirements.
4. Assign this transaction type to the applicable transactions.
When you use this transaction type with transactions you create manually, then Receivables won't create the transaction
if both the transaction and accounting dates are in the future.
Chronological Document Sequencing and AutoInvoice
If you're using document sequencing and the primary ledger option Enforce Chronological Order on Document Date
is enabled, then for AutoInvoice you must set the Receivables system option Accounting Dates Out of Order. Setting
this option determines how AutoInvoice processes transactions when the accounting date is out of order within the
document sequence.
In the Receivables System Options page: Billing and Revenue tab: AutoInvoice section, set the Accounting Dates Out of
Order field to Reject or Adjust:
• Reject: If the transaction accounting date is out of order within the document sequence, reject the transaction
and transfer it to the error table.
• Adjust: If the transaction accounting date is out of order within the document sequence, adjust the accounting
date to conform to the document sequence accounting date.
Related Topics
•
What legal entity is assigned to a transaction?
•
Accounting Date Derivation During AutoInvoice Import
•
Document Sequences
•
Document Sequence Categories
How AutoInvoice Processes Transactions with Document
Sequencing
If the primary ledger is enabled for document sequencing, AutoInvoice validates and assigns document numbers to
transactions according to the requirements of the ledger settings.
Note: If an imported transaction line already has a document number, then AutoInvoice accepts this document
number without further validation.
Settings That Affect AutoInvoice Processing with Document Sequencing
If the primary ledger option Enforce Chronological Order on Document Date is enabled, then you must set the
Receivables system option Accounting Dates Out of Order. Setting this option determines how AutoInvoice processes
transactions when the accounting date is out of order within the document sequence.
23

Oracle Fusion Cloud Financials
Implementing Receivables Credit to Cash
Chapter 1
Define Common Accounts Receivable Configuration
Before you run the Import AutoInvoice program, you must also create and assign document sequences to the document
categories of the transaction types that you plan to assign to imported transactions.
How Transactions with Document Sequencing Are Processed
For the most complete example, if the primary ledger is set for document sequencing at the legal entity level,
AutoInvoice processes transactions in this way:
1. Validate and group transaction lines into transactions.
2. Derive the legal entity for each transaction and assign the legal entity to the transaction.
3. If the transaction doesn't have an accounting date, then derive the accounting date.
4. If the primary ledger option Enforce Chronological Order on Document Date isn't enabled:
a. Retrieve the document sequence for the document category of each transaction type assigned to
transactions.
b. Assign the document number to the transaction according to the combination of legal entity, transaction
type, document sequence, and accounting date.
5. If the primary ledger option Enforce Chronological Order on Document Date is enabled:
a. Order transactions by legal entity and then by transaction type.
b. Retrieve the document sequence for the document category of each transaction type assigned to
transactions.
c. Order transactions by document sequence and then by accounting date in ascending chronological
order.
d. Compare the document sequence accounting date to the accounting date of the transaction.
e. If the transaction accounting date is equal to or later than the document sequence accounting date,
assign the document number to the transaction according to the combination of legal entity, transaction
type, document sequence, and accounting date.
f. If the transaction accounting date is earlier than the document sequence accounting date, retrieve the
value of the Receivables system option Accounting Dates Out of Order.
g. If the Accounting Dates Out of Order option is set to:
- Reject: Reject the transaction and transfer the transaction to the error table.
- Adjust: Update the transaction accounting date with the document sequence accounting date.
Note: If the document sequence accounting date is in a closed period, then adjust this date to
the first open accounting period.
h. Assign the document number to the transaction according to the combination of legal entity, transaction
type, document sequence, and accounting date.
Related Topics
•
How AutoInvoice Processes Data During Import
•
AutoInvoice Validations on Imported Data
24

Oracle Fusion Cloud Financials
Implementing Receivables Credit to Cash
Chapter 1
Define Common Accounts Receivable Configuration
FAQs for Ledger and Legal Entity Document Sequencing
Can I share document sequences across ledgers or business units?
If document sequencing is enabled for a ledger, it isn't recommended to share the same document sequence across
ledgers or business units.
Document sequencing uses the accounting date as the document sequence date. Because ledgers can have different
accounting periods open, each ledger could derive a different accounting date for the same document sequence.
Because a document category is created for each transaction type you create, best practice is to create and maintain a
separate set of transaction types in each business unit.
Receivables Activities
Receivables Activity Types
Receivables activity types provide default accounting information for all activities in Receivables other than transactions
and receipts.
Using Receivables Activity Types
Adjustments
You use activities of this type when creating adjustments. You must create at least one activity of this type.
There are also three related activities that are reserved for internal use only:
• Chargeback Adjustment
• Adjustment Reversal
• Chargeback Reversal
You must define general ledger accounts for the Chargeback Adjustment activity before creating chargebacks.
When you reverse a receipt, if an adjustment or chargeback exists, Receivables automatically generates off-setting
adjustments using the Adjustment Reversal and Chargeback Reversal activities.
Bank Error
You use activities of this type when entering miscellaneous receipts. You can use this type of activity to help reconcile
bank statements using Cash Management.
Bills Receivable Funds Recovery
You use activities of this type when you need to unapply a receipt from a bill receivable. Because you can't reverse
the receipt in Cash Management, you use this activity to create a negative miscellaneous receipt and apply it to Bills
Receivable Funds Recovery.
25

Oracle Fusion Cloud Financials
Implementing Receivables Credit to Cash
Chapter 1
Define Common Accounts Receivable Configuration
Claim Investigation
You use activities of this type when you create a claim investigation application against a receipt for a transaction or
non-transaction underpayment or overpayment. You must define a general ledger account for claim investigation
receipts that use the Claim Investigation activity.
Credit Card Chargeback
You use activities of this type when recording credit card chargebacks. You must define a general ledger clearing
account for the Credit Card Chargeback activity that Receivables provides before recording credit card chargebacks.
Receivables credits the clearing account when you apply a credit card chargeback, and then debits the account after
generating the negative miscellaneous receipt. If you later determine the chargeback is invalid, then Receivables debits
the clearing account when you unapply the credit card chargeback, and then credits the account after reversing the
negative miscellaneous receipt. Only one Credit Card Chargeback activity within a business unit can be active at a time.
Credit Card Refund
You use activities of this type when processing refunds to customer credit card accounts. This activity includes
information about the general ledger clearing account to use to clear credit card refunds. You must create at least one
activity of this type to process credit card refunds.
Earned Discount
You use activities of this type to adjust a transaction if payment is received within the discount period, as determined by
the payment terms on the transaction.
Late Charges
You use activities of this type to define a late charge policy. You must define a Late Charges activity if you record late
charges as adjustments against overdue transactions. If you assess penalties in addition to late charges, then define a
separate Late Charges activity for penalties.
Miscellaneous Cash
You use activities of this type when entering miscellaneous receipts. The Miscellaneous Cash activity uses a distribution
set to automatically distribute miscellaneous cash across various accounts. You must create at least one activity of this
type.
If the Tax Rate Code Source for this activity is Activity, then you must define asset and liability tax rate codes to account
for tax on miscellaneous receipts and miscellaneous payments.
Payments
You use activities of this type when applying a receipt against other open receipts. You must define a general ledger
clearing account to use when offsetting one receipt against another receipt. Only one Payments activity within a
business unit can be active at a time.
Prepayments
You use activities of this type when creating prepayment receipts. You must define a general ledger account for
prepayment receipts that use the Prepayments activity. Only one Prepayments activity within a business unit can be
active at a time.
Receipt Write-off
You use activities of this type when writing off receipts. You must define the general ledger account to credit when you
write off an unapplied amount or an underpayment on a receipt.
26

Oracle Fusion Cloud Financials
Implementing Receivables Credit to Cash
Chapter 1
Define Common Accounts Receivable Configuration
Refund
You use activities of this type to process automated non-credit card refunds. You must define the general ledger
clearing account to use to clear refunds. You must create at least one activity of this type. Only one Refund activity
within a business unit can be active at a time.
Short Term Debt
You use activities of this type to record advances made to creditors by the bank when bills receivable are factored with
recourse. You select a short-term debt receivables activity when you create or update remittance banks to use with bills
receivable remittance receipt methods.
Unearned Discount
You use activities of this type to adjust a transaction if payment is received after the discount period, as determined by
the payment terms on the transaction.
Related Topics
•
PCI DSS Credit Card Processing Requirements
GL Account Source
When you define a Receivables activity, you use the GL Account Source to indicate how Receivables derives the
accounts for the expense or revenue generated by the activity.
GL Account Source Options
Activity GL Account
Allocate the expense or revenue to the general ledger account that you specify for the Receivables activity. If the activity
type is Bank Error, Late Charges, Prepayments, or Receipt Write-off, you can only select this option.
Distribution Set
Allocate the expense or revenue to the distribution set that you specify. This value is only used with Miscellaneous Cash
activities.
Revenue on Invoice
Allocate the expense or revenue net of any tax to the revenue accounts specified on the invoice. If Tax Rate Code
Source is set to None, allocate the gross amount to these accounts. You can only choose this option if the activity type
is Adjustment, Earned Discount, or Unearned Discount.
If the revenue on the invoice is unearned, then AutoAccounting derives the anticipated revenue accounting distribution
accounts and amounts. Receivables then uses this information to allocate the adjustment or discount amount to these
derived revenue accounts.
Tax Rate Code on Invoice
Allocate the net portion using the expense/revenue accounts specified by the tax rate code on the invoice. If Tax Rate
Code Source is set to None, allocate the gross amount to these accounts. You can only choose this option if the activity
type is Adjustment, Earned Discount, or Unearned Discount.
27

Oracle Fusion Cloud Financials
Implementing Receivables Credit to Cash
Chapter 1
Define Common Accounts Receivable Configuration
Note: In the event of an adjustment to an invoice with zero amount revenue distributions, don’t set the adjustment
activity GL Account Source to Revenue on Invoice or Tax Rate Code on Invoice.
Related Topics
•
What are distribution sets?
•
How Adjustments to Transactions Are Calculated
Tax Rate Code Source
When you define a receivables activity, you use the Tax Rate Code Source to indicate how Receivables allocates tax
amounts for the activity.
Tax Rate Code Source Options
None
Allocates the entire tax amount according to the GL Account Source you specified. You use this option if you don't want
to account for tax separately.
Activity
Allocate the tax amount to the asset or liability tax accounts specified by the activity.
Invoice
Distribute the tax amount to the tax accounts specified by the tax rate code on the invoice. You can't choose this option
if the activity type is Miscellaneous Cash or Late Charges.
Enable the Recoverable option to indicate that the tax for this activity is recoverable. Don't enable this option if tax is
nonrecoverable.
Note: In the event of a tax adjustment to an invoice with zero amount tax distributions, you can’t set the adjustment
activity Tax Rate Code Source to Invoice.
Related Topics
•
Accounting for Tax on Receivables Transactions
AutoCash Rule Sets
Examples of Using Each AutoCash Rule
You create an AutoCash rule set from a combination of the six AutoCash rules. You enter the rules in the order in which
you want to use them to apply a receipt to an open debit item.
28

Oracle Fusion Cloud Financials
Implementing Receivables Credit to Cash
Chapter 1
Define Common Accounts Receivable Configuration
The AutoCash rules are:
• Match Payment with Invoice
• Clear the Account
• Clear Past Due Invoices
• Clear Past Due Invoices Grouped by Payment Terms
• Apply to the Oldest Invoice First
• Combo Rule
When you apply a receipt, Receivables uses the first rule in the AutoCash rule set. If the first rule in the set doesn't find a
match, Receivables uses the next rule in the sequence, and so on until it can apply the receipt.
These examples illustrate how each rule applies receipts to transactions and updates customer balances.
Match Payment with Invoice
The Match Payment with Invoice rule applies a receipt to a single invoice, debit memo, or chargeback only if the receipt
amount exactly matches the amount of the debit item. If more than one debit item has an open amount that matches
the receipt amount, Receivables applies the receipt to the item with the earliest due date. If more than one debit item
has the same amount and due date, Receivables applies the receipt to the item with the lowest payment schedule ID
number (internal identifier).
Receivables uses the values specified for the AutoCash rule set open balance calculation and the number of discount
grace days assigned to the customer profile to determine the remaining amount due on the debit item. The rule ignores
the value of the Apply partial receipts option.
For example, consider the following scenario:
Item/Option Value
Discounts
Earned Only
Late Charges
No
Receipt
$1800
Receipt Date
14-JAN-03
Discount Grace Days
5
The invoice details are:
Invoice Number Invoice Amount Discount Payment Terms Invoice Date Due Date
600
$2000
$20
10% 10/Net 30
01-JAN-03
30-JAN-03
29

Oracle Fusion Cloud Financials
Implementing Receivables Credit to Cash
Chapter 1
Define Common Accounts Receivable Configuration
The payment terms assigned to this invoice include a 10% discount if the invoice is paid within 10 days, and the open
balance calculation on the AutoCash rule set allows for earned discounts. Even though the invoice is paid after the 10
day period, Receivables adds the 5 discount grace days, making this invoice eligible for a 10% discount.
The remaining amount due on the invoice on January 14 is $1800. Since the remaining amount due matches the receipt
amount, the receipt is applied. If there had been no discount grace days, Receivables couldn't apply the receipt because
the remaining amount of the invoice would be $2000.
Clear the Account
The Clear the Account rule applies a receipt only if the receipt amount exactly matches the customer open balance.
Receivables includes all open debit and credit items when calculating the customer open balance. Open credit items
include credit memos, on-account credits, and on-account and unapplied cash. The rule ignores the value of the Apply
partial receipts option.
The Clear the Account rule uses the following equation to calculate the open balance for each debit item:
Open Balance = Original Balance + Late Charges - Discount
Receivables then adds the balance for each debit item to determine the total account balance. The rule uses this
equation for each invoice, chargeback, debit memo, credit memo, and application of an unapplied or on-account receipt
to a debit item.
Receivables uses the values specified for the AutoCash rule set open balance calculation and the number of discount
grace days assigned to the customer profile to determine the customer open balance.
For example, consider the following scenario:
Item/Option Value
Late Charges
Yes
Items in Dispute
Yes
Receipt
$590
This table shows the customer activity:
Past Due Debits/Credits Invoice Amount Late Charges In Dispute
Invoice 45
$500
$40
Yes
Invoice 46
$300
$0
N/A
Credit Memo 100
$50
N/A
N/A
Unapplied Cash
$200
N/A
N/A
30

Oracle Fusion Cloud Financials
Implementing Receivables Credit to Cash
Chapter 1
Define Common Accounts Receivable Configuration
Since the Late charges and Items in dispute options are enabled, the open balance for this customer is $590. Because
the receipt amount matches the customer open balance, the receipt can be applied.
If the receipt amount didn't exactly match the customer account balance, Receivables would use the next rule in the set
to attempt to apply the receipt.
Clear Past Due Invoices
The Clear Past Due Invoices rule applies a receipt only if the receipt amount exactly matches the customer past due
account balance. Receivables includes all open past due debit and credit items when calculating the past due account
balance. The rule ignores the value of the Apply partial receipts option.
The Clear Past Due Invoices rule only applies the receipt to items that are currently past due. A debit item is considered
past due if the invoice due date is earlier than or equal to the date of the receipt currently being applied. Receivables
uses the receipt date for unapplied and on-account cash, and the credit memo date for credit memos and on-account
credits, to determine whether to include these amounts as part of the customer past due account balance.
For example, if you apply a receipt with a receipt date of 10-JAN-03, all unapplied and on-account cash, and all credit
memos and on-account credits, that have a transaction date (receipt date or credit memo date) equal to or earlier than
10-JAN-03 are included when calculating the customer past due account balance.
Receivables uses the values specified for the AutoCash rule set open balance calculation and the number of discount
grace days assigned to the customer profile to determine the customer past due account balance. The settings of the
Late charges and Items in dispute options may prevent a past due debit item from being closed, even if the receipt
amount matches the customer past due account balance.
For example, consider the following scenario:
Item/Option Value
Late Charges
No
Items in Dispute
No
Receipt
$420
This table shows the customer activity:
Past Due Debits/Credits Invoice Amount Late Charges In Dispute
Invoice 209
$300
$0
N/A
Invoice 89
$250
$0
Yes
Invoice 7
$120
$30
N/A
Since the Late charges and Items in dispute options aren't enabled, Receivables doesn't include Invoice 89 ($250)
or late charges for Invoice 7 ($30) in the calculation of the customer past due account balance. Therefore, the past
31

Oracle Fusion Cloud Financials
Implementing Receivables Credit to Cash
Chapter 1
Define Common Accounts Receivable Configuration
due account balance for this customer is $420. Because the receipt amount matches the customer past due account
balance, the receipt is applied. However, Invoice 7 and Invoice 89 are still open, past due debit items.
Clear Past Due Invoices Grouped by Payment Terms
The Clear Past Due Invoices Grouped by Payment Terms rule applies a receipt only if the receipt amount exactly
matches the sum of the customer credit memos and past due invoices. This rule is similar to the Clear Past Due Invoices
rule, but it first groups past due invoices by payment terms and uses the oldest transaction due date within the group as
the group due date.
A debit item is considered past due if the invoice due date is earlier than the date of the receipt currently being applied.
For credit memos, Receivables uses the credit memo date to determine whether to include these amounts in the
customer account balance.
For example, if you apply a receipt with a receipt date of 10-JAN-03, credit memos that have a transaction date equal
to or earlier than 10-JAN-03 are included. Credit memos don't have payment terms, and are therefore included in each
group.
Receivables uses the values specified for the AutoCash rule set open balance calculation and the number of discount
grace days assigned to the customer profile to determine the sum of the customer credit memos and past due invoices.
The settings of the Late charges and Items in dispute options may prevent a past due debit item from being closed,
even if the receipt amount matches the sum of the customer credit memos and past due invoices.
For example, consider a $900 receipt applied on 25-JUN. This table shows the related customer activity:
Transaction Number Payment Terms Due Date Invoice Amount
1
A
25-MAY
$500
2
A
25-JUN
$200
3
A
25-JUN
$200
4
B
20-JUN
$900
5
C
25-MAY
$905
Receivables groups these transactions as follows:
• Group 1: Transactions 1,2,3 Amount: $900 Group Due Date: 25-MAY
• Group 2: Transaction 4 Amount: $900 Group Due Date: 20-JUN
• Group 3: Transaction 5 Amount: $905 Group Due Date: 25-MAY
Since both Groups 1 and 2 match the receipt amount, Receivables selects the group with the oldest due date (Group 1)
and applies the receipt to the transactions in this group.
32

Oracle Fusion Cloud Financials
Implementing Receivables Credit to Cash
Chapter 1
Define Common Accounts Receivable Configuration
Apply to the Oldest Invoice First
The Apply to the Oldest Invoice First rule applies receipts to customer debit and credit items, starting with the item
with the oldest due date. Receivables uses the values specified for the AutoCash rule set open balance calculation to
determine the oldest outstanding item for the customer.
For example, consider the following scenario:
Item/Option Value
Apply Partial Receipts
Yes
Late Charges
No
Receipt
$200
This table shows the customer activity:
Invoice Number Invoice Amount Late Charges Due Date
801
$0
$35
01-DEC-02
707
$450
$0
01-JAN-03
If you compare only the due dates for the two invoices, invoice 801 is the oldest invoice. However, Receivables also
checks the open balance calculation and automatic matching rule options for the AutoCash rule set. Since the Late
charges option isn't enabled, Receivables ignores invoice 801 (because the remaining amount only consists of late
charges) and applies the $200 receipt to invoice 707.
If the Apply partial receipts option weren't enabled, Receivables couldn't apply this receipt and would look at the next
rule in the sequence.
Combo Rule
The Combo Rule applies a receipt to two invoices, debit memos, or chargebacks only if the receipt amount exactly
matches the amount of the two debit items. If more than one combination of two debit items has a total open amount
that matches the receipt amount, Receivables applies the receipt to the combination of items with the earliest due date.
If more than one combination of two debit items has the same amount and due date, Receivables applies the receipt to
the combination of items with the lowest payment schedule ID number (internal identifier).
Receivables uses the values specified for the AutoCash rule set open balance calculation and the number of discount
grace days assigned to the customer profile to determine the remaining amount due on the debit items. The rule
ignores the value of the Apply partial receipts option.
For example, a lockbox contains these five open invoices:
33

Oracle Fusion Cloud Financials
Implementing Receivables Credit to Cash
Chapter 1
Define Common Accounts Receivable Configuration
Invoice Number Invoice Amount
101
$50.00
201
$200.00
301
$175.00
401
$372.00
501
$127.00
The lockbox contains a receipt for $572. Using the Combo Rule as the first AutoCash rule, the receipt is applied to
invoices 201 and 401.
Related Topics
•
Guidelines for Applying Receipts and On-Account Credit Memos
Example of Using an AutoCash Rule Set
This example demonstrates how to create and use an AutoCash rule set.
You create an AutoCash rule set to manage the payments received from Global Freight Carriers. You have an earned
discount arrangement with this company but with no payment or discount grace days, and you don't add late charges
for payments received beyond the due date.
Create the AutoCash Rule Set
Create the AutoCash Rule set using these values:
Field Value
Open Balance Calculation: Discounts
Earned Only
Open Balance Calculation: Late Charges
No
Open Balance Calculation: Items in
Dispute
No
Automatic Matching Rules: Apply Partial
Receipts
Yes
Automatic Matching Rules: Remaining
Remittance Amount
On Account
34

Oracle Fusion Cloud Financials
Implementing Receivables Credit to Cash
Chapter 1
Define Common Accounts Receivable Configuration
Field Value
AutoCash Rule
1. Match Payment with Invoice
AutoCash Rule
2. Clear The Account
AutoCash Rule
3. Apply To The Oldest Invoice First
Process a Payment Using the AutoCash Rule Set
Global Freight Carriers has the following outstanding invoices, none of which are in dispute:
Number Amount Remaining Due Date Discount Date Discount Amount
123
$200
11-DEC-02
01-DEC-02
$20
124
$300
08-DEC-02
30-NOV-02
$30
125
$150
13-DEC-02
28-NOV-02
$15
A payment was entered for Global Freight Carriers for $600 with a deposit date of 10-DEC-02.
Using the AutoCash rule set that you created, Receivables processes the payment in this way:
1. AutoCash rule 1, Match Payment with Invoice, fails because none of the customer open items have a remaining
amount due that is equal to the amount of the receipt ($600).
2. Receivables looks at AutoCash rule 2.
3. AutoCash rule 2, Clear the Account, fails because the customer calculated account balance ($650) isn't the
same as the amount of the receipt.
4. Receivables looks at AutoCash rule 3.
35

Oracle Fusion Cloud Financials
Implementing Receivables Credit to Cash
Chapter 1
Define Common Accounts Receivable Configuration
5. Receivables uses AutoCash rule 3, Apply to the Oldest Invoice First.
a. Receivables first applies the receipt to the oldest invoice, Invoice 124 for $300, and performs these
calculations:
- Since the discount date of 30-NOV-02 has passed and the Discount field is set to Earned Only,
the $30 discount is no longer available. The amount due remaining for this invoice is now equal to
either $0 or the amount of any late charges previously assessed for this item.
- Because the Late Charges option is set to No, late charges aren't included in the customer open
balance calculation. The remaining receipt amount is now $300.00.
b. Receivables now applies $200 to the next oldest invoice, Invoice 123, and performs these calculations:
- As with Invoice 124, the discount date for Invoice 123 has passed and the $20 discount is no longer
available. The amount due remaining for this invoice is now equal to either $0 or the amount of any
late charges previously assessed for this item.
- Because the Late Charges option is set to No, late charges aren't included in the customer open
balance calculation. The remaining receipt amount is now $100.
c. Receivables applies the remaining $100 to Invoice 125 ($150) as a partial receipt because the Apply
partial receipts option is set to Yes.
Note: If the Apply partial receipts option were set to No, Receivables couldn't apply the remaining
amount to Invoice 125. Instead, it would be placed on account, because the Remaining Remittance
Amount option is set to On Account.
- As with the other invoices, the discount date for Invoice 125 has passed and the $15 discount is no
longer available.
- If there are no late charges for this invoice, the amount due remaining is reduced from $150 to $50,
and remains open.
FAQs for AutoCash Rule Sets
How is an AutoCash rule set selected and used?
During payment processing, Receivables uses the Match Receipts By rules to attempt to match receipts to open
transactions, and either apply receipts automatically or present recommendations for receipt application.
If transactions can't be matched or transaction information isn't available, Receivables uses the AutoCash rule set,
defined for the customer profile either at the customer site or customer account level, to apply the receipt.
If the customer doesn't have an AutoCash rule set assigned to a profile, Receivables uses the AutoCash rule set assigned
to system options and the number of discount grace days defined in the customer site or customer account profile to
apply the receipt.
If none of the rules in the AutoCash rule set apply, Receivables places the remaining amount either unapplied or on-
account, depending on the setting of the Remaining Remittance Amount option on the AutoCash rule set.
Why can't the AutoCash rule apply a receipt to a related customer account?
You can only use the Apply to the Oldest Invoice First rule to pay for transactions of a related customer account.
36

Oracle Fusion Cloud Financials
Implementing Receivables Credit to Cash
Chapter 1
Define Common Accounts Receivable Configuration
The rule applies the receipt to the transaction with the oldest due date selected from all transactions belonging to all
sites of the related customer account.
How can I use partial receipts?
Use the AutoCash rule set Apply partial receipts option with the Apply to the Oldest Invoice First rule. Enabling this
option lets you apply a receipt to a transaction with an amount less than the amount required to close the debit item.
If the AutoCash rule set doesn't use partial receipts but does include late charges in the open balance calculation, then
Receivables can interpret a receipt application against a transaction amount plus late charges as a partial receipt.
For example, you intend to close a $100 transaction by applying a $100 receipt, but the transaction has since
accumulated a $10 late charge. If the Apply partial receipts option isn't enabled, Receivables can't apply the $100
receipt to the new $110 open debit item.
Approval Limits
Approval Limits Document Types
You can define approval limits for your users for specific transaction activities and amount ranges per currency. The
document types identify the transaction activities that a user can approve.
Document Types
Adjustment
Define Adjustment approval limits by currency and amount. Receivables uses approval limits that have a document type
of Adjustment when you create or approve an adjustment.
When you enter an adjustment outside your approval limit range, Receivables assigns the adjustment a status of
Pending until someone with the appropriate approval limits either approves or rejects it.
Receipt Write-off
Define Receipt Write-off approval limits by currency and amount. Receivables uses approval limits with this document
type whenever you attempt to write off either an unapplied receipt amount or an underpayment on a receipt.
You can't write off a receipt amount outside your approval limit range. In addition, the approval limits for write-offs are
separate from, but can't exceed, the Receivables system options write-off amounts.
Credit Memo Refund
Define Credit Memo Refund approval limits by currency and amount. Receivables uses approval limits with this
document type whenever you attempt to refund an on-account credit memo.
Related Topics
•
How Adjustments to Transactions Are Calculated
•
Guidelines for Applying Receipts and On-Account Credit Memos
•
Write-offs and Receipts
37

Oracle Fusion Cloud Financials
Implementing Receivables Credit to Cash
Chapter 1
Define Common Accounts Receivable Configuration
FAQs for Approval Limits
How can I manage the users that have approval limits?
You can only assign approval limits to valid users that are defined in your organization. The combination of user,
document type, and currency identify a specific approval limit record.
You can, for example, define multiple approval limit ranges for the same user and document type in each currency
defined in your system.
Be sure to update approval limits when personnel changes occur.
Credit Memo Workflow
Configure Manual Review of Credit Memo Requests
You can configure manual review and approval of credit memo requests against Receivables transactions using
Oracle Business Rules. You can also capture additional information about the credit request and its related workflow
notifications.
The manual credit memo request approval flow sends email or online notifications to each designated approver. Each
approver can review the details of the credit request, as well as enter and update information related to credit memo
approval.
Configure the Manual Workflow Notification Process
Configure these tasks in sequence to enable the manual credit memo request approval flow:
• FinArTrxnsCreditMemosAutomaticManual: By default this task is set to Automatic, for automatic creation of the
credit memo (business rule 1=1). You can set this task to Manual to initiate the manual review and approval of
the credit request.
This task by itself doesn't enable the workflow notifications.
• FinArTrxnsCreditMemosCreationPostProcessing: After you enable the manual review of credit requests, use
this task to enable the workflow notifications for manual reviews.
You can configure multiple reviewers for this workflow using the task configuration assignee rules.
To configure the manual workflow notification process:
1. Navigate to the BPM Worklist.
2. From the user drop-down list, select Administration.
3. Click the Task Configuration tab.
4. In the Tasks to be Configured: Search field, enter *Credit and click the Go icon.
This displays the human tasks (HT) available for Credit Memos.
38

Oracle Fusion Cloud Financials
Implementing Receivables Credit to Cash
Chapter 1
Define Common Accounts Receivable Configuration
5. Select FinArTrxnsCreditMemosAutomaticManual and configure the task for manual credit request reviews
using the output value HtOutcmeCreateManualCreditMemo.
6. Select FinArTrxnsCreditMemosCreationPostProcessing and configure the workflow process for manual
credit request reviews.
7. Set up the routing rules for your workflow notifications.
8. Set up the BIP template for the notification window according to your requirements.
You can copy the standard template and modify its content using the BIP editing tools.
You can use additional attributes in Assignee rule conditions to configure the workflow routing rules. These attributes
include:
• Salesperson Name
• Salesperson Email ID
• Sum of all Adjustments Amounts
• Sum of all Receipts Amounts
• Credit Memo Reason Code Descriptive Flexfield Attribute 1-15
• Invoice Line Description
• Collector Descriptive Flexfield Attribute 1-15
• Line Level Credit
• Invoice Line Type
• Invoice or Line Adjustments
• Receipts Applied
• Receivables System Options Descriptive Flexfield Attribute 1-15
• Item Number
• Line Amount Requested
• Transaction Information Descriptive Flexfield Attribute 1-15
• Revenue Scheduling Rule Start Date
• Revenue Scheduling Rule End Date
• Revenue Scheduling Rule Number of Periods
• Revenue Scheduling Rule Rule Type
• Revenue Scheduling Rule Name
• Tax Credit Amount Requested
Enable Privileges for Review Credit Memo Request
Use these three privileges to maintain user access to the Review Credit Memo Request page:
• IEX_REVIEW_CREDIT_REQUEST_PRIV (Review Credit Request): This privilege lets an approver:
◦
Access the Review Credit Request page.
◦
Use the View Transaction Activities button to access the original transaction activities.
◦
Enter comments in the Internal Comments field.
39

Oracle Fusion Cloud Financials
Implementing Receivables Credit to Cash
Chapter 1
Define Common Accounts Receivable Configuration
• IEX_UPDATE_DISPUTE_TYPE_PRIV (Update Dispute Type on Credit Request): This privilege lets an approver
update the value in the Dispute Type field.
• IEX_UPDATE_REBILL_DETAILS_PRIV (Update Rebill Details on Credit Request): This privilege lets an approver
update the values in the Rebill Number and Rebill Group fields.
Related Topics
•
How You Use Oracle Analytics Publisher to Modify Templates for Use with Formats
•
More Setup for Workflow Email Notifications
•
Overview of Financials Configurable Workflow Notifications
How You Define Approval Groups for the Credit Memo Workflow
There are two predefined rule sets for the credit memo workflow: Collection agent rule set and Non-collection agent
rule set.
These two predefined rule sets refer to two approval groups that aren't predefined. The approval groups are:
• Collection_Manager_Approval_Group
• Billing_Manager_Approval_Group
You must define the two predefined approval groups and assign users to the groups using these steps:
1. Create one approval group called Collection_Manager_Approval_Group and one approval group called
Billing_Manager_Approval_Group.
2. Assign the users that you want to each approval group.
Note: You must assign the user with the Billing Manager role to the Billing_Manager_Approval_Group.
Related Topics
•
What's the credit memo request approval process?
Statements
How You Implement Customer Statements
Print statements to provide your customers with a complete record of their invoice, debit memo, chargeback, receipt,
on-account credit, credit memo, and adjustment activity for a specified period.
To set up for statements, complete these tasks:
• Set Receivables System Options for Statements
• Define Remit-to Addresses
• Define Lookup to Print Custom Statements
40

Oracle Fusion Cloud Financials
Implementing Receivables Credit to Cash
Chapter 1
Define Common Accounts Receivable Configuration
• Define Statement Cycles
• Define Customer Site Profiles
Set Receivables System Options for Statements
Set the necessary Receivables system options for statement processing.
To set Receivables system options for statements:
1. Navigate to the Create System Options or Edit System Options page.
2. Select the applicable business unit.
3. Click the Billing and Revenue tab, if it isn't already displayed.
4. Enable the Print remit-to address option to print your remit-to addresses on your customer statements.
5. Enable the Print home country option to print your home country on transactions and statements that refer to
addresses in that country.
6. In the Default Country field, select a country to use as your home country. This is the default country value
for your remit-to addresses. The home country is also used in tax calculations and for taxpayer ID and tax
registration number validation.
7. Complete or update the rest of Receivables system options according to your requirements, and save.
Define Remit-to Addresses
Define remit-to addresses to provide default remit-to information on statements and transactions.
To define a remit-to address:
1. Navigate to the Create Remit-to Address page.
2. In the Remit-to Address Set field, select a reference data set.
3. The Country field displays the default country defined in Receivables system options. If necessary, select
another country.
4. Enter the address details and save.
5. In the Receipt from Criteria section, click the Create icon to open the Create Receipt from Criteria window. Use
this window to assign the remit-to address you just created to customer bill-to sites in specified locations.
6. In the Country field, select a country to assign customer bill-to sites this remit-to address.
7. If necessary, use the State field and Postal Code fields to further limit the remit-to address assignment, and
save.
Define Lookup to Print Custom Statements
By default, the Create Customer Statements process generates one statement document for all the accounts
and sites of each customer with a Preferred Delivery Method setting of Paper in the customer account or site
profile. To enable the printing of custom statements for individual customer accounts or sites, you must define the
AR_PRINT_STATEMENT_BURSTING lookup.
To define the lookup for custom statements:
1. Navigate to the Setup and Maintenance work area.
2. Search for the setup task Manage Receivables Lookups.
3. In the Manage Receivables Lookups page, search for the AR_FEATURES lookup type.
4. Enter a new row for the lookup code.
5. In the Lookup Code field, enter AR_PRINT_STATEMENT_BURSTING.
6. In the Reference Data Set field, select Common Set.
7. Select the Enabled option.
8. In the Meaning field, enter a description of this lookup code.
41

Oracle Fusion Cloud Financials
Implementing Receivables Credit to Cash
Chapter 1
Define Common Accounts Receivable Configuration
9. Save your work.
After you define the AR_PRINT_STATEMENT_BURSTING lookup, you can create custom BI Publisher templates to use
for the statements of individual customer accounts and sites with a Preferred Delivery Method of Paper in the customer
profile.
Define Statement Cycles
Define statement cycles to determine when to send statements to your customers.
To define a statement cycle:
1. Navigate to the Manage Statement Cycles page.
2. In the Search Results section, click the Add icon.
3. In the Name field, enter a name for this statement cycle.
4. In the Interval field, select the interval that determines how often to generate statements: weekly, monthly,
quarterly.
5. In the Cycle Dates section, click the Add icon.
6. In the Business Unit field, select the business unit that will use this statement cycle.
7. In the Statement Date field, enter the first date on which to print statements for the statement cycle.
8. Repeat steps 5 to 7 until you have the appropriate number of rows for the statement cycle interval for each
applicable business unit.
For example, enter four rows for a quarterly interval or twelve rows for a monthly interval to cover the period of
one year.
9. Enable the Skip option on a row if you want to skip an interval in the statement cycle.
For example, after creating a statement cycle with a monthly interval and twelve monthly statement dates, you
decide to send statements bi-monthly instead of monthly. You can enable the Skip option on every other row to
reduce the number of statements to six per year.
10. Complete the remaining fields according to your requirements, and save.
Define Customer Site Profiles
After you define remit-to addresses and statement cycles, you must enable the appropriate profile settings on each
customer bill-to site to which you plan to send statements. If you aren't using one statement site for the customer,
you can, depending on your requirements, assign a different statement cycle to the bill-to sites belonging to the same
customer account. In this way each bill-to site can have its own statement for its site transactions.
To define customer site profiles for statements:
1. Navigate to the Edit Site page of the applicable customer site.
2. Navigate to the Statement and Dunning section.
3. Enable the Send statement option.
4. In the Statement Cycle field, select the statement cycle to use for this site.
5. Click the Late Charges tab.
6. Navigate to the Currency Settings section.
7. Click the Add icon.
8. In the Currency field, select the currency used by this site.
9. In the Minimum Statement Amount field, enter a minimum amount to generate statement. Receivables
generates statements for the site whenever the minimum outstanding balance in the given currency is greater
than this amount.
10. Complete the remaining fields according to your requirements, and save.
42

Oracle Fusion Cloud Financials
Implementing Receivables Credit to Cash
Chapter 1
Define Common Accounts Receivable Configuration
Related Topics
•
How You Use Statement Cycles
•
How You Use Customer Profile Classes
•
How can I use remit-to addresses?
How You Use Statement Cycles
Use statement cycles to determine when to send statements to your customers. You assign statement cycles to
customer and site level profiles.
If you print statements for a specific customer, then:
• If you defined a statement site for the customer, Receivables uses the statement cycle defined in the customer
account profile as the default statement cycle to use for printing.
• If you didn't define a statement site, Receivables uses the statement cycle defined in the customer site profile
for each applicable bill-to site included in the print run.
If you don't select a customer, then Receivables prints statements for all customers that have a statement cycle that
matches the statement cycle you enter for the print run.
When you create a statement cycle, you define the interval to use for the cycle (weekly, monthly, quarterly) and the
dates on which to print statements for the cycle. You can also indicate if Receivables should skip certain statement
dates.
Receivables includes all activity from the last time you printed a statement for this customer to the current statement
date, even if the customer statement cycle is set up to skip printing on one or more statement dates. Receivables also
includes open debit items from prior periods in the statement.
Scenario
Consider the following criteria:
• System Date: 03-SEP-11
• Statement Date: 01-SEP-11
• Previous Statement Date: 01-JUN-11 (skipped)
• Statement Cycle: Quarterly
The activity included in this statement spans the date the statement was last printed on 01-MAR-11 to the current
statement date of 01-SEP-11. The previous statement dated 01-JUN-11 had been skipped, so the activity for that period
now shows on the current statement.
This figure illustrates the activity included in this statement:
43

Oracle Fusion Cloud Financials
Implementing Receivables Credit to Cash
Chapter 1
Define Common Accounts Receivable Configuration
This table provides an explanation of the logic used to include particular transactions on the statement based on
transaction date.
Invoice Creation Date Included in Statement?
Invoice Date: 28-FEB-11
No, unless the invoice is either still open or was closed between 01-MAR-11 and 31-AUG-11.
Invoice Date: 30-AUG-11
Yes, because the invoice date is between the date the statement was last printed and the statement
date.
Invoice Date: 02-SEP-11
No, because the invoice date is later than the statement date.
Related Topics
•
Aging Methods
FAQs for Statements
How can I create a statement site?
You can designate one of the sites belonging to a customer account as a statement site. If you create a statement site,
Receivables generates a single, consolidated statement for all the customer bill-to sites, rather than a statement for each
site.
You can only define one active statement site per customer account.
To create a statement site:
• Assign the site the Statements business purpose.
• Set the Statement, Dunning, and Late Charges Site Profiles Used profile option to Yes.
How do on-account and unapplied receipts appear on statements?
All receipts, including on-account and unapplied receipts, appear on the statement of the corresponding bill-to site.
44

Oracle Fusion Cloud Financials
Implementing Receivables Credit to Cash
Chapter 1
Define Common Accounts Receivable Configuration
If you create a statement site for the customer, then Receivables summarizes on-account and unapplied receipts as
credits and prints them on a separate page of the consolidated statement, before a summarized listing of subtotals for
each of the customer bill-to sites.
FAQs for Standard Messages
Can I write messages in different languages?
Yes, you can write a message in any language that suits the needs of your enterprise. For any language, the text of a
standard message can't exceed 255 characters. Receivables doesn't perform any other validation on messages.
How can I add a message to a document?
You can print standard messages on customer statements, and on late charge documents presented as debit memos or
interest invoices.
For statements, active standard messages appear as list of value choices in the Create Customer Statements process.
The message you select appears at the end of the customer statement.
For late charge documents, active standard messages appear in the choice list of the Message Text field in the Late
Charges tabbed section of the applicable customer or site profile. The message you select appears in the Notes section
of the late charge document for this customer.
FAQs for Distribution Sets
What are distribution sets?
Use distribution sets to account for miscellaneous, or non-invoice related, receipts. Distribution sets are groups of
general ledger code combinations that you define to determine the credit accounts for positive miscellaneous receipt
amounts and the debit accounts for negative receipt amounts.
45

Oracle Fusion Cloud Financials
Implementing Receivables Credit to Cash
Chapter 1
Define Common Accounts Receivable Configuration
FAQs for Define Common Accounts Receivable
Configuration
Why can't I create transactions or generate accounting?
You must open an accounting period before you can perform basic Receivables activities. This is also true of new
installations: manually open an accounting period once your installation is complete.
46

Oracle Fusion Cloud Financials
Implementing Receivables Credit to Cash
Chapter 2
Manage Receivables System Options
2 Manage Receivables System Options
Guidelines for Receivables System Option Settings
Certain Receivables system option settings have critical implications for the way Receivables functions for a given
business unit. You may need to do some advance planning before deciding how to set certain Receivables system
options.
Considerations for Receivables system option settings include:
• Salespersons
• Header Level Rounding
• Allow Change to Printed Transactions
• Discounts
Salespersons
If you intend to use revenue accounting, you must enable the Require salesperson Receivables system option. Revenue
accounting requires that you assign sales credits to all transactions that can be adjusted for either revenue or sales
credits.
If you enable the Require salesperson Receivables system option, use the Sales Credit Percent Limit field to limit the
percentage of revenue plus non-revenue sales credit that a salesperson can have on any transaction line.
If you don't enter a value in the Sales Credit Percent Limit field, then no sales credit limit validation is performed
during revenue accounting.
Header Level Rounding
Depending on the legal requirements of your home country, you may need to round amounts at the transaction header
level for the receivable account, and then account for and post the difference in a separate account between this
rounded amount and the sum of the rounded line amounts for the respective revenue accounts. To do this, enable the
Use header level rounding option and define a Header Rounding Account.
The rounding difference between the header level and line level rounding is assigned to the Header Rounding
Account.
If you enable the Use header level rounding option, then Receivables displays a rounding distribution line for all
transactions, regardless of currency. If the transaction is in the ledger currency, then the amount of this line is zero.
If you don't enable the Use header level rounding option, Receivables rounds amounts at the line level and posts any
rounding difference to the receivable account.
CAUTION: Once you enable Header Level Rounding and save the Receivables system options record, you can't
disable the feature for the applicable business unit.
47

Oracle Fusion Cloud Financials
Implementing Receivables Credit to Cash
Chapter 2
Manage Receivables System Options
Allow Change to Printed Transactions
To allow updates to transactions that have been printed, enable the Allow change to printed transactions option. This
option also determines whether you can update a customer address when printed, posted, or applied transactions are
assigned to that address.
Note: You can't update a transaction if it has activity against it, regardless of how you set this option. Examples of
activity include payments, credit memos, adjustments, accounting, and assigning the transaction to a balance forward
bill.
Discounts
To allow Receivables to accept unearned discounts, enable the Allow unearned discounts option. Unearned discounts
are discounts a customer takes after the discount period passes. The Receivables system options record is the only
place that determines whether you can accept unearned discounts for the given business unit.
To allow discounts to be taken for partial payments against open debit items, enable the Discount on partial payment
option. A partial payment is any payment less than the remaining amount due. If this option is enabled, you can still
decide to disallow discounts on partial payments at the transaction level when defining payment terms.
If you never allow discounts on partial payments, then don't enable the Discount on partial payment option.
Related Topics
•
Example of Header Level Rounding
•
How Discounts Are Calculated
•
Implementation Settings for Revenue Recognition
Example of Header Level Rounding
This example illustrates how header level rounding processes currency conversions and accounts for rounding
differences.
Scenario
ABC Company uses euros as the ledger currency, and it receives an invoice with three line items in Norwegian krone. For
this example, the conversion rate between the krone and the euro is 6.55957.
Transaction Details
The Use header level rounding Receivables system option is enabled for the applicable business unit and a Header
Rounding Account is defined.
This table shows the calculations performed to convert each line amount on the invoice:
48

Oracle Fusion Cloud Financials
Implementing Receivables Credit to Cash
Chapter 2
Manage Receivables System Options
Item/Description Amount in Krone Conversion Rate Amount in Euros Comment
Paper
15.00
6.55957
2.29
rounded up
Pens
12.00
6.55957
1.83
rounded up
Envelopes
25.00
6.55957
3.81
rounded down
Subtotal
52.00
N/A
7.93
sum of items
Rounding Difference
N/A
N/A
- 0.01
N/A
Total Amount
52.00
6.55957
7.92
rounded down
Because the Use header level rounding Receivables system option is enabled, Receivables must calculate the rounding
difference between the currency conversion of the total invoice amount at the header level assigned to the receivable
account and the sum of the currency conversions at the line level assigned to each revenue account. This difference is
placed in the designated header rounding account.
Conversion Results
Receivables first converts each line item separately from krone to euros, and then adds them together, for a total of 7.93
EUR. Receivables then separately adds the line amounts in the invoice currency (krone) and then converts to the ledger
currency, for a total of 7.92 EUR.
The rounding difference of .01 is assigned to the header rounding account as defined in Receivables system options.
AutoInvoice Tuning Segments
Use the AutoInvoice Tuning Segments section of the Billing and Revenue tab of Receivables System Options to
designate Accounting and System Items flexfield segments as tuning segments.
Tuning segments help increase performance of AutoInvoice. The tuning segment is the segment most frequently
accessed by AutoInvoice.
Accounting Flexfield Tuning Segment
If you want to increase the performance of AutoInvoice and indexes already exist for the GL_CODE_COMBINATIONS
table, use the value that you specified for your index as the Accounting Flexfield tuning segment. If you defined a
concatenated index, use the first column of your concatenated index.
If no indexes exist for the GL_CODE_COMBINATIONS table, enter the segment with the most distinct values for your
Accounting Flexfield tuning segment.
49

Oracle Fusion Cloud Financials
Implementing Receivables Credit to Cash
Chapter 2
Manage Receivables System Options
System Items Flexfield Tuning Segment
If you want to increase the performance of AutoInvoice and indexes already exist for the MTL_SYSTEM_ITEMS
table, use the value that you specified for your index as your System Items Flexfield tuning segment. If you defined a
concatenated index, use the first column of your concatenated index.
If no indexes exist for the MTL_SYSTEM_ITEMS table, enter the segment with the most distinct values for your System
Items Flexfield tuning segment.
AutoInvoice Log File Message Levels
In the Log File Message Level field of the AutoInvoice section of the Billing and Revenue tab of Receivables System
Options, enter a value from 0 to 5 to indicate the amount of detail to display in the AutoInvoice log file.
For day-to-day business needs and to improve performance, set the level to 0. If you consistently experience errors
while running AutoInvoice, you can set the output to a higher level to review more detailed information in the log about
the errors.
Log File Message Level Definitions
Message Level 0 provides the following entries in the log file:
• Product Version
• Program Name
• AutoInvoice Start Time
• AutoInvoice Concurrent Request Arguments
• Error and Warning Messages
• AutoInvoice End Time
• AutoInvoice Logical Steps
Message Level 1 provides all of the entries for Message Level 0 plus:
• Time-Stamped function labels
Message Level 2 provides all of the entries for Message Levels 0 and 1 plus:
• Sizes of allocated arrays
• Dynamic SQL statements
• Number of rows updated, inserted, and deleted
Message Level 3 provides all of the entries for Message Levels 0, 1, and 2 plus:
• Method IV SQL array values
Message Level 4 provides all of the entries for Message Levels 0, 1, 2, and 3 plus:
• Values of all variables that are used to call FND or Tax routines
50

Oracle Fusion Cloud Financials
Implementing Receivables Credit to Cash
Chapter 2
Manage Receivables System Options
Message Level 5 provides all of the entries for Message Levels 0, 1, 2, 3, and 4 plus:
• Details of all bad lines and rejected lines. This provides all messages needed for C debugging of AutoInvoice.
FAQs for Manage Receivables System Options
What's the days per posting cycle?
The Days per Posting Cycle setting lets you process the transactions you're posting in smaller groups to ensure that
you don't run out of rollback space during posting.
For example, if your accounting period is 30 days and you set this value to 30, the posting process uses only one cycle.
If your accounting period is 30 days and you set this value to 17, the posting process uses two cycles. Best practice is to
set this field to a value less than the number of days in your accounting period.
What happens if I allow transaction deletion?
Enable the Allow transaction deletion Receivables system option if you want to let users delete Receivables
transactions after the transactions have been saved. If you don't enable this option, all Receivables users are prevented
from deleting transactions.
If an installation is legally required to number transactions sequentially with no missing transaction numbers, then best
practice is to not enable this option.
If you enable the Allow transaction deletion option, you can still control which users can delete transactions using
function security.
How can I determine the memory allocation?
Enter in the Maximum Memory in Bytes field the value that represents the amount of memory to allocate to
AutoInvoice for validation. The default is 65535 bytes.
For best results, enter a value equal to the maximum number of records that you import, rounded to an even number,
multiplied by 1024. For example, if you use AutoInvoice to import no more than 100 records at a time, enter a value of
102400.
During AutoInvoice processing, if you receive a message that indicates the application failed to allocate memory, then
enter a lower number. If you receive a message that the memory isn't large enough, then enter a higher number.
51

Oracle Fusion Cloud Financials
Implementing Receivables Credit to Cash
Chapter 2
Manage Receivables System Options
When do I use days to AutoApply a receipt?
Enter in the Days to AutoApply a Receipt field the age in days of receipts that AutoApply considers for application
against customer transactions. Use this field if your customers often pay for transactions before they're created.
AutoApply looks for and attempts to apply open receipts to transactions created within the number of days that
you specify. For example, if you enter 10, then AutoApply considers all receipts created within the past 10 days for
application to transactions. Receipts created longer than 10 days ago aren't considered.
If you don't enter a value in this field, AutoApply only attempts to match receipts once.
What are the exception rule activities?
The active application exception rule set determines the action to perform on overpayment and underpayment
amounts after receipt application. You can define the default receivables activity to use to process these payments when
the action is either a billing adjustment or a write-off.
The Exception Rule Adjustment Activity field in the Cash Processing tab of Receivables System Options provides the
default receivables activity to use for adjustments on overpayments or underpayments. The Exception Rule Write-off
Activity field provides the default receivables activity to use for write-offs of overpayments or underpayments.
When are receipts required for a bill-to site?
Enable the Require billing location for receipts Receivables system option to require that a bill-to site be associated
with a receipt. If enabled, Receivables doesn't create receipts that don't have a bill-to site.
Use this option for customers without statement sites. If you don't enable this option, and you have receipts for
customers without statement sites and without a bill-to site associated with the receipt, the unapplied amount of the
receipt won't appear on any of the statements for this customer.
What's the difference between the realized gains and losses
accounts and the cross currency rounding account?
The realized gains and realized losses accounts are used to account for the conversion rate gain or loss in the ledger
currency resulting from a cross-currency receipt application.
For example, if the conversion rate for a foreign currency invoice is 1.7 and the conversion rate of the payment for this
invoice is 2.0, Receivables posts the difference as a gain to the realized gains account.
The cross-currency rounding account is used to record rounding error amounts created during a cross-currency receipt
application. You must define a rounding error account if you create cross-currency receipts.
52

Oracle Fusion Cloud Financials
Implementing Receivables Credit to Cash
Chapter 2
Manage Receivables System Options
Email Delivery
Examples of Using the Transaction and Statement Delivery Email
Subject Lines
Use the Email Subject fields in the Transaction Delivery Using Email and Statement Delivery Using Email sections of
the Billing and Revenue region of Receivables system options to create an email subject line for the transactions and
statements you deliver to customers using email.
Receivables inserts a period after the business unit, transaction number, and statement date, and inserts a space
between each of the field values.
The following examples illustrate how the subject line appears depending on the settings you use.
Example 1
The resulting email subject line for the settings in this table is: "Your invoice is now ready for review. Vision Operations.
INV1234."
Field Value
Email Subject
Your invoice is now ready for review.
Include Business Unit in Email Subject
Last
Include Transaction Number in Email
Subject
Last
Example 2
The resulting email subject line for the settings in this table is: "Vision Operations. Your statement is now ready for
review. 01-01-2017."
Field Value
Email Subject
Your statement is now ready for review.
Include Business Unit in Email Subject
First
Include Statement Date in Email Subject
Last
53

Oracle Fusion Cloud Financials
Implementing Receivables Credit to Cash
Chapter 2
Manage Receivables System Options
Example 3
The resulting email subject line for the settings in this table is: "Your invoice is now ready for review. INV1234."
Field Value
Email Subject
Your invoice is now ready for review.
Include Business Unit in Email Subject
Do Not Include
Include Transaction Number in Email
Subject
Last
How Transaction and Statement Delivery Using Email Works
Print and send Receivables transactions and statements to designated customers using email.
When you run the Print Receivables Transactions process or the Create Customer Statements process, the respective
process sends transactions or statements as either a PDF or Zipped PDF file to the designated email addresses of the
customer accounts and sites that are set up for email delivery.
Settings That Affect Delivery Using Email
These settings affect print delivery using email:
• Print Option: Set the Print Option to Print or Do Not Print at the customer site or customer account level,
depending upon whether you want to print for specific customer sites or all sites belonging to a customer
account.
For transactions, if the Print Option value isn't enabled at the site or account level, then Receivables uses
the required Print Option setting on the transaction type. If necessary, you can exclude or include individual
transactions in a print run by changing the Print Option setting on transactions.
Note: If the transaction type doesn't have the Open Receivable option enabled (for example, a Void
transaction), then the email delivery process ignores the Print Option settings at the customer site and
account level and uses the setting assigned to the transaction type. You can still override this setting on the
transaction.
• Preferred Delivery Method: Set the Preferred Delivery Method field to Email at the customer site or customer
account level, depending upon whether you want to deliver using email for specific customer sites or all sites
belonging to a customer account.
54

Oracle Fusion Cloud Financials
Implementing Receivables Credit to Cash
Chapter 2
Manage Receivables System Options
• Customer contacts: Assign at least one customer contact at the account or site level both an email address and
the Bill-to responsibility or Statement responsibility. These rules apply to customer contacts:
◦
The contact must be active when the Print Receivables Transactions or Create Customer Statements
process is run.
◦
If a customer account or site doesn't have any contact with both an email address and a Bill-to
responsibility or Statement responsibility, then transactions or statements aren't delivered for this
customer account or site.
◦
For transactions, if a customer account or site does have a contact with both an email address and a
Bill-to responsibility, but the same contact email address is also assigned the Collections or Dunning
responsibility, then this contact is excluded from email delivery.
◦
For statements, if the customer has a statement site, then a consolidated statement is created and
delivered for all billing sites belonging to the customer account.
• Email Receivables system options: Use the Transaction and Statement Delivery Using Email sections of the
Billing and Revenue tabbed region of the Receivables System Option pages to set up the details of transaction
and statement delivery using email for the applicable business units.
Note: These are all conditionally required fields. If you plan to enable printing and email delivery of
transactions or statements, then you must enter values in these fields to ensure successful delivery.
Enter the appropriate text and values in the corresponding fields:
◦
From Name: Name of your enterprise.
◦
From Email: Email address of your enterprise.
◦
Reply-to Email: Email address of your enterprise that your customers can send an email to.
◦
Email Subject: Text of the email subject line.
◦
Include Business Unit in Email Subject: Option to include the name of your business unit in the subject
line.
◦
Include Transaction Number in Email Subject: Option to include the transaction number in the subject
line.
◦
Include Statement Date in Email Subject: Option to include the statement date in the subject line.
◦
Email Body: Text of the email message. Include appropriate formatting.
Note: You can't use standard messages to create email message text.
How Transactions and Statements are Delivered Using Email
Once your setup is complete, use the Print Receivables Transactions process to print customer transactions, and the
Create Customer Statements process to print customer statements. Use the Output File Type parameter to specify the
output to use for the print run. For print delivery using email, you must select either PDF or Zipped PDFs. If you select
Zipped PDFs, the file includes an index file of the print run, to identify the first and last page of each printed transaction.
When you create a transaction, Receivables looks in your setup for the Print Option setting to assign to the transaction
in this order:
• Customer site profile
• Customer account profile
• Transaction type
55

Oracle Fusion Cloud Financials
Implementing Receivables Credit to Cash
Chapter 2
Manage Receivables System Options
During print processing, the email delivery process verifies for each transaction or statement:
• For transactions, the Print Option is set to Print.
You can update the Print Option setting on individual transactions before printing.
• Preferred Delivery Method field is set to Email for the customer account or site.
• At least one active customer contact has both an email address and Bill-to responsibility or Statement
responsibility. The email delivery process looks for an email address to send transactions or statements to in
this order:
◦
For transactions, email address of the bill-to customer contact on the transaction.
◦
Email addresses of the contacts of the customer site that are assigned a Bill-to responsibility or
Statement responsibility, but not assigned the Collections or Dunning responsibility.
◦
Email addresses of the contacts of the customer account that are assigned a Bill-to responsibility or
Statement responsibility, but not assigned the Collections or Dunning responsibility.
• All fields are completed in the Transaction Delivery or Statement Delivery Using Email section of the Billing and
Revenue tabbed region of Receivables System Options.
The name of the output PDF file for transactions delivered using email uses the format:
<INV_NUMBER>_<INSTALLMENT_NUMBER>.PDF
Related Topics
•
Examples of Using the Transaction and Statement Delivery Email Subject Lines
FAQs for Email Delivery
Why can't I print transactions or statements using email delivery?
Your email delivery setup is incomplete.
This is most likely due to one of two settings:
• In Receivables system options, you must enter an active email address in either the From Email field or the
Reply-to Email field of the Transaction or Statement Delivery Using Email section of the Billing and Revenue
tabbed region for the applicable business unit.
• At least one customer contact must have both a Bill-to responsibility or Statement responsibility assignment
and an active email address.
• For transactions:
◦
If the transaction doesn't have a bill-to customer contact, or if that contact doesn't have an email
address, then the email delivery process looks for all active customer contacts at the account or site level
that have both a Bill-to responsibility and an email address.
◦
If any exist, then the transaction is delivered to all of these contacts, with the exception of contact email
addresses also assigned the Collections or Dunning responsibility.
◦
If none exist, then the transaction isn't printed.
56

Oracle Fusion Cloud Financials
Implementing Receivables Credit to Cash
Chapter 2
Manage Receivables System Options
Multifund Accounting
Overview of Multifund Accounting
Multifund Accounting is an optional accounting feature that lets you post transactions, adjustments, and receipts to
multiple balancing segment values or funds. Multifund Accounting is also known as Detailed Receivables Distributions.
In a default accounting model, multiple revenue, freight, and tax lines of a transaction are consolidated and accounted
as a single distribution line. When Multifund Accounting is enabled for a business unit and ledger, then the accounting
process creates detailed distributions for each transaction line according to the balancing segment values of the
account code combinations.
You can use Multifund Accounting to monitor and track the receipts and usage for each of your balancing segment
values. This lets you manage, for example, the disbursement of funds supporting a particular public sector project, such
as a general operating fund, endowment fund, and gift fund. Or you can monitor and extract financial information in
your organization by division, department, and product, without the need for creating separate invoices for each of
these sectors.
The use of Multifund Accounting is for the setup of a new business unit and primary ledger only. Multifund Accounting
applies to these Receivables event classes only: standard and miscellaneous receipts, invoices, credit memos, debit
memos, and adjustments.
For information about the activities supported for Multifund Accounting in each Receivables event class, see Events
Supported for Multifund Accounting, Document ID 2558258.1, on My Oracle Support.
Example of Multifund Accounting
These tables provide an example of multifund accounting on an invoice. In this example, Invoice 101 makes use of
funding from two different fund sources.
Invoice 101 has two invoice lines, one in the amount of $1000 and one in the amount of $500:
Line Number Memo Line Quantity Unit Price Amount
1
1 year support
1
1000
1000
2
1 year additional
consultations
2
250
500
The accounting for these invoice lines with detailed distributions splits the Receivable and Revenue across the two
funds (the additional $190 is for Tax and Freight):
Line Event Account Class Debit Credit
1
Invoice Created
02-000-1200-0000-000
Receivable
1120.00
57

Oracle Fusion Cloud Financials
Implementing Receivables Credit to Cash
Chapter 2
Manage Receivables System Options
Line Event Account Class Debit Credit
2
Invoice Created
03-000-1200-0000-000
Receivable
570.00
3
Invoice Created
02-000-4100-0000-000
Revenue
1000.00
4
Invoice Created
03-000-4100-0000-000
Revenue
500.00
Reports for Multifund Accounting
Use the available reports to review and reconcile your multifund accounting detailed distributions.
You can manage your multifund accounting detailed distributions using the Receivables to General Ledger
Reconciliation Report and the Receivables Aging by General Ledger Account for Multifund Accounting Report.
Note: The use of these reports for reviewing multifund accounting detailed distributions applies only to the ledger
and business units set up to use Multifund Accounting.
You can review and reconcile your multifund accounting detailed distributions using the available tools in the
Receivables to General Ledger Reconciliation Report. Run the Prepare Receivables to General Ledger Reconciliation
process, and then access the summary and detailed reports using the Receivables to General Ledger Reconciliation task.
You can generate and review the aging details for the ledger and business units enabled for Multifund Accounting using
the Receivables Aging by General Ledger Account for Multifund Accounting Report. You schedule this report from the
Oracle Transactional Business Intelligence Catalog.
Guidelines for Enabling Multifund Accounting
You enable Multifund Accounting as part of your Receivables System Options setup for a business unit.
The use of Multifund Accounting involves preliminary planning and an understanding of the ramifications related to its
use. Before you enable this feature, review all of the guidelines indicated in this topic.
Enable Multifund Accounting
To enable Multifund Accounting, follow these steps:
1. Navigate to Setup and Maintenance.
2. Search for the task Manage Receivables System Options.
3. Open the Create or Edit System Options page for the business unit designated for Multifund Accounting.
4. If not already displayed, navigate to the Accounting section of the Billing and Revenue tabbed region.
5. Enable the Enable multifund accounting option.
6. Save your work.
CAUTION: Once you enable the Enable multifund accounting option and save the System Options record, you can't
disable this feature for this business unit.
58

Oracle Fusion Cloud Financials
Implementing Receivables Credit to Cash
Chapter 2
Manage Receivables System Options
To complete your setup for Multifund Accounting, you must also create an accounting method in Subledger Accounting
for the primary ledger assigned to this business unit.
Requirements for Business Units and Primary Ledger
Even though you enable the setting for Multifund Accounting as part of the Receivables System Options setup for a
business unit, the setting actually applies to the primary ledger and all of the Receivables business units associated with
this ledger.
These requirements apply to enabling Multifund Accounting for a business unit:
• When you enable the Multifund Accounting feature for a business unit, this feature is also automatically
enabled on all business units associated with the same primary ledger.
• If any business unit associated with this primary ledger doesn't require Multifund Accounting, then you must
disassociate the business unit from this ledger before enabling the feature.
• You can only enable Multifund Accounting on business units that don't have any transactions.
Requirements for Cash Budget Funding with Receipts
If you intend to use cash budget funding for receipts, the ledger that you enable for Budgetary Control must be
associated with a business unit enabled for Multifund Accounting.
Ensure that you select a ledger belonging to a business unit enabled for Multifund Accounting when you enter and
complete the setup for budgetary control and cash budget funding with receipts using the Edit Budgetary Control and
Encumbrance Accounting page.
Requirements for Migrating Legacy Transactions
These requirements apply to migrating legacy transactions to a business unit enabled for Multifund Accounting:
• You must enable Multifund Accounting for a business unit before migrating transactions from your legacy
system to this business unit.
• You can use either an FBDI template or Receivables REST API resources to migrate your transactions.
• Migrate your legacy transactions as open balances for each transaction line.
• After migrating your legacy transactions, post all transactions to General Ledger.
To ensure the posting of all migrated transactions to a single journal, in the Edit Accounting Options page for the
applicable ledger, set the General Ledger Journal option Entry Summarization to Summarize by General Ledger Date.
This setting lets you manually reverse the journal so that it won't contradict open balance migrations from General
Ledger. This also prevents unwanted entries for Revenue, Freight, and Taxes in the current period.
Subledger Accounting Setup for Multifund Accounting
After you enable a business unit for Multifund Accounting using the Enable multifund accounting option in
Receivables System Options, you must complete related setups in Subledger Accounting to use multifund accounting.
Define a Multifund Accounting accounting method and journal entry rule set assignments in Subledger Accounting for
the primary ledger assigned to the business unit.
59

Oracle Fusion Cloud Financials
Implementing Receivables Credit to Cash
Chapter 2
Manage Receivables System Options
To prepare the primary ledger for Multifund Accounting:
• Create an accounting method for Multifund Accounting.
• Assign the predefined Multifund Accounting journal entry rule sets to the Multifund Accounting accounting
method you defined.
• Associate the Multifund Accounting accounting method with the primary ledger.
CAUTION: You can only set up Subledger Accounting for Multifund Accounting by assigning the predefined
Multifund Accounting journal entry rule sets indicated in this task to the Multifund Accounting accounting method.
You can't customize the predefined Multifund Accounting journal rules and journal entry rule sets.
Set Up an Accounting Method and Journal Entry Rule Sets for Multifund Accounting
To set up the Multifund Accounting accounting method, complete these steps:
1. Navigate to the Manage Accounting Methods task from the Receivables configuration.
2. Search for the Accounting Method Standard Accrual.
3. In the Edit Accounting Method page for Standard Accrual, select Duplicate from the Actions menu.
4. In the Create Accounting Method window, create an accounting method for Multifund Accounting. Enter for
example:
a. In the Name field, enter Multifund Accounting Method.
b. In the Short Name field, enter MULTI_FUND_ACCOUNTING_METD.
c. In the Description field, enter "Accounting method to support Multifund Accounting."
d. In the Chart of Accounts field, select the chart of accounts.
e. Click the Save and Close button.
5. In the Journal Entry Rule Set Assignments section of the Edit Accounting Method page for Multifund
Accounting, delete the existing rule sets copied from the Duplicate action.
6. Enter the predefined Multifund Accounting journal entry rule sets:
◦
Invoices - Multifund Accounting Balancing Method
◦
Credit Memos - Multifund Accounting Balancing Method
◦
Debit Memos - Multifund Accounting Balancing Method
◦
Adjustments - Multifund Accounting Balancing Method
◦
Receipts - Multifund Accounting Balancing Method
◦
Miscellaneous Receipts - Multifund Accounting Balancing Method
7. Activate the Multifund Accounting accounting method.
8. Save your work.
9. Navigate to the Specify Ledger Options task.
10. Select the primary ledger associated with the business unit enabled for Multifund Accounting.
11. In the Accounting Method field of the Subledger Accounting section of the Specify Ledger Options page,
select the accounting method that you defined for Multifund Accounting.
12. Complete the remaining fields according to your business requirements
13. Save your work.
Set Up Multifund Accounting for Transactions with Invoicing Rules
You can set up Subledger Accounting for multifund accounting to create detailed distributions on Receivables
transactions that use invoicing rules. With the appropriate setup, the Receivables account is split on the basis of
60

Oracle Fusion Cloud Financials
Implementing Receivables Credit to Cash
Chapter 2
Manage Receivables System Options
Unearned Revenue for transactions using the In Advance invoicing rule, and Unbilled Receivables for transactions using
the In Arrears invoicing rule.
Example of Multifund Accounting on an Invoice with an Invoicing Rule
The example in the tables below illustrates how the Receivables account is split on an invoice assigned the In Advance
invoicing rule. The revenue scheduling rule uses the fixed schedule rule type.
This table shows details of the transaction:
Field Value
Invoice Date
1-Mar-20
Invoicing Rule
In Advance
Line 1 Amount
12000
Line 2 Amount
15000
Revenue Scheduling Rule
3 Months Fixed
Rule Start Date
20-Jan-20
This table shows the resulting Invoice Accounting Entries, with the Receivables account split according to the balancing
segment, which is the first segment of the GL account code combination. The corresponding revenue is recognized over
the three-month period, as specified by the revenue scheduling rule:
Date Dr/Cr Account Class GL Account Amount
1-Mar-20
Debit
Receivables
01-000-1210-0000-000
12000
1-Mar-20
Debit
Receivables
02-000-1210-0000-000
15000
1-Mar-20
Credit
Unearned Revenue
01-000-1222-0000-000
12000
1-Mar-20
Credit
Unearned Revenue
02-000-1222-0000-000
15000
1-Mar-20
Debit
Unearned Revenue
01-000-1222-0000-000
4000
1-Mar-20
Credit
Revenue
01-000-4110-0000-000
4000
1-Mar-20
Debit
Unearned Revenue
02-000-1222-0000-000
5000
61

Oracle Fusion Cloud Financials
Implementing Receivables Credit to Cash
Chapter 2
Manage Receivables System Options
Date Dr/Cr Account Class GL Account Amount
1-Mar-20
Credit
Revenue
02-000-4110-0000-000
5000
1-Apr-20
Debit
Unearned Revenue
01-000-1222-0000-000
4000
1-Apr-20
Credit
Revenue
01-000-4110-0000-000
4000
1-Apr-20
Debit
Unearned Revenue
02-000-1222-0000-000
5000
1-Apr-20
Credit
Revenue
02-000-4110-0000-000
5000
1-May-20
Debit
Unearned Revenue
01-000-1222-0000-000
4000
1-May-20
Credit
Revenue
01-000-4110-0000-000
4000
1-May-20
Debit
Unearned Revenue
02-000-1222-0000-000
5000
1-May-20
Credit
Revenue
02-000-4110-0000-000
5000
Setting Up Your Balancing Segment Values
As this example illustrates, you must use the same balancing segment value for the corresponding invoicing rule:
• In Advance: Use the same balancing segment value for the Unearned Revenue and Revenue accounts across
periods.
• In Arrears: Use the same balancing segment value for the Unbilled Receivables and Revenue accounts across
periods.
Note: Using the same balancing segment values applies whether a balancing segment value is manually overridden
using the Review Distributions window or overridden through the segment rules in Subledger Accounting. Otherwise,
Intracompany and Intercompany balancing entries are generated.
To use Multifund Accounting on transactions that use invoicing rules and revenue scheduling rules, you must modify
the Multifund Accounting accounting method you created for the primary ledger associated with the business unit
enabled for Multifund Accounting.
To modify the Multifund Accounting accounting method for invoices with rules, perform these four tasks:
1. Create a journal line rule for the Invoice event class and associate it with the journal entry rule set.
2. Create a journal line rule for the Debit Memo event class and associate it with the journal entry rule set.
3. Modify the conditions within the journal line rule Receipt Application to Multifund Transaction Receivable
for the Receipt event class.
62

Oracle Fusion Cloud Financials
Implementing Receivables Credit to Cash
Chapter 2
Manage Receivables System Options
4. Update your Multifund Accounting accounting method with the new rule sets for Invoice, Debit Memo, and
Receipt.
Create a Journal Line Rule for Invoice Event Class and Associate the Rule with the Journal Entry Rule Set
To create a journal line rule for the Invoice event class and associate it with the journal entry rule set, complete these
steps:
1. Navigate to the Journal Line Rules task from the Receivables configuration.
2. In the Name field of the Manage Journal Line Rules: Receivables page, search for the journal line rule
Multifund Invoice Receivable.
3. Select Multifund Invoice Receivable and click the Duplicate icon.
4. In the Create Journal Line Rule window, enter a Name and Short Name that identifies this new Multifund
Invoice Receivable journal line rule.
5. Click the Save and Close button.
6. In the Conditions tabbed region of the Edit Journal Line Rule page, enter the following conditions for the new
Multifund Invoice Receivable journal line rule:
("Transaction Invoicing Rule" Is not null) 'And' ( "Transaction Distribution Account Class" = TAX 'Or'
"Transaction Distribution Account Class" = FREIGHT 'Or' "Transaction Distribution Account Class" =
ROUND 'Or' "Transaction Distribution Account Class" = CHARGES 'Or' "Transaction Distribution Account
Class" = DEFERRED_TAX 'Or' ( "Transaction Distribution Account Class" = UNBILL 'And' "Receivables
Offset Indicator" = Y ) 'Or' ( "Transaction Distribution Account Class" = UNEARN 'And' "Receivables
Offset Indicator" = Y ) )
CAUTION: Insert the conditions by selecting them from the menu list. Don't copy and paste condition text
from another document.
7. Click the Save and Close button.
8. Navigate to the Subledger Journal Entry Rule Sets task from the Receivables configuration.
9. In the Name field of the Manage Subledger Journal Entry Rule Sets: Receivables page, search for the journal
entry rule set Invoices - Multifund Accounting Balancing Method.
10. Select Invoices - Multifund Accounting Balancing Method and click the Duplicate icon.
11. In the Create Subledger Journal Entry Rule Set window, enter a Name and Short Name that identifies this new
Invoices - Multifund Accounting Balancing Method journal entry rule set.
12. Click the Save and Close button.
13. In the Journal Lines section of the Edit Subledger Journal Entry Rule Set page, click the Plus (+) icon to create a
new row.
14. In the Journal Line Rule field, select the new Multifund Invoice Receivable journal line rule that you created in
steps 1-5.
15. In the Account Combination Rule field, select Multifund Transaction Default Receivables GL Account.
16. In the Primary Balancing Segment, Second Balancing Segment, and Third Balancing Segment fields, select
Copy.
17. Click the Save and Close button.
Create a Journal Line Rule for Debit Memo Event Class and Associate the Rule with the Journal Entry Rule Set
Create a journal line rule for the Debit Memo event class and associate the new Debit Memo journal line rule with the
journal entry rule set by completing the same steps as you did for the Invoice event class.
Modify the Receipt Application to Multifund Transaction Receivable Journal Line Rule
To modify the conditions within the journal line rule Receipt Application to Multifund Transaction Receivable for the
Receipt event class, complete these steps:
1. Navigate to the Journal Line Rules task from the Receivables configuration.
63

Oracle Fusion Cloud Financials
Implementing Receivables Credit to Cash
Chapter 2
Manage Receivables System Options
2. In the Name field of the Manage Journal Line Rules: Receivables page, search for the journal line rule Receipt
Application to Multifund Transaction Receivable.
3. Select Receipt Application to Multifund Transaction Receivable and click the Duplicate icon.
4. In the Create Journal Line Rule window, enter a Name and Short Name that identifies this new Receipt
Application to Multifund Transaction Receivable journal line rule.
5. Click the Save and Close button.
6. In the Conditions tabbed region of the Edit Journal Line Rule page, insert these new condition details:
'Or' "Transaction Distribution Account Class" = UNEARN 'Or' "Transaction Distribution Account Class" =
UNBILL
before the existing condition details:
'And' "Distribution Source Type" = REC 'And' "Distribution Multifund Additional Entry" = N
CAUTION: Insert the conditions by selecting them from the menu list. Don't copy and paste condition text
from another document.
7. Click the Save and Close button.
8. Navigate to the Subledger Journal Entry Rule Sets task from the Receivables configuration.
9. In the Name field of the Manage Subledger Journal Entry Rule Sets: Receivables page, search for the journal
entry rule set Receipts - Multifund Accounting Balancing Method.
10. Select Receipts - Multifund Accounting Balancing Method and click the Duplicate icon.
11. In the Create Subledger Journal Entry Rule Set window, enter a Name and Short Name that identifies this new
Receipts - Multifund Accounting Balancing Method journal entry rule set.
12. Click the Save and Close button.
13. In the Journal Lines section of the Edit Subledger Journal Entry Rule Set page, select the existing Receipt
Application to Multifund Transaction Receivable journal line rule and delete it.
14. Click the Plus (+) icon to create a new row.
15. In the Journal Line Rule field, select the new Receipt Application to Multifund Transaction Receivable journal
line rule that you just created and modified.
16. Click the Save and Close button.
Update Your Multifund Accounting Method with the New Rule Sets
To replace the existing rule sets for the Invoice, Debit Memo, and Receipt event class in your Multifund Accounting
accounting method, complete these steps:
1. Navigate to the Manage Accounting Methods task from the Receivables configuration.
2. In the Manage Accounting Methods page, search for and select your Multifund Accounting Method to navigate
to the Edit Accounting Method page.
3. In the Receivables tabbed region of the Journal Entry Rule Set Assignments section of the Edit Accounting
Method page, either delete or apply an end date to the existing rule sets for Invoice, Debit Memo, and Receipt.
4. Add the new rule sets that you created for Invoice, Debit Memo, and Receipt and activate them.
5. Click the Save and Close button.
Cash Pooling for Multifund Accounting
You can use a cash pooling model to record multifund accounting entries on cash receipts.
64
Oracle Fusion Cloud Financials
Implementing Receivables Credit to Cash
Chapter 2
Manage Receivables System Options
Cash pooling is a cash management system that notionally consolidates account balances from several accounts
without physically moving funds. An organization can combine credit and debit positions from various bank accounts
into a pooled account to provide better visibility into the current state of an organization's business and to facilitate
ongoing decision-making.
The cash pool accounting model represents a cash account with the Cleared Cash account class. Other offset cash
accounts that reflect an interim receipt status, such as Confirmed Cash or Remitted Cash, aren't used in the cash pool
accounting model.
You can implement cash pooling for multifund accounting using either of two methods, depending on the fund
management requirements and local accounting conventions of your organization. The two methods are:
• Cash Pooling using Source Transaction Fund Allocation: Represent cash receipts as a direct split of cash
account entries according to the source transaction allocation. Balancing segments of applied transaction
receivable accounts are the basis for cash account split on a regular receipt; balancing segment miscellaneous
cash distribution accounts are the basis for cash account split on a miscellaneous receipt.
• Cash Pooling using Intercompany Balancing Entries: Represent cash receipts as offsetting treasurer's equity
and cash owed to an affiliate using intercompany balancing entries.
After you set up cash pooling for multifund accounting using either of these methods, you must create an
AR_CASHPOOLING lookup code under the AR_FEATURES lookup type.
Note: Cash pooling only applies to a business unit enabled for Multifund Accounting. You must ensure that you have
completed the base setup for Multifund Accounting on the applicable business unit before configuring Cash Pool
accounting.
Example of Cash Pooling Methods for Multifund Accounting
This example illustrates the accounting entries for both methods of representing cash pooling for Multifund
Accounting.
Invoice XYZ contains three transaction lines for a total of $1600. This table represents the three line amounts:
Account Class Amount
Revenue
$600
Revenue
$250
Revenue
$750
This table represents the accounting entries for Invoice XYZ. The first segments in the account code combinations--
B,C,D--are the balancing segments that represent the three funds:
Dr/Cr Reference Account Class Account Amount
Debit
Header
Receivables
B.000.1200.0
$600
Debit Header Receivables C.000.1200.0 $250
65

Oracle Fusion Cloud Financials
Implementing Receivables Credit to Cash
Chapter 2
Manage Receivables System Options
Dr/Cr Reference Account Class Account Amount
Debit
Header
Receivables
D.000.1200.0
$750
Credit
Revenue
Revenue
B.000.4100.0
$600
Credit
Revenue
Revenue
C.000.4100.0
$250
Credit
Revenue
Revenue
D.000.4100.0
$750
Here the Receivables entry is split according to the fund allocation on each Revenue account.
Receipt PQR in the amount of $1600 is applied to Invoice XYZ. This table represents the receipt:
Receipt Amount $1600
Receipt Status
Cleared
Applied to
XYZ
The resulting receipt accounting entries will differ depending on the Cash Pooling method used.
Accounting Entries for Cash Pooling using Source Transaction Fund Allocation: This table represents the receipt
accounting entries with Cash Pooling enabled on a bank account:
Dr/Cr Reference Account Class Account Amount
Debit
Receipt
Cash
G.000.1110.0
$1600
Credit
Invoice
Receivable
B.000.1200.0
$600
Credit
Invoice
Receivable
C.000.1200.0
$250
Credit
Invoice
Receivable
D.000.1200.0
$750
Debit
Invoice
Cash
B.000.4100.0
$600
Debit
Invoice
Cash
C.000.4100.0
$250
Debit
Invoice
Cash
D.000.4100.0
$750
Credit Receipt Cash G.000.1110.0 $1600
66

Oracle Fusion Cloud Financials
Implementing Receivables Credit to Cash
Chapter 2
Manage Receivables System Options
Dr/Cr Reference Account Class Account Amount
Here the Cash Account is originally debited to a generic fund according to the setup defined for the receipt method
remittance bank account. It is then reversed and debited back into split cash accounts according to the funds allocation
used on the invoice closed by the receipt.
Accounting Entries for Cash Pooling using Intercompany Balancing Entries: This table represents the receipt accounting
entries using Treasurer's Equity and Cash to Affiliates accounts as Intercompany Balancing Accounts (and without Cash
Pooling enabled on a bank account). The Debit Intercompany entries represent Intercompany Cash Equity in the cash
pool and the Credit Intercompany entries represent Intercompany Cash from Affiliate:
Dr/Cr Reference Account Class Account Amount
Debit
Receipt
Cash
T.000.1110.0
$1600
Credit
Invoice
Receivable
B.000.1200.0
$600
Credit
Invoice
Receivable
C.000.1200.0
$250
Credit
Invoice
Receivable
D.000.1200.0
$750
Debit
Invoice
Intercompany
B.000.1750.T
$600
Debit
Invoice
Intercompany
C.000.1750.T
$250
Debit
Invoice
Intercompany
D.000.1750.T
$750
Credit
Receipt
Intercompany
T.000.2125.B
$600
Credit
Receipt
Intercompany
T.000.2125.C
$250
Credit
Receipt
Intercompany
T.000.2125.D
$750
Here the entire Cash account is initially debited to the Treasurer's Pool. It is then split into various accounts representing
the cash contributed by each fund/affiliate as credit intercompany entries, with corresponding debit intercompany
entries representing the Equity in Pool for each fund.
Cash Pooling using Source Transaction Fund Allocation
Use the Pooled account option on the applicable bank account to enable default cash pooling entries rather than
Intercompany entries. If you don't enable this option, balancing entries are used to manage cash pooling, according to
the additional setup for Intercompany Balancing Rules.
This option is available by default on the business unit enabled for Multifund Accounting.
67

Oracle Fusion Cloud Financials
Implementing Receivables Credit to Cash
Chapter 2
Manage Receivables System Options
Note: The Pooled account option is commonly used by Payables and Receivables to drive the required fund
representation. You should analyze the impact on both your Payables and Receivables activities before deciding on
the pooling method to use for funds received or funds expensed through the designated bank account.
After you enable cash pooling on a bank account, set up an AR_CASHPOOLING lookup code under the AR_FEATURES
lookup type.
To enable cash pooling for multifund accounting using source transaction fund allocation, complete these steps:
1. Navigate to the Manage Bank Accounts page.
2. Search for and select the bank account you want.
3. In the Bank Account page, navigate to the Controls tabbed region.
4. In the Payables and Receivables Controls section, enable the Pooled account option.
Enabling this option designates this bank account as the bank account to use as the default model for
representing the cash pooling.
5. Complete the other fields according to your requirements.
6. Save your work.
7. Navigate to the Manage Standard Lookups page.
8. Search for and select the lookup type AR_FEATURES.
9. In the AR_FEATURES lookup codes section, click the Plus (+) icon.
10. In the Lookup Code field, enter AR_CASHPOOLING.
11. Enter a start date, and a meaning and description for this lookup code.
12. Check the Enabled option to activate the lookup code.
13. Save your work.
Cash Pooling using Intercompany Balancing Entries
Represent multifund accounting cash pooling by using intercompany balancing rules to map the Equity Pool
(receivables) and Treasurer's Equity (payables) accounts.
After you configure intercompany balancing rules, set up an AR_CASHPOOLING lookup code under the AR_FEATURES
lookup type.
Note: If you use intercompany balancing rules to set up cash pooling, then don't enable the Pooled cash option on a
bank account.
To enable cash pooling for multifund accounting using intercompany balancing entries, complete these steps:
1. Navigate to the Manage Intercompany Balancing Rules page.
2. Navigate to the Chart of Accounts Rules tabbed region.
3. Click the Plus (+) icon to open the Create Chart of Accounts Balancing Rules page.
4. In the Source field, select Receivables.
5. In the Category field, select Receipts.
6. In the Chart of Accounts field, select the chart of accounts.
7. In the Receivables Account field, enter the account segments for the Equity Pool natural account.
8. In the Payables Account field, enter the account segments for the Treasurer's Equity natural account.
9. In the Start Date field, enter the date this chart of accounts rule becomes active.
10. Save your work.
This chart of accounts rule applies to all ledgers that use this chart of accounts.
68

Oracle Fusion Cloud Financials
Implementing Receivables Credit to Cash
Chapter 2
Manage Receivables System Options
Note: If you intend to use more than one balancing segment, use the Additional Intercompany Balancing
and Clearing Options page to configure options to balance the second and third balancing segments.
These options are used whenever a transaction is balanced by the primary balancing segment, but remains
unbalanced by the second or third balancing segment.
11. Navigate to the Manage Standard Lookups page.
12. Search for and select the lookup type AR_FEATURES.
13. In the AR_FEATURES lookup codes section, click the Plus (+) icon.
14. In the Lookup Code field, enter AR_CASHPOOLING.
15. Enter a start date, and a meaning and description for this lookup code.
16. Check the Enabled option to activate the lookup code.
17. Save your work.
Related Topics
•
Guidelines for Enabling Multifund Accounting
69

Oracle Fusion Cloud Financials
Implementing Receivables Credit to Cash
Chapter 2
Manage Receivables System Options
70

Oracle Fusion Cloud Financials
Implementing Receivables Credit to Cash
Chapter 3
Define Customer Billing Configuration
3 Define Customer Billing Configuration
AutoInvoice
AutoInvoice Data Preparation
Prepare your Receivables environment for any new data that you want to import. If your original system uses any setup
data which isn't yet defined in Receivables, you must define this data before using AutoInvoice.
Data Checklist
Ensure that you have set up and updated the appropriate records in Receivables and related applications.
Add or update this setup data:
• Add or import customers, if your original system contains data for customers that aren't yet defined in
Receivables.
• Add units of measure, if your original system uses units of measure not yet defined.
• Add or update in General Ledger this data:
◦
Currencies, if your original system uses currencies not yet defined.
◦
Accounting flexfield segment values, if your original system uses values not yet defined.
• Add or update in Tax this tax data:
◦
Tax rates assigned to tax rate codes that aren't yet defined.
◦
Tax rates associated with products shipped to specific locations.
◦
Full or partial customer and item tax exemptions.
• Add or update these Receivables lookup codes:
◦
Free on Board (FOB) lookup codes, if your original system uses FOB point codes not yet defined.
◦
Freight carrier lookup codes.
• Add or update this Receivables data:
◦
AutoAccounting (this is a required setup to use AutoInvoice)
◦
Payment terms
◦
Transaction types
◦
Transaction sources
◦
Salespersons
◦
Revenue scheduling rules
71

Oracle Fusion Cloud Financials
Implementing Receivables Credit to Cash
Chapter 3
Define Customer Billing Configuration
AutoInvoice Setup
Review and update Receivables data specific to AutoInvoice.
Review and update this data:
• AutoInvoice Grouping Rules: Define additional grouping rules or update the default grouping rule provided by
Receivables. AutoInvoice uses grouping rules to determine how to create transactions.
AutoInvoice uses the following hierarchy when determining the grouping rule to use:
◦
Transaction source
◦
Customer site
◦
Customer profile
◦
System options
• AutoInvoice Line Ordering Rules: Define line ordering rules for AutoInvoice to determine how to order
transaction lines. AutoInvoice randomly orders lines on your transactions if you don't define line ordering rules.
• AutoInvoice Transaction Source Automatic Receipt Handling: If you want AutoInvoice to automatically evaluate
imported credits for receipt handling, select the applicable Receipt Handling for Credits option on the
AutoInvoice transaction source.
◦
On Account: Place imported credits on account.
◦
Refund: Create refunds for imported credits.
• Receivables System Options: Set Receivables system options for AutoInvoice in the Billing and Revenue tab:
◦
Customers section: Grouping Rule field: Assign an AutoInvoice grouping rule to use as part of the default
hierarchy for selecting a grouping rule during transaction processing.
◦
AutoInvoice section: Purge interface tables option: Enable this option to purge data automatically after
running AutoInvoice.
◦
AutoInvoice section: Maximum Memory in Bytes field: Enter a value that represents the amount of
memory to allocate to AutoInvoice for validation.
◦
AutoInvoice section: Log File Message Level field: Enter a level from 0 to 5 to indicate the amount of
detail that you want to display in the AutoInvoice log file.
◦
AutoInvoice section: Accounting Dates Out of Order field: Select Reject or Adjust to determine how
AutoInvoice processes transactions when the accounting date is out of order within the document
sequence.
Note: You only use this setting when the primary ledger is enabled for document sequencing.
• Profile Options: Set these profile options for AutoInvoice:
◦
ID Flexfield Code: Specify the ID of the flexfield code used by AutoInvoice.
◦
Maximum Lines per AutoInvoice Worker: Specify the maximum number of lines per AutoInvoice
worker.
◦
Source Code: Specify the source code used by AutoInvoice.
◦
Use Parallel Hint: Enable parallel hints in AutoInvoice.
◦
AutoInvoice Gather Statistics Allowed: If you set this profile option to Yes, then when you
submit AutoInvoice, the program first analyzes the interface tables (RA_INTERFACE_LINES_ALL,
72

Oracle Fusion Cloud Financials
Implementing Receivables Credit to Cash
Chapter 3
Define Customer Billing Configuration
RA_INTERFACE_DISTRIBUTIONS_ALL, and RA_INTERFACE SALESCREDITS_ALL) and gathers statistics to
determine how best to execute the transaction import.
If the number of records to be imported and the number of worker processes are approximately the
same as the previous submission of AutoInvoice, then you can set this profile option to No and skip this
analysis.
Transaction Flexfield
Receivables uses the transaction flexfield to uniquely identify each transaction and transaction line you import using
AutoInvoice. Transaction flexfields are also used to reference and link transaction lines.
You must define a Line Transaction Flexfield, and you can optionally define a header-level Invoice Transaction Flexfield.
If you define an Invoice Transaction Flexfield, all segments in the Line Transaction Flexfield that refer to header
information must also exist in the Invoice Transaction Flexfield. For example, if you define a Line Transaction Flexfield
with four segments, and the last two segments refer to line-level information only, define the Invoice Transaction
Flexfield using the first two segments.
If you don't create Reference and Link-To Transaction Flexfields, then Receivables uses the Line Transaction Flexfield
structure to link and reference different lines. You don't have to define separate Reference and Link-To Transaction
Flexfields in this case.
However, if you want to create your own form to enter interface data to display the Reference and Link-To Transaction
Flexfields, then you must define these transaction flexfields. These flexfields must have the same flexfield structure as
the Line Transaction Flexfield.
Related Topics
•
AutoInvoice Line Ordering Rule Transaction Attributes
•
AutoInvoice Grouping Rule Attributes
•
Ledger and Legal Entity Document Sequencing in Receivables
AutoInvoice Grouping Rule Attributes
AutoInvoice grouping rules determine how to group transaction lines into transactions during AutoInvoice import.
AutoInvoice grouping rules contain both mandatory and optional transaction attributes. Two or more transaction lines
must contain identical transaction attributes for AutoInvoice to group them together in the same transaction.
For example, transaction number (TRX_NUMBER) is a mandatory attribute of all grouping rules. If you have two records
in the interface tables with different transaction numbers, AutoInvoice creates separate transactions for each record.
You can't delete a mandatory attribute from any grouping rule, but you can add optional attributes to the mandatory
attributes to create a new grouping rule.
Note: If you have Order Management and Revenue Management (OM-RMCS) integration enabled, then the optional
transaction attribute sales order date (SALES_ORDER_DATE) is a mandatory attribute for AutoInvoice to import sales
orders from Order Management.
73

Oracle Fusion Cloud Financials
Implementing Receivables Credit to Cash
Chapter 3
Define Customer Billing Configuration
Mandatory Transaction Attributes
The AutoInvoice grouping rule provides the following mandatory transaction attributes from the
RA_INTERFACE_LINES_ALL table. All of these transaction attributes apply to all transactions created using AutoInvoice
grouping rules:
• BILL_PLAN_NAME
• BILL_PLAN_PERIOD
• COMMENTS
• CONS_BILLING_NUMBER
• CONVERSION_DATE
• CONVERSION_RATE
• CONVERSION_TYPE
• CREDIT_METHOD_FOR_ACCT_RULE
• CREDIT_METHOD_FOR_INSTALLMENTS
• CURRENCY_CODE
• CUSTOMER_BANK_ACCOUNT_ID
• CUST_TRX_TYPE_ID
• DOCUMENT_NUMBER
• DOCUMENT_NUMBER_SEQUENCE_ID
• GL_DATE
• HEADER_ATTRIBUTE1-15
• HEADER_ATTRIBUTE_CATEGORY
• HEADER_GDF_ATTRIBUTE1-30
• INITIAL_CUSTOMER_TRX_ID
• INTERNAL_NOTES
• INVOICING_RULE_ID
• ORIG_SYSTEM_BILL_ADDRESS_ID
• ORIG_SYSTEM_BILL_CONTACT_ID
• ORIG_SYSTEM_BILL_CUSTOMER_ID
• ORIG_SYSTEM_SHIP_CONTACT_ID
• ORIG_SYSTEM_SHIP_CUSTOMER_ID
• ORIG_SYSTEM_SOLD_CUSTOMER_ID
• ORIG_SYSTEM_BATCH_NAME
• PAYMENT_SERVER_ORDER_ID
• PAYMENT_SET_ID
• PREVIOUS_CUSTOMER_TRX_ID
• PRIMARY_SALESREP_ID
• PRINTING_OPTION
74

Oracle Fusion Cloud Financials
Implementing Receivables Credit to Cash
Chapter 3
Define Customer Billing Configuration
• PURCHASE_ORDER
• PURCHASE_ORDER_DATE
• PURCHASE_ORDER_REVISION
• REASON_CODE
• RECEIPT_METHOD_ID
• RELATED_CUSTOMER_TRX_ID
• SET_OF_BOOKS_ID
• TERM_ID
• TERRITORY_ID
• TRX_DATE
• TRX_NUMBER
Optional Transaction Attributes
The AutoInvoice grouping rule provides the following optional transaction attributes from the
RA_INTERFACE_LINES_ALL table. You can assign one or more of these attributes to transaction classes within a
grouping rule:
• ACCOUNTING_RULE_DURATION
• ACCOUNTING_RULE_ID
• ATTRIBUTE1-15
• ATTRIBUTE_CATEGORY
• INTERFACE_LINE_ATTRIBUTE1-15
• INTERFACE_LINE_CONTEXT
• INVENTORY_ITEM_ID
• REFERENCE_LINE_ID
• RULE_START_DATE
• SALES_ORDER
• SALES_ORDER_DATE (mandatory for Order Management - Revenue Management integration)
• SALES_ORDER_LINE
• SALES_ORDER_REVISION
• SALES_ORDER_SOURCE
• TAX_CODE
• TAX_RATE
AutoInvoice Line Ordering Rule Transaction Attributes
AutoInvoice uses line ordering rules to determine how to order and number each line of a transaction, after AutoInvoice
has grouped transactions into invoices, debit memos, and credit memos. You can specify a line ordering rule for each
AutoInvoice grouping rule that you create.
75

Oracle Fusion Cloud Financials
Implementing Receivables Credit to Cash
Chapter 3
Define Customer Billing Configuration
Transaction Attributes
AutoInvoice provides the following transaction attributes from the RA_INTERFACE_LINES_ALL table for use with line
ordering rules:
• ACCOUNTING_RULE_DURATION
• ACCOUNTING_RULE_ID
• ACCOUNTING_RULE_NAME
• AMOUNT
• ATTRIBUTE_CATEGORY
• ATTRIBUTE1-15
• FOB_POINT
• INTERFACE_LINE_ATTRIBUTE1-15
• INTERFACE_LINE_CONTEXT
• ORIG_SYSTEM_SHIP_ADDRESS_ID
• QUANTITY
• QUANTITY_ORDERED
• REASON_CODE
• REASON_CODE_MEANING
• REFERENCE_LINE_ATTRIBUTE1-15
• REFERENCE_LINE_CONTEXT
• REFERENCE_LINE_ID
• SALES_ORDER
• SALES_ORDER_DATE
• SALES_ORDER_LINE
• SALES_ORDER_SOURCE
• SHIP_DATE_ACTUAL
• SHIP_VIA
• TAX_CODE
• UNIT_SELLING_PRICE
• UNIT_STANDARD_PRICE
• UOM_CODE
• UOM_NAME
• WAYBILL_NUMBER
Example of an AutoInvoice Grouping Rule
This example illustrates how to use grouping rules to group transaction lines into transactions during AutoInvoice
import.
76

Oracle Fusion Cloud Financials
Implementing Receivables Credit to Cash
Chapter 3
Define Customer Billing Configuration
Scenario
Define an AutoInvoice grouping rule that specifies that to appear on the same invoice, items must
match on all mandatory attributes, such as currency (CURRENCY_CODE) and customer bill-to address
(ORIG_SYSTEM_BILL_ADDRESS_ID), and must also match on the optional attribute of sales order type
(SALES_ORDER_SOURCE).
Transaction Details
During AutoInvoice import, assume that all mandatory attributes match other than currency and customer bill-to
address.
This figure illustrates how three imported invoices are created according to the AutoInvoice grouping rule defined in this
example:
Items A and B share the same currency and sales order type, so they appear on the same invoice (Invoice 1). Item C has
the same currency as A and B, but it has a different sales order type, so it appears on its own invoice (Invoice 2). Items D
and E share the same currency and sales order type, so they appear on the same invoice (Invoice 3).
Result
Because of the optional attribute of sales order type, AutoInvoice created three invoices. If the grouping rule had
designated only mandatory attributes, then AutoInvoice would have created only two invoices.
FAQs for AutoInvoice
Why did AutoInvoice reject transactions?
During AutoInvoice processing, if you have transaction lines that fail validation, the import process looks at the value of
the Invalid Line field in the transaction source to determine what to do about the transaction.
77

Oracle Fusion Cloud Financials
Implementing Receivables Credit to Cash
Chapter 3
Define Customer Billing Configuration
If the value is Reject Invoice, then AutoInvoice rejects all of the transaction lines that make up one invoice according
to the grouping rule, if any one of the transaction lines are invalid. For example, if a grouping rule specifies that three
transaction lines should be created as one invoice and one of the transaction lines has an error, AutoInvoice rejects all
three transaction lines and doesn't create an invoice.
However, if the value is Create Invoice, AutoInvoice rejects the one invalid transaction line and creates an invoice from
the two remaining valid transaction lines.
Why did AutoInvoice create transactions with duplicate transaction numbers?
During AutoInvoice processing, the import process validates that transaction and document numbers are unique after
grouping has completed.
In certain cases, AutoInvoice will create multiple invoices in the same group with the same transaction or document
number. Once grouping is completed, AutoInvoice checks for duplicate transaction and document numbers and reports
any lines that fail validation.
For example, two lines are imported with the same transaction number, but they have different currencies. These lines
are split into two separate invoices during grouping due to the different currencies. Once grouping has completed, both
of the invoices will fail validation due to identical transaction numbers.
What happens if AutoInvoice processes a transaction class that's not defined for a
grouping rule?
If AutoInvoice uses grouping rules and is processing a transaction class not defined for a grouping rule, then
AutoInvoice only uses the mandatory transaction attributes to group transactions.
When does a grouping rule need a line ordering rule?
Assign an AutoInvoice line ordering rule to an AutoInvoice grouping rule when you want to organize the transaction
lines belonging to a transaction created by the grouping rule in a specific order.
Use the Order By Type to specify whether to order the values belonging to a transaction attribute from least to greatest
(Ascending) or greatest to least (Descending).
For example, when importing transactions from Distributed Order Orchestration, you can define a line ordering rule
with the attribute SALES_ORDER_LINE to list the items on the invoice in the same order as they appear on the sales
order.
Or, you can define a line ordering rule with the attribute AMOUNT and an Order By Type of Descending to ensure that
the highest invoice line amounts are listed first on the transactions created by the grouping rule.
Payment Terms
Guidelines for Defining Payment Terms
Use payment terms to identify due dates and discount dates on your customer transactions.
78

Oracle Fusion Cloud Financials
Implementing Receivables Credit to Cash
Chapter 3
Define Customer Billing Configuration
After you create payment terms, you can optionally assign them both to customer account and site profiles and to
transaction types. The payment terms you assign are then assigned by default to transactions you create manually
using the related customer account or site, or transaction type.
Considerations for payment terms include:
• Payment Terms and Customer Profiles
• Payment Terms and Discounts
• Payment Terms and Print Lead Days
• Split Payment Terms with Installments
• Prepayment Payment Terms
Payment Terms and Customer Profiles
The setup of payment terms on customer account and site profiles influences the use and availability of payment terms
on transactions you create manually.
When you create a transaction manually, Receivables looks for payment terms to assign to the transaction in this order:
1. Payment terms assigned to the site profile of the bill-to customer.
2. Payment terms assigned to the account profile of the bill-to customer.
3. Payment terms assigned to the transaction type.
You must enable the Override terms option on the customer account or site profile in order to change the payment
terms assigned to the transaction. Enabling the Override terms option provides more flexibility in assigning payment
terms to manual transactions.
If you don't enable the Override terms option on customer account and site profiles, then:
• You can't change the payment terms assigned by default.
• If you select a bill-to customer, and no payment terms were assigned either to the account or site profiles of this
customer or to the transaction type, then no payment terms are available for use on the transaction.
You can alternatively either select another bill-to customer or select payment terms before selecting a
customer.
• If you select payment terms and then select a bill-to customer, and no payment terms were assigned to the
account or site profiles of this customer, then you can't change the payment terms originally assigned.
Tip: If you intend to leave the Override terms option disabled on customer account and site profiles, then make sure
that you assign payment terms to the transaction types that you intend to use for manual transactions.
Payment Terms and Discounts
Define standard payment terms for your customers to specify the due date and discount date for their open items.
Payment terms can include a discount percent for early payment, and you can assign multiple discounts to each line of
your payment terms.
For example, the payment terms named 2% 10, Net 30 indicates that a customer is allowed a two percent discount if
payment is received within 10 days. After 10 days, the entire balance is due within 30 days of the transaction date with
no applicable discount.
79

Oracle Fusion Cloud Financials
Implementing Receivables Credit to Cash
Chapter 3
Define Customer Billing Configuration
Enable the Allow discount on partial payments option to let your customers take discounts for partial payments on
items associated with payment terms. A partial payment is a payment less than the remaining amount due. If you do
this, you must also ensure that the Discount on partial payment Receivables system option is enabled.
Use the Discount Basis field to determine what amount to use to calculate discounts for the payment terms. If the
payment terms use installments, you can assign discount percentages to each installment.
Use the Discount Basis Date field to select the date to use to calculate discounts. The choices are:
• Receipt Date: Date the receipt is created.
• Receipt Application Date: Date the receipt is applied to the transaction.
• Deposit Date: Date the receipt is deposited into the remittance bank.
The discount is applied if the transaction is paid within the payment terms discount date. The formula is: Transaction
Date + Discount Due By Period >= Discount Basis Date (Receipt Date/Receipt Application Date/Deposit Date).
Payment Terms and Print Lead Days
The Print Receivables Transactions process prints eligible transactions according to the transaction date. You normally
can't print a transaction in advance of the transaction date.
You can use the Print Lead Days field to allow printing of transactions with the applicable payment terms a designated
number of days before the transaction date.
Use this field in conjunction with the due date and discount date to print and send customers transactions in advance of
the transaction date, for example, to remind customers of due dates and potential discounts.
Split Payment Terms with Installments
Create split payment terms for invoice installments that have different due dates. The payment terms determine the
amount of each installment.
Use the Installment Option field to determine how to allocate the freight and tax charged to transactions. You can
either distribute tax and freight charges across all installments, or allocate all freight and tax charges to the first
installment.
Define the payment schedule for the split payment terms. The payment schedule determines when each installment is
due, how much in each installment is due, and how much discount to offer in each installment.
Prepayment Payment Terms
You can optionally define prepayment payment terms by enabling the Prepayment option. You assign prepayment
payment terms to transactions to indicate which transactions require prepayment for goods and services.
Prepayment payment terms don't require the capture of funds in advance of invoicing or the delivery of prepaid goods
or services. You must establish specific business practices at your enterprise if you want to capture these funds in
advance.
Split Payment Terms and Amounts Due
Split payment terms derive different amounts due in each installment of the payment schedule, depending on the
setting of the Installment Option field.
80

Oracle Fusion Cloud Financials
Implementing Receivables Credit to Cash
Chapter 3
Define Customer Billing Configuration
If the base amount is different from the relative amount, and you set the Installment Option field to Allocate tax and
freight, Receivables prorates the base amount across the relative amounts of the payment schedule based upon the
ratio you define. Receivables uses the following equation to determine the original amount due for each installment:
Amount Due = Relative Amount/Base Amount * Invoice Amount
If you set the Installment Option field to Include tax and freight in first installment, the base amount and the relative
amounts that you specify for the payment schedule only indicate how the original line amounts of the invoices to which
you assign these payment terms are distributed across different installments.
In this case, the original freight and tax amounts are included in the first installment, in addition to the line amount
allocated by the ratio of the base amount and the relative amount that you specify for the first payment. Receivables
uses the following equation to determine the original amount due for the first installment:
Amount Due = (Relative Amount/Base Amount * Base Line Amount) + Base Freight Amount + Base Tax Amount
Payment Terms Discount Basis
The payment terms Discount Basis field determines on what basis Receivables calculates the discount amount.
Discount Basis
Invoice Amount
Calculates the discount amount based on the sum of the tax, freight, and line amounts of transactions.
Lines Only
Calculates the discount amount based on only the line amounts of transactions.
Lines, Freight Items and Tax
Calculates the discount amount based on the amount of line items and their freight and tax amounts, but excludes
freight and charges at the transaction header level.
Lines and Tax, not Freight Items and Tax
Calculates the discount amount based on the line items and their tax amounts, but excludes freight items and their tax
lines.
How Discounts Are Calculated
Receivables uses different formulas to calculate discounts, depending on your setup, the payment terms on the
transaction, and the type of payment received.
Receivables provides formulas for these discount events:
• Maximum Discount
• Earned Discounts and Partial Payments Allowed
• Unearned Discounts with Partial Payment Discounts Allowed
• Earned Discounts with Partial Payment Discounts Not Allowed
81

Oracle Fusion Cloud Financials
Implementing Receivables Credit to Cash
Chapter 3
Define Customer Billing Configuration
• Unearned Discounts and Partial Payments Not Allowed
• Discount on Lines Only
Maximum Discount
Receivables uses the following formula to determine the maximum discount amount:
Maximum Discount = (Amount Due Original) * (Highest Discount Percent - Discount Taken)
Earned Discounts and Partial Payments Allowed
If the receipt amount is greater than the remaining amount due, less the discount, Receivables uses the following
formula to determine the earned discount:
Earned Discount = Amount Due Remaining * Discount Percent
If the receipt amount is either the equal to or less than the remaining amount due, less the discount, Receivables uses
the following formula to determine the earned discount:
Earned Discount = (Receipt Amount * Discount Percent) / (1 - Discount Percent)
Unearned Discounts with Partial Payment Discounts Allowed
Receivables uses the following formula to determine unearned discounts if partial payments are allowed:
Unearned Discount = Maximum Discount - Earned Discount
Earned Discounts with Partial Payment Discounts Not Allowed
If the Allow discount on partial payments option on the payment terms isn't enabled, Receivables only takes earned
discounts if the receipt amount closes the installment.
Receivables uses the following formula to determine earned discounts, if partial payment discounts aren't allowed and
the receipt amount closes the installment:
Earned Discount = Amount Due Original * Discount Percent
Unearned Discounts and Partial Payments Not Allowed
If the Allow discount on partial payments option on the payment terms isn't enabled, Receivables only takes unearned
discounts if the receipt amount closes the installment.
Receivables uses the following formula to determine unearned discounts, if partial payments aren't allowed and the
receipt amount closes the installment:
Unearned Discount = (Amount Due Original) * (Maximum Discount Percent - Earned Discount)
Discount on Lines Only
If the Discount Basis field on the payment terms is set to Lines Only, Receivables doesn't take discounts on receipt
amounts applied to tax, freight, or late charges. Receivables uses the following formula to determine the discount
amount:
Line Percent = Discount Percent * (Sum of Lines + Sum of Line Adjustments - Sum of Line Credits) / (Amount
Due Original + Sum of Adjustments - Sum of Credits)
Once you determine the discount line percent, use this as the discount percent in all of these formulas.
82

Oracle Fusion Cloud Financials
Implementing Receivables Credit to Cash
Chapter 3
Define Customer Billing Configuration
Example of Deriving Discount Amounts
This example illustrates how Receivables derives discount information based on the date of the receipt.
When you enter receipts manually, Receivables determines whether discounts are allowed based on the payment terms,
discount grace days, Receivables system options, transaction date, and the payment terms discount basis date (receipt
date, receipt application date, or receipt deposit date). If discounts are allowed, Receivables determines the amount of
both earned and unearned discounts, as determined by the details of your setup.
Scenario
Assume that you're using the following information:
• Unearned Discounts = Yes
• Payment Terms: 10/10, 5/15, Net 30
• Discount Basis Date: Receipt Date
• Discount Grace Days = 0
• Calculate Discount on Lines Only = No
• Allow Discount on Partial Payments = Yes
This table shows the discount details:
Percent Date On Lines Only On Partial Payments
5
17-DEC-10
NO
YES
10
12-DEC-10
NO
YES
Assume these invoice details:
• Invoice #101
• Invoice Date: 02-DEC-10
• Due Date: 01-JAN-11
• Amount: $1100
The following table displays the default discount amounts based on different receipt application dates. You can also see
the amount of earned and unearned discounts that your customers can take.
Receipt Date Receipt Amount Default Discount
Amount
Message Line Earned Discount
Allowed
Unearned Discount
Allowed
From 02-DEC-10 to 12-
DEC-10
$990
$110
Discount Earned = 110
Total = 110
$110
None
83

Oracle Fusion Cloud Financials
Implementing Receivables Credit to Cash
Chapter 3
Define Customer Billing Configuration
Receipt Date Receipt Amount Default Discount
Amount
Message Line Earned Discount
Allowed
Unearned Discount
Allowed
After 17-DEC-10
$990
0
To take the unearned
discount, you must
update the amount.
Discount Earned = 0
Total = 110
None
$110
From 02-DEC-10 to 12-
DEC-10
$1000
$10 of the receipt is
left as Unapplied after
the default discount.
$110
Discount Earned = 110
Total = 110
$110
None
From 13-DEC-10 to 17-
DEC-10
$1000
After the default
discount of $52.63, the
receipt is fully applied.
However, a balance of
$47.37 remains on the
invoice.
$52.63
To take the unearned
discount, you must
update the amount.
Discount Earned =
52.63
Total = 110
$52.63
$57.37
After 17-DEC-10
$1000
Since there's no
default discount,
the receipt is fully
applied. A balance of
$100 remains on the
invoice.
0
To take the unearned
discount, you must
update the amount.
Discount Earned = 0
Total = 110
None
$110
FAQs for Payment Terms
What's the difference between balance forward payment terms and other payment
terms?
Balance forward billing payment terms pass the balance forward billing cycle to the Create Balance Forward Bill process.
The billing cycle determines when customer balance forward bills are generated.
Because balance forward bills can't be split across installments, all settings related to installments on balance forward
billing payment terms are disabled. You can't change existing payment terms back and forth for use as both non-
balance forward billing and balance forward billing payment terms.
84

Oracle Fusion Cloud Financials
Implementing Receivables Credit to Cash
Chapter 3
Define Customer Billing Configuration
AutoAccounting
AutoAccounting Account Types and Segment Values
Define AutoAccounting to specify how to determine the default general ledger accounts for transactions that you enter
manually or import using AutoInvoice.
You must define AutoAccounting before you can enter transactions in Receivables. When you enter or update
transactions, you can override the default general ledger accounts that AutoAccounting creates.
Account Types
Define an AutoAccounting record for each type of account. You can then assign either a table name or constant value to
each segment of the account.
AutoInvoice Clearing
The clearing account for imported transactions. Receivables uses the clearing account to hold any difference between
the specified revenue amount and the selling price times the quantity for imported invoice lines. Receivables only uses
the clearing account if you have enabled this option on the transaction source used for imported transactions.
Bills Receivable
The bills receivable account for your transactions. Receivables uses this account when you apply transactions to bills
receivable.
Factored Bills Receivable
The factored bills receivable account for your bills receivable transactions.
Freight
The freight account for transactions.
Receivable
The receivable account for transactions.
Remitted Bills Receivable
The remitted bills receivable account for your bills receivable transactions.
Revenue
The revenue and late charges account for transactions.
Tax
The tax account for transactions.
Unbilled Receivable
85

Oracle Fusion Cloud Financials
Implementing Receivables Credit to Cash
Chapter 3
Define Customer Billing Configuration
The unbilled receivable account for transactions. Receivables uses this account when the transaction uses the In Arrears
invoicing rule. If the revenue scheduling rule on the transaction recognizes revenue before the invoicing rule bills it,
Receivables uses this account.
Unearned Revenue
The unearned revenue account for transactions. Receivables uses this account when a transaction uses the In Advance
invoicing rule. If the revenue scheduling rule on the transaction recognizes revenue after the invoicing rule bills it,
Receivables uses this account.
Unpaid Bills Receivable
The unpaid bills receivable account for your bills receivable transactions.
Table Names
Enter either the table name or constant value that you want Receivables to use to retrieve information for each
accounting flexfield segment of a given account.
Enter a constant value instead of a table name if you want AutoAccounting to always use the same value for a given
segment.You must ensure that you enter valid information for this segment.
For example, if you defined your Company segment as a two-character segment with valid values ranging from 00 to
10, you must only enter a two-character value within this range.
Bill-to Site
Use the bill-to site of the transaction to determine this segment of revenue, freight, receivable, AutoInvoice clearing, tax,
unbilled receivable, and unearned revenue accounts.
Drawee Site
Use the drawee site table to determine this segment of your bills receivable, factored bills receivable, remitted bills
receivable, and unpaid bills receivable account.
Remittance Banks
Use the remittance banks table to determine this segment of your factored bills receivable and remitted bills receivable
account.
Salesperson
Use the salesperson table to determine this segment of revenue, freight, receivable, AutoInvoice clearing, tax, unbilled
receivable, and unearned revenue accounts.
If you select this option for AutoInvoice clearing, tax, or unearned revenue accounts, Receivables uses the revenue
account associated with the salesperson on the transaction. If you select this option for the unbilled receivable account,
Receivables uses the receivable account associated with the salesperson on the transaction.
If the transaction has a line type of Line with an inventory item of Freight, AutoAccounting uses the revenue scheduling
rules for the freight account rather than the revenue account.
Standard Lines
Use the memo line or inventory item on the transaction to determine this segment of revenue, AutoInvoice clearing,
freight, tax, unbilled receivable, and unearned revenue accounts.
If you select this option for AutoInvoice clearing, freight, tax, unbilled receivable or unearned revenue accounts,
Receivables uses the revenue account associated to the memo line item or inventory item.
86

Oracle Fusion Cloud Financials
Implementing Receivables Credit to Cash
Chapter 3
Define Customer Billing Configuration
If the transaction has a line type of Line with an inventory item of Freight, AutoAccounting uses the revenue scheduling
rules for the freight account rather than the revenue account.
Tax
Use the tax account assigned to the tax rate codes on the transaction.
Transaction Types
Use the transaction types table to determine this segment of revenue, freight, receivable, AutoInvoice clearing, tax,
unbilled receivable, and unearned revenue accounts.
If the transaction has a line type of Line with an inventory item of Freight, AutoAccounting uses the revenue scheduling
rules for the freight account rather than the revenue account.
Guidelines for Creating an AutoAccounting Structure
To implement AutoAccounting, you first define your AutoAccounting structure and then define information for each
salesperson, transaction type, product, and tax rate code in order for AutoAccounting to properly create your default
accounts.
You must define your AutoAccounting structure before you can enter invoices and credit memos, and you can only
define one structure for each account type. During transaction creation, if AutoAccounting can't determine all of the
accounting flexfield segments, it derives what it can and displays an incomplete accounting flexfield. You must provide
any missing accounting flexfield information before you can complete a transaction.
Review these guidelines for each account type when creating your AutoAccounting structure:
• AutoInvoice Clearing Account
• Freight Account
• Receivable Account
• Revenue Account
• Tax Account
• Unbilled Receivable Account
• Unearned Revenue Account
• Available Information for Each Account
This table indicates the information that you can use to create each type of account. (Rec) and (Rev) indicate whether
the account information is taken from the corresponding Receivables or Revenue accounting flexfield.
Information
Source /
AutoAccounting
Type
Constant Customer Bill-to
Site
Salesperson Transaction Type Standard Item Tax Rate Code
AutoInvoice
Clearing
Yes
Yes
Yes (Rev)
Yes
Yes (Rev)
No
Freight
Yes
Yes
Yes
Yes
Yes (Rev)
No
87

Oracle Fusion Cloud Financials
Implementing Receivables Credit to Cash
Chapter 3
Define Customer Billing Configuration
Information
Source /
AutoAccounting
Type
Constant Customer Bill-to
Site
Salesperson Transaction Type Standard Item Tax Rate Code
Receivable
Yes
Yes
Yes
Yes
No
No
Revenue
Yes
Yes
Yes
Yes
Yes
No
Tax
Yes
Yes
Yes (Rev)
Yes
Yes (Rev)
Yes
Unbilled
Receivable
Yes
Yes
Yes (Rec)
Yes
Yes (Rev)
No
Unearned Revenue
Yes
Yes
Yes (Rev)
Yes
Yes (Rev)
No
Notes on the table:
• If AutoAccounting for the AutoInvoice Clearing, Tax, Unbilled Receivable, or Unearned Revenue account is
based on Standard Item, Receivables uses the segment from the standard item Revenue accounting flexfield.
• If AutoAccounting for the AutoInvoice Clearing, Tax, or Unearned Revenue account is based on Salesperson,
Receivables uses the segment from the salesperson Revenue accounting flexfield.
• If AutoAccounting for Unbilled Receivable is based on Salesperson, Receivables uses the segment from the
salesperson Receivable accounting flexfield.
• If the AutoInvoice Clearing, Revenue, Tax, Unbilled Receivable, or Unearned Revenue account is based on
Salesperson, and there are multiple salespersons on the transaction, then Receivables creates separate
distributions for each salesperson.
AutoInvoice Clearing Account
During AutoInvoice processing, Receivables uses the AutoInvoice clearing account to store any differences between the
specified revenue amount and the (price * quantity) for imported invoice lines.
Receivables only uses the AutoInvoice clearing account if you enabled the Create clearing option on the transaction
source assigned to imported transactions. However, you must define a clearing account whether or not you enable this
option.
You can use constant value, customer bill-to site, salesperson, transaction type, and standard item for your AutoInvoice
clearing account. If you select salesperson or standard item, Receivables uses the specified Revenue accounting
flexfield.
Freight Account
The freight account controls the account in general ledger to which you post freight amounts. You can use constant
value, customer bill-to site, salesperson, transaction type, and standard item to specify your freight account.
If you choose standard item, Receivables uses the specified Revenue accounting flexfield. In addition, you can't import
transactions with header-level freight through AutoInvoice.
If the transaction has a line type of LINE with an inventory item of freight, AutoAccounting uses the revenue scheduling
rules for the freight account rather than the revenue account.
88

Oracle Fusion Cloud Financials
Implementing Receivables Credit to Cash
Chapter 3
Define Customer Billing Configuration
Receivable Account
The receivable account controls the account in your general ledger to which you post receivable amounts. You can use
transaction type, customer bill-to site, salesperson, and constant value to specify your receivable account.
Revenue Account
The revenue account controls the account in your general ledger to which you post your revenue amounts. You can use
transaction type, customer bill-to site, standard item, salesperson, and constant value to specify your revenue account.
Tax Account
The tax account controls the account in your general ledger to which you post tax amounts. You can use tax rate codes,
customer bill-to site, salesperson, transaction type, standard item, and constant value to specify your tax account.
If you select salesperson or standard item, Receivables uses the specified Revenue accounting flexfield.
Unbilled Receivable Account
Receivables uses the unbilled receivable account for transactions that have invoicing and revenue scheduling rules.
Whenever the revenue scheduling rule recognizes revenue on the transaction before the invoicing rule bills for the
transaction, Receivables posts this amount to the unbilled receivable account.
You can select constant value, customer bill-to site, salesperson, transaction type, and standard item for your unbilled
receivable account.
If you select standard item, Receivables uses the specified Revenue accounting flexfield. If you select salesperson,
Receivables uses the salesperson Receivable accounting flexfield.
Unearned Revenue Account
Receivables uses the unearned revenue account for transactions that have invoicing and revenue scheduling rules.
Whenever the revenue scheduling rule recognizes revenue on the transaction after the invoicing rule bills for the
transaction, Receivables posts this amount to the unearned revenue account.
You can select constant value, customer bill-to site, salesperson, transaction type, and standard item for your unearned
revenue account.
If you select salesperson or standard item, Receivables uses the specified Revenue accounting flexfield.
Example of Deriving Accounting Flexfield Segments in
AutoAccounting
This example illustrates how to derive default accounting flexfield segments in AutoAccounting.
Receivables uses AutoAccounting to derive the default accounting on transactions, and uses the predefined setup
in Subledger Accounting so that the Create Receivables Accounting program accepts the default accounts that
AutoAccounting derives without change. However, if you modify the Subledger Accounting setup, you can instead
select a constant value for all accounting flexfield segments.
These two scenarios illustrate how Receivables uses the AutoAccounting structure you define to determine your
accounting flexfield defaults.
89

Oracle Fusion Cloud Financials
Implementing Receivables Credit to Cash
Chapter 3
Define Customer Billing Configuration
Flexfield with Four Definitions
You want to define a four segment revenue flexfield: 00-000-0000-000 (Company-Cost Center-Account-Product). You
can define AutoAccounting to derive defaults for each segment:
• Company, the first segment, is the constant 01.
• Cost Center, the second segment, derives from the salesperson (John Doe).
• Account, the third segment, derives from the transaction type (Standard Invoice).
• Product, the fourth segment, derives from the standard line (20 Megabyte Hard Disk).
Salesperson John Doe enters a one line Standard Type invoice for a 20 Megabyte Hard Drive.
This figure illustrates how AutoAccounting derives the revenue flexfield based on a separate definition for each
segment:
Flexfield with Two Definitions
You redefine the structure so that AutoAccounting only uses information from the transaction type (Standard Invoice)
for segments 1 and 2, and standard line (consulting services) for segments 3 and 4.
This figure illustrates how AutoAccounting derives the revenue flexfield based on the same definitions for segments 1
and 2 and segments 3 and 4:
90

Oracle Fusion Cloud Financials
Implementing Receivables Credit to Cash
Chapter 3
Define Customer Billing Configuration
FAQs for AutoAccounting
When does AutoAccounting create subledger accounting?
AutoAccounting derives the default accounting for each transaction accounting event in Receivables according to your
setup.
AutoAccounting assigns valid accounting flexfields to invoices and credit memos, and automatically generates valid
accounting flexfields for all related accounts: freight, receivable, revenue, AutoInvoice clearing, tax, unbilled receivable,
and unearned revenue.
When you submit the Create Receivables Accounting process, this creates the subledger accounting entries. Subledger
Accounting transfers the final accounting to General Ledger.
You can optionally define your own accounting rules in Subledger Accounting to create accounting that meets your
business requirements. If you change the Subledger Accounting setup to create your own accounting, then Subledger
Accounting overwrites the default accounts, or individual segments of accounts, that AutoAccounting originally derived
during transaction entry.
Transaction Types
Options for Posted and Non-Posted Activities using Transaction
Types
Use the Open Receivable and Post to GL options on the transaction type to manage posted and non-posted activities
on transactions.
If the Open Receivable option is enabled, Receivables updates your customer balances each time you create a complete
debit memo, credit memo, chargeback, or on-account credit with this transaction type. Receivables also includes these
transactions in the standard aging and collection processes.
If the Post to GL option is enabled, Receivables posts transactions with this transaction type to general ledger. If this
option isn't enabled, then no accounting is generated for transactions with this transaction type.
Considerations for defining transaction types include:
• Void Transaction Type
• Updates to Customer Accounts and Aging
• Updates to Accounting Only
91

Oracle Fusion Cloud Financials
Implementing Receivables Credit to Cash
Chapter 3
Define Customer Billing Configuration
Void Transaction Type
You can void a debit memo, credit memo, on-account credit, or invoice by defining a Void transaction type and
assigning it to the transaction. To define a Void transaction type, set the Open Receivable and Post to GL options to
No. You can void a transaction by changing the transaction type to Void provided:
• No activity exists against the transaction.
• Transaction hasn't posted to general ledger.
This activity isn't included in the Review Customer Account Details page since the activity doesn't modify the customer
balance.
Updates to Customer Accounts and Aging
If you set the Open Receivable option to Yes and the Post to GL option to No, Receivables updates customer accounts
with the transaction activity of transactions assigned this transaction type. This has no effect on accounting.
Use transaction types with these settings during your initial implementation, where the transaction amount is included
in the general ledger beginning balance for the receivable account, but activity still needs to be aged and payment
collected against it. All related activities against the transaction, such as credit memos, payments, and adjustments, are
accounted as affecting the customer balance. You can review these activities on the Review Customer Account Details
page.
Updates to Accounting Only
If you set the Open Receivable option to No and Post to GL option to Yes, Receivables updates accounting without any
impact on the customer balance.
Use transaction types with these settings when you want to adjust accounting activity, such as when you rebill a
customer in order to reclassify the general ledger account. A credit memo and invoice with the Open Receivable option
set to No are created where the credit memo reverses the general ledger account of the original invoice, and the invoice
creates accounting with the new general ledger account. This activity is transparent to the customer because the
original invoice is used for the cash application when payment is received.
This activity isn't included in the Review Customer Account Details page since the activity doesn't modify the customer
balance.
Transactions with the Open Receivable option set to No appear in the Other Accounting section of the Receivables to
General Ledger Reconciliation Report, even though transactions post to Receivables accounts assigned the financial
category of Accounts Receivable.
Related Topics
•
When do I credit and rebill a transaction?
Natural Application and Overapplication
The transaction type that you assign to a transaction defines the type of application permitted against the transaction
balance. This definition is managed by the Natural Application Only and Allow Overapplication options on the
transaction type.
92

Oracle Fusion Cloud Financials
Implementing Receivables Credit to Cash
Chapter 3
Define Customer Billing Configuration
Natural application only lets you apply a payment or credit to a transaction that brings the transaction balance close
to or equal to zero. For example, if an invoice has a balance due of $400, you can make applications against this
transaction up to $400 only. With natural application, you can only bring the balance to zero.
Overapplication lets you apply more than the balance due on a transaction. For example, if you apply a $500 receipt to a
$400 invoice, this overapplies the invoice by $100 and reverses the balance sign from positive to negative.
Use of Natural Application and Overapplication
Whether or not a transaction allows overapplication determines the actions that you can take on that transaction.
If a transaction that allows natural application only is paid in full, then in order to credit the transaction you must first
unapply the receipt from the transaction before creating the credit.
If you want to use AutoInvoice to import credit memos against paid invoices and evaluate these credits for automatic
receipt handling, then the transaction type of the paid invoices must allow natural application only. However, if the
Receipt Handling for Credits option isn't enabled on the transaction source of the transaction, AutoInvoice leaves the
related credit memo in the interface tables until you unapply the receipt from the invoice.
Related Topics
•
How AutoInvoice Processes Credited Amounts
Guidelines for Transaction Type Reference Accounts
Define the accounting for transaction types of class Invoice, Chargeback, Credit Memo, and Debit Memo. Receivables
uses this information along with your AutoAccounting definition to determine the accounts to use for transactions with
the applicable transaction type.
Revenue
Enter a revenue account, unless the transaction type doesn't allow freight.
If the Invoice Accounting Used for Credit Memos profile option is set to No, then a revenue account isn't required for
Credit Memo transaction types.
Freight
Enter a freight account, unless the transaction type doesn't allow freight.
Receivable
Enter a receivable account for all transaction types.
If the Post To GL option on the transaction type is enabled, Receivables creates a receivable transaction record using
this account in order to transfer accounting to general ledger and create a journal entry.
For Chargeback transaction types, enter the Receivable Chargeback account. The offset to the receivable account on the
original debit transaction is generated by the chargeback adjustment.
If the Invoice Accounting Used for Credit Memos profile option is set to No, then a receivable account isn't required
for Credit Memo transaction types.
93

Oracle Fusion Cloud Financials
Implementing Receivables Credit to Cash
Chapter 3
Define Customer Billing Configuration
AutoInvoice Clearing
If this is an Invoice or Debit Memo transaction type, enter an AutoInvoice clearing account. Receivables uses this
account to hold any difference between the revenue amount specified for the revenue account and the selling price
times the quantity for imported invoice lines.
Receivables only uses the AutoInvoice clearing account for imported transactions that have a transaction source with
the Create clearing option enabled. If the Create clearing option isn't enabled, then AutoInvoice requires that the
revenue amount on the invoice be equal to the selling price times the quantity, or the invoice is rejected.
Tax
If this is an Invoice, Credit Memo, or Debit Memo transaction type, enter a tax account.
Unbilled Receivable
If this is an Invoice or Credit Memo transaction type, enter an unbilled receivable account. This account is for
transactions that use the In Arrears invoicing rule.
Unearned Revenue
If this is an Invoice or Credit Memo transaction type, enter an unearned revenue account. This account is for
transactions that use the In Advance invoicing rule.
Related Topics
•
What happens if I don't create a clearing account?
•
Guidelines for Creating an AutoAccounting Structure
FAQs for Transaction Types
How can I arrange the creation of transaction types?
Create transaction types for each transaction class, and create them in a way that can account for dependencies
between transaction types.
Create your transaction types in the following order:
• Credit memo transaction types
• Invoice transaction types
• Debit memo transaction types
• Chargeback transaction types
If applicable, create the transaction types that you want to add to your transaction sources before creating transaction
sources.
If you're using late charges, create a transaction type with a class of Debit Memo to present late charges as debit
memos, and a transaction type with a class of Invoice to present late charges as interest invoices. Specify the receivable
and revenue accounts for these transaction types. Receivables uses these accounts instead of AutoAccounting when
generating late charges.
94

Oracle Fusion Cloud Financials
Implementing Receivables Credit to Cash
Chapter 3
Define Customer Billing Configuration
How can I use transaction types to review and update customer balances?
Use the Open Receivable option on the transaction type to implement an approval cycle for any temporary or
preliminary transactions.
For example, if you have particularly sensitive debit memos, credit memos, on-account credits, chargebacks, or invoices
that you want to review after creation, you can define a transaction type called Preliminary with Open Receivable set to
No and assign it to the applicable transactions. This transaction type doesn't update your customer balances.
Once you review and approve these transactions, you can define a transaction type called Final with Open Receivable
set to Yes and assign it to the same transactions. This will now update your customer balances on these transactions.
Transaction Sources
Guidelines for Transaction Numbering
Use the various options on the transaction source assigned to a transaction to manage your transaction numbering
requirements.
Refer to these guidelines when defining transaction numbering for transactions assigned to specific transaction
sources:
• Document Sequences
• Automatic Transaction Numbering
• Copy Document Numbers to Transaction Numbers
• Allow Duplicate Transaction Numbers
• Credit Memo Transaction Source
Document Sequences
If necessary, define document sequences to assign unique numbers to each transaction, in addition to the transaction
number assigned automatically.
Ensure that the necessary setups for document sequences are completed, according to your requirements.
Automatic Transaction Numbering
To automatically number new transactions you create using a transaction source, enable the Automatic transaction
numbering option and enter a number in the Last Number field.
For example, to start numbering transactions with 1000, enter a last number of 999. Receivables automatically updates
the Last Number fields on transaction sources, so you can review the transaction source later to see the last transaction
number that was generated.
Note: The last transaction number on the transaction source is an approximation only, due to caching.
You can use automatic transaction numbering with both Imported and Manual transaction sources.
95

Oracle Fusion Cloud Financials
Implementing Receivables Credit to Cash
Chapter 3
Define Customer Billing Configuration
Copy Document Numbers to Transaction Numbers
If you're using document sequences and you want to use the same number as both the document number and
the transaction number for transactions assigned to a transaction source, enable the Copy document number to
transaction number option.
If you're using Gapless document sequences, you should enable this option if you require gapless transaction
numbering. This ensures that transaction numbers are generated sequentially with no missing numbers.
Allow Duplicate Transaction Numbers
Enable the Allow duplicate transaction numbers option to allow duplicate transaction numbers within a transaction
source.
This option is for manual transaction numbering only.
Credit Memo Transaction Source
Assign a credit memo transaction source to an invoice transaction source, if you want to number credit memos
differently from the invoices that they credit.
Related Topics
•
Document Sequences
AutoInvoice and Sales Credit Information
During AutoInvoice processing, whether you must provide sales credit information on imported transaction lines
depends on the settings of the Allow sales credits option on the transaction source and the Require salesperson
Receivables system option.
These are the requirements for passing sales credit information on imported transaction lines:
• If the Require salesperson system option and the Allow sales credits option on the transaction source are
both enabled, you must provide sales credit information.
• If the Require salesperson system option isn't enabled and the Allow sales credits option on the transaction
source is enabled, you can provide sales credit information, but it isn't required.
• If the Require salesperson system option is enabled and the Allow sales credits option on the transaction
source isn't enabled, you must provide sales credit information.
• If neither the Require salesperson system option nor the Allow sales credits option on the transaction source
are enabled, you can't provide sales credit information. AutoInvoice ignores any values that you pass.
How AutoInvoice Validates Imported Transactions
Use the AutoInvoice Options and Import Information sections of an Imported transaction source to define how
AutoInvoice validates imported transaction lines.
96

Oracle Fusion Cloud Financials
Implementing Receivables Credit to Cash
Chapter 3
Define Customer Billing Configuration
You don't have to pass values for all of the fields that are referenced in the transaction source. If you don't want
AutoInvoice to pass certain data, then where available you can set the related option to None.
Note: Even if you set a transaction source data option to None in order to avoid importing this information into the
interface tables, AutoInvoice can still validate and reject transaction lines with invalid data.
Settings That Affect the Validation of Imported Transactions
These settings affect the validation of imported transactions:
• Invalid Line field: Indicate how AutoInvoice handles imported transactions with invalid lines by selecting either
Reject Invoice or Create Invoice.
◦
If you select Reject Invoice, AutoInvoice doesn't import this transaction or any of its lines into the
interface tables.
◦
If you select Create Invoice, AutoInvoice creates a transaction with valid lines only. For example, you
import an invoice with three invoice lines and one of the lines is invalid. AutoInvoice creates the invoice
with the two valid lines only and rejects the invalid line. You can use the Edit Transaction page to add the
rejected line.
• Accounting Date in a Closed Period field: Indicate how AutoInvoice handles imported transactions that have
lines in the interface lines table that are in a closed accounting period.
◦
Select Adjust to have AutoInvoice automatically adjust the accounting dates to the first accounting date
of the next open or future enterable period.
◦
Select Reject to reject these transaction lines.
• In the Import Information sections, where applicable select Number, Value, Segment, or ID for each option to
indicate how AutoInvoice validates information:
◦
Select Number to import a record into the interface tables using its assigned number.
◦
Select Value to import a record into the interface tables using its actual name.
Note: Use Value if you intend to use the transaction source to import data from a non-Oracle system.
◦
Select Segment to use the flexfield segment.
◦
Select ID to use the internal identifier of the record.
• Select Amount or Percent to indicate how AutoInvoice validates Sales Credits and Revenue Account Allocations
on transaction lines.
How Imported Transactions Are Validated
AutoInvoice validates imported transactions based on the settings of the assigned Imported transaction source.
Transactions that fail validation appear in the Import AutoInvoice Validation report.
AutoInvoice ensures that certain column values agree with each other. These values can be within an interface table
or multiple interface tables. For example, if the transaction source indicates that a revenue scheduling rule can't be
used, AutoInvoice ignores any values passed for invoicing rule, revenue scheduling rule, and revenue scheduling rule
duration.
97

Oracle Fusion Cloud Financials
Implementing Receivables Credit to Cash
Chapter 3
Define Customer Billing Configuration
AutoInvoice performs these validations on transaction lines with revenue scheduling rules:
• Requires that these transactions also include an invoicing rule, if you import transactions that use revenue
scheduling rules.
• Rejects lines, if the revenue scheduling rule has overlapping periods.
• Rejects lines, if the designated accounting periods don't exist for the duration of the revenue scheduling rule.
Related Topics
•
Why did AutoInvoice reject transactions?
How You Implement CPQ Cloud and Receivables Processing
Set up CPQ Cloud and Receivables to enable the integrated quote-to-cash cloud service. This integrated service lets you
manage the entire process of quote, pricing, order entry, credit checking, and invoicing.
To set up the CPQ Cloud/Receivables integration service, perform one or more of these tasks:
• Set up CPQ Cloud and CPQ Cloud data.
• Set up Receivables transaction sources.
• Set Up for multiple CPQ Cloud Instances.
Set Up CPQ Cloud
Perform the necessary setups in CPQ Cloud using the CPQ Administration pages.
Create a data table definition for each of the integration services used by the CPQ Cloud/Receivables quote-to-cash
cloud service:
• Credit Check Service: Service that verifies customer creditworthiness.
• Receivables Invoice Service: Service that transfers order lines from CPQ Cloud to the AutoInvoice interface
tables in Receivables.
Each data table definition includes these attributes:
• Endpoint URL: The URL to use to contact the service.
• User Name: The valid user name recognized by the service.
• Password: The accompanying password for the valid user.
Set Up the CPQ Cloud Transaction Source
Receivables provides an Imported transaction source under the Common reference data set to use to configure the CPQ
Cloud/Receivables integrated service.
Use this transaction source to:
• Manage the transfer of transaction information from CPQ Cloud to the AutoInvoice interface tables.
• Manage the Call Back service to send Receivables transaction information to CPQ Cloud after the transactions
are created.
98

Oracle Fusion Cloud Financials
Implementing Receivables Credit to Cash
Chapter 3
Define Customer Billing Configuration
To set up the transaction source for CPQ Cloud:
1. Navigate to the Edit Transaction Source page.
2. Open the CPQ Cloud transaction source.
3. If applicable, enter the legal entity.
4. If applicable, update the From Date and To Date fields.
5. In the Oracle CPQ Cloud Integration section, check the Enabled option.
6. Click the Define button to open the Define Endpoint Policy window.
7. In the URL field, enter the URL to use to contact the Call Back service.
8. In the Security Policy field, enter oracle/wss_username_token_over_ssl_client_policy.
9. In the User Name field, enter the user name to use for the Call Back service.
10. In the Password field, enter the accompanying password for the valid user.
11. Click the Save and Close button to exit the Define Endpoint Policy window.
12. Save and close the Edit Transaction Source page.
Set Up for Multiple CPQ Cloud Instances
If you plan to have more than one CPQ Cloud instance sending data to Receivables, you must represent each CPQ
instance as a business unit and define a transaction source for each instance.
To set up for multiple CPQ Cloud instances:
1. Define one reference data set for each CPQ Cloud instance.
2. Associate this reference data set to the business unit for the reference object transaction source.
3. Create a transaction source for each reference data set:
a. Open the Create Transaction Source page.
b. In the Transaction Source Set field, select the applicable reference data set for the business unit.
c. If applicable, enter the legal entity.
d. In the Name and Description fields, enter a name and description for this transaction source.
e. In the Type field, select Imported.
f. If applicable, update the From Date and To Date fields.
g. Complete the remaining fields in the transaction source with the same settings as the predefined
transaction source.
h. In the Oracle CPQ Cloud Integration section, check the Enabled option and complete the endpoint policy.
i. Save and close the Create Transaction Source page.
FAQs for Transaction Sources
What do I create before creating transaction sources?
You may want to create certain records before creating your transaction sources.
You can optionally create these objects for Manual or Imported transaction sources:
• Transaction types: Define the transaction types that you want to appear by default on transactions assigned
to your transaction sources. You select the transaction type you want for a transaction source in the Standard
Transaction Type field.
99

Oracle Fusion Cloud Financials
Implementing Receivables Credit to Cash
Chapter 3
Define Customer Billing Configuration
• Credit memo transaction source: Define one or more transaction sources for credit memos before you define
a transaction source for invoices. You then select a credit memo transaction source to accompany the invoice
transaction source in the Credit Transaction Source field.
You can use credit memo transaction sources in these ways:
◦
Number the credit memos created against invoices differently from the invoices they're crediting.
◦
Create a manual credit memo transaction source for credit memo request approvals, when the approved
credit memo amount is greater than the open balance on the invoice. For these transaction sources, set
the Receipt Handling for Credits option to On Account.
You can optionally create these objects for Imported transaction sources only:
• Invoice Transaction Flexfield: Define the reference information that you want to capture in the Invoice
Transaction Flexfield and display on imported transactions, such as a purchase order number.
• AutoInvoice grouping rule: Define the grouping rule to appear by default on imported transaction lines.
• AutoInvoice clearing account: Define an AutoInvoice clearing account, if you intend to enable the Create
clearing option. AutoInvoice puts any difference between the revenue amount and the selling price times the
quantity for a transaction into this account.
How can I manage credit memos with transaction sources?
Special conditions may apply to the creation of transaction sources for credit memos.
Review these considerations for transaction sources assigned to credit memos:
• Define Manual transaction sources for credit memos created by the credit memo request approval process.
• Define credit memo transaction sources to assign to invoice transaction sources using the Credit Transaction
Source field. Use credit memo transaction sources on invoice transaction sources under these conditions:
◦
Number the credit memos created against invoices differently from the invoices they're crediting.
◦
Create a manual credit memo transaction source for credit memo request approvals, when the approved
credit memo amount is greater than the open balance on the invoice. For these transaction sources, set
the Receipt Handling for Credits option to On Account.
• Enable the Copy transaction information flexfield to credit memo option on Manual transaction sources
used for credit memos, to copy the Invoice Transaction Flexfield reference information to the credit memo
crediting the invoice.
• Select the transaction type to assign to the invoice using the Standard Transaction Type field, if the credit
memo transaction source requires invoice transaction types that use natural application only.
What happens if I don't enter an AutoInvoice grouping rule?
Assign the AutoInvoice grouping rule to Imported transaction sources that AutoInvoice uses to group imported
transaction lines.
If you don't assign a grouping rule to an Imported transaction source, AutoInvoice uses the following hierarchy to
determine which rule to use:
1. Grouping rule assigned to the transaction source of the transaction line.
2. Grouping rule assigned to the bill-to customer site profile of the transaction line.
3. Grouping rule assigned to the bill-to customer profile of the transaction line.
4. Grouping rule assigned to Receivables system options.
100

Oracle Fusion Cloud Financials
Implementing Receivables Credit to Cash
Chapter 3
Define Customer Billing Configuration
What happens if I don't create a clearing account?
If you don't use an AutoInvoice clearing account, but you enable the Create clearing option on the transaction source,
the revenue amount must equal (Selling Price * Quantity) for all transactions AutoInvoice processes. AutoInvoice rejects
transaction lines that don't meet this requirement.
Memo Lines
Revenue Accounts and Memo Lines
You can optionally associate a revenue account with a memo line.
If AutoAccounting depends on memo line, Receivables uses the revenue account segment values defined for the
memo line, in combination with the rest of your AutoAccounting structure, to determine the default revenue, freight,
AutoInvoice clearing, tax, unbilled receivable, unearned revenue, and receivable accounts for invoices that include the
memo line.
When you create a debit memo or on-account credit memo with memo lines, Receivables uses the revenue account
from the original receivable item as the credit account. However, when you create debit memo reversals or chargebacks,
Receivables uses instead the revenue flexfield from the original receivable item as the credit account.
Related Topics
•
Debit Memo Reversals
•
AutoAccounting Account Types and Segment Values
FAQs for Memo Lines
When do I use memo lines?
Use memo lines when the item isn't an inventory item. For example, you can define a memo line called Consulting
Services to identify charges for consulting activities. You can assign memo lines to debit memos, on-account credits,
debit memo reversals, chargebacks, and invoices.
How can I use tax memo lines?
You can only use tax memo lines if your tax definition lets you enter manual tax lines on transactions. After you enter a
tax memo line on a transaction, you can specify the amount of tax to assign to the transaction line.
101

Oracle Fusion Cloud Financials
Implementing Receivables Credit to Cash
Chapter 3
Define Customer Billing Configuration
Prepayments
Overview of Prepayments in Receivables
Use Prepayments in Receivables to manage advance payments that you receive from your customers.
You may receive advance payments, for example: against expenses related to a project contract; full or partial payment
against a sales order; a mandatory advance payment for goods and/or services to be delivered on a specified date.
In addition, in some countries the tax authorities require companies to issue a taxable prepayment invoice before or
with any advance payment.
You use the AutoInvoiceImportTemplate and the Import AutoInvoice process to create prepayment invoices from
advance payments from your customers and to apply the prepayment invoices to the final standard invoices.
You can't create, apply, or perform any other transaction activities on prepayment invoices using SOAP, REST API, or the
Receivables Transaction pages ( including Create Transaction and Credit Transaction).
To use Prepayments in Receivables, you must complete these setups:
• Create Prepayment Receivables Activities
• Create Prepayment Transaction Types
• Create Prepayment Transaction Sources
All prepayment activity is against transactions in the ledger currency only. All prepayment accounting activity is
maintained in a separate Prepayment account assigned to the Prepayment Receivables activity for a business unit.
Prepayment accounting doesn't affect your Revenue account.
Create Prepayment Receivables Activities
Use the Manage Receivables Activities page to create a Prepayment Receivables activity for each business unit that will
create and use prepayment invoices.
The Prepayment Receivables activity designates a separate general ledger account for all prepayment distributions. You
can't create prepayment transactions unless a Prepayment Receivables activity is defined for the applicable business
unit.
To create a Prepayment Receivables activity:
1. Navigate to the Manage Receivables Activities page.
2. Click the Plus (+) icon to open the Create Receivables Activity page.
3. In the Business Unit field, select the business unit you want.
4. In the Name and Description fields, enter a name and description that identifies this specific Prepayment
Receivables activity.
5. In the Activity Type field, select Prepayment. This sets the GL Account Source field to Activity GL Account
and read-only. The Activity GL Account value allocates expense or revenue to the Prepayment general ledger
account that you enter in the Activity GL Account field.
6. In the Activity GL Account Source field, enter the account to use to create prepayment invoice distributions.
7. In the Tax Rate Code Source field, select None. This value allocates the entire tax amount to the prepayment
distributions.
8. Save your work.
102

Oracle Fusion Cloud Financials
Implementing Receivables Credit to Cash
Chapter 3
Define Customer Billing Configuration
9. Repeat these steps for each business unit that will create and use prepayment invoices
Create Prepayment Transaction Types
Use the Manage Transaction Types page to create prepayment transaction types.
Create one or more prepayment transaction types with the Transaction Class of Invoice and the Transaction Subclass of
Prepayment.
To create a prepayment transaction type:
1. Navigate to the Manage Transaction Types page.
2. Click the Plus (+) icon to open the Create Transaction Type page.
3. In the Transaction Type Set field, select a reference data set.
4. In the Name and Description fields, enter a name and description that identifies the transaction type as a
prepayment transaction type.
5. In the Transaction Class field, select Invoice.
6. In the Transaction Subclass field, select Prepayment. This sets the Creation Sign field to Positive Sign.
Prepayment invoices can't have a zero or negative transaction or line amount.
7. In the Transaction Status field, select Open.
8. In the From Date field, enter the date from which this transaction type is active.
9. Ensure that the Open Receivable, Post to GL, and Default tax classification code options are enabled.
Note:
When you select the subclass Prepayment, the Natural Application Only option is enabled and set to read-
only. You can't use overapplications on prepayment invoices.
10. Complete the remaining fields according to your requirements.
11. Save your work.
12. Repeat these steps for each transaction type that you want to create for prepayment invoices.
Create Prepayment Transaction Sources
Use the Manage Transaction Sources page to create prepayment transaction sources.
Create one or more prepayment transaction sources to assign to the Import Receivables Transactions Using AutoInvoice
process to both create prepayment invoices and apply prepayment invoices to transactions.
To create a prepayment transaction source:
1. Navigate to the Manage Transaction Sources page.
2. Click the Plus (+) icon to open the Create Transaction Source page.
3. In the Transaction Source Set field, select a reference data set.
4. In the Name and Description fields, enter a name and description that identifies the transaction source as a
prepayment transaction source.
5. In the Type field, select Imported.
6. Ensure that the Action option is enabled.
7. In the From Date field, enter the date from which this transaction source is active.
8. Complete the transaction numbering and document numbering fields according to your requirements.
9. Complete the Receipt Handling for Credits field according to your requirements. If you leave the field blank, the
Import AutoInvoice process creates all credit memos as Incomplete.
10. Don't enter a value in the Standard Transaction Type field. You can only select a Prepayment transaction type
from the Import Receivables Transactions Using AutoInvoice process parameters.
11. In the Invalid Line field, select Reject Invoice.
12. In the Accounting Date in a Closed Period field, select Reject.
13. Complete the Import Information section according to your requirements.
103

Oracle Fusion Cloud Financials
Implementing Receivables Credit to Cash
Chapter 3
Define Customer Billing Configuration
14. Save your work.
15. Repeat these steps for each transaction source that you want to create for prepayment invoices.
Related Topics
•
How AutoInvoice Validates Imported Transactions
How You Create and Apply Prepayments to Transactions
Use AutoInvoice both to generate prepayment invoices and credit memos from advance payments and to apply
prepayment invoices to the applicable final standard invoices.
You create and apply prepayment transactions against the applicable primary ledger and all business units assigned to
this primary ledger. You can only process prepayment transactions in the ledger currency.
You can enable document sequencing on prepayment invoices and credit memos using the Sequencing section of the
Specify Options page of the primary ledger.
Creating a prepayment invoice and applying a prepayment invoice to a final invoice are two different processes. You
can't submit a prepayment invoice and its corresponding final invoice in the same process.
You use the the AutoInvoiceImportTemplate both to prepare and create prepayment invoice lines and to apply existing
prepayment invoice lines to final invoices.
Related Topics
•
Ledger and Legal Entity Document Sequencing in Receivables
•
How AutoInvoice Processes Data During Import
Create Prepayment Invoices
Use the AutoInvoiceImportTemplate to prepare your prepayment invoice lines and upload them to the AutoInvoice
interface tables for import.
Download the AutoInvoiceImportTemplate and populate the template with the prepayment invoice lines from the
advanced payments you have received. After upload to the AutoInvoice interface tables, submit the Import Receivables
Transactions Using AutoInvoice process to create the prepayment invoices.
To create prepayment invoices:
1. Navigate to the File-Based Data Import for Financials guide.
2. In the Table of Contents, click Receivables.
3. Click AutoInvoice Import.
4. In the File Links section, click the link to download the Excel template.
5. Populate the template with the prepayment invoice lines from your customer advanced payments.
6. After you complete the data preparation, click the Generate CSV File button to generate a ZIP file containing
the CSV files.
7. In Scheduled Processes, select and submit the Load Interface File for Import process to load the invoice lines
into the AutoInvoice interface tables:
◦
In the Import Process parameter, select Import AutoInvoice.
◦
In the Data File parameter, select the CSV ZIP file you generated.
8. In Scheduled Processes, select and submit the Import Receivables Transactions Using AutoInvoice process to
create the prepayment invoices:
104

Oracle Fusion Cloud Financials
Implementing Receivables Credit to Cash
Chapter 3
Define Customer Billing Configuration
◦
Select a business unit assigned to the primary ledger, or leave the Business Unit parameter blank to run
the process on all applicable business units.
◦
Select a Prepayment transaction source.
◦
Enter the Default Date.
◦
Select a Prepayment transaction type.
9. After the AutoInvoice Import process completes, navigate to the Manage Transactions page to review the
prepayment transactions.
10. In the Search section of the Manage Transactions page, click the Advanced button.
11. Select one of the required search parameters.
12. Select Yes in the Prepayment field.
13. Click the Search button.
14. Review the prepayment transactions.
Note:
All prepayment transactions are created as Complete. The Incomplete button is disabled on prepayment
transactions.
Apply Prepayment Invoices to Receivables Invoices
Use the AutoInvoiceImportTemplate to prepare existing prepayment invoice lines for application against final invoices
from your customers.
During the prepayment application process, the original accounting and tax lines of the prepayment invoice lines are
reversed, and the outstanding balance of the final invoice is reduced or closed by the amount applied.
To apply prepayment invoices to final invoices:
1. Download the AutoInvoiceImportTemplate.
2. Populate the template with:
◦
Sales invoice lines.
◦
Prepayment lines in negative amounts.
3. If necessary, populate any Additional Line Descriptive Flexfield attributes for any of the prepayment application
lines.
Note:
The combination of the Additional Line Descriptive Flexfield attributes must match exactly the combination
of the Line Transaction Descriptive Flexfield attributes in the prepayment invoice. Otherwise, the AutoInvoice
Import process ends in error.
4. After you complete the data preparation, click the Generate CSV File button to generate a ZIP file containing
the CSV files.
5. Submit the Load Interface File for Import process to load the invoice lines into the AutoInvoice interface tables.
6. Submit the Import Receivables Transactions Using AutoInvoice process to apply the prepayment invoices to the
sales invoices.
Note:
The sales invoice transaction type must be different from the prepayment transaction type.
The accounting for prepayment applications is maintained in the Prepayment account only, and not the Revenue
account. This account maintains the remaining amount due on any open receivables against the customer.
105

Oracle Fusion Cloud Financials
Implementing Receivables Credit to Cash
Chapter 3
Define Customer Billing Configuration
FAQs for Prepayments
How can I use prepayment credit memos?
You can apply a prepayment credit memo to a prepayment invoice or a sales invoice with prepayment applications, or
both.
You can only apply prepayment credit memos in full, and only in the ledger currency.
If you intend to credit both the prepayment invoice and the sales invoice, you must credit the sales invoice with
prepayment applications before you credit the prepayment invoice. The credit memo line amounts must match all line
amounts of the referenced invoice.
Balance Forward Billing
Balance Forward Billing on Customer Accounts and Sites
You can enable and maintain balance forward billing details at the customer account level and customer site level. The
rules governing the interaction between the customer account and customer sites determine what sites are included in
balance forward bills.
Rules for Account and Site Balance Forward Billing
These rules apply to balance forward billing at the account level and site level:
• Account level customer profile values become the default values for the related customer sites when you create
site profiles.
• If balance forward billing is enabled at the account level, you still need to enable balance forward billing on the
related site profiles if you want to include these sites in the account-level balance forward bill.
In the Balance Forward Billing section of site profiles:
◦
Set the Enable option.
◦
In the Bill Level field, select Account.
◦
In the Bill Type field, select the bill type defined at the account level.
• You can define separate balance forward billing details for a particular site. In the Balance Forward Billing
section of site profiles:
◦
Set the Enable option.
◦
In the Bill Level field, select Site.
◦
In the Bill Type field, select the bill type to use for this site.
Once you create a site profile and define separate balance forward billing details, the site profile no longer
references the account profile.
106

Oracle Fusion Cloud Financials
Implementing Receivables Credit to Cash
Chapter 3
Define Customer Billing Configuration
• Balance forward billing definitions at the site level take precedence over balance forward billing definitions at
the account level.
Related Topics
•
Example of Setting Up Balance Forward Billing
•
Overview of Balance Forward Billing
Example of Setting Up Balance Forward Billing
This example demonstrates how to set up balance forward billing for the customer Business World. The example
includes the setup of a balance forward billing cycle, balance forward billing payment terms, and the Business World
customer profile.
This table summarizes key decisions for this scenario.
Decisions to Consider In This Example
What billing cycle is used?
Monthly
What day of the month is used on the
payment terms?
15th
How are balance forward bills
consolidated?
Account level
Can the customer exclude transactions
from the balance forward bill?
Yes
Summary of the Tasks
To generate balance forward bills for a customer:
1. Define a balance forward billing cycle.
2. Define balance forward billing payment terms.
3. Set up the customer profile class for balance forward billing.
4. Assign the profile class to the Business World customer account.
Define a Balance Forward Billing Cycle
Define the balance forward billing cycle to use for this customer:
1. Open the Balance Forward Billing Cycle window.
107

Oracle Fusion Cloud Financials
Implementing Receivables Credit to Cash
Chapter 3
Define Customer Billing Configuration
2. Complete the fields, as shown in this table:
Field Value
Name
Name that identifies this balance forward billing cycle for this customer.
Frequency
Monthly
Repeat Every
1 (every month)
Day of Month
Last Day of Month
Define Balance Forward Billing Payment Terms
Define the balance forward billing payment terms to use for this customer:
1. Open the Create Payment Terms page.
2. Complete the fields, as shown in this table:
Field Value
Name
Name that identifies these payment terms for this customer.
Billing Cycle
The billing cycle you defined in the previous step.
Due By Day of Month
15
Set Up the Customer Profile Class for Balance Forward Billing
Set up the customer profile for Business World for balance forward billing:
1. Open the Create Receivables Customer Profile Class page.
2. Complete the general required fields for the profile class.
3. Complete the fields on the Profile Class tab, as shown in this table:
Field Value
Balance Forward Billing Enable
Enable this option.
Bill Level
Account
108

Oracle Fusion Cloud Financials
Implementing Receivables Credit to Cash
Chapter 3
Define Customer Billing Configuration
Field Value
Bill Type
Detail
Payment Terms
The balance forward billing payment terms you defined in the previous step.
Override terms
Enable this option.
Note: The Override terms option makes available to transactions both non-balance forward billing payment
terms and the one balance forward billing payment terms you defined in the previous step. This lets you
exclude individual transactions from balance forward billing by assigning the transaction non-balance
forward payment terms.
Assign the Profile Class to the Business World Customer Account
Assign the profile class to the Business World account:
1. Open the Edit Account page for Business World.
2. Click the Profile tab.
3. Open the Insert Account Profile page and update the Business World customer account with the profile you
defined in the previous step.
4. Make sure that balance forward billing is enabled at the site profile level for all sites belonging to the customer
account that you want to include in balance forward billing.
Related Topics
•
What's a balance forward billing cycle?
•
How can I change a customer's billing cycle?
•
How Transactions for Balance Forward Billing Are Selected
Balance Forward Billing Email Delivery
Email Delivery of Balance Forward Bills
Deliver balance forward bills by email as PDF attachments to your customer account or site level contacts.
You can email balance forward bills directly to your customers, in addition to the existing capability of printing bills.
Setups for Email Delivery of Balance Forward Bills
You must opt in to enable this feature, and then complete the related setups in Receivables.
Setups for email delivery of balance forward bills include:
• Receivables System Options: Transaction Delivery Using Email
• Customer account and site profiles
109

Oracle Fusion Cloud Financials
Implementing Receivables Credit to Cash
Chapter 3
Define Customer Billing Configuration
• Customer account and site contacts
Updates to Balance Forward Bill Processes
Once you enable and set up Email Delivery of Balance Forward Bills, the following scheduled processes are available for
generating balance forward bills:
• Create Balance Forward Bills: Generate balance forward bills as PDFs and send them by email.
• Deliver Balance Forward Bills: Deliver previously delivered balance forward bills using the designated delivery
method (Paper or Email).
• Print Summary Balance Forward Bills and Print Detailed Balance Forward Bills: Continue to deliver previously
delivered balance forward bills using the delivery method Paper.
The Create Balance Forward Bills process contains the additional parameter Draft Email ID. When you create balance
forward bills in Draft mode (Print Option parameter = Print draft balance forward bills), you can use this parameter to
send the draft bill to the email address of your choice for testing and review.
The Draft Email ID parameter is a free text field, but the email address you enter must conform to the standard format
for email addresses ([email protected]). When you run the Create Balance Forward Bills process with an email address in
this parameter, this email address receives a PDF of all balance forward bills generated by the process run for customers
enabled for email delivery only.
The Create Balance Forward Bills process doesn't generate an error under any of the following conditions:
• Email address you entered doesn't exist.
• Email address you entered exists, but it isn't the one you intended.
• Email recipient inbox is full.
Deliver Balance Forward Bills Process
The Email Delivery of Balance Forward Bills feature enables the Deliver Balance Forward Bills process to deliver previous
balance forward bills (Paper or Email) for the applicable customers.
Use the Deliver Balance Forward Bills process to deliver previously created balance forward bills to customers. Enter
in the Process ID parameter the process ID of a previous run of balance forward bills. The process delivers the bills by
email as a PDF attachment for all customer account and site profiles enabled for email delivery.
How To Set Up for Email Delivery of Balance Forward Bills
If you use Balance Forward Billing, you can enable the delivery of balance forward bills by email as PDF attachments to
your customer account or site level contacts.
You must opt in to enable the Email Delivery of Balance Forward Bills feature. After you opt in, you must complete the
following setups to deliver balance forward bills by email:
• Set up the Transaction Delivery Using Email section in the Billing and Revenue tab of Receivables System
Options.
• Set up the applicable customer account and site profiles for balance forward billing and email delivery.
• Set up contacts for each customer account and site that receives balance forward bills by email.
110

Oracle Fusion Cloud Financials
Implementing Receivables Credit to Cash
Chapter 3
Define Customer Billing Configuration
Receivables System Options
You must complete the fields in the Transaction Delivery Using Email section of Receivables System Options for the
applicable business unit.
If you're already using this section for email delivery of transactions, you can either use the same values for balance
forward bills or update individual fields according to your requirements. For example, you may need to edit the Email
Subject and Email Body fields to accommodate both transactions and balance forward bills.
To set up Receivables System options for email delivery of balance forward bills:
1. In the Create or Edit System Options page for the business unit you want, navigate to the Transaction Delivery
Using Email section of the Billing and Revenue tab.
2. Complete all fields in this section for email delivery of balance forward bills.
These fields are conditionally required. You must enter values in these fields to ensure successful delivery of
balance forward bills by email.
3. Save your work.
Customer Account and Site Profiles
You must set up balance forward billing in the applicable customer account and site profiles, and set a preferred delivery
method of Email.
Note: You can't use XML delivery with the Email Delivery of Balance Forward Bills feature. This feature considers a
preferred delivery method of XML as Paper.
To set up a customer account or site for email delivery of balance forward bills:
1. Navigate to the Edit Account or Edit Site page for the customer account or site you want.
2. Click the Profile History tab.
3. Update or Insert a profile for the customer account or site.
4. In the Balance Forward Billing section of the Profile tab, complete these fields:
◦
Enable: Enable this option to activate balance forward billing.
◦
Bill Level: Select the level at which to generate balance forward bills: Account or Site.
For customer site profiles, select the bill level Account to include transactions belonging to the site in the
account-level balance forward bill. Select the bill level Site to deliver a separate balance forward bill for
transactions belonging to the site.
Note: You must set up an active customer profile at both the customer account and site levels for
balance forward billing to process successfully, no matter which Bill Level setting you use.
◦
Bill Type: Select the format to use for balance forward bills.
5. In the Terms section, select in the Payment Terms field the balance forward billing payment terms to use for
this account or site.
6. In the Invoicing section, select Email in the Preferred Delivery Method field:
◦
If the Bill Level setting in the profile is Account, the Create Balance Forward Bills process references the
Preferred Delivery Method setting in the customer account profile.
◦
If the Bill Level setting in the profile is Site, the Create Balance Forward Bills process references the
Preferred Delivery Method setting in the customer site profile.
111

Oracle Fusion Cloud Financials
Implementing Receivables Credit to Cash
Chapter 3
Define Customer Billing Configuration
7. Complete the profile according to your requirements and save.
Customer Account and Site Contacts
You must set up at least one customer contact for each account or site that receives balance forward bills by email.
To receive balance forward bills by email, a customer contact must have all of these settings:
• Role Type assignment of Contact.
• Active email address.
• Responsibility type assignment of any responsibility other than Collections or Dunning.
Note: If you designate a customer contact as Primary, balance forward bills are still sent by email to all contacts
assigned to the applicable customer account or site.
To set up a contact for a customer account or site for email delivery of balance forward bills:
1. Navigate to the Edit Account or Edit Site page for the customer account or site you want.
2. Click the Communication tab.
3. Click the Edit Contacts button.
4. Click the applicable Plus (+) icon (Create Contact or Add Contact) either to create a new person record for a
contact or to add an existing person record as a contact.
5. Enter the name of the contact and related job information, according to your requirements.
6. In the Role Type field, select Contact.
7. Optionally click the Set Primary Contact icon for this contact.
8. In the Contact Points section, click the Plus (+) icon to open a Create Contact Point window.
9. In the Contact Point Type field, select Email.
10. In the Email field, enter the email address for the contact.
11. In the From Date and To Date fields, enter the dates that this contact point is active for this contact.
12. Optionally click the Set Primary icon for this contact point.
13. In the Responsibilities section, click the Plus (+) icon to create a responsibility row.
14. In the Responsibility Type field, select a responsibility for this contact.
15. Optionally click the Plus (+) icon again to create additional responsibilities for the contact.
For email delivery of balance forward bills, you can assign any responsibilities to a contact except Collections or
Dunning.
16. To set a primary responsibility for the contact, select a responsibility and click the Set Primary Responsibility
icon.
17. Save your work.
Related Topics
•
How Transaction and Statement Delivery Using Email Works
FAQs for Balance Forward Billing
What's a balance forward billing cycle?
The balance forward billing cycle determines the day, week, or month of the year to generate balance forward bills, and
the customers and customer transactions to include in a balance forward bill.
112

Oracle Fusion Cloud Financials
Implementing Receivables Credit to Cash
Chapter 3
Define Customer Billing Configuration
You assign balance forward billing cycles to payment terms, and assign these balance forward billing payment terms to
your customer accounts and sites.
When you run the Create Balance Forward Bill process, you're required to select a balance forward billing cycle. The
Create Balance Forward Bill process selects all payment terms assigned this balance forward billing cycle, and then
selects all customers and customer transactions assigned these payment terms.
A run of the Create Balance Forward Bill process includes all transactions not included on a previous balance forward
bill assigned the payment terms with the selected billing cycle, or a subset of these payment terms as determined by the
other process parameters.
Remit-to Addresses
How You Create a Remit-to Address
Create remit-to addresses to specify on transactions and statements where your customers are to send payment for
their open receivables.
Considerations for remit-to addresses include:
• Receivables system options > Billing and Revenue tab: You can set these Receivables system options as part of
your remit-to address setup:
◦
Print remit-to address option: Enable this option to print remit-to addresses on your customer
statements.
◦
Print home country option: Enable this option to print your home country on transactions and
statements with addresses in that country.
◦
Default Country field: Select the country to assign by default to the remit-to addresses you create.
• Reference data set: Remit-to addresses belong to a reference data set. You can assign remit-to addresses to the
Common set or to business unit-specific sets.
• Receipt from Criteria section: Use this section to assign remit-to addresses by default to the transactions and
statements of specific customer bill-to sites.
Note: A remit-to address is required on all Receivables transactions. If you don't set up default remit-to addresses for
customer transactions, the Remit-to Address field remains blank on the transaction. You can't update and save any
fields on the transaction or complete the transaction without entering a remit-to address. You must ensure that you
enter a remit-to address before updating any other fields on the transaction. In the Edit Transaction page, click the
Show More link, naviagte to the Payment tab, and enter a remit-to address.
To create a remit-to address:
1. Navigate to the Create Remit-to Address page.
2. In the Remit-to Address Set field, select a reference data set.
3. The Country field displays the default country defined in Receivables system options. If necessary, select
another country for the remit-to address.
If you select another country, this may update the required and optional address fields. You may also need to
select the reference data set again.
113

Oracle Fusion Cloud Financials
Implementing Receivables Credit to Cash
Chapter 3
Define Customer Billing Configuration
4. Enter the address details and save. You return to the Manage Remit-to Addresses page.
5. In the Manage Remit-to Addresses page, search for and select the remit-to address you just created.
6. In the Receipt from Criteria section, click the Create (+) icon to open the Create Receipt from Criteria window
for the remit-to address.
Use this window to assign the remit-to address to customer bill-to sites.
7. In the Country field, select the country you want. By default, the remit-to address is assigned to all customer
bill-to sites defined in this country.
8. If necessary, use the State and Postal Code fields to restrict the remit-to address assignment to specific
regions of the country.
9. Save your work.
FAQs for Remit-to Addresses
How can I use remit-to addresses?
The remit-to address lets your customers know where to send payment for their open debit items.
After you create a remit-to address, you can assign it to the bill-to addresses of the customers and customer sites that
you designate by country and, if applicable, by region and postal code range.
If the Print remit-to address Receivables system option is enabled, the remit-to address is printed on the related
customer dunning letters and statements.
How does AutoInvoice validate remit-to addresses?
During the import process, AutoInvoice rejects all invoices for which it can't determine a remit-to address.
In order for AutoInvoice to import an invoice, you must either define a remit-to address for the geographical location of
each applicable bill-to site or define a remit-to address to use as default for one or more locations.
How can I define a default remit-to address?
Create or select a remit-to address, then open the Receipts from Criteria window. Select the country that you want to
assign to this remit-to address.
If you only select a country, then all customer bill-to sites in this country are assigned this remit-to address.
If you want to assign this remit-to address to specific locations within the country, you can optionally select a state or
region within the country, and a range of postal codes.
Why did the country appear?
When you create a remit-to address, a country appears by default if one was defined in Receivables system options. You
can change the default to the applicable country of the remit-to address.
Why do I verify the address?
If you have Trading Community Data Quality installed, you can expose a Verify Address button on the Create and Edit
Remit-to Address pages for applicable countries.
114

Oracle Fusion Cloud Financials
Implementing Receivables Credit to Cash
Chapter 3
Define Customer Billing Configuration
After you enter a remit-to address, use the Verify Address button to confirm that the address is in the Trading
Community Model registry. If the address doesn't exist, Receivables either presents alternative addresses or lets you
optionally add the address you entered to the registry.
FAQs for Salesperson Reference Accounts
What are salesperson reference accounts?
Assign general ledger accounts to your salespersons. When AutoAccounting depends on salesperson, Receivables uses
the account references that you define here to derive the accounts to use on transactions that are assigned a particular
salesperson.
B2B XML
B2B XML Invoicing in Receivables
Send Receivables transactions electronically in XML format to designated customers using the Oracle B2B outbound
service. Oracle B2B is a SOA Suite component that manages the interactions between your enterprise and your
customers.
A customer designated for receiving transactions in XML format is called a trading partner. You set up your customer
trading partners in Oracle B2B to send XML transactions using one of these transmission methods:
• Directly to the customer.
• Using Oracle Supplier Network.
• Using a third-party service.
In Receivables, you must set up the related customer accounts for B2B XML using the Invoicing section of the account
profile. The settings that you use apply to all sites belonging to the customer account.
To set up a customer account for B2B XML invoicing:
1. In the Invoicing section of the Account Profile tab, select XML in the Preferred Delivery Method field.
2. In the B2B Trading Partner Code field, enter the connecting identifier of the trading partner.
If applicable, you can assign the same trading partner code to multiple customer accounts.
CAUTION: This is a required value for XML delivery. If you don't enter the connecting identifier, then you
can't send transactions in XML format to this customer account.
3. Using the Enable for XML Invoicing check boxes, select the transactions that you want to send to this trading
partner in XML format. Receivables selects all eligible transactions whenever you run the XML Invoicing
Program for this customer account.
115

Oracle Fusion Cloud Financials
Implementing Receivables Credit to Cash
Chapter 3
Define Customer Billing Configuration
After you set up your customer accounts for B2B XML invoicing, you can use the XML invoice template to enhance the
information included in the invoice output by mapping Receivables attributes to attributes in the User Area section of
the template.
Once your setup is complete, use the XML Invoicing Program to send customer transactions in XML format. If any
transactions fail during the transmission process, use the Manage Transactions page to review failed transactions and
pursue corrective actions. You can then resend these transactions using the XML Invoicing Program.
Related Topics
•
XML Transactions in Receivables
XML Transactions in Receivables
Use the XML Invoicing process to send Receivables transactions to your customer trading partners.
These restrictions apply to the transactions you send:
• Transactions belong to customer accounts set up for XML invoicing.
• Transactions are complete.
• Transactions have a status of Print Pending.
• Transactions (invoice, credit memo, debit memo, chargeback) are enabled for XML invoicing in the related
customer account profiles.
• Transactions have the printing option on the transaction type set to Print.
New Transactions
Select New Transactions Only in the Transactions Included field to send new transactions in XML format to your
customers. You can process all eligible transactions for all business units and customers, or you can use the available
parameters to limit the transactions processed according to your needs.
Failed Transactions
Transactions can fail to transmit correctly at one of three stages in the transmission process.
These three stages are:
• Receivables process
• SOA process
• B2B process
This table describes the potential errors that can occur at each stage of the B2B XML transmission process:
XML
Process Error Condition Error Notification Corrective Action
Receivables
Customer Account is missing the
B2B trading partner code.
Transaction marked as Failed with
corresponding error reason.
Add the B2B trading partner code
to the appropriate account.
116

Oracle Fusion Cloud Financials
Implementing Receivables Credit to Cash
Chapter 3
Define Customer Billing Configuration
Process Error Condition Error Notification Corrective Action
SOA
Receivables system or server is
down.
Transaction isn't marked because
it wasn't processed. System
error notification only on the EM
console.
System administrator restarts and
reinitiates SOA for the transaction.
SOA
Transformation errors.
Transaction marked as Failed with
corresponding error reason.
System administrator fixes the
transformation errors.
SOA
B2B server is down.
Transaction marked as Failed with
corresponding error reason.
System administrator restarts the
B2B server.
B2B
B2B setup is either incomplete or
incorrect.
Transaction marked as Failed with
corresponding error reason.
B2B administrator fixes the B2B
setup errors.
Related Topics
•
B2B XML Invoicing in Receivables
Set Up Oracle B2B to Send Receivables XML Transactions
Oracle B2B Server is an Oracle SOA Suite component that manages interactions between deploying companies
and trading partners. Oracle Receivables supports an outbound Oracle B2B flow using Oracle B2B Server to send
transactions to customer trading partners in XML format.
The setup of the Oracle B2B flow for Receivables makes use of these existing elements:
• XML Schema document guideline
• OAG-7.2.1-PROCESS_INVOICE_002-OAG_DEF document definition
• Host trading partner MyCompany
To set up Oracle B2B to send Receivables transactions in XML:
• Configure the host and remote trading partners
• Configure agreements between the host and remote trading partners
Configure Trading Partners
Configure your enterprise as the host trading partner, and all of your customers that receive XML documents as remote
trading partners.
To configure trading partners:
1. Log in to the Oracle B2B Server.
2. Navigate to the Administration page.
3. Click the Document tab.
4. Load the OAG-7.2.1-PROCESS_INVOICE_002-OAG_DEF document definition file.
5. Click the Types tab.
117

Oracle Fusion Cloud Financials
Implementing Receivables Credit to Cash
Chapter 3
Define Customer Billing Configuration
6. Add a new Internal Identifier with the name B2B Trading Partner Code.
This name matches the field name on the customer account profile.
7. Navigate to the Partners page.
8. In the Partner section, select the default host partner MyCompany.
9. If necessary, update the default host partner name to reflect your enterprise.
10. Click the Documents tab.
11. Verify that the OAG-7.2.1-PROCESS_INVOICE_002-OAG_DEF document definition is assigned to the host
trading partner.
12. Ensure that the Sender option is enabled.
13. In the Partner section, click the Add icon.
14. Enter the name of a remote trading partner.
15. Select the Internal Identifier Type B2B Trading Partner Code that you previously created and enter the Value
for the identifier.
This is the value that you will enter in the B2B Trading Partner Code field on the customer account profile of
this remote trading partner.
16. Click the Documents tab.
17. Click the Add icon to associate the OAG-7.2.1-PROCESS_INVOICE_002-OAG_DEF document definition with the
remote trading partner.
18. Enable the Receiver option.
19. Click the Channel tab.
20. Define a channel for the remote trading partner.
The channel determines how the XML transaction is delivered to the remote trading partner from B2B: directly;
using the Oracle Supplier Network (OSN), or using a third party service.
If you're communicating using Oracle Supplier Network (OSN), select the Generic Identifier and enter the IP
Address for OSN.
21. Repeat steps 13 to 20 for each remote trading partner.
Configure Agreements
A trading partner agreement defines the terms that enable two trading partners, the sender and the receiver, to
exchange business documents. The agreement identifies the trading partners, trading partner identifiers, document
definitions and channels.
An agreement consists of two trading partners, the host trading partner and one remote trading partner, and represents
one type of business transaction between these partners. For example, if the host trading partner MyCompany and
the remote trading partner ABC Solutions regularly exchange both purchase orders and invoices, then two separate
agreements are needed for each document definition.
To configure agreements between the host and remote trading partners:
1. Log in to the Oracle B2B Server.
2. Navigate to the Partners page.
3. In the Agreement section, click the Add icon to open a new agreement for the host trading partner
MyCompany.
4. Enter the agreement ID and Name.
5. Enter the agreement parameters.
6. Select the Document Definition OAG-7.2.1-PROCESS_INVOICE_002-OAG_DEF for this agreement.
7. Select the remote trading partner to include in this agreement.
118

Oracle Fusion Cloud Financials
Implementing Receivables Credit to Cash
Chapter 3
Define Customer Billing Configuration
8. Select the channel for the remote trading partner.
9. Add identifiers for the remote trading partner.
10. Click Save to save the agreement.
11. Click Validate to validate the agreement.
12. Click Deploy to deploy the agreement.
Deployment is the process of activating an agreement from the design-time repository to the run-time
repository.
13. Repeat steps 3 to 12 for each agreement between the host trading partner and this remote trading partner.
FAQs for B2B XML
Why can't I configure B2B XML on the profile class?
You configure and maintain B2B XML invoicing parameters in the related customer account profile. Customer sites
share the settings of the related customer account.
OAGIS 10.1 XML
Overview of OAGIS 10.1 XML Transaction Delivery for Receivables
Use the Open Applications Group Integration Specification (OAGIS) 10.1 XML format to deliver Receivables transactions
to your customers as XML documents.
XML transaction delivery makes use of the Collaboration Messaging Framework (CMK) to send transactions to
customers and receive confirmation messages from customers.
Receivables OAGIS 10.1 XML provides these capabilities:
• Deliver invoices, credit memos, debit memos, and chargebacks to customers (trading partners) in OAGIS 10.1
XML format using Collaboration Messaging Framework.
• Deliver XML transactions to your trading partners with or without service providers.
• Receive acknowledgment of transaction delivery from customers by means of a Confirmation Business Object
Document (CBOD). The CBOD also uses the OAGIS 10.1 XML format.
• Include user-defined attributes, in addition to the standard mapped attributes, in the XML document.
Receivables supports the inclusion of UserArea extension attributes at the invoice header, invoice line, and
invoice tax line level of OAGIS 10.1 XML transactions.
• Include transaction header level attachments in the OAGIS 10.1 XML delivery.
• Review the XML transaction delivery using Collaboration Messaging Framework.
Use the Feature Opt-in page in Functional Setup Manager (FSM) to enable Receivables Invoice Delivery in Open
Applications Group Integration Specification (OAGIS) 10.1 XML Format.
You also use the same Feature Opt-in to enable Universal Business Language (UBL) 2.1 XML transaction delivery.
119

Oracle Fusion Cloud Financials
Implementing Receivables Credit to Cash
Chapter 3
Define Customer Billing Configuration
You then need to complete the related setups in Receivables and Collaboration Messaging Framework (CMK) to deliver
OAGIS 10.1 or UBL 2.1 XML transactions to customers.
Complete these setups using the related Receivables and Collaboration Messaging Framework setup tasks. If you're
using service providers to deliver XML documents, you can also use the Customer Import FBDI template to import both
the CMK setup required for XML transaction delivery and the related Receivables customer account profile information.
Note: If you're using the existing Receivables XML Invoicing feature through the Service Oriented Architecture (SOA)
business-to-business (B2B) gateway, you should only change over to OAGIS 10.1 XML transaction delivery when your
customers are ready to receive transactions in OAGIS 10.1 XML format. When you do change over, you must redo your
service provider and trading partner setups in Collaboration Messaging Framework.
Related Topics
•
UBL 2.1 XML Transaction Delivery for Receivables
How You Set Up Receivables for OAGIS 10.1 XML Transaction
Delivery
Set up Receivables for OAGIS 10.1 XML transaction delivery, as part of the implementation to enable sending
transactions to customers in OAGIS 10.1 XML format.
Along with completing the setups in Receivables, you must also complete the related setups in Collaboration Messaging
Framework. Once you complete the setups in both products, you can make use of XML transaction delivery.
To set up Receivables for OAGIS 10.1 XML transaction delivery, complete these tasks:
• Set up XML invoicing on customer account profiles.
• Set up an attachment category for XML transactions (optional).
Note: You must first use the Feature Opt-in page in Functional Setup Manager to enable Receivables Invoice Delivery
in Open Applications Group Integration Specification (OAGIS) 10.1 XML Format before completing these setups.
Enabling OAGIS 10.1 XML transaction delivery also enables the Universal Business Language (UBL) 2.1 XML transaction
delivery.
Set Up XML Invoicing on Customer Account Profiles
Set up the Receivables customer account profiles of customers that you intend to define as trading partners for XML
transaction delivery. The settings that you use apply to all sites belonging to the customer account.
To set up a customer account for XML transaction delivery:
1. Navigate to the Billing work area.
2. Select the Manage Customers task.
3. In the Manage Customers page, search for the customer that you want to enable for XML transaction delivery.
4. In the Edit Account page, click the Profile History tab.
5. In the Invoicing section, set the Preferred Delivery Method to XML.
6. Select the Enable for XML Invoicing check boxes for the applicable transactions for this customer: Invoice,
Debit Memo, Chargeback, Credit Memo.
120

Oracle Fusion Cloud Financials
Implementing Receivables Credit to Cash
Chapter 3
Define Customer Billing Configuration
Receivables selects all eligible transactions whenever you run the Generate and Transfer XML Transactions
process for this customer account.
7. Save your work.
8. Repeat steps 3 to 7 for each applicable customer account.
You can optionally enhance XML invoice delivery in the customer profile to limit the delivery of transactions in XML
format to all customer sites belonging to a customer account that don't have a preferred delivery method of Paper,
Email, Portal Upload, or any custom delivery method. You define this enhancement by creating and enabling the
AR_XML_INVOICE_ENHANCED lookup code under the AR_FEATURES lookup type.
To set up for this XML delivery enhancement:
1. Navigate to the Setup and Maintenance work area.
2. Search for the setup task Manage Receivables Lookups.
3. In the Manage Receivables Lookups page, search for the AR_FEATURES lookup type.
4. Enter a new row for the lookup code.
5. In the Lookup Code field, enter AR_XML_INVOICE_ENHANCED.
6. In the Reference Data Set field, select Common Set.
7. Select the Enabled option.
8. In the Meaning field, enter a description of this lookup code.
9. Save your work.
When you run the Generate and Transfer XML Transactions process, the process selects transactions for delivery in XML
format belonging to customer sites of the customer account that don't have a site-level delivery method setting. The
process ignores customer sites with a preferred delivery method setting of Paper, Email, Portal Upload, or any custom
delivery method.
Note: If you create the AR_XML_INVOICE_ENHANCED lookup code but don't select the Enabled option, the Generate
and Transfer XML Transactions process ignores the site-level delivery method settings and selects all transactions for
delivery in XML format belonging to the customer account and its customer sites.
Set Up an Attachment Category for XML Transactions
You can optionally define an attachment category for including transaction header attachments in the XML transaction.
During a run of the Generate and Transfer XML Transactions process, attachments to the transaction associated with
the XML attachment category you define are embedded in the OAGIS 10.1 XML.
To set up an attachment category for XML transactions:
1. Navigate to the Setup and Maintenance work area.
2. Select the Manage Attachment Categories task.
3. In the Manage Attachment Categories page, click the Plus (+) icon to create a new attachment category.
Note: You can also use an existing attachment category.
4. Complete the fields for the XML transaction attachment category. For example:
◦
Category Name: XML_INVOICE
◦
User Name: XML invoice
◦
Description: Attachments embedded in the XML invoice header
121

Oracle Fusion Cloud Financials
Implementing Receivables Credit to Cash
Chapter 3
Define Customer Billing Configuration
5. In the Attachment Entities section, click the Plus (+) icon.
6. In the Entity Name field, enter RA_CUSTOMER_TRX_ALL to associate attachments with the transaction header.
7. Save your work.
8. Select the Manage Receivables Profile Options task.
Now associate the attachment category with the Bill Presentment profile option for printing attachments
(AR_BPA_PRINT_ATTACH_CATEGORY).
9. In the Manage Receivables Profile Options page, search for the AR_BPA_PRINT_ATTACH_CATEGORY profile
option.
10. In the Profile Values section, click the Plus (+) icon.
11. In the Profile Level field, enter Site.
12. In the Profile Value field, enter the name of the attachment category that you defined in step 4.
13. Save your work.
This site profile value allows attachments belonging to the AR_BPA_PRINT_ATTACH_CATEGORY category on
the transaction header to be embedded in the XML transaction.
14. In the Attachments window of Create Transaction pages, use the attachment category that you created and
associated with the AR_BPA_PRINT_ATTACH_CATEGORY profile option to add an attachment intended for
inclusion in an XML transaction.
Related Topics
•
Overview of OAGIS 10.1 XML Transaction Delivery for Receivables
•
How You Set Up Collaboration Messaging for OAGIS 10.1 XML Transaction Delivery
•
UBL 2.1 XML Transaction Delivery for Receivables
How You Set Up Collaboration Messaging for OAGIS 10.1 XML
Transaction Delivery
Set up the Collaboration Messaging Framework for OAGIS 10.1 XML transaction delivery, as part of the implementation
to enable sending Receivables transactions to customers in XML format.
Along with completing the setups in Collaboration Messaging, you must also complete the related setups in
Receivables. Once you complete the setups in both products, you can make use of OAGIS 10.1 XML transaction delivery.
The Collaboration Messaging setup involves enabling Collaboration Messaging for Order to Cash documents, and
creating service providers and trading partners and associating them with trading partner customer accounts.
To set up Collaboration Messaging for XML transaction delivery, complete these tasks:
• Enable collaboration messaging for Receivables.
• Set up service providers.
• Set up B2B trading partners.
• Associate service providers and trading partners with customer accounts.
Note: You must first use the Feature Opt-in page in Functional Setup Manager to enable Receivables Invoice Delivery
in Open Applications Group Integration Specification (OAGIS) 10.1 XML Format before completing these setups.
122

Oracle Fusion Cloud Financials
Implementing Receivables Credit to Cash
Chapter 3
Define Customer Billing Configuration
Enable Collaboration Messaging for Receivables
Configure your outbound message processing and enable the Order to Cash business process.
To enable collaboration messaging for Receivables:
1. Navigate to the Setup and Maintenance work area.
2. Select the Manage Collaboration Messaging Configuration task.
3. In the General Setup tabbed region of the Manage Collaboration Messaging Configuration page, enter your
company identifier in the Global Sender ID field.
This identifier is used by your service providers and trading partners to identify you as the sender of XML
transactions.
4. If you're planning to send attachments with XML transactions, in the Maximum Attachment Size field enter in
megabytes the maximum size of an attachment that can be embedded in an XML transaction.
If the size of an attachment in the transaction header exceeds this limit, the attachment isn't embedded in the
XML transaction delivery.
5. Click the Business Process Setup tab.
6. In the Collaboration Business Process table, check the Enable box for the Order to Cash business process.
7. Save your work.
Set Up Service Providers
Use the Manage Collaboration Messaging Service Providers task to create service providers. Service providers are the
intermediaries that exchange messages between Oracle Applications Cloud and trading partners (customers).
For each service provider, define the delivery method, outbound collaboration message, and inbound collaboration
message for OAGIS 10.1 XML transaction delivery.
Note: If you plan to send XML transactions directly to trading partners without a service provider, skip this task
and complete the tasks to set up B2B trading partners and to associate service providers and trading partners with
customer accounts.
To set up a service provider:
1. Navigate to the Setup and Maintenance work area.
2. Select the Manage Collaboration Messaging Service Providers task.
3. In the Manage Collaboration Messaging Service Providers page, click the Plus (+) icon to open the Create
Collaboration Messaging Service Provider window.
4. In the Name field, enter the name that you want to use for the service provider.
5. In the Provider ID field, enter the identifier for the service provider.
6. In the ID Type field, select Generic.
7. In the Description field, you can enter a description that identifies this service provider for XML transaction
delivery.
8. Click the Save and Close button.
9. In the Edit Collaboration Messaging Service Provider page, click the Delivery Methods tab.
10. Click the Plus (+) icon to open a delivery method row.
11. In the Name field, enter the name of the XML message delivery method, according to your agreement with the
service provider.
12. In the Delivery Method Type field:
123

Oracle Fusion Cloud Financials
Implementing Receivables Credit to Cash
Chapter 3
Define Customer Billing Configuration
◦
Select Web Service for OAGIS 10.1 XML.
◦
Select B2B Adapter or Email for UBL 2.1 XML.
13. In the Service Name field, select CollaborationMessage.Process for synchronous service or
CollaborationMessage.ProcessAsync for asynchronous service.
14. Complete the remaining fields for the delivery method according to your business requirements.
15. Click the Outbound Collaboration Messages tab.
16. Click the Plus (+) icon to open an outbound collaboration messages row.
17. In the Name field, enter a name to identify this outbound collaboration message, for example, AR_Invoice.
18. In the Collaboration Message field, select:
◦
OAGIS_10.1_PROCESS_INVOICE_COLLAB_MSG_OUT for outbound OAGIS XML transaction delivery.
◦
UBL_2.1_INVOICE_OUT for outbound UBL 2.1 XML transaction delivery.
19. In the Status field, select Active.
20. In the Delivery Method Name field, enter the XML message delivery method you defined in the Delivery
Methods tab.
21. If your service provider has agreed to send an acknowledgment in OAGIS 10.1 CBOD format for XML
transactions received, click the Inbound Collaboration Messages tab to define the inbound collaboration
message.
22. Click the Plus (+) icon to open an inbound collaboration messages row.
23. In the Name field, enter a name to identify the inbound collaboration message, for example, AR_CBOD.
24. In the Collaboration Message field, select OAGIS_10.1_CONFIRM_BOD_COLLAB_MSG_IN.
25. In the Status field, select Active.
26. Click the Outbound Collaboration Messages tab again.
27. In the Status field, select Inactive.
This lets you edit the fields in the outbound collaboration message.
28. In the Confirmation Message Name field enter the name of the CBOD message that you just defined.
This associates the inbound CBOD message with the outbound transaction message to receive
acknowledgment of the XML transaction.
29. In the Status field, select Active.
30. Save your work.
Set Up B2B Trading Partners
Trading partners are the customers that you designate to receive Receivables transactions in XML format. Each trading
partner is required to have a trading partner identifier, known to you and to your service provider. This identifier is
included in the XML message and is used by the service provider to identify the trading partner receiving the XML
document.
You must also set up the Receivables customer account profile for each customer that you intend to define as a trading
partner for XML transaction delivery.
After you create the trading partner, you must associate the outbound collaboration message and inbound CBOD
collaboration message that you defined for the service provider with the trading partner.
To set up a trading partner:
1. Navigate to the Collaboration Messaging work area.
2. Select the Manage B2B Trading Partners task.
3. In the Manage B2B Trading Partners page, click the Plus (+) icon to open the Create Trading Partner window.
124

Oracle Fusion Cloud Financials
Implementing Receivables Credit to Cash
Chapter 3
Define Customer Billing Configuration
4. In the Service Provider field, select the service provider to use for this trading partner for XML delivery.
If you plan to send XML transactions to the trading partner directly without using a service provider, select
None.
5. In the Trading Partner ID field, enter the identifier for the trading partner.
6. In the Partner ID Type field, select the category of the trading partner identifier.
Valid values are: D-U-N-S, Generic (if you use the customer account number to identify the trading partner),
GLN, MISC, PHONE, TAXID, Name (if you use the customer account name to identify the trading partner).
7. Click the Save and Close button.
8. In the Collaboration Documents for Service Provider section of the Edit Trading Partner page, enter in the
Documents column the outbound collaboration message and inbound CBOD collaboration message for this
service provider.
9. Save your work.
Associate Service Providers and Trading Partners with Customer Accounts
After setting up your service providers and trading partners, associate both the service provider and trading partner to
the related customer account.
If you plan to send XML transactions to the trading partner directly without using a service provider, you must still
associate the service provider value None with the related customer account.
To associate a service provider and trading partner to a customer account:
1. Navigate to the Collaboration Messaging work area.
2. Select the Manage Customer Account Collaboration Configuration task.
3. In the Manage Customer Account Collaboration Configuration page, search for the customer account you want.
4. Select the customer account and click the Edit Collaboration Configuration button.
5. In the Associated Service Providers section of the Edit Customer Account Collaboration Configuration page,
click the Plus (+) icon to open a service provider row.
6. Enter the service provider and the related trading partner ID. This associates the service provider and trading
partner with the customer account.
7. In the Collaboration Documents for Service Provider section, click the Plus (+) icon to open a collaboration
documents row.
8. In the Document field, enter the outbound collaboration message associated with the service provider.
You don't need to enter the inbound CBOD collaboration message, because it's already associated with the
service provider.
9. In the Associated Status field, select Enabled.
10. Save your work.
Related Topics
•
How You Set Up Receivables for OAGIS 10.1 XML Transaction Delivery
Import Setup Data for OAGIS 10.1 XML Transaction Delivery Using
the Customer Import FBDI
Use the Customer Import FBDI (File-Based Data Import) to complete certain setups for OAGIS 10.1 XML transaction
delivery.
125

Oracle Fusion Cloud Financials
Implementing Receivables Credit to Cash
Chapter 3
Define Customer Billing Configuration
You can use the RA_CUSTOMER_PROFILES_INT_ALL worksheet of the Customer Import Template to complete these
setups in Collaboration Messaging Framework and in Receivables:
• Collaboration Messaging: B2B trading partners.
• Collaboration Messaging: Customer account collaboration configuration.
• Receivables: Customer account profiles. You can either update an existing customer account profile or create a
new customer account profile.
The data in this worksheet is imported into the RA_CUSTOMER_PROFILES_INT_ALL interface table for transfer to
Receivables.
Note: You can only use the Customer Import FBDI to import setup data for OAGIS 10.1 XML transaction delivery if
you're using a service provider to send XML documents.
Before you can import setup data using the Customer Import Template, you must complete these tasks:
• Use the Feature Opt-in page in Functional Setup Manager to enable the Receivables Invoice Delivery in Open
Applications Group Integration Specification (OAGIS) 10.1 XML Format feature.
• Use the Manage Collaboration Messaging Service Providers task to create service providers for XML
transaction delivery.
To import setup data for XML transaction delivery:
1. Download the Customer Import Template.
2. Click the RA_CUSTOMER_PROFILES_INT_ALL tab.
The RA_CUSTOMER_PROFILES_INT_ALL worksheet displays the columns for Receivables customer account
profiles. The Collaboration Messaging columns are hidden by default.
3. Display the Collaboration Messaging columns:
a. Highlight the XML Invoicing for Credit Memo column and the next column.
b. Right-click to display the Collaboration Messaging columns.
4. Complete the Collaboration Messaging columns:
a. Enable Collaboration Messaging Configuration: Select Y to import Collaboration Messaging setup data
for the customer account.
b. Service Provider Name: Enter the name of the service provider that you defined using the Manage
Collaboration Messaging Service Providers task.
c. Trading Partner ID: Enter the code that identifies the customer account as a trading partner to receive
XML transactions.
d. Trading Partner ID Type: Select the category of the trading partner identifier.
Valid values are: D-U-N-S, Generic (if you use the customer account number to identify the trading
partner), GLN, MISC, PHONE, TAXID, Name (if you use the customer account name to identify the trading
partner).
e. Receivables Outbound XML Transaction Document: Select Y to indicate that the trading partner is
enabled to receive Receivables transactions in XML format.
f. Receivables Inbound Confirmation Document: Select Y to indicate that the trading partner is enabled
to send back a confirmation BOD after receiving an XML transaction.
5. Complete the Receivables customer account profile columns according to your requirements.
6. Submit the Data Import Batch to import the Receivables and Collaboration Messaging setup data into the
corresponding tables.
126

Oracle Fusion Cloud Financials
Implementing Receivables Credit to Cash
Chapter 3
Define Customer Billing Configuration
Related Topics
•
How You Set Up Collaboration Messaging for OAGIS 10.1 XML Transaction Delivery
How You Add User-Defined Attributes to OAGIS 10.1 XML
Receivables Transactions
Add and maintain user-defined attributes at the invoice header, invoice line, and invoice tax line level of OAGIS 10.1 XML
Receivables transactions.
OAGIS 10.1 XML provides many standard attributes for including information related to a transaction, such as purchase
orders, shipping information, inventory details, and accounting. You can include attributes not mapped in and with no
standard tag available in OAGIS 10.1 XML, by adding the attributes to the UserArea extension of OAGIS 10.1.
Prepare User-Defined Attributes
You use public APIs to insert and process user-defined attributes in XML transactions.
The public APIs include:
• arp_util.insert_ar_extension_attributes: Use the public API arp_util.insert_ar_extension_attributes to create and
load user-defined attributes into the AR_EXTENSION_ATTRIBUTES table.
• arp_util.update_ar_extension_attributes: Use the public API arp_util.update_ar_extension_attributes
to update the ATTRIBUTE_NAME and ATTRIBUTE_VALUE of user-defined attributes already in
AR_EXTENSION_ATTRIBUTES table.
• arp_util.update_ready_for_xml_flag: Use the public API arp_util.update_ready_for_xml_flag to set
RA_CUSTOMER_TRX_ALL.READY_FOR_XML_DELIVERY to Y in the Load Extension Attributes for XML
Transactions BIP report. The signature of this API is available in the delivered data model for the BIP report
process.
Use these APIs in the PL/SQL code you write in the anonymous code block of the delivered Load Extension Attributes
for XML Transactions BIP data model. The Load Extension Attributes for XML Transactions BIP report process runs as
part of the Generate and Transfer XML Transactions process.
The extension attributes for Receivables transactions are computed and loaded into the AR_EXTENSION_ATTRIBUTES
table during XML creation and delivery, once you configure the Load Extension Attributes for XML Transactions BIP
data model to compute and load extension attributes using the API arp_util.insert_ar_extension_attributes. The API
arp_util.update_ready_for_xml_flag sets RA_CUSTOMER_TRX_ALL.READY_FOR_XML_DELIVERY to Y.
Any errors encountered during the loading of extension attributes into the AR_EXTENSION_ATTRIBUTES table appear
in the report output of the Load Extension Attributes for XML Transactions BIP process.
To add user-defined attributes to OAGIS 10.1 XML transactions, complete these steps:
1. Log in to Oracle BI Publisher Enterprise using the xml p server URL for a user with the BI Administrator Role.
2. Navigate to the Data Models folder in the BI Publisher Enterprise Catalog.
3. Select the Load Extension Attributes for XML Transactions data model.
4. In the Diagram tab, click the gear icon and select Edit Data Set.
5. In the Edit Data Set window, complete the required fields.
127

Oracle Fusion Cloud Financials
Implementing Receivables Credit to Cash
Chapter 3
Define Customer Billing Configuration
6. In the SQL Query section, write your PL/SQL code to compute and load the extension attributes for your
transactions.
7. Ensure that your PL/SQL code sets RA_CUSTOMER_TRX_ALL.READY_FOR_XML_DELIVERY
to Y for transactions after the extension attributes are inserted. The API to set this is
arp_util.update_ready_for_xml_flag.
8. Save your work.
When you have finished defining your extension attributes and completed creating the Receivables transactions to
deliver in XML format, run the Generate and Transfer XML Transactions process to deliver these transactions.
If RA_CUSTOMER_TRX_ALL.READY_FOR_XML_DELIVERY isn't set to Y by the Load Extension Attributes for XML
Transactions process, the process marks the XML Delivery Status of the transactions as Delivery Failed. Review the
report output of the BIP process for errors encountered while inserting extension attributes for transactions that didn't
have READY_FOR_XML_DELIVERY set to Y.
API Signatures
The signatures of the APIs are available in the delivered data model for the Load Extension Attributes for XML
Transactions BIP report process.
The signature of the API arp_util.insert_ar_extension_attributes to insert user-defined attributes into the
AR_EXTENSION_ATTRIBUTES table is as follows:
PROCEDURE insert_ar_extension_attributes(extension_attr_tbl IN ARP_UTIL.EXTENSION_ATTR_TBL_TYPE,
x_msg_count OUT NOCOPY NUMBER,
x_msg_data OUT NOCOPY VARCHAR2,
x_return_status OUT NOCOPY VARCHAR2);
In this case EXTENSION_ATTR_TBL_TYPE is a PL/SQL table of the EXTENSION_ATTRIBUTE_RECORD record type. The
definition of the EXTENSION_ATTRIBUTE_RECORD record type is as follows:
TYPE EXTENSION_ATTRIBUTE_RECORD IS RECORD(EXTN_ENTITY_ID AR_EXTENSION_ATTRIBUTES.EXTN_ENTITY_ID
%type, ASSOCIATED_EXTN_ENTITY_ID1 AR_EXTENSION_ATTRIBUTES.ASSOCIATED_EXTN_ENTITY_ID1%type,
ASSOCIATED_EXTN_ENTITY_ID2 AR_EXTENSION_ATTRIBUTES.ASSOCIATED_EXTN_ENTITY_ID2%type,ENTITY_TYPE_CODE
AR_EXTENSION_ATTRIBUTES.ENTITY_TYPE_CODE%type,PROCESS_TYPE_CODE AR_EXTENSION_ATTRIBUTES.PROCESS_TYPE_CODE
%type,ATTRIBUTE_NAME AR_EXTENSION_ATTRIBUTES.ATTRIBUTE_NAME%type,ATTRIBUTE_VALUE
AR_EXTENSION_ATTRIBUTES.ATTRIBUTE_VALUE%type);
The signature of the API arp_util.update_ar_extension_attributes to update ATTRIBUTE_NAME and ATTRIBUTE_VALUE
of the user-defined attributes already in the AR_EXTENSION_ATTRIBUTES table is as follows:
PROCEDURE update_ar_extension_attributes(extension_attr_tbl IN ARP_UTIL.EXT_ATTR_TBL_FR_UPDATE,
x_msg_count OUT NOCOPY NUMBER,
x_msg_data OUT NOCOPY VARCHAR2,
x_return_status OUT NOCOPY VARCHAR2);
In this case EXT_ATTR_TBL_FR_UPDATE is a PL/SQL table of the EXT_ATTR_RECORD_FR_UPDATE record type. The
definition of the EXT_ATTR_RECORD_FR_UPDATE record type is as follows:
TYPE EXT_ATTR_RECORD_FR_UPDATE IS RECORD(EXTN_ENTITY_ID AR_EXTENSION_ATTRIBUTES.EXTN_ENTITY_ID
%type, ENTITY_TYPE_CODE AR_EXTENSION_ATTRIBUTES.ENTITY_TYPE_CODE%type, PROCESS_TYPE_CODE
AR_EXTENSION_ATTRIBUTES.PROCESS_TYPE_CODE%type, ATTRIBUTE_NAME AR_EXTENSION_ATTRIBUTES.ATTRIBUTE_NAME
%type, NEW_ATTRIBUTE_NAME AR_EXTENSION_ATTRIBUTES.ATTRIBUTE_NAME%type, NEW_ATTRIBUTE_VALUE
AR_EXTENSION_ATTRIBUTES.ATTRIBUTE_VALUE%type);
128

Oracle Fusion Cloud Financials
Implementing Receivables Credit to Cash
Chapter 3
Define Customer Billing Configuration
The signature of the API arp_util.update_ready_for_xml_flag to update READY_FOR_XML_DELIVERY_FLAG in the
RA_CUSTOMER_TRX_ALL table is as follows:
PROCEDURE update_ready_for_xml_flag(p_customer_trx_id IN NUMBER,
p_xml_ready_flag IN VARCHAR2,
x_msg_count OUT NOCOPY NUMBER,
x_msg_data OUT NOCOPY VARCHAR2,
x_return_status OUT NOCOPY VARCHAR2);
OAGIS 10.1 XML Delivery Errors
After you run the Generate and Transfer XML Transactions process to deliver transactions in OAGIS 10.1 XML format,
review the status of your XML transaction deliveries. If necessary, take corrective actions on any transactions that
weren't successfully delivered.
XML Transaction Delivery Errors
Use the Manage Transactions page to review transactions delivered in XML format. Use Collaboration Messaging to
review and correct any transactions with the XML delivery status Processing Error or Delivery Failed.
• Use the Manage Undelivered Collaboration Messages page to review the error details of transactions with the
XML delivery status Processing Error.
• Use the Manage Failed Collaboration Messages page to review the error details of transactions with the XML
delivery status Delivery Failed.
Note: If a Receivables XML transaction remains in the Delivery In Progress status for more than two hours, the
status of the transaction is updated to Delivery Failed by the next run of the Generate and Transfer XML Transactions
process. You can reprocess XML transactions marked as Delivery Failed by the running the Generate and Transfer
XML Transactions process with the Transactions Included parameter set to Failed Transactions.
Inbound CBOD Collaboration Message
The inbound CBOD collaboration message returns an acknowledgment code of Success, Error, or Other. This
acknowledgment code appears in the XML Delivery Status column of the Manage Transactions page.
The CBOD acknowledgment codes appear in the XML Delivery Status column in this way:
• Document Received corresponds to Success.
• Document Not Received corresponds to Error.
• Unknown Acknowledgment Code corresponds to Other.
If a customer trading partner wants to send a status code other than one of these three, you can map customer codes to
one of the three statuses using the Manage Confirmation Codes page of the Manage B2B Trading Partners task in the
Collaboration Messaging work area.
129

Oracle Fusion Cloud Financials
Implementing Receivables Credit to Cash
Chapter 3
Define Customer Billing Configuration
Note: Collaboration Messaging provides the CollaborationMessageService, which service providers and trading
partners can use to send the CBOD acknowledgment. You can access the details of the CollaborationMessageService
using the available URL.
Review Errors in XML Transaction Delivery
To review errors in XML delivery:
1. Navigate to the Manage Transactions page.
2. Search for transactions with the Delivery Method field set to XML.
3. Scroll across to expose the Ready for XML Delivery and XML Delivery Status columns.
4. If the XML Delivery Status column for an XML transaction displays Processing Error or Delivery Failed, use
Collaboration Messaging to investigate the cause of the failure.
5. Navigate to the Collaboration Messaging work area.
6. If the status is Processing Error, navigate to the Manage Undelivered Collaboration Messages page.
You can either reprocess these transactions from the Manage Undelivered Collaboration Messages page or set
them to Delivery Failed by canceling the transactions.
7. If the status is Delivery Failed, navigate to the Manage Failed Collaboration Messages page.
You can reprocess these transactions with another run of the Generate and Transfer XML Transactions process,
setting the Transactions Included parameter to Failed Transactions.
Correct Errors in XML Transaction Delivery
Review and correct outbound processing, document retrieval, and inbound processing errors using the Manage Failed
Collaboration Messages and Manage Undelivered Collaboration Messages tasks.
To review and correct errors in XML delivery:
1. Navigate to the Collaboration Messaging work area.
2. Open either the Manage Failed Collaboration Messages page or the Manage Undelivered Collaboration
Messages page.
3. Search for the XML transaction you want.
4. In the Messages section, review the Error Type and Error Subtype columns:
◦
Error Type displays the category of delivery error: Outbound Processing Error, Document Retrieval, or
Inbound Processing Error.
◦
Error Subtype displays the specific delivery error.
This table displays for each Error Type and Error Subtype the corrective action to use:
Error Type Error Subtype Corrective Action
Outbound Processing Error
Collaboration Messaging Framework is disabled
1. Navigate to Setup and Maintenance.
2. Open the Manage Collaboration
Messaging Configuration page.
3. Enable collaboration messaging for the
Order to Cash business process.
4. Rerun the Generate and Transfer
XML Transactions process with the
Transactions Included parameter set to
Failed Transactions.
130

Oracle Fusion Cloud Financials
Implementing Receivables Credit to Cash
Chapter 3
Define Customer Billing Configuration
Error Type Error Subtype Corrective Action
Outbound Processing Error
Application Partner Document status is
Disabled
1. Navigate to the Collaboration Messaging
Framework work area.
2. Open the Manage Customer Account
Collaboration Configuration page and
search for the customer account.
3. Set the Association Status to Enabled for
the PROCESS_INVOICE_OUT document.
4. Rerun the Generate and Transfer
XML Transactions process with the
Transactions Included parameter set to
Failed Transactions.
Outbound Processing Error
External Partner Document not found
1. Navigate to the Collaboration Messaging
Framework work area.
2. Open the Manage B2B Trading Partners
page and search for the trading partner.
3. Define the PROCESS_INVOICE_OUT
document for this trading partner.
4. Rerun the Generate and Transfer
XML Transactions process with the
Transactions Included parameter set to
Failed Transactions.
Outbound Processing Error
External Partner Message not found
1. Navigate to the Collaboration Messaging
Framework work area.
2. Open the Manage B2B Trading Partners
page and search for the trading partner.
3. Define the PROCESS_INVOICE_COLLAB_
MSG_OUT message for this trading
partner.
4. Rerun the Generate and Transfer
XML Transactions process with the
Transactions Included parameter set to
Failed Transactions.
Outbound Processing Error
Application Partner Document status is Hold
1. Navigate to the Collaboration Messaging
Framework work area.
2. Open the Manage Customer Account
Collaboration Configuration page and
search for the customer account.
3. Set the Association Status to Enabled for
the PROCESS_INVOICE_OUT document.
4. Open the Manage Undelivered
Collaboration Messages page and search
for the XML transaction.
5. Reprocess the XML transaction.
Outbound Processing Error
External Service Invocation Failure
1. Navigate to the Collaboration Messaging
Framework work area.
2. Open the Manage Undelivered
Collaboration Messages page and search
for the XML transaction.
3. Review the error description and fix the
Web service URL, if this is the reason for
the error.
4. Reprocess the XML transaction.
Outbound Processing Error
Unexpected error
1. Navigate to the Collaboration Messaging
Framework work area.
131

Oracle Fusion Cloud Financials
Implementing Receivables Credit to Cash
Chapter 3
Define Customer Billing Configuration
Error Type Error Subtype Corrective Action
2. Open the Manage Undelivered
Collaboration Messages page and search
for the XML transaction.
3. Review the error description and fix the
reason for the error.
4. Reprocess the XML transaction.
Outbound Processing Error
External Partner Document status not Active
1. Navigate to the Collaboration Messaging
Framework work area.
2. Open the Manage B2B Trading Partners
page and search for the trading partner.
3. Set the PROCESS_INVOICE_OUT
document status to Active for this trading
partner.
4. Open the Manage Undelivered
Collaboration Messages page and search
for the XML transaction.
5. Reprocess the XML transaction.
Outbound Processing Error
External Partner Message status not Active
1. Navigate to the Collaboration Messaging
Framework work area.
2. Open the Manage Collaboration
Messaging Service Providers page and
search for the service provider.
3. Set the PROCESS_INVOICE_COLLAB_
MSG_OUT message status to Active for
this service provider.
4. Open the Manage Undelivered
Collaboration Messages page and search
for the XML transaction.
5. Reprocess the XML transaction.
Outbound Processing Error
Application Service Invocation Failure
1. Navigate to the Collaboration Messaging
Framework work area.
2. Open the Manage Undelivered
Collaboration Messages page and search
for the XML transaction.
3. Reprocess the XML transaction.
Document Retrieval
Application Partner Document not found
1. Navigate to the Collaboration Messaging
Framework work area.
2. Open the Manage Customer Account
Collaboration Configuration page and
search for the customer account.
3. Associate the PROCESS_INVOICE_OUT
document to the customer account.
4. Rerun the Generate and Transfer
XML Transactions process with the
Transactions Included parameter set to
Failed Transactions.
Document Retrieval
Application Query returned no records
Rerun the Generate and Transfer XML
Transactions process with the Transactions
Included parameter set to Failed Transactions.
Inbound Processing Error
Setup validation failure
1. Navigate to the Collaboration Messaging
Framework work area.
132

Oracle Fusion Cloud Financials
Implementing Receivables Credit to Cash
Chapter 3
Define Customer Billing Configuration
Error Type Error Subtype Corrective Action
2. Open the Manage Collaboration
Messaging Service Providers page and
search for the service provider.
3. Define the CONFIRM_BOD_COLLAB_
MSG_IN message and associate it to the
PROCESS_INVOICE_COLLAB_MSG_OUT
message for this service provider.
Inbound Processing Error
Unidentified Message Type
1. Ensure that the type in the
BusinessObjectDocument tag of the
CBOD XML sent by the external partner is
ConfirmBODType.
2. The existing document can't be
reprocessed. The inbound CBOD needs to
be re-sent by the external partner.
UBL 2.1 XML
UBL 2.1 XML Transaction Delivery for Receivables
Use the Universal Business Language (UBL) 2.1 XML format to deliver Receivables transactions to your customers as
XML documents.
The UBL 2.1 format is now required for business-to-government electronic invoicing in certain countries.
As with OAGIS 10.1, the UBL 2.1 XML transaction delivery makes use of the Collaboration Messaging Framework (CMK) to
send transactions to customers and receive confirmation messages from customers.
How You Configure the Universal Business Language (UBL) 2.1 XML Format
To use UBL 2.1 XML transaction delivery, you must enable the Receivables Invoice Delivery in Open Applications Group
Integration Specification (OAGIS) 10.1 XML Format feature in the Feature Opt-in page in Functional Setup Manager. The
Universal Business Language (UBL) 2.1 format feature is then enabled by default.
You must complete all of the required setups for OAGIS 10.1 XML transaction delivery, but with the following
modifications and restrictions to use UBL 2.1 XML:
• In the Manage Collaboration Messaging Service Providers task, the supported delivery method types in CMK
for UBL 2.1 XML are B2B Adapter and Email.
• In the Manage Collaboration Messaging Service Providers task, the outbound collaboration message definition
in CMK for UBL 2.1 XML is UBL_2.1_INVOICE_OUT.
• You can add additional attributes to the UBL 2.1 XML transaction using the User-Defined Attributes of the
Receivables XML feature.
You map additional attributes to the UBL 2.1 XML transaction by modifying the delivered UBL 2.1 XSLT using the
Manage Collaboration Message Definitions task, available from the Collaboration Messaging Framework work
area.
133

Oracle Fusion Cloud Financials
Implementing Receivables Credit to Cash
Chapter 3
Define Customer Billing Configuration
Note: If you want to deliver UBL 2.1 XML transactions using any delivery method other than those supported by CMK,
or if you need to add certificates and signatures to the UBL 2.1 transaction, you must use a third party service provider.
XML UBL 2.1 Transaction Delivery and Final Printing
Generate and send XML transactions in UBL 2.1 format for review and approval by business partners and tax authorities
before printing final transactions.
Use XML transaction generation and delivery for both your trading partners and tax authorities. For example:
• Provide trading partners with XML invoices and credit memos to contribute to a transparent view of financial
transactions ahead of final invoicing. Partners can confirm the transaction details or suggest updates.
• Generate XML invoices for review by the relevant tax authority. The tax authority can confirm tax compliance
and, if necessary, indicate essential data that must be added to the final invoice.
XML UBL 2.1 transaction generation and delivery is configured at the legal entity level, and the transactions are
submitted using the Generate and Transfer XML Transactions process. The XML transaction is delivered using the
message service in Collaboration Messaging Framework.
This process runs independently of transaction printing, without submitting the Print Receivables Transaction process
and without accessing the Preferred Delivery Method settings in the customer account and site profiles.
After receiving and incorporating any review comments from the XML transaction delivery, you run the Print
Receivables Transaction process to print and deliver final transactions in PDF format to your business partners and tax
authorities.
Collaboration Messaging Framework manages the message exchange of XML transactions between Oracle Receivables
and your trading partners.
To set up Collaboration Messaging Framework for XML generation and delivery:
• Enable collaboration messaging for Receivables.
• Set up service providers.
• Set up trading partners.
• Set up the message exchange between Oracle Cloud Applications and trading partners.
A successful run of the process generates the extract file and the UBL 2.1 XML transactions. Use the Collaboration
Messaging pages to review and correct any failed and undelivered transactions.
To generate XML transactions for review before final printing, you must complete these steps in Receivables:
• Configure the applicable legal entity for XML transaction generation and delivery.
• Define XML transaction delivery statuses as lookup codes.
• Prepare Receivables transactions and customer accounts.
Related Topics
•
How You Set Up Collaboration Messaging for OAGIS 10.1 XML Transaction Delivery
134

Oracle Fusion Cloud Financials
Implementing Receivables Credit to Cash
Chapter 3
Define Customer Billing Configuration
Configure the Legal Entity for XML UBL 2.1 Transaction Delivery
Configure one or more legal entities for generation and delivery of XML UBL 2.1 transactions.
The legal entities you configure must be assigned to the business unit used to create Receivables transactions. You can
only create and deliver XML UBL 2.1 transactions under the legal entities configured for XML delivery.
In the Preferred Electronic Invoice Delivery Method descriptive flexfield of the applicable legal entity, you assign the
value XML delivery along with PDF generation. This value enables XML transaction generation and delivery under
this legal entity.
Note: The Preferred Electronic Invoice Delivery Method descriptive flexfield is configured using the descriptive
flexfield column XLE_ENTITY_PROFILES.LE_INFORMATION16. You can't use this column for any other purpose. If this
column is customized, the XML transaction generation and delivery will fail.
Don't set up customer account profiles belonging to this legal entity with a Preferred Delivery Method of XML. The XML
transaction delivery and review process doesn't access customer account profiles.
To enable a legal entity for XML transaction generation and delivery:
1. Navigate to the Manage Legal Entity Financial Information page.
2. Search for and select the Legal Entity you want to open the Edit Legal Entity page.
3. In the Preferred Electronic Invoice Delivery Method field, select XML delivery along with PDF generation.
4. Save your work.
5. If necessary, repeat these steps for any other legal entity that will host XML transaction delivery and review.
Define XML UBL 2.1 Transaction Delivery Statuses
After transaction delivery, you can review the status of XML UBL 2.1 transactions in the XML Delivery Status column of
the Manage Transactions page.
The statuses in this column are defined as lookup codes under the XML_DELIVERY_STATUS lookup type. For example,
AP (Accepted) or CA (Conditionally Accepted).
To deliver XML transactions and to enable final print and delivery of transactions in PDF format that were
successfully delivered as XML transactions, you must first define the same successful status or statuses under
the ORA_AR_XML_STATUS_FOR_PRINTING lookup type. The statuses under this lookup type confirm that XML
transactions successfully delivered are also eligible for final printing.
If lookup codes are not configured under ORA_AR_XML_STATUS_FOR_PRINTING, then the Generate and Transfer XML
Transactions process will end in error.
To define XML transaction statuses for final printing:
1. Navigate to the Manage Receivables Lookups page.
2. In the Search section, enter XML_DELIVERY_STATUS in the Lookup Type field and click the Search button.
3. Review the lookup codes with successful statuses under the XML_DELIVERY_STATUS lookup type.
4. In the Search section, enter ORA_AR_XML_STATUS_FOR_PRINTING in the Lookup Type field and click the
Search button.
5. In the Lookup Code section, click the Plus (+) icon to open a new row.
6. In the Lookup Code field, enter a lookup code with a successful status to match a lookup code belonging to the
XML_DELIVERY_STATUS lookup type.
7. In the Reference Data Set field, select the same reference data set as the XML_DELIVERY_STATUS lookup type.
8. Ensure that the Enabled option is selected.
9. In the Start Date field, enter the date from which the lookup code is active.
10. In the Meaning field, enter the same meaning as the corresponding XML_DELIVERY_STATUS lookup code.
135

Oracle Fusion Cloud Financials
Implementing Receivables Credit to Cash
Chapter 3
Define Customer Billing Configuration
11. Save your work.
12. If necessary, define a second successful lookup code that matches an existing lookup code in the
XML_DELIVERY_STATUS lookup type.
Prepare Receivables Transactions and Customers for XML UBL 2.1 Transaction
Delivery
After review and approval of XML transactions by your trading partners and the relevant tax authorities, you can print
and deliver final transactions.
Prepare both your Receivables transactions and your customers for final print and delivery.
These settings apply to Receivables transactions:
• Transaction Class: Invoice, Credit Memo, Debit Memo, Chargeback.
Note: You can't deliver Balance Forward Bills using XML transaction delivery.
• Business unit for the transaction is assigned a legal entity configured for XML transaction delivery.
• Transaction type has the Generate Bill field set to Yes.
• Transaction is Complete.
• Legal entity of the business unit is configured for XML transaction delivery.
• Generate Bill field is set to Yes.
• Print Status is set to No.
For your customers, use the customer account profile settings only. The customer account settings apply to all sites
belonging to the customer account. In the Invoicing section of the Customer Account profile:
• Set the Generate Bill field to Yes.
• Set the Preferred Delivery Method field to Paper or Email only. You can't select XML or Portal Upload. If you
leave this field blank, the default value is Paper.
If you select Email as the Preferred Delivery Method, complete these settings:
• In the Communication section of the Edit Account page, define at least one customer contact with both
an email address and the Bill-to responsibility. Do not assign this contact the Collections or Dunning
responsibility.
• In the Billing and Revenue tabbed region of the Receivables System Options record of the applicable business
unit, complete the fields in the Transaction Delivery Using Email section.
• Set up the attachment of a copy of the emailed transaction to the transaction itself, by enabling the
AR_STORE_PRINTED_TRANSACTIONS lookup code under the AR_FEATURES lookup type.
Related Topics
•
How Transaction and Statement Delivery Using Email Works
136

Oracle Fusion Cloud Financials
Implementing Receivables Credit to Cash
Chapter 3
Define Customer Billing Configuration
Deliver XML UBL 2.1 Transactions and Print Final Transactions
Once you have completed the required setups, you can generate and deliver XML UBL 2.1 transactions to your business
partners and the applicable tax authorities.
After final review and update of the delivered transactions, you can print and deliver final transactions in PDF format.
The process flow for XML UBL 2.1 transaction delivery and final printing is as follows:
1. Verify Legal Entity Configuration: Run the Print Receivables Transactions process for the applicable
transactions to verify that the assigned legal entity is configured for XML UBL 2.1 transaction delivery.
2. Generate and Deliver XML Transactions: Run the Generate and Transfer XML Transactions process to
generate the XML extract and send XML transactions using Collaboration Messaging Framework.
3. Review XML Delivery and Correct Failures: Use the Manage Transactions page to review the XML delivery
status; use Collaboration Messaging Framework to correct any failed or undelivered transactions. If necessary,
run the Generate and Transfer XML Transactions process again.
4. Print and Deliver Final Transactions: Run the Print Receivables Transactions process to generate and deliver
final transactions in PDF format to your partners and tax authorities.
Verify Legal Entity Configuration for XML UBL 2.1 Transaction Delivery
After you complete the XML Delivery setup and prepare your transactions, run the Print Receivables Transactions
process to verify that the legal entity assigned to each transaction is configured for XML delivery.
Confine the print run to newly created transactions that you intend to generate and deliver in XML UBL 2.1 format.
To verify the legal entity configuration:
1. Navigate to Scheduled Processes.
2. Select the Print Receivables Transactions process.
3. In the Transactions to Print parameter, select Unprinted.
4. Complete the remaining parameters according to your requirements.
5. Click the Submit button.
The process checks that the legal entity on each transaction is assigned the value XML delivery along with PDF
generation in the Preferred Electronic Invoice Delivery Method descriptive flexfield.
The process ends without printing transactions that have the assigned legal entities properly configured.
Generate and Deliver XML UBL 2.1 Transactions
After verifying the legal entity configuration, run the Generate and Transfer XML Transactions process to generate the
XML extract.
After you generate the XML extract and deliver transactions, best practice is not to incomplete and make any updates to
these transactions. Any updates should await feedback from trading partners and tax authorities.
The Generate and Transfer XML Transactions process runs on transactions belonging to one business unit only. If you
have transactions with legal entities assigned to more than one business unit, then you will need to run this process for
each business unit.
The Generate and Transfer XML Transactions process ends in error under any of these conditions:
• Collaboration Messaging Framework setup is incomplete.
137

Oracle Fusion Cloud Financials
Implementing Receivables Credit to Cash
Chapter 3
Define Customer Billing Configuration
• ORA_AR_XML_STATUS_FOR_PRINTING lookup type doesn't have status lookup codes defined for XML delivery.
• One or more transactions are Incomplete.
To generate the XML extract:
1. Navigate to Scheduled Processes.
2. Select the Generate and Transfer XML Transactions process.
3. In the Business Unit parameter, select the business unit with the applicable assigned legal entity.
4. In the Transactions Included parameter, select New Transactions Only.
5. In the Transaction Class parameter, if necessary select the transaction class of the transactions you are
delivering.
6. Complete the remaining parameters according to your requirements.
7. Click the Submit button.
The Collaboration Messaging Framework process:
• Generates the XML UBL 2.1 file with the Receivables transactions.
• Sends the generated file to the service provider.
• Updates the XML delivery status of each transaction.
Review XML UBL 2.1 Transaction Delivery and Correct Failures
After you run the Generate and Transfer XML Transactions process, use the Manage Transactions page to search for the
transactions and check the XML Delivery Status.
Use Collaboration Messaging Framework to correct any transactions not displayed as successfully delivered in
the Manage Transactions page. Unsuccessfully delivered transactions in Collaboration Messaging Framework are
categorized as Processing Error or Delivery Failed.
For confirmation of XML UBL 2.1 transaction delivery, the XML Delivery Status field displays the statuses that you
created in the ORA_AR_XML_STATUS_FOR_PRINTING lookup type.
To review and correct unsuccessfully delivered transactions:
1. Navigate to the Collaboration Messaging work area.
2. Navigate to the Manage Undelivered Collaboration Messages page to review transactions marked with
Processing Error.
3. Set these transactions to Delivery Failed by canceling the transactions.
4. Navigate to the Manage Failed Collaboration Messages page to review transactions marked with Delivery
Failed.
5. Reprocess all transactions marked as Delivery Failed with another run of the Generate and Transfer XML
Transactions process.
6. Navigate to Scheduled Processes.
7. Select the Generate and Transfer XML Transactions process.
8. In the Business Unit parameter, select the business unit of the failed transactions.
9. In the Transactions Included parameter, select Failed Transactions Only.
10. Complete the remaining parameters according to your requirements.
11. Click the Submit button.
Related Topics
•
OAGIS 10.1 XML Delivery Errors
138

Oracle Fusion Cloud Financials
Implementing Receivables Credit to Cash
Chapter 3
Define Customer Billing Configuration
Print and Deliver Final Transactions after XML UBL 2.1 Transaction Delivery
After receiving and incorporating feedback from trading partners and tax authorities, you can print and deliver final
transactions.
Before you print and deliver final transactions:
• Ensure that all transactions are updated and set to Complete.
• Set the Preferred Delivery Method of the related customer accounts to Paper or Email.
• Complete the related setups for Email delivery of transactions.
• Complete the setup to deliver a copy of the transaction as an attachment to the emailed transaction.
To print and deliver final transactions:
1. Navigate to Scheduled Processes.
2. Select the Print Receivables Transactions process.
3. In the Business Unit parameter, select the applicable business unit for the final transactions.
4. In the Transactions to Print parameter, select Printed to confine the print run to the final transactions.
5. Complete the remaining parameters according to your requirements.
6. Click the Submit button.
The process prints and delivers the final transactions in PDF format to the applicable customer accounts.
139

Oracle Fusion Cloud Financials
Implementing Receivables Credit to Cash
Chapter 3
Define Customer Billing Configuration
140

Oracle Fusion Cloud Financials
Implementing Receivables Credit to Cash
Chapter 4
Define Customer Payments
4 Define Customer Payments
Create a Shared Service Model in Receivables
Use service provider relationships to create a shared service model in Receivables to centralize the processing of
customer payments.
In the shared service model, you define one servicing business unit for customer payments. You then create a service
provider relationship between this servicing business unit and one or more client billing business units.
Note: All business units must belong to the same ledger.
Once you define this relationship, the servicing business unit can receive and process payments for all of its client billing
business units. The shared service model for centralized customer payment processing supports all receipt creation
methods in Receivables:
• Manual receipts.
• Receipts uploaded using a spreadsheet.
• Lockbox receipts.
• Automatic receipts.
Receivables provides additional functionality for cross-business unit receipt processing, to facilitate the processing of
customer payments:
• Allow a billing business unit outside the service provider relationship to have payments for its transactions
processed by any other business unit in the same ledger.
• Allow an individual receipt to be applied to transactions of any business unit in the same ledger.
Perform these procedures to manage shared services in Receivables:
• Define Customer Payments Service Providers
• Define Receivables System Options for Cross-Business Unit Receipt Processing
• Enable a Receipt for Cross-Business Unit Processing
Define Customer Payments Service Providers
Perform the steps in this procedure to define a servicing business unit and client billing business units.
1. Create a servicing business unit and client business units.
2. Assign the appropriate business functions to each business unit:
a. Open the Assign Business Functions page for the servicing business unit.
b. Assign business functions to the servicing business unit. At a minimum, you must assign the servicing
business unit the Customer Payments business function.
c. Save your work.
d. Open the Assign Business Functions page for the first client business unit.
141

Oracle Fusion Cloud Financials
Implementing Receivables Credit to Cash
Chapter 4
Define Customer Payments
e. Assign business functions to the client business unit. At a minimum, you must assign the client business
unit the Billing and Revenue Management business function.
f. Save your work.
g. Repeat steps 4 to 6 for each client business unit.
3. Assign the servicing business unit to each client business unit:
a. From the Manage Service Provider Relationships task, open the Manage Service Providers page for the
first client business unit.
b. In the Customer Payments Service Providers section, click the Add icon.
c. In the Search and Select window, select the servicing business unit.
d. Save your work.
e. Repeat steps 1 to 4 for each client business unit.
Define Receivables System Options for Cross-Business Unit Receipt
Processing
Perform the steps in this procedure to allow a billing business unit outside the service provider relationship to have
payments for its transactions processed by any other business unit in the same ledger.
1. From the Manage Receivables System Options task, open the Edit System Options page for the business unit
that you want.
2. Navigate to the Billing and Revenue tabbed region.
3. Enable the Allow any business unit to process receipts option.
4. Save your work.
This business unit can now have payments for its transactions processed by any other business unit in the
same ledger.
Enable a Receipt for Cross-Business Unit Processing
Perform the steps in this procedure to apply an individual receipt to one or more transactions belonging to any business
unit in the same ledger.
1. Use the Create Receipt page to create a new receipt or the Edit Receipt page to open an unapplied receipt.
2. In the Application tabbed section, click the Add Open Receivables button.
3. In the Add Open Receivables window, enable the Include transactions from all business units option.
4. Search for and select the transactions that you want to apply to the receipt. You can select transactions from
any business unit in the same ledger.
5. Click the Add button and then the Done button.
6. If necessary, update the figure in the Applied Amount field for each applicable transaction.
7. Click the Save button to apply the receipt to the selected transactions.
142

Oracle Fusion Cloud Financials
Implementing Receivables Credit to Cash
Chapter 4
Define Customer Payments
Application Rule Sets
Rules of the Application Rule Set
When you apply a receipt or credit memo to a transaction, the application rule set determines how Receivables reduces
the open balance of the line, tax, freight, and late charge amounts on a transaction.
Receivables uses the application rule set assigned to the transaction type to process payment applications. If no
application rule set is assigned to the transaction type, then the application rule set assigned to Receivables system
options is used.
You can arrange the order of the line types and application rules in an application rule set according to your needs. Each
line type must appear in an application rule set, and appear only once. The Overapplication rule is always last in the
sequence.
Line First - Tax After Rule
The Line First - Tax After rule first applies the payment to open line amounts, and then applies the remaining amount to
the associated tax.
If the payment is greater than the sum of the open line and tax amounts, Receivables attempts to close each remaining
open item by applying the remaining amount in the following order, stopping when the payment has been fully applied:
1. Freight
2. Late charges
After the payment is fully applied, if a receipt amount remains, this amount is managed by the Overapplication rule.
Line and Tax Prorate
The Line and Tax Prorate rule applies a proportionate amount of the payment to open line and tax amounts for each
line.
If the payment is greater than the sum of the open line and tax amounts, Receivables attempts to close each remaining
open item by applying the remaining amount in the following order, stopping when the payment has been fully applied:
1. Freight
2. Late charges
After the payment is fully applied, if a receipt amount remains, this amount is managed by the Overapplication rule.
Prorate All
The Prorate All rule applies a proportionate amount of the payment to each open amount associated with a debit item
(any line, tax, freight, and late charge amounts for this item).
Receivables uses the following formula to determine the applied amount:
Applied Amount = open application line type amount / sum of application line types in rule details * Receipt
Amount
After the payment is fully applied, if a receipt amount remains, this amount is managed by the Overapplication rule.
143

Oracle Fusion Cloud Financials
Implementing Receivables Credit to Cash
Chapter 4
Define Customer Payments
Overapplication Rule
The Overapplication rule is always the last rule in an application rule set. This rule manages any remaining receipt
amount after the open balance of all transaction lines has been reduced to zero.
If the transaction type for the debit item allows overapplication, Receivables applies the remaining amount
to transaction lines, making the balance due negative. If the transaction type for the debit item doesn't allow
overapplication, you can either place the remaining amount on-account or leave it unapplied.
Note: Lockbox uses the AutoCash rule set rather than the Application rule set to determine how to apply a remaining
amount.
Related Topics
•
Natural Application and Overapplication
•
Examples of Using Each AutoCash Rule
Examples of Using Application Rules
These examples show how each application rule in an application rule set applies a payment to a transaction.
Invoice 123 contains these details:
Field Value
Line
$1000
Tax
$140
Freight
$200
Total
$1340
Your customer remits a partial payment of $1040 for this invoice. This table shows how Receivables applies the payment
using each of the three application rules:
Application Rule Total Amount Applied Line Amount Applied Tax Amount Applied Freight Amount Applied
Line First - Tax After
1040
1000
40
0
Line and Tax Prorate
1040
912.28
127.72
0
Prorate All
1040
776.12
108.66
155.22
144

Oracle Fusion Cloud Financials
Implementing Receivables Credit to Cash
Chapter 4
Define Customer Payments
This table shows the calculations used by each application rule:
Application Rule Calculations
Line First - Tax After
1. Apply payment to open line amount.
2. Apply any remaining amount to tax.
Line and Tax Prorate
1. (1040/1140) * 1000 = 912.28 (Receipt Amount / Total Line and Tax) * Line Amount = Line Amount
Applied
2. (1040/1140) * 140 = 127.72 (Receipt Amount / Total Line and Tax) * Open Tax Amount = Tax
Amount Applied
Prorate All
1. (1040/1340) x 1000 = 776.12 (Receipt Amount / Invoice Total) * Open Line Amount = Line Amount
Applied
2. (1040/1340) x 140 = 108.66 (Receipt Amount / Invoice Total) * Open Tax Amount = Tax Amount
Applied
3. (1040/1340) x 200 = 155.22 (Receipt Amount / Invoice Total) x Open Freight Amount = Freight
Amount Applied
Line First - Tax After
The Line First - Tax After rule first applies the payment to the line amount, reducing the balance due to zero. Receivables
then applies the remaining amount ($40) to the tax charges, reducing the open tax amount to $100. Since the payment
isn't enough to close these items, the freight balance isn't affected.
This table compares each line type before and after you apply an amount using the Line First - Tax After rule:
Transaction
Amount
Remaining
Amount
Line Items Line Items
Remaining
Tax Tax Remaining Freight Freight
Remaining
$1340
$300
$1000
$0
$140
$100
$200
$200
Line and Tax Prorate
The Line and Tax Prorate rule applies a proportionate amount to the open line and tax charges. Since the amount
applied isn't enough to close these items, the freight balance isn't affected.
This table compares each line type before and after you apply an amount using the Line and Tax Prorate rule:
Transaction
Amount
Remaining
Amount
Line Items Line Items
Remaining
Tax Tax Remaining Freight Freight
Remaining
$1340
$300
$1000
$87.72
$140
$12.28
$200
$200
This table shows the calculations used to arrive at the proportionate amounts:
Item Calculations
Line Items
1000 - 912.28 = 87.72
145

Oracle Fusion Cloud Financials
Implementing Receivables Credit to Cash
Chapter 4
Define Customer Payments
Item Calculations
Amount Line Items - Line Amount Applied = Open Line Amount
Tax
140 - 127.72 = 12.28
Tax Original - Tax Amount Applied = Open Tax Amount
Prorate All
The Prorate All rule applies a proportionate amount of the receipt to the line, tax, and freight for this transaction.
This table compares each line type before and after you apply an amount using the Prorate All rule:
Transaction
Amount
Remaining
Amount
Line Items Line Items
Remaining
Tax Tax Remaining Freight Freight
Remaining
$1340
$300
$1000
$223.88
$140
$31.34
$200
$44.78
This table shows the calculations used to arrive at the proportionate amounts:
Item Calculations
Line Items
1000 - 776.12 = 223.88
Amount Line Items - Line Amount Applied = Open Line Amount
Tax
140 - 108.66 = 31.34
Tax Original - Tax Amount Applied = Open Tax Amount
Freight
200 - 155.22 = 44.78
Freight Original - Freight Amount Applied = Open Freight Amount
Example of Using Application Rules with Transactions with Mixed
Sign Balances
This example shows how the Prorate All application rule is used to apply a payment to a transaction with mixed sign
balances. In a transaction with mixed sign balances, the charges in the transaction have a combination of positive and
negative signs.
When you apply a payment to a transaction that has mixed sign balances, Receivables applies the payment only to
those amounts that have the same sign as the payment. For example, if the payment is for a positive amount (meaning,
146

Oracle Fusion Cloud Financials
Implementing Receivables Credit to Cash
Chapter 4
Define Customer Payments
not a credit memo), Receivables only reduces the charges that have a positive balance. Any negative balances aren't
affected.
As with transactions having a same sign balance, Receivables applies any remaining amounts according to the
Overapplication rule assigned to the application rule set.
Prorate All with Mixed Sign Balances
Invoice 101 contains these details:
Field Value
Line
<$100>
Tax
$100
Freight
$30
Late Charges
$10
Assume that you're using the Prorate All application rule. Your customer remits a receipt of $100. Receivables prorates
the positive receipt amount among the positive tax, freight, and late charges amounts. The line amount of <$100> isn't
affected.
This table shows the new balance of Invoice 101 after the receipt application:
Field Value
Line
<$100>
Tax
$28.56
Freight
$8.58
Late Charges
$2.86
This table compares each line type for this invoice before and after you apply the payment using the Prorate All rule:
Line Items Line Items
Remaining
Tax Tax Remaining Freight Freight
Remaining
Late Charges Late Charges
Remaining
<$100>
<$100>
$100
$28.56
$30
$8.58
$10.00
$2.86
This table shows the amount applied to each line type:
147

Oracle Fusion Cloud Financials
Implementing Receivables Credit to Cash
Chapter 4
Define Customer Payments
Total Amount Applied Line Amount Applied Tax Amount Applied Freight Amount Applied Late Charges Amount
Applied
100
0
71.44
21.42
7.14
This table shows the calculations used by the Prorate All application rule:
Item Calculations
Tax
100 - (21.42 + 7.14) = 71.44
Freight
(30 * 100) / 140 = 21.42
Late Charges
3(10.00 * 100) / 140 = 7.14
FAQs for Application Rule Sets
What's the tax treatment?
The Tax Treatment option on the application rule set determines how to reduce the tax amount in relation to the line
amount when a payment is applied.
The tax treatment options are:
• Prorate: Proportionately reduce the net amount of the line and associated tax amounts.
• Before: First reduce the open tax amount, then apply any remaining amount to the line.
• After: Reduce the open line amount, then apply any remaining amount to the associated tax.
How can I use the rounding correction?
You assign a rounding correction to one of the line types (Line, Freight, or Charges) belonging to an application rule set.
When an amount is prorated across more than one line type, the application rule set uses the line type you indicate to
account for the rounding adjustment. The line amount of the designated line type is adjusted accordingly to account for
any rounding corrections within the application rule set.
148

Oracle Fusion Cloud Financials
Implementing Receivables Credit to Cash
Chapter 4
Define Customer Payments
Receipt Classes and Methods
Remittance Methods and Clearance Methods
Define a remittance method and clearance method for each receipt class. These settings determine the remittance and
clearing behavior for receipts with a given receipt class.
Remittance Methods
Use the remittance method to determine the accounts to use for receipts that you create using the receipt
method assigned to this receipt class.
Standard
Use the remittance account for automatic receipts assigned to a receipt method with this receipt class.
Factoring
Use the factoring account for automatic receipts assigned to a receipt method with this receipt class.
Standard and Factoring
Receivables selects receipts assigned to this receipt class for remittance regardless of the batch remittance method. In
this case, you can specify either of these remittance methods when creating your remittance batches.
No Remittance
For Manual receipts only. Remittance isn’t required for manual receipts assigned to this receipt class.
Clearance Methods
Use the clearance method to require receipts created using a receipt method assigned to this receipt class to be
reconciled before posting them to the general ledger cash account.
Directly
This method is for receipts that you don't expect to be remitted to the bank and subsequently cleared.
It’s assumed that these receipts are cleared at the time of receipt entry and require no further processing.
By Automatic Clearing
Use this method to clear receipts using the Clear Receipts Automatically program.
Note: You can also clear receipts using this method in Cash Management.
By Matching
Use this method to clear receipts manually in Cash Management.
149

Oracle Fusion Cloud Financials
Implementing Receivables Credit to Cash
Chapter 4
Define Customer Payments
Related Topics
•
Considerations for Remitting Receipts
•
Automatic Clearing of Receipts
Guidelines for Defining Automatic Receipt Methods
Define the attributes of an automatic receipt method to determine how automatic receipts are processed against
selected transactions.
Review these guidelines when defining the attributes of automatic receipt methods:
• Receipts Inherit Transaction Numbers
• ISO Direct Debit
• Number of Receipts Rule
• Receipt Maturity Date Rule
• Automatic Print Template
• Lead Days
• Customer Payment Method
Receipts Inherit Transaction Numbers
If you're using One per Invoice as the Number of Receipts Rule, you can enable the Receipts inherit transaction
numbers option to ensure that the automatic receipt number is always the same as the transaction number that the
receipt is applied to. Enabling this option helps track automatic receipts.
Note: Don't enable this option if you're using document sequencing with automatic receipts.
ISO Direct Debit
Enable the ISO direct debit option to create automatic receipts that automatically debit a customer bank account
according to the standards of ISO 20022 direct debit.
Enabling this option assumes that you have created a debit authorization agreement with your customers for ISO 20022
direct debit.
Number of Receipts Rule
The Number of Receipts Rule determines the way in which the automatic receipt process creates and applies receipts
against transactions.
Note: If you enable the ISO direct debit option, the Number of Receipts Rule is disabled. ISO 20022 direct debit
creates one receipt for the prearranged debit amount from your customer and transfers this amount to the remittance
bank account defined in the automatic receipt method.
Select one of these rules:
• One per Customer: Create one receipt for each customer.
150

Oracle Fusion Cloud Financials
Implementing Receivables Credit to Cash
Chapter 4
Define Customer Payments
• One per Customer Due Date: Create one receipt for each customer and due date. This option creates several
payments for a customer if the invoices of the customer have several due dates.
• One per Invoice: Create one receipt for each invoice.
• One per Site: Create one receipt for each customer site.
• One per Site Due Date: Create one receipt for each customer site and due date.
Note: The Number of Receipts Rule assumes an additional grouping by payment instrument. For example, if you
use the One per Customer rule, and two invoices belonging to the same customer are to be paid from different bank
accounts, the automatic receipt process creates two receipts, one for each bank account number.
Receipt Maturity Date Rule
Use the Receipt Maturity Date Rule to pay invoices that have different due dates with a single receipt.
Select Earliest to use the earliest due date of all of the invoices that the receipt covers as the receipt maturity date.
Select Latest to use the latest due date of all of the invoices that the receipt covers as the receipt maturity date.
When you remit a receipt, Receivables uses the maturity date to determine when to transfer funds from the customer
bank account to your remittance bank account.
Automatic Print Template
Enter the automatic print template to use for transmissions using this receipt method.
Receivables provides one standard receipt print template to format the output of payment selection and creation
programs when you create the receipt document. To use a different receipt print template, you must copy and modify
this standard receipt print template.
Lead Days
The number of lead days is the number of days before the invoice due date that an invoice can be selected for
application by the automatic receipt process using this receipt method.
This option is useful, for example, when customer approval is required. You can set the value to the number of days
normally required to receive customer approval.
Customer Payment Method
Select the funds capture payment method that the customer will use to remit payment for automatic receipts using this
receipt method.
Note: If you enable the ISO direct debit option, Bank Account Transfer is the only payment method available.
Oracle Payments provides predefined funds capture payment methods, but you can define your own.
Related Topics
•
How Automatic Receipts Are Processed
•
ISO 20022 Direct Debit Prenotifications
•
ISO 20022 Payment Status Reports
151

Oracle Fusion Cloud Financials
Implementing Receivables Credit to Cash
Chapter 4
Define Customer Payments
Fund Transfer Error Handling on Automatic Receipts
Define fund transfer error handling on automatic receipt methods to manage error correction during automatic receipt
processing.
You define fund transfer error handling to automatically correct errors encountered either during credit card
authorization or payment capture, or during bank account transfer.
You set up error handling in the Fund Transfer Error Handling section of the Automatic Processing tab of the Create or
Edit Receipt Class and Methods page, for the applicable automatic receipt methods.
Mapping Third-Party Error Codes
To define fund transfer error handling for a given automatic receipt method, you map the error codes from a third-party
credit card provider or financial institution to the corrective actions in Receivables for each category of transaction.
When an error occurs during payment processing of automatic receipts with the specified receipt method, Receivables
applies the corrective action that corresponds to the given third-party error code.
Map each error code to a corresponding action for each category of transaction. This table indicates the corrective
actions available for each category:
Category Available Actions
Invoice, Debit Memo, Credit Memo
Clear Payment Information, Retry
Receipt
Retry, Reverse Receipt
Refund
Retry, Reverse Receipt
Mapping Error Codes: Example
You map a credit card provider error code of GW-0062 to the Invoice category and the Retry action.
When credit card authorization fails and the credit card provider returns the error code of GW-0062 for multiple
transactions, then Receivables automatically deletes this error code on these failed transactions. These transactions
then become available for inclusion in the next automatic receipt batch.
Related Topics
•
PCI DSS Credit Card Processing Requirements
Remittance Bank Accounts on Receipt Methods
Define remittance bank account information for each receipt method assigned to a receipt class. Remittance bank
account information includes the general ledger accounts to use when you enter or apply receipts.
152

Oracle Fusion Cloud Financials
Implementing Receivables Credit to Cash
Chapter 4
Define Customer Payments
Remittance Bank Accounts and Receipt Currencies
If you remit receipts in one currency only, you can enter more than one remittance bank account for a receipt method,
but you must mark one account as the primary bank account for the receipt method.
If you remit receipts in more than one currency for a receipt method, then you must enter at least one remittance bank
account per currency and mark one account per currency as primary.
During receipt entry and processing, Receivables uses the primary bank account as the default remittance bank account
for the receipt. You can accept this value or enter any other bank account defined for the receipt method in the same
currency as the receipt.
Factored Receipts
If the receipt class of the receipt method allows factoring, you can specify the number of Risk Elimination Days for
factored receipts for a given bank account.
When you factor receipts, Receivables creates a short term debt to account for risk in case of customer default. When
you clear or risk eliminate these receipts, the debt is cleared after the receipt maturity date plus the number of risk
elimination days that you enter.
Cash Budget Funding with Receipts
If you intend to fund a cash control budget in Budgetary Control with application amounts from standard receipt
applications and miscellaneous receipt creation, you must complete related setups for receipt methods and remittance
bank accounts.
Create and assign a remittance bank account to each receipt method that you will use to process receipts for cash
budget funding. You can set up receipt methods for both automatic and manual receipt creation.
During setup, you must assign the same GL cash account to the remittance bank account belonging to the receipt
method used for cash budget funding and to the ledger in Budgetary Control enabled for cash budget funding.
Complete these steps for your GL accounts:
• In your Budgetary Control setup, enter the GL cash account in the Accounts in Journals Subject to Cash
Controls section of the Edit Budgetary Control page for the applicable ledger.
• In the related remittance bank account, enter the same GL cash account in the Cash field in the GL Accounts
section of the Edit Remittance Bank Account page.
• You must only enter the GL cash account in the Cash field. Enter different natural accounts in each of these
fields in the GL Accounts section of the same remittance bank account:
◦
Receipt Confirmation
◦
Remittance
◦
Unapplied Receipts
◦
Unidentified Receipts
◦
On-Account Receipts
You must enter different natural accounts in these fields to prevent overstating the cash control budget with additional
budget activity on the cash account.
153

Oracle Fusion Cloud Financials
Implementing Receivables Credit to Cash
Chapter 4
Define Customer Payments
Related Topics
•
Considerations When You Create Accounts
•
What legal entity is assigned to a receipt?
FAQs for Receipt Classes and Methods
What creation method should a receipt class have?
Use an Automatic creation method to use the automatic receipt process to create a batch of receipts from selected
transactions. Payments is responsible for the funds capture process in automatic receipts. Use a Manual creation
method for receipts entered manually or imported using lockbox.
What's the relationship between the receipt class and receipt methods?
The receipt methods assigned to a receipt class account for receipt entries and applications. They also determine the
customer remittance bank information.
The receipt class determines the processing steps that are required for receipts. These steps include automatic or
manual creation, the remittance method, the bank clearance method, and whether receipts require confirmation by the
customer.
What legal entity is assigned to a receipt?
Legal entities are linked to remittance and internal bank accounts. The receipt method determines which remittance
bank account, and therefore which legal entity, is assigned to a receipt.
All receipts inherit the legal entity from the bank account, and all refunds inherit the legal entity of the original receipt.
You can perform receipt applications across legal entities, if both the receipt and the transactions the receipt is applied
to are in the same business unit. Receipt applications and receipt clearing across legal entities is recorded in the
subledger as intercompany accounting.
Lockbox
Lockbox Interface Table AR_PAYMENTS_INTERFACE_ALL
During the Import step of lockbox processing, Receivables stores receipt data from your bank file in the
AR_PAYMENTS_INTERFACE_ALL table. Each column in the AR_PAYMENTS_INTERFACE_ALL table contains information
needed to run lockbox successfully.
TRANSMISSION_RECORD_ID
Receivables assigns a value to this column during the import process.
validation
154

Oracle Fusion Cloud Financials
Implementing Receivables Credit to Cash
Chapter 4
Define Customer Payments
The import file must leave this column blank.
destination
None.
CREATION_DATE
Receivables assigns a value to this column during the import process.
validation
The import file must leave this column blank.
destination
None.
CREATED_BY
Receivables assigns a value to this column during the import process.
validation
The import file must leave this column blank.
destination
AR_BATCHES.CREATED_BY, AR_INTERIM_CASH_RECEIPTS.CREATED_BY, or
AR_INTERIM_CASH_RECEIPT_LINES.CREATED_BY.
LAST_UPDATE_LOGIN
Receivables assigns a value to this column during the import process.
validation
The import file must leave this column blank.
destination
None.
LAST_UPDATED_BY
Receivables assigns a value to this column during the import process.
validation
The import file must leave this column blank.
destination
None.
LAST_UPDATE_DATE
Receivables assigns a value to this column during the import process.
validation
The import file must leave this column blank.
destination
None.
155

Oracle Fusion Cloud Financials
Implementing Receivables Credit to Cash
Chapter 4
Define Customer Payments
RECORD_TYPE
Enter the record type. For example, if this is a batch header record, and your bank uses the value 3 to identify batch
headers, enter 3 in this column.
validation
Find out from the bank what character they use to identify each record type. Keep in mind that not all banks use all of
the record types. Assign values to identify the following types of records: TRANSMISSION HEADER, TRANSMISSION
TRAILER, LOCKBOX HEADERS, LOCKBOX TRAILERS, BATCH HEADERS, BATCH TRAILERS, PAYMENT RECORDS,
PAYMENT OVERFLOW RECORDS, and SERVICE HEADER.
destination
None.
STATUS
Enter the value AR_PLB_NEW_RECORD_INF for all records inserted into this table. The control files that Receivables
provides populate this column.
validation
The import file must leave this column blank.
destination
None.
TRANSMISSION_REQUEST_ID
Receivables assigns a value to this column during the import process.
validation
The import file must leave this column blank.
destination
None.
TRANSMISSION_ID
Receivables assigns a value to this column during the import process.
validation
The import file must leave this column blank.
destination
None.
DESTINATION_ACCOUNT
Enter the account number of the sending bank.
validation
None.
destination
AR_TRANSMISSIONS.DESTINATION
156

Oracle Fusion Cloud Financials
Implementing Receivables Credit to Cash
Chapter 4
Define Customer Payments
ORIGINATION
Enter the transit routing number of the sending bank.
validation
If this value is included in a transmission header or trailer, you must have the same value here.
destination
AR_TRANSMISSIONS.ORIGIN
DEPOSIT_DATE
Enter the date on which the transmission was deposited into your bank account. This date can be on any of the record
types in the transmission.
Each unique deposit date determines a batch of transmission records. For example, if you enter two unique deposit
dates for the transmission, lockbox divides the transmission into two batches of receipts.
validation
None.
destination
AR_BATCHES.DEPOSIT_DATE
GL_DATE
Receivables assigns a value to this column during the import process.
validation
The import file must leave this column blank.
destination
AR_BATCHES.GL_DATE, AR_INTERIM_CASH_RECEIPTS.GL_DATE, or AR_CASH_RECEIPT_HISTORY.GL_DATE.
DEPOSIT_TIME
Enter the time the deposit was made.
validation
None.
destination
None.
TRANSMISSION_RECORD_COUNT
Enter the number of records in the import file. Include all of the types of records in the count: headers, trailers, receipts,
and overflow records.
validation
If the transmission format includes the transmission header or trailer, lockbox counts all records in this transmission.
The validated count includes all receipts and detail records transferred to the interim table.
destination
AR_TRANSMISSIONS.COUNT
157

Oracle Fusion Cloud Financials
Implementing Receivables Credit to Cash
Chapter 4
Define Customer Payments
TRANSMISSION_AMOUNT
Enter the amount of the transmission.
validation
The sum of all of the receipt amounts within the transmission.
destination
AR_TRANSMISSIONS.AMOUNT
TRANSFERRED_RECEIPT_COUNT
Receivables assigns a value to this column during the import process.
validation
The import file must leave this column blank.
destination
AR_TRANSMISSIONS.VALIDATED_COUNT
TRANSFERRED_RECEIPT_AMOUNT
Receivables assigns a value to this column during the import process.
validation
The import file must leave this column blank.
destination
AR_TRANSMISSIONS.VALIDATED_AMOUNT
LOCKBOX_NUMBER
For lockbox header or trailer records, enter the lockbox name or number specified by the bank.
For batch header and trailer records, enter the lockbox number assigned to receipts in the batch.
For receipt records, enter the lockbox number assigned to receipts.
For overflow records, enter the number of the lockbox for the receipt.
validation
This column is required on all lockbox headers and trailers. If the lockbox number is included in the lockbox
transmission format, it must appear on every batch record. If the lockbox number is included in the lockbox
transmission format and you don't have batch records, it must be entered for each receipt and overflow record.
destination
None.
LOCKBOX_BATCH_COUNT
Enter the number of batches in the lockbox.
validation
None.
destination
None.
158

Oracle Fusion Cloud Financials
Implementing Receivables Credit to Cash
Chapter 4
Define Customer Payments
LOCKBOX_RECORD_COUNT
Enter the number of payment records in the lockbox.
validation
Don’t include payment overflow records.
destination
None.
LOCKBOX_AMOUNT
Enter the total value of the receipts in the lockbox.
validation
None.
destination
None.
BATCH_NAME
For batch header and trailer records, enter the name or number that the bank uses to identify the batch.
For receipt records, enter the batch name for this receipt.
For overflow records, enter the batch for this overflow record.
validation
This column is required for each batch header and trailer record. If the batch name is included in your format, it must
be entered for every receipt record. Each unique batch name determines a batch of transmission records. For example,
if you enter two unique batch names for your transmission, lockbox divides your transmission into two batches of
receipts. If the batch name is included in your format, you must enter this name for each overflow record.
destination
AR_BATCHES.LOCKBOX_BATCH_NAME
BATCH_AMOUNT
Enter the total value of all receipts in this batch.
validation
None.
destination
AR_BATCHES.CONTROL_AMOUNT
BATCH_RECORD_COUNT
Enter the number of receipt records in this batch.
validation
None.
destination
AR_BATCHES.CONTROL_COUNT
159

Oracle Fusion Cloud Financials
Implementing Receivables Credit to Cash
Chapter 4
Define Customer Payments
ITEM_NUMBER
Enter a sequential number to indicate the location of each receipt or overflow record in the batch.
validation
This column is required, even if the lockbox transmission format doesn't have batch, lockbox, or transmission records.
The item number must be unique within a batch, a lockbox (if batches aren’t provided), or within a transmission (if
neither batches nor lockboxes are provided). All overflow records for a receipt must have the same item number as the
receipt record. You must enter an item number for each overflow record to reference the receipt.
destination
None.
CURRENCY_CODE
Enter the currency for each receipt.
validation
None.
destination
AR_BATCHES.CURRENCY_CODE or AR_INTERIM_CASH_RECEIPTS.CURRENCY_CODE.
EXCHANGE_RATE
For receipts, enter the conversion rate to use for this currency.
validation
None.
destination
AR_BATCHES.EXCHANGE_RATE or AR_INTERIM_CASH_RECEIPTS.EXCHANGE_RATE.
EXCHANGE_RATE_TYPE
Enter the conversion rate type to use for the receipt: Corporate, Spot, or User.
validation
None.
destination
AR_BATCHES.EXCHANGE_RATE_TYPE or AR_INTERIM_CASH_RECEIPTS.EXCHANGE_RATE_TYPE.
REMITTANCE_AMOUNT
Enter the value of each receipt in the batch.
validation
A value is required for each receipt record.
destination
AR_INTERIM_CASH_RECEIPTS.AMOUNT
TRANSIT_ROUTING_NUMBER
Enter the transit routing number from the receipt.
validation
160

Oracle Fusion Cloud Financials
Implementing Receivables Credit to Cash
Chapter 4
Define Customer Payments
This column is optional, but you must enter this number if you enter the account number. Receivables uses the transit
routing number and account number together to identify the customer MICR number.
destination
AP_BANK_BRANCHES.BANK_NAME, AP_BANK_BRANCHES.BANK_BRANCH_NAME, or
AP_BANK_BRANCHES.BANK_NUM
ACCOUNT
Enter the bank account number from the receipt.
validation
This column is optional, but you must enter this number if you enter the transit routing number. Receivables uses the
transit routing number and account number together to identify the customer MICR number.
destination
AP_BANK_ACCOUNTS.BANK_ACCOUNT_NUM
CUSTOMER_BANK_ACCOUNT_ID
Receivables assigns a value to this column during the import process.
validation
The import file must leave this column blank.
destination
AR_INTERIM_CASH_RECEIPTS.CUSTOMER_BANK_ACCOUNT_ID
ANTICIPATED_CLEARING_DATE
Date a receipt is expected to clear.
validation
None.
destination
AR_INTERIM_CASH_RECEIPTS.ANTICIPATED_CLEARING_DATE
CHECK_NUMBER
Enter the check number printed on the receipt.
validation
A value is required for each receipt record.
destination
AR_INTERIM_CASH_RECEIPTS.RECEIPT_NUMBER or AR_CASH_RECEIPTS.RECEIPT_NUMBER.
SPECIAL_TYPE
Receivables assigns a value to this column during the import process.
validation
The import file must leave this column blank.
destination
AR_INTERIM_CASH_RECEIPTS.SPECIAL_TYPE
161

Oracle Fusion Cloud Financials
Implementing Receivables Credit to Cash
Chapter 4
Define Customer Payments
AUTOAPPLY_FLAG
Indicates whether the AutoApply process is used during lockbox processing.
validation
None.
destination
AR_INTERIM_CASH_RECEIPTS.AUTOAPPLY_FLAG
CUSTOMER_NUMBER
Enter the customer account number.
validation
This column is optional.
destination
None.
OVERFLOW_INDICATOR
Receivables uses this column to indicate overflow records for the current receipt. You must enter a value for all overflow
records.
validation
To identify the last overflow record, enter a value different from the overflow indicator in the transmission format. For
example, in the BAI transmission format, 0 indicates an overflow record. You have three overflow records for a receipt,
the first two records have 0 as the overflow indicator and the third record has 9. Since the third record isn’t 0, this record
is identified as the last overflow record.
destination
None.
OVERFLOW_SEQUENCE
Enter a sequential number to indicate the order of overflow records.
validation
Within each receipt, the Overflow Sequence usually begins with 1.
destination
None.
CUSTOMER_ID
Receivables assigns a value to this column during the import process.
validation
The import file must leave this column blank.
destination
AR_INTERIM_CASH_RECEIPTS.PAY_FROM_CUSTOMER or AR_CASH_RECEIPTS.PAY_FROM_CUSTOMER.
BILL_TO_LOCATION
Enter the customer bill-to site for this receipt and include the bill-to site in the transmission format.
162

Oracle Fusion Cloud Financials
Implementing Receivables Credit to Cash
Chapter 4
Define Customer Payments
validation
If the Require billing location for receipts Receivables system option is enabled, you must enter a value in this column.
If the Require billing location for receipts Receivables system option isn’t enabled, you only have to enter a value in
this column if the Require billing location option on the lockbox record is enabled.
destination
None.
CUSTOMER_SITE_USE_ID
Receivables assigns a value to this column during the import process.
validation
The import file must leave this column blank.
destination
AR_INTERIM_CASH_RECEIPTS.SITE_USE_ID or AR_CASH_RECEIPTS.CUSTOMER_SITE_USE_ID.
RECEIPT_DATE
For receipt records, enter the date written on the check.
validation
If you’re using MICR numbers to identify customers, this date must be equal to or earlier than the date of the lockbox
submission. Otherwise, the receipts are processed as unidentified.
destination
AR_INTERIM_CASH_RECEIPTS.RECEIPT_DATE, AR_INTERIM_CASH_RECEIPTS.EXCHANGE_DATE,
AR_CASH_RECEIPTS.RECEIPT_DATE, or AR_CASH_RECEIPTS.EXCHANGE_DATE.
RECEIPT_METHOD
Enter the receipt method to associate with a receipt.
validation
Receipt methods contain information about the bank, bank account, and receipt distributions. The receipt method in
this column must be the same as the receipt method assigned to the batch source for the lockbox.
destination
None.
RECEIPT_METHOD_ID
Receivables assigns a value to this column during the import process.
validation
The import file must leave this column blank.
destination
AR_INTERIM_CASH_RECEIPTS.RECEIPT_METHOD_ID or AR_CASH_RECEIPTS.RECEIPT_METHOD_ID.
INVOICE1-8
For receipt records and overflow records, optionally enter the invoice numbers that a receipt is applied to.
validation
163

Oracle Fusion Cloud Financials
Implementing Receivables Credit to Cash
Chapter 4
Define Customer Payments
You don't have to start with INVOICE1, nor use all eight of the INVOICE columns on a record before you create a receipt
record or an overflow record. You can find a list of valid values in AR_PAYMENT_SCHEDULES.TRX_NUMBER. You can
supply invoice numbers without specifying the amount applied to each invoice.
destination
None.
MATCHING1_DATE - MATCHING8_DATE
For matching dates.
validation
destination
None.
RESOLVED_MATCHING_NUMBER1-8
For resolved matching numbers.
validation
destination
None.
RESOLVED_MATCHING1_DATE - RESOLVED_MATCHING8_DATE
For resolved matching dates.
validation
destination
None.
MATCH_RESOLVED_USING
For a match resolved.
validation
GD: No description or validation information is provided.
destination
None.
RESOLVED_MATCHING1_INSTALLMENT - RESOLVED_MATCHING8_INSTALLMENT
For resolved matching installments.
validation
destination
None.
INVOICE1_STATUS - INVOICE8_STATUS
Status of the invoices that a receipt is applied to.
validation
None.
destination
164

Oracle Fusion Cloud Financials
Implementing Receivables Credit to Cash
Chapter 4
Define Customer Payments
None.
COMMENTS
For batch header and trailer records and for receipt records, enter any free-form comments.
validation
For receipt records, Receivables stores these comments but doesn't display them on the receipts.
destination
AR_BATCHES.COMMENTS or AR_INTERIM_CASH_RECEIPTS.COMMENTS
ATTRIBUTE_CATEGORY
Enter the descriptive flexfield category information for this receipt.
validation
Descriptive flexfield category used to transfer additional information about a receipt.
destination
AR_INTERIM_CASH_RECEIPTS.ATTRIBUTE1-15 or AR_CASH_RECEIPTS.ATTRIBUTE1-15.
ATTRIBUTE1-15
Enter the descriptive flexfield attributes of the category designated in the ATTRIBUTE_CATEGORY column.
validation
Use this column to transfer additional information about a receipt. For example, if the bank enters and transmits the
customer name, use an attribute column to import this name.
destination
AR_INTERIM_CASH_RECEIPTS.ATTRIBUTE1-15 or AR_CASH_RECEIPTS.ATTRIBUTE1-15.
INVOICE1_INSTALLMENT - INVOICE8_INSTALLMENT
For receipt records and overflow records, enter the installment numbers of invoices with multiple payment schedules
that a receipt is applied to.
validation
If you don't specify the installment number for an invoice with multiple payment schedules, then Receivables applies
the receipt amount to the oldest payment schedule first. The installment number must be on the same record as the
associated invoice number.
destination
None.
CUSTOMER_NAME_ALT
The alternate name of the customer.
validation
None.
destination
None.
165

Oracle Fusion Cloud Financials
Implementing Receivables Credit to Cash
Chapter 4
Define Customer Payments
CUSTOMER_BANK_NAME
The name of the customer bank. Used for receipt records.
validation
None.
destination
None.
CUSTOMER_BANK_BRANCH_NAME
The name of the customer bank branch. Used for receipt records.
validation
None.
destination
None.
REMITTANCE_BANK_NAME
The name of the bank that received the payment. Used for receipt records.
validation
None.
destination
None.
BANK_TRX_CODE
The transaction code of the bank.
validation
None.
destination
None.
AMOUNT_APPLIED1-8
Enter the amount of the receipt to apply to the invoice. If the receipt currency and the transaction currency are different,
enter the amount of the receipt to apply in the transaction currency.
validation
If you provide invoice numbers without specifying the amount applied to each invoice, Receivables applies the receipt to
the invoices starting with the oldest receipt schedule first. The value of the AMOUNT_APPLIED column must be on the
same record as the invoice number the receipt is applied to. For example, you can't have all of the invoice numbers on
the receipt record and all of the amounts applied on the overflow record.
destination
AR_INTERIM_CASH_RECEIPTS_ALL.AMOUNT_APPLIED (if a single application) or
AR_INTERIM_CASH_RCPT_LINES_ALL.PAYMENT_AMOUNT (if multiple applications).
166

Oracle Fusion Cloud Financials
Implementing Receivables Credit to Cash
Chapter 4
Define Customer Payments
AMOUNT_APPLIED_FROM1-8
For receipt and overflow records, if the receipt currency and the transaction currency are different, enter the amount of
the receipt to apply in the receipt currency.
validation
None.
destination
AR_INTERIM_CASH_RECEIPTS_ALL.AMOUNT (if a single application) or
AR_INTERIM_CASH_RCPT_LINES_ALL.AMOUNT_APPLIED_FROM (if multiple applications).
INVOICE_CURRENCY_CODE1-8
For receipt and overflow records, if the receipt currency and the transaction currency are different, enter the currency of
the transaction. This column is used for cross-currency receipt applications.
validation
This column is optional. If null, lockbox derives this value from AR_PAYMENT_SCHEDULES_ALL.
destination
AR_INTERIM_CASH_RECEIPTS_ALL.INVOICE_CURRENCY_CODE (if a single application) or
AR_INTERIM_CASH_RCPT_LINES_ALL.INVOICE_CURRENCY_CODE (if multiple applications).
TRANS_TO_RECEIPT_RATE1-8
For receipt and overflow records, if the receipt currency and the transaction currency are different, enter the conversion
rate used to convert the receipt to the transaction currency.
validation
This value is used for cross-currency receipt applications when the receipt and transaction currencies don’t have a fixed
conversion rate.
destination
TRANS_TO_RECEIPT_RATE.
CUSTOMER_REFERENCE_1-8
For customer reference.
validation
destination
CUSTOMER_REASON1-8
For customer reason codes.
validation
destination
Related Topics
•
How Lockbox File Transmissions Are Validated
•
Lockbox Transmission Format Record Types
167

Oracle Fusion Cloud Financials
Implementing Receivables Credit to Cash
Chapter 4
Define Customer Payments
Receipt Application Using the Match Receipts By Rule
During lockbox and manual receipt processing, Receivables uses the settings of the Match Receipts By rule to identify
the document type to use to match receipts to transactions when customer information isn't available.
Document Types for Receipt Matching
The following six document types are used to match receipts to transactions. During receipt processing, Receivables
searches for one of these document types in this order:
• Transaction number
• Sales order number
• Purchase order number
• Balance forward billing number (Lockbox only)
• Shipping reference
• Contract number
Selection of the Match Receipts By Rule
When Receivables finds a document type with the same number as the current search to match the receipt with a
transaction, the process checks the locations where Match Receipts By rules are enabled in this order:
• Customer bill-to site
• Customer
• Lockbox (for lockbox processing)
• System options
Receivables looks for a rule that matches the document type of the number in the current search, and stops when
a value is found. For example, if Receivables finds a matching transaction number in the first search, it checks the
customer site for the Match Receipts By rule. If the rule is set to Transaction, Receivables matches the receipt with this
transaction and applies the receipt.
If the Match Receipts By rule at the customer site is a document type other than Transaction, Receivables searches for a
number that matches this document type.
If there are no values assigned at the customer site or customer level:
• For lockbox processing, Receivables uses either the Match Receipts By rule assigned to the lockbox or, if the
Use match criteria to determine customer option is enabled, the entire document type hierarchy.
• For manual receipt processing, Receivables uses the Match Receipts By settings on the Receivables system
options record assigned to the business unit.
If Receivables can't find a match after searching each document type, the process applies the receipt using the
AutoCash rule set defined for the customer.
If the AutoCash rule set is unable to apply the receipt, Receivables assigns the receipt a status of Unapplied. You must
then manually apply the receipt.
168

Oracle Fusion Cloud Financials
Implementing Receivables Credit to Cash
Chapter 4
Define Customer Payments
Examples of Matching Rules
Here are two examples of using matching rules.
Example 1: During lockbox processing, a receipt record indicates that a receipt should be applied to open debit item
12345. Receivables first searches for a transaction (invoice, debit memo, chargeback) with this number. Receivables
finds an invoice with this number, so the process checks the value of the Match Receipts By parameter at the customer
site. The Match Receipts By rule is null for this customer site, so Receivables checks the setting in the customer profile.
Match Receipts By is set to Transaction in the customer profile, so Receivables matches and applies the receipt to the
invoice.
Example 2: Using the same receipt record information as Example 1, assume that Receivables fails to find a transaction
with the number 12345. The process then searches for a sales order with this number. Receivables can't find a sales
order with this number, so it now searches for and finds a purchase order with number 12345. Receivables then checks
the Match Receipts By rule at the customer site. The Match Receipts By rule is null for this customer site, so Receivables
checks the setting in the customer profile. The rule is also null in the customer profile, so Receivables checks the rule for
the lockbox. The Match Receipts By rule is set to Purchase Order Number for this lockbox, so the process matches the
receipt with this purchase order and applies the receipt to the transaction.
Related Topics
•
Examples of Using Each AutoCash Rule
•
What are exception trends?
Zengin Format for Japan
Zengin Format for Japan Lockbox Processing
Process Japanese lockbox customer payments using the Zengin transmission format ORA_ZENGIN_LOCKBOX.
The Zengin transmission format ORA_ZENGIN_LOCKBOX (arlockboximportzenginr.ctl) identifies customers using
alternate payer names to create customer receipts and process the corresponding receipt applications. If defined, the
lockbox process optionally uses the customer bank name and customer branch name, along with the alternate payer
name, to identify a customer associated with a payment.
Before you start
To process customer payments using the Zengin transmission format ORA_ZENGIN_LOCKBOX, you must complete
these setups:
• Define Zengin alternate payer name mapping rules for the paying customers.
• Define context sensitive segments for the Zengin Cash Receipts context under the Receipts descriptive flexfield
for ORA_ZENGIN_LOCKBOX.
Prepare and Submit ORA_ZENGIN_LOCKBOX
After you complete the required setups, prepare the ORA_ZENGIN_LOCKBOX transmission file for lockbox processing.
The ORA_ZENGIN_LOCKBOX predefined transmission format arlockboximportzenginr.ctl contains two record types:
Lockbox Header with data type as 1 and Payment with data type as 2.
169

Oracle Fusion Cloud Financials
Implementing Receivables Credit to Cash
Chapter 4
Define Customer Payments
Considerations for preparing ORA_ZENGIN_LOCKBOX include:
• Use this naming convention for Zengin lockbox bank file names: arlockboximportzenginr_yymmdd.
• Exclude records with the field types Deposit/Withdrawal equal to 2 and Transaction Type equal to 10 in the bank
file loaded for import.
• Exclude trailer and end record types with data type 8 and 9 respectively in the bank file loaded for import.
• Populate the Payment Number (Check/Bill Number) with a unique number for each data record in the bank file
loaded for import.
• Exclude multiple header records from different remittance banks, branches, and accounts in a single lockbox
bank file, as this can cause validation failure.
• The Item Number field type is a system-generated sequence number assigned to each payment. You don't
need to pass the item number in the bank file loaded for import.
When you submit the Zengin lockbox, the Process Receipts Through Lockbox process performs these steps specific to
ORA_ZENGIN_LOCKBOX:
• Converts the Japanese Imperial date format to the Western Calendar date.
• Converts the bank file dates in the Reiwa era to the Western Calendar date.
• Uses the Zengin alternate payer name mapping rules to identify the customer account associated with the
receipt by accessing the defined alternate payer name, and optionally the customer bank name and bank
branch name, if included in the mapping rule.
• Creates the receipt for either the customer site defined in the alternate payer name mapping rule, or, if no site is
defined, the primary bill-to site of the business unit assigned to the receipt.
• Captures additional information in the Receipts descriptive flexfield Zengin Cash Receipts context for review
and research.
Related Topics
•
Define Zengin Alternate Payer Name Mapping Rules
•
Define Context Sensitive Segments for Zengin Receipts
Zengin Format for Japan Lockbox Processing with VAN
Process Japanese lockbox customer payments using the Zengin transmission format ORA_ZENGIN_LOCKBOX_VAN for
customers with a virtual account number (VAN).
The Zengin transmission format ORA_ZENGIN_LOCKBOX_VAN (arlockboximportzenginvan.ctl) includes additional
support for the customer virtual account number (VAN). Customers can use virtual account numbers in place of their
business deposit accounts for both payables and receivables transactions. ORA_ZENGIN_LOCKBOX_VAN includes
a Virtual Account Number field to identify the customer account or site for receipt creation and cash application. If
lockbox processing can't identify the customer account from the VAN, the process uses the alternate payer name to
identify the customer account and create the receipts.
Before you start
To process customer payments using the Zengin transmission format ORA_ZENGIN_LOCKBOX_VAN, you must
complete these setups:
• Define Zengin alternate payer name mapping rules with VAN for the paying customers.
170

Oracle Fusion Cloud Financials
Implementing Receivables Credit to Cash
Chapter 4
Define Customer Payments
• Define a lockbox with the customer VAN location and length for ORA_ZENGIN_LOCKBOX_VAN.
Define a Lockbox for ORA_ZENGIN_LOCKBOX_VAN
Before you can submit the ORA_ZENGIN_LOCKBOX_VAN control file, you must create a Zengin lockbox with the
customer Virtual Account Number information.
To create a lockbox for ORA_ZENGIN_LOCKBOX_VAN:
1. Navigate to the Manage Lockboxes page.
2. Click the Create icon to open the Create Lockbox page.
3. In the Lockbox Set field, search for and select a lockbox reference data set.
4. In the Lockbox Number field, enter an alphanumeric code to identify this lockbox for
ORA_ZENGIN_LOCKBOX_VAN.
5. In the Receipt Source field, search for and select a receipt source. The receipt source populates the business
unit and bank information.
6. In the Regional Information field, select Lockboxes for Japan. This displays the Virtual Account Number
Location and Virtual Account Number Length fields.
7. In the Virtual Account Number Location field, enter the location in the ORA_ZENGIN_LOCKBOX_VAN control
file of the paying customer VAN.
8. In the Virtual Account Number Length field, select the length of the paying customer VAN: 10 digit or 7 digit.
9. Complete the remaining fields according to your requirements.
10. Save your work.
Prepare and Submit ORA_ZENGIN_LOCKBOX_VAN
The ORA_ZENGIN_LOCKBOX_VAN predefined transmission format arlockboximportzenginvan.ctl contains two record
types: Lockbox Header with data type as 1 and Payment with data type as 2.
Additional considerations for preparing ORA_ZENGIN_LOCKBOX_VAN include:
• Use this naming convention for Zengin lockbox bank file names: arlockboximportzenginvan_yymmdd.
• Exclude multiple header records from different remittance banks, branches, and accounts in a single lockbox
bank file, as this can cause validation failure.
When you submit the Zengin lockbox, the Process Receipts Through Lockbox process performs these steps specific to
ORA_ZENGIN_LOCKBOX_VAN:
• Excludes all records with the field type Deposit/Withdrawal Type equal to 2 in the data record.
• Excludes all records with the field type Transaction Type not equal to 11 or 14 in the data record.
• Excludes all trailer and end records.
• If the check/bill number is blank in the Zengin file, creates and automatically numbers a receipt for the
payment record.
An automatic number for payment record receipts is 30 characters in length and uses the format: Transmission
Name_DDMMYYHHMI_SequenceNum.
• Captures additional information in the Receipts global descriptive flexfield Receipts for Japan context for review
and research.
Related Topics
•
Define Zengin Alternate Payer Name Mapping Rules
171

Oracle Fusion Cloud Financials
Implementing Receivables Credit to Cash
Chapter 4
Define Customer Payments
Review and Update Zengin Unidentified Receipts
After Zengin lockbox processing, use either the Edit Receipt page or the Manage Lockbox Transmission ADFdi
worksheet to review and update unidentified receipts.
Edit Receipt Page
Use the Edit Receipt page to update a Zengin unidentified receipt with customer information. When you provide
customer information for an unidentified receipt, this automatically creates an alternate mapping rule for the customer
when you save the updated receipt.
To update an unidentified Zengin receipt with customer information:
1. Navigate to the Accounts Receivable work area.
2. Open the Tasks panel on the right and select Receipts > Manage Receipts.
3. In the Manage Receipts page, search for and select the receipt that you want.
4. In the Edit Receipt page, complete either of these steps:
◦
Enter customer information for the receipt.
◦
Click the Add Open Receivables button to open the Add Open Receivables window, then search for and
apply an open receivable with customer information to the receipt.
5. Save your work.
This automatically assigns an alternate payer name mapping rule to the customer added to or applied to the
unidentified receipt.
Manage Lockbox Transmission ADFdi Worksheet
Use the worksheet to review unidentified receipts for an ORA_ZENGIN_LOCKBOX or ORA_ZENGIN_LOCKBOX_VAN
lockbox process. You can either create identified receipts by providing customer information, or create records as
unidentified receipts.
When you provide customer information for an unidentified receipt, this automatically creates an alternate mapping
rule for the customer.
Note: Don't make edits to the attribute column values in the ADFdi worksheet. These values contain logic that
identifies the records as Zengin payments.
To review and update unidentified receipts in a Zengin lockbox transmission using the worksheet:
1. Navigate to the Accounts Receivable work area.
2. Open the Tasks panel on the right and select Receipts > Manage Lockbox Transmission and download the
worksheet.
3. Search for the first Zengin unidentified receipt that didn't find a matching alternate payer name mapping rule.
4. Scroll to the Customer Account Number and Customer Site columns for this record.
5. Update the receipt:
◦
To create the receipt as identified, replace the alternate payer name in the Customer Account Number
field, and if applicable the Customer Site field, with the valid customer account and site.
◦
To keep the receipt as unidentified, remove the alternate payer name from the Customer Account
Number field and leave it blank.
6. Repeat steps 3 to 5 for each unidentified receipt.
172

Oracle Fusion Cloud Financials
Implementing Receivables Credit to Cash
Chapter 4
Define Customer Payments
7. In the Lockbox Errors tab, click Upload or Submit and Post to resubmit the file.
When you resubmit the completed worksheet, this automatically assigns alternate payer name mapping rules
to the customers added to unidentified receipts.
FAQs for Lockbox
Why can't I find a receipt source in the lockbox?
Receipt sources are created and assigned to a particular business unit. Lockboxes are created and assigned to a
particular lockbox set.
The receipt sources available for use with a given lockbox are limited to the receipt sources created and assigned to the
business units that belong to the lockbox set.
To define a receipt source for use with lockbox, use these settings:
• Set Receipt Source Type to Manual.
• Provide both a default Receipt Method and a default Bank Account.
• Set Batch Numbering to Automatic.
How can I calculate the lockbox batch size?
Use the Batch Size field to enter the number of receipts to assign to each receipt batch during lockbox processing.
For example, if you have 991 receipts, and you set the batch size to 10, the lockbox process creates 99 batches with 10
receipts and one batch with one receipt.
If you don't want the lockbox process to separate your lockbox submission into multiple receipt batches, complete these
steps:
• Enter a number larger than the number of receipts in the lockbox transmission for this lockbox.
• Enable the Complete batches only option when you submit your lockbox transmission.
How can I use the accounting date source?
The value in the lockbox Accounting Date Source field determines the accounting date to apply to the receipts in the
lockbox.
The accounting date source values for lockbox processing are:
• Constant Date: Use the accounting date that you enter in the lockbox transmission.
If you don't enter an accounting date, the lockbox process doesn't validate your data.
• Deposit Date: Use the deposit date that you enter in the lockbox transmission. This is the date that your
remittance bank deposits your receipts.
If you don't enter a deposit date, the lockbox process displays an error and prompts for a deposit date to submit
the lockbox.
• Import Date: Use the date you import receipts.
173

Oracle Fusion Cloud Financials
Implementing Receivables Credit to Cash
Chapter 4
Define Customer Payments
How does AutoApply manage invalid transaction numbers?
If lockbox uses AutoApply, then the lockbox process attempts to match customers to receipts and receipts to
transactions based on your setup.
If lockbox can't fully apply a receipt due to invalid transaction numbers, then it manages the additional amounts
according to the Post Partial Amount as Unapplied option. Receipts are applied to valid transactions, and the
remaining receipt amounts are marked as Unapplied.
Transmission Formats for Lockbox
How Lockbox File Transmissions Are Validated
The first step in lockbox processing is validating the data imported from your bank file using the lockbox file
transmission.
The lockbox process validates the data that you receive from the bank to ensure that:
• entire file was received.
• no duplicate receipts within a batch.
• customers and transactions are valid.
Lockbox also validates that all data is compatible with Receivables by ensuring that the columns in the
AR_PAYMENTS_INTERFACE_ALL table reference the appropriate values and columns in Receivables.
Settings That Affect Lockbox Validation
Lockbox checks for duplicate receipts and transactions.
Duplicate receipts have the same receipt number, amount, currency, and customer account number. Lockbox doesn't
allow duplicate receipts within the same receipt source for the same customer. This is the same validation Receivables
performs when you manually enter receipts.
Transaction numbers are only required to be unique within a receipt source. A customer can have duplicate transaction
numbers as long as they belong to different receipt sources. However, lockbox can't automatically apply a payment to
these transactions.
If a customer has more than one transaction in the lockbox transmission with the same number, then lockbox can't
determine to which transaction to apply the payment. In this case, the receipt is either left as Unapplied (if the customer
account number or MICR number is provided) or Unidentified (if the customer account number or MICR number isn't
provided).
You can manually apply the receipt according to the transaction recommendations that Receivables presents according
to your implementation.
How a Lockbox Transmission Is Validated
When you import a bank file, lockbox completes the following validations:
• Transmission Level Validations
174

Oracle Fusion Cloud Financials
Implementing Receivables Credit to Cash
Chapter 4
Define Customer Payments
• Lockbox Level Validations
• Batch Level Validations
• Receipt Level Validations
• Overflow Level Validations
• Customer Validations
• Currency Validation
Transmission Level Validations
Lockbox validates the lockbox transmission to ensure that transmission information corresponds to the transmission
format. The following attributes are validated:
• Transmission format contains receipt records.
• Either the lockbox number is part of the transmission format, or you specify the lockbox number when you
submit the lockbox.
• Accounting date is in an open accounting period.
• Total transmission record count and amount that you supply must match the actual receipt count and amount
as determined by lockbox. If the transmission format includes the transmission header or trailer, lockbox counts
all records in this transmission. The validated count includes all receipts and detail records transferred to the
interim table.
• Origination number is valid, if provided.
Lockbox Level Validations
Lockbox validates the lockbox records to ensure that lockbox information corresponds to the transmission format. The
following attributes are validated:
• If the transmission format includes the transmission header or trailer, ensure that the lockbox number is
included and is valid.
• Lockbox batch count is correct, if provided.
• Lockbox amount is correct, if provided.
• Lockbox record count is correct, if provided.
• Origination number is valid, if provided.
• No duplicate lockbox numbers.
Batch Level Validations
Lockbox validates the batch records to ensure that batch information corresponds to the transmission format. The
following attributes are validated:
• Batch name exists on batch records.
• Batch name is unique within the transmission.
• Batch amount is correct.
• Batch record count is correct.
• Lockbox number exists on batch records, if this number is part of the transmission format.
175

Oracle Fusion Cloud Financials
Implementing Receivables Credit to Cash
Chapter 4
Define Customer Payments
Receipt Level Validations
Lockbox validates the receipt records to ensure that receipt information corresponds to the transmission format. The
following attributes are validated:
• Remittance amount is specified.
• Check number is specified.
• Item number is specified and is unique within a batch, a lockbox, or the transmission, depending on the
transmission format.
• Lockbox number is specified (if this number isn't part of the lockbox header or trailer of the transmission
format) and batches aren't imported.
• Batch name is specified, if either batch headers or trailers are part of the transmission format.
• Account number is specified, if transit routing number is part of the transmission format.
• Invoice1-8 are either valid or left blank.
• Installment1-8 are either valid installment numbers or are left blank.
• Invoice, debit memo, credit memo, on-account credit, or chargeback number derived from the matching
number doesn't belong to a receipt.
• Transaction number is entered where an application amount is specified.
• Sum of all of the Amount Applied columns for a receipt doesn't exceed the remittance amount.
• Customer account number is valid.
• Customer account number and MICR number both reference the same customer, if both are provided.
• Receipt date is specified.
• Receipt method is valid.
• Currency is valid.
Overflow Level Validations
Lockbox validates the overflow records to ensure that overflow information corresponds to the transmission format.
The following attributes are validated:
• Batch name is specified, if either batch headers or trailers are part of the transmission format.
• Lockbox number is specified, if either the batch header or trailer isn't specified and the transmission format
includes the lockbox number.
• Item number is specified and matches a receipt record.
• Overflow indicator is specified, unless it's the last overflow record.
• Overflow sequence is specified.
• Invoice1-8 are either valid or are left blank.
• Installment1-8 are either valid installment numbers or are left blank.
• Transaction number derived is entered where an application amount is specified.
176

Oracle Fusion Cloud Financials
Implementing Receivables Credit to Cash
Chapter 4
Define Customer Payments
Note: For Receipt and Overflow validations of Invoice1-8: If you're using matching numbers and a receipt record
indicates that multiple transactions are to be paid by this receipt, lockbox assumes that all of the transactions are
the same document type, such as invoices, sales orders, or purchase orders. For example, if the first 2 transactions
are invoices, lockbox successfully matches them with this receipt. However, if the next transaction isn't an invoice,
lockbox either imports the remaining receipt amount as Unidentified or rejects the entire receipt, depending on the
lockbox definition. If lockbox imports the remaining receipt amount as Unapplied, then Receivables retains the invalid
matching numbers.
Customer Validations
Lockbox can either validate customer data based on the following attributes or mark the receipt as Unidentified if no
match is found:
• Customer account number is valid.
• MICR number is valid.
• Bill-to customer is from a matched invoice, if matching is enabled.
Currency Validation
Receivables lets you process receipts in multiple currencies. If you pass the currency, conversion type, and receipt date,
lockbox attempts to determine the conversion rate. If lockbox is unable to determine the conversion rate, the receipt will
fail validation.
Related Topics
•
Lockbox Standard Receipt Import Process
Lockbox Transmission Formats
Lockbox receipt processing makes use of transmission formats, also called control files (.ctl), to specify how the data in a
bank file is organized for import into the Receivables interface tables.
The control files are based on industry standards that are used by many banks for transferring lockbox receipts.
During Lockbox receipt processing:
• The Load Interface File for Import process identifies the control file to use based on the prefix of the bank file
name. For example, because the file Arlockboximportbai2_mmddyyyy.dat begins with arlockboximportbai2, the
process uses this transmission format.
• The Lockbox validation process uses the structure of the transmission format to ensure that data is transferred
from the bank file to the tables correctly.
Transmission Formats
The following list describes predefined Receivables transmission formats. The BAI and EDI823 control files are fixed-
length text-based data files.
If the BAI and EDI823 control files can't meet the specific requirements of a particular customer, Receivables also
provides the FBDI comma-delimited control file (arlockboximportc.ctl) and corresponding spreadsheet.
177

Oracle Fusion Cloud Financials
Implementing Receivables Credit to Cash
Chapter 4
Define Customer Payments
BAI (arlockboximportbai.ctl)
Original format created by the Bank Administration Institute.
BAI 2.0 (arlockboximportbai2.ctl)
Updated format created by the Bank Administration Institute.
BAI2 Extended (arlockboximportextbai2.ctl)
Updated format that provides some extended field lengths.
ORA_BAI2-EXTENDED_GENERIC (arlockboximportgenbai2.ctl)
Updated format similar to the BAI2 Extended format with field lengths similar to database table field lengths holding
comparable data.
EDI823 (arlockboximportedi823.ctl)
Format used in an Electronic Data Interchange (EDI) environment.
Receivables Standard Receipt Import (FBDI) (arlockboximportc.ctl)
Format similar to Cloud FBDI process control files. These files provide a comma-delimited data file with a corresponding
macro-enabled spreadsheet template.
Zengin Format for Japan (ORA_ZENGIN_LOCKBOX) (arlockboximportzenginr.ctl)
Format for Zengin data that identifies Japanese customers using the alternate payer name.
Zengin Format for Japan with VAN (ORA_ZENGIN_LOCKBOX_VAN) (arlockboximportzenginvan.ctl)
Format for Zengin data with Virtual Account Number (VAN) support to identify Japanese customers.
Lockbox Transmission Format Record Types
Enter the record types to include in a lockbox transmission format. Use the Identifier column to uniquely identify each
record type.
Your bank file might not contain all of these record types. You should define your transmission format to only include
the record types you actually use.
Record Types
Batch Header
A Batch Header marks the beginning of a specific batch. Batch Headers usually contain information such as batch
number, deposit date, and lockbox number.
Batch Trailer
A Batch Trailer marks the end of a specific batch. Batch Trailers usually contain information such as batch number,
lockbox number, batch record count, and batch amount.
Lockbox Header
178

Oracle Fusion Cloud Financials
Implementing Receivables Credit to Cash
Chapter 4
Define Customer Payments
A Lockbox Header marks the beginning of a specific lockbox. Lockbox Headers usually contain information such as
destination account and origination number.
Lockbox Trailer
A Lockbox Trailer marks the end of a specific lockbox. Lockbox Trailers usually contain information such as lockbox
number, deposit date, lockbox amount, and lockbox record count.
Overflow Receipt
An Overflow Payment usually contains invoice information for a specific payment, such as batch number; item
number; sequence number; overflow indicator; invoice, debit memo, or chargeback number; and debit item amounts.
Receivables combines the overflow and payment records to create a logical record to submit payment applications.
Receipt
A Receipt usually contains payment information such as MICR number, batch number, item number, check number, and
remittance amount.
Service Header
Service Header records contain general information about the transmission.
Transmission Header
A Transmission Header marks the beginning of a specific data file. Transmission Headers usually contain information
such as destination account, origination number, deposit date, and deposit time.
Transmission Trailer
A Transmission Trailer marks the end of a specific data file. Transmission Trailers usually contain information such as
total record count.
Lockbox Transmission Format Field Types
Enter the lockbox transmission field types to use to identify the characteristics of each lockbox transmission record type.
You specify the size, order, and format of each transmission record. The lockbox transmission program only validates
the fields that you define in your transmission format. The transmission format must be fully compatible with how you
organize data in your lockbox file.
Field Types
Account
Your customer bank account. The bank account number and the transit routing number make up your customer MICR
number.
Alternate Name
The alternate name for this customer.
Amount Applied 1 to 8
179

Oracle Fusion Cloud Financials
Implementing Receivables Credit to Cash
Chapter 4
Define Customer Payments
The amount applied to each invoice, debit memo, or chargeback. Each payment or overflow payment record can
accommodate up to eight debit item numbers. For cross-currency applications, this is the amount to apply in the
transaction currency.
Amount Applied From 1 to 8
Used for cross-currency receipt applications, this is the amount applied to each transaction in the receipt currency. Each
payment or overflow payment record can accommodate up to eight debit item numbers.
Attribute 1 to 15
Use attributes to enter descriptive flexfield segments. Attributes can only be assigned to payment records.
Bank Transaction Code
A code defined for each account, used by your bank to uniquely identify the kind of transaction in a bank statement (for
example, debit, credit, void). This is also used by Cash Management to determine the receipt effective date.
Batch Amount
The total receipt batch amount for a specific bank batch.
Batch Name
The name of the batch for a specific bank batch.
Batch Record Count
The total number of payment records in a specific bank batch. The total number of all batch record counts equals the
Lockbox Record Count. This doesn't include overflow payments, headers, or trailers.
Billing Location
Your bank transmits the billing location of the payment. You must only specify the field name and the field positions
that the billing location occupies in the transmitted data file.
Comment
Any comments you want to associate with this transmission.
Conversion Rate
The conversion rate associated with this payment, if you’re using lockbox to import foreign currency receipts.
Conversion Type
The conversion type used to convert a foreign currency receipt to the ledger currency.
Currency
The currency of the payment. For cross-currency payments, you can also enter the Invoice Currency. If you don't enter a
value in this field, lockbox derives the currency from the information provided in the Amount Applied 1 to 8 and Amount
Applied From 1 to 8 fields.
Customer Bank Branch Name
The name of the customer bank branch.
Customer Bank Name
The name of the customer bank.
180

Oracle Fusion Cloud Financials
Implementing Receivables Credit to Cash
Chapter 4
Define Customer Payments
Customer Number
The identification number of the customer who submitted a payment.
Customer Reason 1 to 8
The customer reason why a payment shows a discrepancy.
Customer Reference 1 to 8
Customer comments about this payment.
Deposit Date
The date the bank receives and deposits the customer payment.
Deposit Time
The time the bank receives and deposits the customer payment.
Destination Account
Your business bank account. Your business may have more than one bank account.
Effective Date
The date on which the bank determines a customer balance to apply interest (used by Cash Management).
Invoice 1 to 8
The invoices, debit memos, and chargebacks to which you apply your payment. Each payment or overflow payment
record can accommodate up to eight debit item numbers.
Invoice 1 to 8 Installment
The installment number for this invoice.
Invoice Currency 1 to 8
The currency of the transaction. This field is used for cross-currency receipt applications. This field is optional.
Item Number
A sequence number that your bank assigns to a specific payment. This number associates an invoice with a receipt.
Lockbox Amount
The total payment amount in a specific lockbox.
Lockbox Batch Count
The total number of bank batches in a specific lockbox.
Lockbox Number
The identification number for a specific lockbox.
Lockbox Record Count
The number of payment records in a specific lockbox. This doesn't include overflow payments, headers, or trailers.
Matching Date 1-8
181

Oracle Fusion Cloud Financials
Implementing Receivables Credit to Cash
Chapter 4
Define Customer Payments
The dates to use to match receipts with transactions, if you’re using the Match on Corresponding Date option for this
lockbox.
Origination
The bank origination number provided by your bank. This number uniquely identifies the bank branch that sends you
lockbox information.
Overflow Indicator
Indicates any additional overflow records for this payment.
Overflow Sequence
A sequence number that your bank assigns to each overflow payment.
Receipt Method
The receipt method associated with this lockbox.
Payment Number
The identification number of a payment. For example, a check number.
Receipt Date
The date your customer made a payment.
Record Identifier
A number that identifies the kind of transmission record.
Remittance Amount
The amount of a payment.
Remittance Bank Branch Name
The name of the bank branch from which this payment originated.
Remittance Bank Name
The name of the bank from which this payment originated.
Status
The status of this payment.
Total Record Count
The total number of transmission records in a bank file. This includes headers, trailers, payments, and overflow records.
Trans to Receipt Rate 1 to 8
The conversion rate used to convert the receipt amount from the receipt currency to the transaction currency. This field
is used for cross-currency receipt applications, when the receipt and transaction currencies don't have a fixed rate. If the
currencies have a fixed rate, this field is optional (in this case, lockbox derives the rate to use).
Transit Routing Number
182

Oracle Fusion Cloud Financials
Implementing Receivables Credit to Cash
Chapter 4
Define Customer Payments
The number that uniquely identifies your customer bank. The transit routing number and the customer bank account
number make up the customer MICR number.
Transmission Amount
The total amount of payments for a bank file.
Setup for Zengin Transmission Formats
Define Zengin Alternate Payer Name Mapping Rules
Define alternate payer name mapping rules to identify Japanese customers during Zengin lockbox processing.
During standard lockbox processing, Receivables transmission formats use the customer account number to identify
the paying customer. Because the Zengin system doesn't include customer account information, lockbox instead
identifies customers by alternate payer name and, if defined, the customer’s virtual account number (VAN).
Use the Manage Alternate Name Mapping Rules page to map customer accounts, sites, and bank information to
designated alternate payer names and VANs to identify paying customers during lockbox processing of Zengin
receipts. The Zengin transmission formats ORA_ZENGIN_LOCKBOX and ORA_ZENGIN_LOCKBOX_VAN use all the
customer information in the mapping rule to identify a customer, create the customer receipts, and process the receipt
applications.
By default, a mapping rule must contain a direct mapping between an alternate payer name or VAN and a customer
account number. You can optionally include a customer bill-to site, Zengin paying customer bank and branch
information, and the remittance bank and branch information.
Note: You can only set up mapping rules for the customer accounts and sites you have access to for lockbox
payments.
To define an alternate name mapping rule for Zengin lockbox processing:
1. Navigate to the Manage Alternate Name Mapping Rules page.
2. Click the Create icon to open a new row.
3. In the Alternate Payer Name field, enter the alternate payer name that identifies the customer.
4. If applicable, enter in the Virtual Account Number field the virtual account number that identifies the paying
customer's bank account.
To maximize successful matching, set up unique individual mapping rules for each combination of VAN, alternate
payer name, and customer bank/branch.
5. In the Customer Account Number field, search for and select the customer account for this paying customer.
6. In the Bill-to Site field, select a bill-to site belonging to the customer account, if processing receipts for this bill-to site
only.
7. In the Zengin Customer Bank Name and Zengin Customer Bank Branch Name fields, optionally enter the name and
branch of the paying customer's bank.
8. In the Remittance Bank Number and Remittance Bank Branch Number fields, optionally enter the bank number and
branch number of the remittance bank that clears receipts and processes the remittances.
9. Enable the Active option.
10.Save your work.
183

Oracle Fusion Cloud Financials
Implementing Receivables Credit to Cash
Chapter 4
Define Customer Payments
What to do next
After Zengin lockbox processing, any receipt without an alternate payer name mapping rule or customer information is
created as an unidentified receipt. When you assign customer information to an unidentified receipt, this automatically
creates an alternate payer name mapping rule for that customer account.
You can assign customer information to an unidentified receipt using either the Manage Lockbox Transmission ADFdi
worksheet or the Edit Receipt page:
• In the Manage Lockbox Transmission ADFdi worksheet, for each unidentified receipt enter in the Customer
Account Number column and, if applicable, the Customer Site column the valid customer information. When
you resubmit the completed worksheet, this automatically assigns alternate payer name mapping rules to these
customers.
• In the Edit Receipt page, open an unidentified receipt and either enter customer information or apply an open
receivable with customer information. When you save the receipt, this automatically assigns an alternate payer
name mapping rule to this customer.
Establish best practices to periodically review and update your alternate payer name mapping rules to reflect changes to
customer alternate payer names and VANs.
You can use the Alternate Name Mapping Rules REST API to create a regular schedule for maintaining alternate payer
name mapping rules for Japanese customer bank accounts. The Alternate Name Mapping Rules REST API provides bulk
upload of alternate payer name mapping rules for Japanese customer bank accounts. The upload process verifies and
updates existing rules, creates new rules, and deletes obsolete rules.
Define Context Sensitive Segments for Zengin Receipts
Use the Zengin Cash Receipts predefined context in the Receipts descriptive flexfield to store additional information
required for ORA_ZENGIN_LOCKBOX during Zengin lockbox processing.
This information includes the transmission format file name, the alternate payer name mapped to the customer account
number of the paying customer, and, if available, the Zengin paying customer bank name and branch name.
This table indicates the name and table column assignment for each context sensitive segment:
Context Sensitive Segment Values
Segment Name Description Table Column
Transmission Name Name specified by the user to identify the
transmission.
Attribute1
Alternate Payer Name EFT requester name in the Zengin file. Attribute2
Customer Bank Name EFT requester bank name in the Zengin file. Attribute3
Customer Bank Branch Name EFT requester bank branch name in the Zengin
file.
Attribute4
To define the context sensitive segments for the Zengin Cash Receipts predefined context:
1. Navigate to the Manage Receivables Descriptive Flexfields page.
2. In the Search section, enter Receipts in the Name field and click the Search button.
3. Select the Receipts descriptive flexfield and click the Edit icon. The Edit Descriptive Flexfield: Receipts page opens.
184

Oracle Fusion Cloud Financials
Implementing Receivables Credit to Cash
Chapter 4
Define Customer Payments
4. In the Context Sensitive Segments section, select Zengin Cash Receipts in the Context field.
5. Click the Create icon to open the Create Segment page to create the first context sensitive segment.
6. In the Name field, enter Transmission Name.
7. In the Code field, enter the corresponding transmission name code.
8. In the API Name field, enter transmissionName.
9. In the Description field, enter the Transmission Name description.
10.In the Data Type field, select Character.
11. In the Table Column field, select ATTRIBUTE1.
12. In the Value Set field, select a value set according to your business requirements.
13. In the Prompt field, enter the segment name, in this case Transmission Name.
14.In the Display Type field, select Text Box.
15. Complete the remaining fields according to your business requirements.
16.Save your work.
17. Repeat steps 5 to 16 for the remaining segments.
FAQs for Transmission Formats for Lockbox
Can I reformat the transmission amount?
Yes, by using the Format Amount field setting. If you set this field to Yes, lockbox rounds the format amount to the
same degree of precision and the same number of decimal places as your ledger currency.
For example, if your ledger currency is USD (precision = 2) and you set this option to Yes, a value of 50000 in the bank
data file is formatted as 500.00. If you set the option to No, then this value isn't formatted and would appear as 50000.
What's an overflow record?
An overflow record stores additional receipt information that can't fit on the receipt record. This is typically additional
invoice numbers and the amount of the receipt to apply to each invoice.
Each overflow record must have a receipt record as a parent. If there are multiple overflow records for a receipt record,
each overflow record is assigned an overflow sequence.
AutoMatch Rule Sets
How AutoMatch Recommendations Are Calculated
During receipt processing, Receivables applies receipts to transactions based on the transaction information provided.
In cases where the transaction information provided doesn't exactly match the transaction numbers on record,
the AutoApply process attempts to find as close a match as possible and either apply the receipt to the transaction
automatically or present one or more transactions as recommendations for manual receipt application.
185

Oracle Fusion Cloud Financials
Implementing Receivables Credit to Cash
Chapter 4
Define Customer Payments
In like manner, during lockbox processing it may happen that a lockbox contains incomplete or inaccurate customer
information. The AutoApply process attempts to match a customer to a receipt and present one or more customers as
recommendations for the receipt.
The AutoMatch rule set provides information used by the AutoApply process to complete the process of applying
receipts to transactions. The settings in the AutoMatch rule set provide these recommendations:
• Customer recommendations: The matching process recommends customers for lockbox receipts that have
invalid customer information.
• Transaction recommendations: The matching process recommends one or more transactions for receipt
application for both lockbox and manual receipts.
Settings That Affect AutoMatch Recommendations
Recommendations are based on matching threshold levels defined in the AutoMatch rule set. These threshold settings
determine the percentage level necessary to consider a customer or transaction for receipt recommendation:
• Customer Recommendation Threshold: The qualifying percentage necessary to add customer information to
a receipt. If the calculated score for a customer account number is above this threshold, then the AutoApply
process adds this customer information to the receipt.
• Minimum Match Threshold: The qualifying percentage necessary to recommend a transaction for receipt
application. If the calculated score for one or more transactions is above this threshold, the AutoApply process
recommends the transactions for receipt application, in order of the highest percentage match.
Note: The minimum match threshold must be less than the customer recommendation threshold and the
combined weighted threshold.
• Combined Weighted Threshold: The qualifying percentage necessary for the AutoApply process to apply a
receipt to a transaction automatically. This percentage is the sum of the qualifying percentages defined for the
supplied customer information, transaction information, and actual transaction amount considered for receipt
matching.
• Days of Closed Invoices Threshold: Determines which closed transactions to include in the AutoMatch
process. All transactions that were closed on or before the number of days provided as the threshold value are
considered for application or recommendation.
How AutoMatch Recommendations Are Calculated
The threshold qualifying percentages defined in the AutoMatch rule set are compared to the resulting scores of each
customer account number or transaction number analyzed by the matching process.
The matching process derives a recommendation in this way:
1. If applicable, remove characters and spaces from the number as defined by the AutoMatch rule set string
handling.
2. Apply the formula (Levenshtein algorithm) to the resulting string to obtain the score. This formula is:
1 - (number of changes required to make the recommended string match the provided string / length of the
larger string)
3. Compare the resulting score to the applicable threshold.
186

Oracle Fusion Cloud Financials
Implementing Receivables Credit to Cash
Chapter 4
Define Customer Payments
AutoMatch Recommendation: Example
The transaction number 10010 is provided by lockbox for a receipt application. This number doesn't exist, but
Receivables finds the number AR10001. The recommendation for this number is calculated in this way:
1. The AutoMatch rule set string handling settings indicate that the first two characters are to be removed from a
string under consideration.
Receivables removes AR, leaving the number 10001.
2. It will take one transposition for 10001 to match 10010. Therefore, the score for this match is (1 - 1/5) = 80%.
3. The 80% score exceeds the Combined Weighted Threshold value of 70%, so the receipt is automatically applied
to transaction AR10001.
Related Topics
•
When do I use days to AutoApply a receipt?
•
How Recommendations for Receipt Application Are Calculated
AutoMatch Combined Weighted Thresholds
When you define an AutoMatch rule set, use the weighted threshold fields to qualify the percentage necessary to allow
for an automatic receipt application.
This qualifying percentage considers the importance, or weight, that the AutoApply process should give to the three
main components of a transaction: customer information, transaction information, and transaction amount.
How You Use the Combined Weighted Thresholds
Enter the weight, as a percentage, that the AutoApply process should give to the successful matching of customer,
transaction, and amount information, when considering a transaction for automatic receipt application.
The total of the three percentages must equal 100. In most cases, you wouldn't give equal weight to each component
of a transaction. That is, you wouldn't enter 33, 33, 34 as the three weighted values. In order for AutoApply to apply
a receipt to a transaction automatically, the weighted thresholds you enter should reflect your standard business
practices.
Enter these weighted thresholds:
• Customer Weight: Enter the weight to give to matching the customer information on the transaction.
• Transaction Weight: Enter the weight to give to identifying the correct transaction, either by correct matching or
by the Match Receipts By rule document reference.
• Amount Weight: Enter the weight to give to matching the open balance amount. Because the parts of a
transaction amount can play a part in this decision, you can use the Amount Weight Exceptions section to
provide additional granularity to the open balance amount considered.
The AutoApply process calculates the percentage score for each match between customer, transaction, and amount. It
then derives a final score for each weighted threshold as a percentage of the weighted threshold values, and adds these
results to obtain a final score. This final score is then compared against the combined weighted threshold value.
For example, you enter these weighted threshold values:
187
Oracle Fusion Cloud Financials
Implementing Receivables Credit to Cash
Chapter 4
Define Customer Payments
Weight Value
Combined Weighted Threshold
75%
Customer
20%
Transaction
70%
Amount
10%
During lockbox processing, a transaction is presented for receipt application with these details:
• Customer account number: 1001
• Transaction number: 10010
• Amount due remaining : 127
• Amount after discount: 120.65
• Tax remaining: 20
• Freight Remaining: 7
• Unearned Discount: 6.35
Lockbox presents a receipt for application with these details:
• Customer account number: 1005
• Reference number: 1001
• Reference amount: 120.65
AutoApply performs these calculations:
• Customer match: The match between account number 1001 and 1005 has a calculated score of 75%
[(1-1/4)*100]. Since the customer weighted threshold value is 20%, this provides a final score of 15%.
• Transaction match: The transaction match has a calculated score of 80% [(1-1/5)*100]. Since the transaction
weighted threshold value is 70%, this provides a final score of 56%.
• Amount match: The transaction amount match is 100%. Since the amount weighted threshold value is 10%, this
provides a final score of 10%.
The sum of the three final scores is 81%, which is greater than the Combined Weighted Threshold value of 75%.
Therefore, AutoApply automatically applies the receipt to the transaction.
Note: If the score were below the Combined Weighted Threshold value but above the Minimum Match Threshold
value, then AutoApply would generate recommendations for user review. If the score were below the Minimum Match
Threshold value, then AutoApply wouldn't generate recommendations.
188

Oracle Fusion Cloud Financials
Implementing Receivables Credit to Cash
Chapter 4
Define Customer Payments
AutoMatch Amount Weight Exceptions
When you define an AutoMatch rule set, the values you enter in the Amount Weight Exceptions section qualify the
meaning of the open balance amount considered by the Amount Weight threshold.
How You Use Amount Weight Exceptions
Enter threshold percentages to qualify the weight to give to different portions of the open balance amount on a
transaction.
Enter these amount weight exception thresholds:
• Net of Tax Weight: Enter the weight to give to the total transaction amount net of tax but including freight.
• Net of Tax and Freight Weight: Enter the weight to give to the total transaction amount net of tax and freight.
• Net of Freight Weight: Enter the weight to give to the total transaction amount net of freight but including tax.
• Unearned Discount Weight: Enter the weight to give to transaction amounts that include an unearned
discount.
If an exact match exists between the receipt amount and transaction amount, AutoApply uses the Amount Weight
threshold value without reference to the amount weight exceptions.
If an exact match doesn't exist between the receipt amount and transaction amount, AutoApply looks for the best
match among all of the amount weight exceptions to derive a percentage score.
For example, you enter these amount weight exception threshold values:
Weight Value
Net of Tax Weight
70%
Net of Tax and Freight Weight
70%
Net of Freight Weight
80%
Unearned Discount Weight
60%
During lockbox processing, a transaction is presented for receipt application with these details:
• Customer account number: 1001
• Amount due remaining: 127
• Amount after discount: 120.65
• Tax remaining: 20
• Freight Remaining: 7
• Unearned Discount: 6.35
189

Oracle Fusion Cloud Financials
Implementing Receivables Credit to Cash
Chapter 4
Define Customer Payments
Lockbox presents a receipt for application with these details:
• Customer account number: 1005
• Reference amount: 120
Because no exact match exists between the transaction amount and the receipt amount, AutoApply looks for the closest
match among the amount weight exceptions to derive an amount weight. An exact match exists between the receipt
amount and the transaction amount net of freight (127 - 7 = 120). AutoApply therefore uses the Net of Freight Weight
threshold value of 80% as the calculated score for the Amount Weight threshold.
How AutoMatch String Handling Works
The String Handling section of the Create and Edit AutoMatch Rule Set pages provides rules that assist in the search for
transaction matches against the Match Receipts By document type reference used by AutoApply.
The rules indicate what part of a string to remove in order to compare the resulting stripped number against the
matching numbers provided during receipt processing. Matching recommendations for the string are processed
according to the weighted threshold values of the AutoMatch rule set.
You can define rules for transaction strings and remittance strings.
Settings That Affect String Handling
Use the string handling settings to indicate what part of a string to remove before string comparison. This is typically an
alphanumeric prefix or suffix, or a string of zeros used to pad numbers to equal length.
Enter these settings:
• String Location: Indicate whether to remove characters and digits from the Front or Back of the string.
• String Value: Indicate the type of characters and digits to remove: Zero, Empty Spaces, or Any. Any includes
zeros, spaces, and any character, digit, or special character.
• Number of Characters: Indicate the number of places to remove.
How String Handling Is Used
If the string handling settings for a transaction number are:
• String Location: Front.
• String Value: Any.
• Number of Characters: 5.
Then the string ABC: 10044 is converted to 10044. The string handling process removed the first 5 characters from the
string: the alphanumeric characters ABC, the colon (:), and the space.
If the string handling settings for a transaction number are:
• String Location: Back.
• String Value: Zero.
• Number of Characters: 3.
190

Oracle Fusion Cloud Financials
Implementing Receivables Credit to Cash
Chapter 4
Define Customer Payments
Then the string:
• ABC: 10044000 is converted to ABC: 10044.
• 985660000 is converted to 985660.
• 985660000000003 isn't processed. This is because AutoApply looks for zeros at the end of the string but finds
a number instead.
Related Topics
•
Receipt Application Using the Match Receipts By Rule
Application Exception Rule Sets
Application Exception Rule Conditions and Actions
Use the Exception Rules section of the Create Receivables Application Exception Rule Set page to indicate how to
process each overpayment and underpayment condition.
Each exception rule consists of:
• A condition.
• The amount and percentage that applies to the condition.
• The action to take when the condition arises.
The Action field contains the Receivables activities that you have defined for Adjustment, Receipt Write-off, or Refund.
The underpayment or overpayment amount is accounted for in the general ledger accounts belonging to the applicable
Receivables activity.
The User Review Required option indicates whether the action is processed automatically or requires manual review
and approval.
For example, the exception rule:
Over Payment >= 100 Refund
means that if a receipt application overpays a transaction by $100 or more, then the customer should receive a refund.
The exception rule:
Under Payment < 5 Write-off
means that if a receipt application results in an underpayment of less than $5, then the remaining amount can be
written off.
You can use the Percent field with the Amount field to further refine the scope of a condition. If you use both fields,
then both conditions must be met in order to apply the rule.
For example, the exception rule:
Under Payment < 5 5% Write-off
191

Oracle Fusion Cloud Financials
Implementing Receivables Credit to Cash
Chapter 4
Define Customer Payments
means that if a receipt application results in an underpayment less than $5 and also less than 5% of the open balance,
then the remaining amount can be written off. In this case, if a $10 open balance has a $4 underpayment, then this
exception rule doesn't apply, because $4 is 40% of the open balance. If the $4 underpayment were for an open balance
of $100, then the rule does apply, because $4 is 4% of the open balance.
Related Topics
•
Approval Limits Document Types
•
How Recommendations for Receipt Application Are Calculated
FAQs for Application Exception Rule Sets
When do I use an application exception rule set?
Use an application exception rule set to manage remaining amounts after lockbox or receipt batch processing.
After lockbox or the receipt batch processes and applies receipts, the AutoApply process uses the application exception
rule set to determine how to manage over and under payments:
• If there's an overpayment, the application exception rule indicates whether to refund the amount to the
customer, place the amount on account, write off the amount, or leave the amount unapplied.
• If there's an underpayment, the application exception rule indicates whether to allow write off of the remaining
open balance amount on the transaction.
• For integration with Channel Revenue Management, the application exception rule designates the
underpayment or overpayment amount after receipt application for claim settlement.
What's the difference between the AutoMatch rule set and the application exception
rule set?
During lockbox or receipt batch processing, the AutoMatch rule set provides recommendations for matching receipts to
transactions based on the transaction information provided.
The AutoApply process attempts to match receipts to transactions and either apply receipts automatically or present for
manual processing transaction recommendations for receipt application.
If the AutoApply process can apply the receipt to all of the transaction references automatically, then it uses the details
of the application exception rule to refund overpayment to the customer, if there is one, or process underpayment
according to the exception rules. For integration with Channel Revenue Management, the application exception rule
designates the underpayment or overpayment amount after receipt application for claim settlement.
If AutoApply can't apply the receipt to all of the transaction references automatically, then the remaining transaction
recommendations are presented, if available, for manual processing and the application exception rule isn't used.
Note: If a receipt doesn't have a transaction reference, the application exception rule for overpayments isn't used.
192

Oracle Fusion Cloud Financials
Implementing Receivables Credit to Cash
Chapter 4
Define Customer Payments
Customer Paying Relationships
Customer Hierarchies and Paying Relationships
The customer hierarchy describes the structure of an enterprise or portion of an enterprise. Enterprise structures are
defined and maintained in the FND_HIER tables. There are three predefined hierarchies: Customer hierarchy, Trading
Community party hierarchy, and Duns and Bradstreet hierarchy.
You assign a paying relationship to a hierarchy to indicate how the parties in the hierarchy are able to manage each
other's customer payments. There are two paying relationships:
• Pay Any: Any party within the relationship can pay for the accounts of any other party within the relationship.
• Pay Below: A parent-child relationship, whereby each party can pay for its own transactions and the
transactions of all parties that are lower in the hierarchy (children, grandchildren, and so on).
This figure describes the customer hierarchy in Acme Corporation:
193

Oracle Fusion Cloud Financials
Implementing Receivables Credit to Cash
Chapter 4
Define Customer Payments
Pay Any Paying Relationship
If this Acme Corporation hierarchy is assigned a Pay Any paying relationship, then:
• Acme Worldwide can pay for Acme USA, Acme Japan, and Acme West.
• Acme USA can pay for Acme Worldwide, Acme Japan, and Acme West.
• Acme Japan can pay for Acme Worldwide, Acme USA, and Acme West.
• Acme West can pay for Acme Worldwide, Acme USA, and Acme Japan.
Pay Below Paying Relationship
If this Acme Corporation hierarchy is assigned a Pay Below paying relationship, then:
• Acme Worldwide can pay for Acme USA, Acme Japan, Acme West, and its own transactions.
• Acme USA can pay for Acme West and its own transactions.
194

Oracle Fusion Cloud Financials
Implementing Receivables Credit to Cash
Chapter 4
Define Customer Payments
• Acme Japan can pay for its own transactions.
Related Topics
•
What's the difference between an account relationship and a paying relationship?
•
How You Manage Hierarchies
FAQs for Customer Paying Relationships
What's the difference between an account relationship and a paying relationship?
An account relationship is a flat relationship between two customer accounts only. In an account relationship, either
one account can pay for the transactions of another account (one-way) or both accounts can pay for the transactions of
each other (reciprocal).
A paying relationship makes use of a hierarchical structure within an enterprise to allow all corresponding accounts and
transactions that are associated with one party to be accessible to other parties in the structure. In a paying relationship
either one account can pay for the transactions of accounts lower in the hierarchy (Pay Below) or all accounts anywhere
in the hierarchy can pay for the transactions of any other party (Pay Any).
What happens if a customer hierarchy type is deactivated?
Then the active paying relationship assignments for this hierarchy are no longer valid. You must enter an end date for
each related paying relationship assignment that's on or before the date the customer hierarchy type was deactivated.
FAQs for Receipt Sources
How does automatic batch numbering work?
The automatic receipt and remittance processes assign a number to an automatic receipt or remittance batch by adding
+1 to the previous batch number.
When you define the Automatic Receipts receipt source, enter a number in the Batch Number Starts After field as the
starting point from which to increment the next automatic receipt batch number.
For example, to number automatic receipt batches starting with 1000, enter the number 999. The automatic receipt
process adds +1 to each subsequent number as new batches are created.
Where are receipt sources used?
You only use receipt sources with receipt batches and remittance batches. This includes automatic receipt batches,
lockbox receipts, and receipts created using a spreadsheet.
195

Oracle Fusion Cloud Financials
Implementing Receivables Credit to Cash
Chapter 4
Define Customer Payments
The Automatic Receipts receipt source is used automatically by the automatic receipt and remittance processes. You
don't need to enter this receipt source.
196

Oracle Fusion Cloud Financials
Implementing Receivables Credit to Cash
Chapter 5
Configure Payment System Connectivity
5 Configure Payment System Connectivity
Options for Validations
Validations are rules that ensure that transactions are valid before they are printed or submitted electronically to
payment systems. You use validations to ensure that disbursement transactions, such as invoices, payments, and
payment files meet specific conditions before they can be paid.
You can assign validations to payment methods and payment formats. A validation can be executed at the document
payable, payment, or payment file level.
In payment processing, it's critical that payment files sent to payment systems and financial institutions are valid and
correctly formatted. If this is not done, the payment process is slowed, which results in additional time and cost due to
problem resolution. Oracle Fusion Payments helps you achieve straight-through processing by ensuring that payment-
related details are valid. To assign validations, you can select from the following options:
• Assigning validations
• Creating user-defined validations
• Selecting from a predefined library of validations
The following table lists the objects you can validate and when validations are executed for the applicable setup.
Object Payment Method-Driven Validations are
Enforced When...
Payment File Format-Driven Validations are
Enforced When...
Document Payable
The invoice is saved in the source product.
The invoice installment is selected for payment.
The invoice installment is selected for payment.
Payment
The payment is created by building related
documents payable together.
The payment is created by building related
documents payable together.
Payment File
Not applicable.
The payment file is created.
Assigning Validations
You can assign user-defined validations to any:
• Payment method
• Payment file format
You can assign a validation to whichever object drives the requirement for validation. For example, if your bank
format requires a limited number of characters in a specific field, you can assign that validation to the bank format. By
doing this, you ensure that the validation is enforced only when applicable. However, if you want to enforce a general
validation that isn't specific to the payment method or format, you can consider timing in your decision.
197

Oracle Fusion Cloud Financials
Implementing Receivables Credit to Cash
Chapter 5
Configure Payment System Connectivity
Payments always validates as early as possible for a given object and setup. Document payable validations that are
associated with payment methods are enforced earlier in the process than those associated with formats. If you want
validation failures handled by the same person who is entering the invoice, you can associate the validation with the
payment method. This method is ideal for business processes where each person has full ownership of the items
entered. However, if you want focused invoice entry with validation failures handled centrally by a specialist, you can
associate the validation with the format. This method is ideal for some shared service centers.
Creating User-Defined Validations
A user-defined validation explicitly specifies the object to which the validation applies:
• Document payable
• Payment
• Payment file
User-defined validations are basic validations that correspond to simple operations. These validations can be used
as components, or building blocks, to build more complex validations. They enable you to validate, for example, the
following conditions:
• Length of a value. Example: Payment Detail must be fewer than 60 characters for your bank-specific payment
file format.
• Whether a field is populated. Example: Remit to bank account is required when payment method is Electronic.
• Whether content of a field is allowed. Example: Currency must be USD when using your domestic payment file
format.
Selecting From a Predefined Library of Validations
Payments provides a library of predefined validations. You can associate these predefined validations with any
payment method or payment file format you create. Many of the payment formats provided by Oracle have predefined
validations associated with them by default.
Predefined validations are groups of individual validations that are together for a specific purpose. Many of the
predefined validations that you can associate with payment formats are country-specific. Predefined validations cannot
be modified, although some have parameters you can set to define specific values.
How You Set Up Formats
Setting up formats is a required task in Oracle Fusion Payments. A format is a disbursements or a funds capture data file
to which an Oracle Analytics Publisher template is applied.
Oracle Analytics Publisher templates contain formatting attributes that format data files. Formatted outputs include
printed checks, electronically transmitted payment files, settlement batches, and reports.
The purpose of setting up formats is to enable payment systems, financial institutions, or countries to understand your
company's messages, given their specific formatting requirements for disbursements or funds capture transactions.
Inbound messages come from a payment system or financial institution to your company. Outbound messages leave
your company to your payment system or financial institution.
198

Oracle Fusion Cloud Financials
Implementing Receivables Credit to Cash
Chapter 5
Configure Payment System Connectivity
Setting up formats involves the following actions:
• Using Oracle Analytics Publisher templates
• Using data extracts
• Using the identity format
• Considering best practices
• Setting up formats
• Understanding associations between format entities
• Assigning validations to formats
Note: Before you can set up formats, you must set up the corresponding templates in Oracle Analytics Publisher.
For more information on setting up templates, see the Oracle Fusion Middleware Report Designer's Guide for Oracle
Analytics Publisher.
Using Oracle Analytics Publisher Templates
Each Payments format corresponds to one Oracle Analytics Publisher template. Analytics Publisher templates specify
exactly how formatted output is to be generated. Analytics Publisher templates can also be used to generate fixed-
position, machine-readable files through Analytics Publisher's eText functionality.
Using Data Extracts
Each disbursement or funds capture format is also associated with a disbursement or funds capture Payments' data
extract. Each data extract contains transactional data. Oracle Analytics Publisher templates use data extracts to format
transactional data. Transactional data is extracted from Payments' or Oracle Fusion Receivables' transactional tables.
For a disbursements extract, data comes from:
• Payments
• Payment files
• Documents payable tables
For a funds capture extract, data comes from:
• Funds capture transactions
• Settlement batches
• Receivables transactions
Using the Identity Format
The Identity format outputs the XML extract provided by Payments. It's intended for diagnostic purposes, but you
can also use it to understand how extract fields are populated from transactional and setup entities. This is especially
helpful if you intend to create complex configurations using other templates.
The Identity format is an Oracle Analytics Publisher template called IBY_IDENTITY. It's part of the Funds Capture
Authorization and Settlement report. To use the Identity format for a disbursements report, you must download the
RTF template and upload it as part of the intended disbursements report. Then, you can set up a modified format
in Payments using the newly created format with a payment process profile or a funds capture process profile, and
examine the XML output.
199

Oracle Fusion Cloud Financials
Implementing Receivables Credit to Cash
Chapter 5
Configure Payment System Connectivity
Considering Best Practices
Before setting up formats, find out what payment formats your processing bank supports. Consider using standards-
based payment formats that can be used with multiple banks:
• EDIFACT formats, such as PAYMUL, MT100, and MT103
• NACHA formats, such as Generic, CCD, or PPD
Setting Up Formats
In the Setup and Maintenance work area, use the following to select a predefined format type on the Manage Formats
page:
• Offering: Financials
• Functional Area: Payments
• Task: Manage Formats
The format type you select specifies:
• Type of message created
• Oracle Analytics Publisher template used to format the data file
• Data extract used
On the Create Format page, associate an Oracle Analytics Publisher template with the format type you selected.
Understanding Associations Between Format Entities
The following table describes the association between format types, templates, and data extracts.
Format Types Oracle Analytics Publisher Template Data Extracts
Disbursement Payment File Formats
Disbursement Payment File Formats
Disbursement Extract
Disbursement Positive Pay File Formats
Disbursement Positive Pay Formats
Disbursement Positive Pay Extract
Disbursement Separate Remittance Advice
Formats
Disbursement Separate Remittance Advice
Formats
Disbursement Extract
Disbursement Accompanying Letter Formats
Disbursement Accompanying Letter Formats
Disbursement Extract
Disbursement Payment Process Request Status
Report Formats
Disbursement Payment Process Request Status
Report
Disbursement Payment Process Request
Extract
Disbursement Payment File Register Formats
Disbursement Payment File Register
Disbursement Extract
Funds Capture Settlement Format
Funds Capture Authorization And Settlement
Formats
Funds Capture Extract
200

Oracle Fusion Cloud Financials
Implementing Receivables Credit to Cash
Chapter 5
Configure Payment System Connectivity
Format Types Oracle Analytics Publisher Template Data Extracts
Funds Capture Accompanying Letter Formats
Funds Capture Accompanying Letter Formats
Funds Capture Extract
Funds Capture Payer Notification Formats
Funds Capture Payer Notification Formats
Funds Capture Extract
Assigning Validations to Formats
After you create a format, you can optionally assign predefined or user-defined payment validations to it on the Edit
Format page. Validations ensure that disbursements or funds capture transactions execute according to specified
conditions.
Related Topics
•
What's a format type?
•
Options for Validations
•
Oracle Fusion Middleware Report Designer's Guide for Oracle Business Intelligence Publisher
Transmission Protocols
Computers use transmission protocols to communicate with each other across a network. To transmit data, such as
payment files from Oracle Fusion Payments to a payment system, the implementor defines protocols that the payment
system can receive.
Payments offers industry-standard transmission protocols, such as FTP, HTTP, and HTTPS, predefined. They are
composed of the following:
• A code entry point, which the payment system servlet uses to accomplish transmission
• A list of parameters, such as network address and port, for which the transmission configuration must supply
values
• Transmission protocol entry points, which are independent of payment servlets and may be called from the
Payments engine
While the transmission protocol defines which parameters are expected in the communication, the transmission
configuration defines what value is supplied for each parameter. Transmission configurations and payment systems are
associated on the funds capture process profile for funds capture or on the payment process profile for disbursements.
Note: This note applies only to on-premises customers, and never to Oracle Cloud customers. The preferred file-
based transmission protocol is Secure File Transfer Protocol (SFTP). File Transfer Protocol (FTP) is unsecured and
should only be used to meet legacy third-party requirements. FTP must be used over a secure link such as a virtual
private network or a leased line with data link level encryption enabled.
Related Topics
•
Transmission Configurations
201

Oracle Fusion Cloud Financials
Implementing Receivables Credit to Cash
Chapter 5
Configure Payment System Connectivity
Transmission Configurations
A transmission configuration is a group of specific transmission details. A transmission configuration defines a value
for each parameter in a transmission protocol. The values in a transmission configuration are specific to one payment
system or financial institution.
For example, suppose a transmission protocol requires parameter values for a Socket IP Address and a Socket
Port Number. Your payment system that accepts that protocol will give you the values that it expects to receive for
these parameters. You enter the applicable values in the Socket IP Address and Socket Port Number fields for
the transmission configuration. The transmission configuration is then assigned to the payment system within the
funds capture process profile for funds capture transactions or within the payment process profile for disbursement
transactions.
In the Setup and Maintenance work area, use the following to transmit files to your payment system by setting up
transmission configurations:
• Offering: Financials
• Functional Area: Payments
• Task: Manage Transmission Configurations
On the Manage Transmission Configurations page, click Create. The Create Transmission Configuration page appears.
Related Topics
•
How You Set Up Transmission Configurations
•
Transmission Protocols
How You Set Up Transmission Configurations
In Oracle Fusion Payments, setting up transmission configurations is mandatory if your company wants to transmit
payments to a payment system or a bank.
To enable your company to exchange information with your payment system or bank, a preexisting agreement must
exist as to how information is structured and how each side sends and receives it.
Setting up transmission configurations involves the following actions:
• Understanding protocols
• Understanding transmission configurations
• Understanding tunneling configurations
• Considering best practices
• Setting up transmission configurations
202

Oracle Fusion Cloud Financials
Implementing Receivables Credit to Cash
Chapter 5
Configure Payment System Connectivity
Understanding Protocols
A transmission protocol is a set of rules or procedures for transmitting data between electronic devices, such as
computers. To transmit data, such as a payment file or a settlement batch from Payments to an external payment
system, you must define the transmission protocols that the payment system can receive.
Payments offers industry-standard predefined transmission protocols, such as SFTP, HTTP, HTTPS, and AS2. These
protocols include the following:
• A protocol implementation class, which implements the technical details of communication in a generic manner
• A list of parameters, such as network address and port, for which the transmission configuration must supply
values
The transmission protocol defines which parameters are expected in the communication between your company and its
payment system or bank.
Understanding Transmission Configurations
A transmission configuration is a group of specific transmission details, which is associated with a specific transmission
protocol. A transmission configuration defines a value for each parameter in a transmission protocol. The values in a
transmission configuration are specific to one payment system or financial institution. For example, a transmission
protocol may require parameters, as well as a Socket IP Address, and a Socket Port Number. Your payment system,
which accepts that protocol, gives you the values that it expects to receive for those parameters. You enter those values
in the Socket IP Address and Socket Port Number fields.
Understanding Tunneling Configurations
A tunneling configuration is a type of transmission configuration that helps transmit data through a transmission
servlet that can securely connect to your payment system or bank without exposing internal data. The transmit servlet
acts as a relay or bridge between the different segments of your network infrastructure, some of which are more
suitable, such as a DMZ zone, from which to open connections to external systems.
Considering Best Practices
Before selecting a protocol for payment processing, do the following:
• Find out what your processing bank supports.
• Favor transmission protocols predefined in Payments.
• Use funds capture process profiles or payment process profiles for greater ease in configuring transmission and
formatting.
Before selecting a transmission configuration for payment processing, note the following:
You may need two transmission configurations as follows if you use a protocol normally blocked by your network
security rules:
• A tunneling configuration to exit the fire wall
• A transmission configuration for the payment system server
Your transmission configuration must point to the tunneling configuration.
203

Oracle Fusion Cloud Financials
Implementing Receivables Credit to Cash
Chapter 5
Configure Payment System Connectivity
CAUTION: It is always a configuration error for the tunneling configuration to point to any other tunneling
configuration, including itself.
Setting Up Transmission Configurations
In the Setup and Maintenance work area, use the following to select a protocol, which is the method of transmission,
and click Create on the Manage Transmission Configurations page.
• Offering: Financials
• Functional Area: Payments
• Task: Manage Transmission Configurations
On the Create Transmission Configuration page, enable electronic connectivity with your payment system or bank by
specifying values for each parameter for the protocol you selected.
The transmission configuration is subsequently assigned to a payment system or bank in the funds capture process
profile for funds capture transactions or in the payment process profile for disbursements.
Note: When an environment is refreshed (Production-to-Test or Test-to-Test), you must perform these payments
transmission-related updates in the target environment before running any payment batches:
• Migrate Payment Wallet - During Production-to-Test (P2T) process, payments wallet stored in OPSS isn't
migrated from source to target environment. As part of post P2T tasks, user must perform the wallet migration
using the steps provided in Payments Wallet Migration Post P2T / T2T Refresh (Doc ID 2407678.1)
• Update Transmission Configuration - As part of post P2T tasks, user must update payments transmission
configuration to point to the bank's nonproduction server. Running a payment batch without making these
changes will accidentally transmit the payment file from target environment to the bank's production server.
Related Topics
•
Payments Wallet Migration Post P2T / T2T Refresh (Doc ID 2407678.1)
Considerations for Environment Cloning
Payments stores the master encryption key and other security credentials in Oracle Platform Security Services (OPSS).
When you clone an environment with another environment using methods such as production-to-test (P2T), test-
to-production (T2P), test-to-test (T2T), and so on, the data from the source environment in OPSS isn’t automatically
replicated to the target environment.
After cloning, system administrator must immediately perform the following actions in the target environment:
• Migrate Wallet: The payments wallet contained in the OPSS repository isn’t migrated during a P2T environment
refresh. Migrate the wallet from the source to the target environment using the steps provided in Payments
Wallet Migration Post P2T/T2T Refresh (Doc ID 2407678.1).
• Update Transmission Configuration: Edit transmission configuration details to ensure that they point to the
right destination. If the target environment is a test environment, you must confirm that details such as host/IP,
port, username, client private key file, remote directory, and so on, pertain to the test environment provided by
the bank or payment gateway.
204

Oracle Fusion Cloud Financials
Implementing Receivables Credit to Cash
Chapter 5
Configure Payment System Connectivity
Note: Adding an end date to the transmission configuration doesn’t prevent its usage if these transmission
configuration details are already associated with a payment process profile or a fund capture process profile.
It is mandatory to update the transmission configuration with the correct destination details for the refreshed
environment.
Note: Don’t run any payment batches in a cloned environment until you have migrated the wallet and updated the
transmission configuration details. If you do run payment batches, you may accidentally send payment files to the
bank’s production server.
Related Topics
•
Payments Wallet Migration Post P2T / T2T Refresh (Doc ID 2407678.1)
•
Oracle Applications Cloud Service Definition – Environment Refresh (2015788.1)
How You Configure Pretty Good Privacy (PGP)
Encryption and Digital Signature for Outbound and
Inbound Messages
You can secure both outbound and inbound messages using payload security. Payload security is the securing of
payment files and other files using payment file encryption and digital signature based on the open PGP standard.
You can update existing transmission configurations to use encryption and digital signature for your existing
connectivity with banks.
For outbound messages, Oracle Payments Cloud supports encryption and digital signature for:
• Payment files and positive pay files for disbursements
• Settlement batch files for funds capture
For inbound messages, the application supports decryption and verification of digitally signed encrypted files for:
• Funds capture acknowledgment files
• Bank statements
You can also secure payment data using secured transmission protocols, such as SFTP or HTTPS.
Note: Oracle Applications Cloud supports decryption of payment files that are encrypted using version BCPG 1.45 or
lower of the OpenPGP standard.
Configuring encryption and digital signature for outbound and inbound messages includes the following actions:
• Generating keys
• Setting up outbound transmission configuration
• Setting up inbound transmission configuration
• Uploading the bank-provided public key file
205

Oracle Fusion Cloud Financials
Implementing Receivables Credit to Cash
Chapter 5
Configure Payment System Connectivity
• Downloading the system-generated public key file
Generating Keys
Encryption and digital signature verification requires a public key. Conversely, decryption and signing a digital signature
requires a private key. A private key and public key pair is known as the key pair. The party who generates the key pair
retains the private key and shares the public key with the other party. You can generate or receive a public key subject to
the agreement with your bank.
The following table provides typical generation details of the public and private key pair:
Key Pair Generated Generates Outbound Messages from
Payments
Generates Inbound Messages to Payments
PGP Public Encryption Key and PGP Private
Signing Key
Bank
Deploying company
PGP Public Signature Verification Key and PGP
Private Decryption Key
Deploying company
Bank
If you're generating the key pair, you can automatically generate them within Oracle Applications Cloud.
You must import the public encryption key or the public signature verification key that you receive into the Oracle
Application Cloud using UCM.
Setting Up Outbound Transmission Configuration
For outbound messages, such as payment files, positive pay files, and settlement batch files, you must:
• Encrypt your payment file using the bank-provided public encryption key.
• Optionally, sign the payment file digitally using the private signing key that you generate.
On the Create Transmission Configuration page, you can see the outbound parameters as described in the following
table.
Outbound Parameters Description
PGP Public Encryption Key
A key given to you by your bank that you use to encrypt your outbound payment file.
To upload the bank-provided public encryption key, use UCM by navigating to Tools > File Import and
Export.
Lastly, on the Create Transmission Configuration page for the PGP Public Encryption Key parameter,
select the public encryption key file from the Value choice list.
PGP Private Signing Key
A key generated by you to digitally sign the outbound payment file.
To generate the private signing key, select Quick Create from the Value choice list for the PGP Private
Signing Key parameter. The application:
• Automatically generates the private signing key and links it to your transmission configuration.
206

Oracle Fusion Cloud Financials
Implementing Receivables Credit to Cash
Chapter 5
Configure Payment System Connectivity
Outbound Parameters Description
• Generates a public encryption key file that you can download from UCM and share with your
bank. The bank uses your public encryption key file to verify the digital signature of the payment
files that you transmit to the bank.
Note:
You must provide a key password to generate a private signing key using the Quick Create feature.
This password is also used for exporting and deleting this key.
Setting Up Inbound Transmission Configuration
For inbound payment messages, such as acknowledgments and bank statements, you must:
• Verify the digital signature using the bank-provided public signature verification key.
• Decrypt the file using the private decryption key that you generate.
On the Create Transmission Configuration page, you can see the inbound parameters as described in the following
table.
Inbound Parameters Description
PGP Public Signature Verification Key
A key given to you by your bank that you use to validate the digital signature of inbound
acknowledgment files or bank statements.
To upload the bank-provided public signature verification key, use UCM by navigating to Tools > File
Import and Export.
After uploading the bank-provided public signature verification key using UCM, you can select the
key file on the Create Transmission Configuration page. Select it in the Value choice list for the PGP
Public Signature Verification Key parameter. After you select the public signature verification key file,
it's automatically imported.
PGP Private Decryption Key
A key generated by you to decrypt the inbound encrypted file. To generate the private decryption key,
select Quick Create from the Value choice list for the PGP Private Decryption Key parameter. The
application:
• Generates the private decryption key and links it to your transmission configuration.
• Generates a public signature verification key file that you can download from UCM and share with
your bank. The bank uses your public signature verification key file to encrypt acknowledgments
and bank statements.
Note:
You must provide a key password to generate a private signing key using the Quick Create feature.
This password is also used for exporting and deleting this key.
207

Oracle Fusion Cloud Financials
Implementing Receivables Credit to Cash
Chapter 5
Configure Payment System Connectivity
Creating Private Keys Using the Advanced Create Feature
You can also generate private keys by selecting Advanced Create from the Value choice list. Advanced Create feature
lets you configure certain properties to generate stronger keys. This enhances the security of payment files transmitted
to your bank. Here are the properties you can configure for PGP private signing keys:
Option Description
Key Type
The type of private signing key generated.
• RSA: Key is generated using the RSA algorithm.
Length
The number of bits in the private signing key (or key size).
• 2048: 2048-bit key
• 3072: 3072-bit key
• 4096: 4096-bit key
Expiration Date
The date when this private signing key expires.
Encryption Algorithm
The encryption algorithm of the private signing key.
• AES128: 128-bit cryptographic key generated using Advanced Encryption Standard.
• AES192: 192-bit cryptographic key generated using Advanced Encryption Standard.
• AES256: 256-bit cryptographic key generated using Advanced Encryption Standard.
• 3DES: Cryptographic key generated using Triple Data Encryption Standard.
Hashing Algorithm
The hashing algorithm of the private signing key.
• SHA256: 256-bit hash computed using Secure Hash Algorithm.
• SHA384: 384-bit hash computed using Secure Hash Algorithm.
Compression Algorithm
The compression algorithm of the private signing key.
• ZIP: Cryptographic key compression using ZIP algorithm.
• ZLIB: Cryptographic key compression using ZLIB algorithm.
• BZIP2: Cryptographic key compression using BZIP2 algorithm.
Configuring these properties lets you meet bank-specific payment file security requirements. When you generate a
private key using the Advanced Create option, a corresponding public key is exported to UCM from where you can
download it. Similar to Quick Create, you must provide a key password when you use Advanced Create to generate a
private key.
208

Oracle Fusion Cloud Financials
Implementing Receivables Credit to Cash
Chapter 5
Configure Payment System Connectivity
Uploading the Bank-Provided Public Key File
To upload or import the bank-provided PGP Public Encryption Key or the PGP Public Signature Verification Key into
Oracle Applications Cloud, perform these steps:
1. Rename the bank-provided key file by including _public.key as the suffix. Ensure that the key file name doesn't
have any special characters other than the underscore.
2. Navigate to: Navigator > Tools > File Import and Export.
3. Import the bank-provided key file into account fin/payments/import.
4. Navigate to the Create Transmission Configuration page.
5. From the Value choice list for the applicable parameter, select the uploaded key file.
Tip: The key name in the choice list is the same as the one you uploaded using UCM.
6. After you select the key and save the transmission configuration, the key is automatically imported into the
Payments.
Downloading the System-Generated Public Key File
To download the system-generated public key file from Payments to share with your bank, perform the follow steps:
1. On the Create Transmission Configuration page, select Quick Create for the applicable parameter.
2. Click the Save and Close button.
3. Navigate to: Navigator > Tools > File Import and Export.
4. From the Account choice list, select fin/payments/import and search for the system-generated public key file.
5. Download the system-generated public key file.
Tip: The file name is similar to the private key file that was generated and attached to the transmission
configuration.
Note: SSH (Secure Socket Shell) key-generation for SFTP two-factor authentication is generated by Oracle Support
based on a service request.
Exporting and Deleting Keys
The Export and Delete option lets you securely export a selected private or public key. This lets you use the same key for
different environments. When you export a key using this feature, the key is exported to UCM from where you download
it. If the selected key is a private key, you must provide the key password that was used while generating the key. No key
password is required for exporting public keys.
You can also use this feature to delete PGP. However, you can't delete a key that's currently attached to a transmission
configuration. When you delete a system-generated private key, the corresponding public key is also deleted. Just like
how exporting works, deleting a key also requires the key password, if the selected key is a private one. No password is
required for deleting a public key.
The Export and Delete feature works not only for the application-generated keys but also for imported keys.
209

Oracle Fusion Cloud Financials
Implementing Receivables Credit to Cash
Chapter 5
Configure Payment System Connectivity
How You Configure Two-Factor Authentication Using A
Security Key File
You can enable security key file-based authentication in addition to the user credential-based authentication for more
secured transmission. The key pair can be generated within Payments or can be generated externally and imported.
You can use the private key within Payments and share the public key with your bank.
Importing an Externally-Generated Security Key File
Before you import the security key file, ensure that these conditions are met:
• The Master encryption key has already been configured using the Manage System Security Options task.
• Ensure that the key file name doesn’t have any special characters other than the underscore (_).
• Ensure that the key file has the SSH extension (file name has .ssh as suffix).
• Ensure that file name length (including the extension) doesn't exceed 26 characters.
Here’s how you import externally generated private security key file:
1. Upload the file in UCM using the File Import and Export utility. Use this UCM account: fin/payments/import.
2. Create or update the SFTP transmission configuration.
3. Select the private key file that should now be available in the Client Private Key File choice list.
4. Enter the applicable password for this key file in the Client Private Key Password field and then click Save.
Generating a Key File
Perform these steps to generate a key file within the Payments application:
1. In the Setup and Maintenance work area, go to the Manage Transmission Configurations task:
◦
Offering: Financials
◦
Functional Area: Payments
◦
Task: Manage Transmission Configurations
2. Select the transmission protocol for which the key pair must be generated.
3. Create a new transmission configuration or select an existing one.
4. Enter the transmission details.
5. In the Value choice list for the Client Private Key File, select Quick Create to generate a key pair.
Note: You must enter the password for private key file in the Client Key File Password field.
The application generates the key pair and populates the Client Private Key File field with the private key file name.
This file name has the SSH extension. You can download the corresponding public key file from the UCM account /fin/
payments/import. This public key has the same file name as the private key. However, it has a PUB extension (file name
has .pub as suffix). Share the public key file with the bank to deploy it on the SFTP server.
210
Oracle Fusion Cloud Financials
Implementing Receivables Credit to Cash
Chapter 5
Configure Payment System Connectivity
Creating Private Keys Using the Advanced Create Feature
In addition to the Quick Create feature, you can also generate private keys by selecting Advanced Create from the Value
choice list. Advanced Create feature lets you configure certain properties to generate stronger keys. You can configure
these properties for client private keys that use SSH encryption:
Option Description
Key Type
The type of SFTP key generated.
• RSA: Key is generated using the RSA algorithm.
Length
The number of bits in the SFTP key (or key size).
• 2048: 2048-bit key
• 3072: 3072-bit key
• 4096: 4096-bit key
When you generate a private key using the Advanced Create option, a corresponding public key is exported to UCM
from where you can download it. Similar to Quick Create, you must provide a key password when you use Advanced
Create to generate a private key.
Exporting and Deleting Keys
The Export and Delete option lets you securely export selected private or public keys that use SSH encryption. This
lets you use the same key for different environments. When you export a key using this feature, the key is exported to
UCM from where you download it. If the selected key is a private key, you must also provide the key password. No key
password is required for exporting public keys.
You can also use this feature to delete SSH keys. However, you can’t delete a key that’s currently attached to a
transmission configuration. When you delete a system-generated private key, its corresponding public key is also
deleted. You must also provide the key password when deleting a private key. You don’t need a password to delete a
public key.
The Export and Delete feature works for both application-generated keys and imported keys.
How You Test the Transmission Configuration
The transmission configuration setup is used to transmit outbound payment files, settlement batch files, and positive
pay files to your payment system or financial institution. It's also used to pull funds capture acknowledgment files.
The setup captures various parameters, which may be different for different protocols. You can test your transmission
configuration to confirm whether your setup of outbound and inbound transmission protocols is correct.
To confirm the accuracy of the setup, click the Test button on the Create or Edit Transmission Configuration page.
The Test button is active only when the values associated with all the mandatory parameters are present. Typical
transmission configuration parameters that are available to test include:
• Destination server URL
211

Oracle Fusion Cloud Financials
Implementing Receivables Credit to Cash
Chapter 5
Configure Payment System Connectivity
• Destination server IP address
• Destination server port number
• Remote file directory
• User credentials
Testing the transmission configuration setup includes reviewing return messages.
Reviewing Return Messages
The Test button action contacts the destination server with the specified parameters, which results in a return message.
The return message is a combination of functional text and raw message text. This occurs so both functional and
technical users can benefit from the message. For example, suppose the remote file directory is invalid. The return
message is: Incorrect remote directory (IBY_Trans_Test_Remote_Dir_Fals).
The following table describes transmission configuration connection tests and test results with their associated return
messages.
Test Test Result Return Message
Whether the connection is correct.
• Connection is successful.
• Remote file directory is present.
Success (raw message)
Whether the remote file directory is valid.
• Connection is successful.
• Remote file directory isn't present or
incorrect.
Incorrect remote directory (raw message)
Whether user credentials are correct.
• Connection is unsuccessful.
• Destination IP address and port is correct.
• Incorrect login credentials.
Incorrect user credentials (raw message)
Whether IP address or port is correct.
• Connection is unsuccessful.
• Incorrect IP address or port.
Incorrect destination server details (raw
message)
Whether two factor key file-based
authentication is successful.
• Connection is unsuccessful.
• Unsuccessful key file-based
authentication.
Unsuccessful authentication (raw message)
Whether the destination server is responsive.
Destination server is down.
Destination server is not responding (raw
message)
Not applicable.
Any other failure.
(raw message)
212

Oracle Fusion Cloud Financials
Implementing Receivables Credit to Cash
Chapter 5
Configure Payment System Connectivity
How You Configure a Communication Channel to a
Payment System
To transmit payment information to or receive payment information from a payment system, you must configure the
channel used to communicate with the payment system. This topic discusses the following concepts:
• Proxy server
• Secure sockets layer (SSL) protocol
• Unsecured protocols
Proxy Server
Payments must communicate through a proxy server to its payment system. You can use the standard Java networking
proxy system properties that are in the configuration files when Oracle Fusion Applications were initially set up.
Alternatively, you can specify proxy settings for a transmission protocol on the Create Transmission Configuration page
by entering a value for the Proxy Host parameter.
Secure Sockets Layer Protocol
When Payments communicates with a payment system, the information exchanged may be sensitive information, such
as credit card numbers. If the communication isn't secure, it poses a security risk. The security risk increases when
communication to the payment system is across a public network, such as the Internet.
To set up a payment system servlet with a secure sockets layer, enable HTTPS on the application server where the
servlet resides. If funds capture process profiles aren't defined for the payment system, change the Transmission
Servlet Base URL on the Edit Payment System page to start with HTTPS. If funds capture process profiles are defined,
change the value for the Destination URL parameter on the Edit Transmission Configuration page to start with HTTPS.
For secure communication with the payment system, ensure that the most current certification authority (CA)
certificates are in the Oracle Fusion secure sockets trust store file. If Payments rejects the payment system's secure
sockets certificate, you may have to insert the certificates manually.
The following table lists security actions that are applicable to Cloud and on-premise.
Action Cloud On-premise
Set up a payment system servlet with a secure
sockets layer.
Not applicable.
Enable SSL on the servlet's application server.
Insert certification authority certificates.
File a service request with the help desk.
Enter a value in the Value field for the Wallet
Location parameter on the Create or Edit
Transmission Configuration page.
213

Oracle Fusion Cloud Financials
Implementing Receivables Credit to Cash
Chapter 5
Configure Payment System Connectivity
Unsecured Protocols
The preferred file-based transmission protocol is Secure File Transfer Protocol (SFTP). File Transfer Protocol (FTP) is
unsecured and should only be used to meet legacy third-party requirements. FTP must be used over a secure link such
as a virtual private network or a leased line with data link level encryption enabled.
Related Topics
•
How To: Fusion Payment And Positive Pay File Transmission Using SFTP PUT Protocol (Doc ID 1901745.1)
How You Set Up a Payment System
If your company wants to transmit electronic payments or funds capture transactions to a payment system or a bank,
you must set up a payment system. A payment system defines the organization that Payments uses to process your
funds capture and disbursement transactions.
Here's what can be considered as a payment system:
• The bank where your company has its bank accounts
• A third-party processor or gateway that connects your company to a financial network
Payment systems aren't required for printed disbursement payments, such as checks, but may be required for related
services, such as a positive pay report.
Set up a payment system by completing these actions:
• Selecting a gateway or processor payment system
• Considering best practices
• Defining a payment system
• Specifying payment system settings
• Understanding payment system accounts
Selecting a Gateway or Processor Payment System
Payments supports both gateway and processor payment systems. A gateway is a service provider that acts as an
intermediary between a first party payee and a payment processor. A processor is a service provider that interacts
directly with banks and card institutions to process financial transactions. Examples of payment processors include Visa,
MasterCard, and American Express.
Your choice of integrating with a gateway or a processor payment system is generally determined by your:
• Type of business
• Number of transactions per day
• Your bank
This table describes the differences between gateway and processor payment systems.
214

Oracle Fusion Cloud Financials
Implementing Receivables Credit to Cash
Chapter 5
Configure Payment System Connectivity
Factors Gateways Processors
Connectivity and Security
Provide easy connection, often using SSL-
based internet connectivity.
Provide more rigorous security, connectivity,
and testing requirements.
Additional Fees
Charge additional fees, including per-
transaction fees, beyond what processors
charge.
Not applicable.
Volume of Transactions
Favor lower-volume merchants or merchants
who are willing to pay a per-transaction
premium for easier setup and connectivity.
Often favor higher-volume merchants who
are willing to exert more effort for processor
connectivity.
Online or Offline
Takes all transactions online.
Enables authorizations in real-time and follow-
up transactions, such as settlements and credits
offline.
• Offline transactions must be batched
together and sent as a single request to
the payment system.
• All transactions other than authorizations
are, by default, performed offline.
• Offline transactions are sent when
the next settlement batch operation is
attempted.
Considering Best Practices
Before you set up a payment system, use your current banking or processing relationship. Determine whether your
bank or processor can process transactions or has a partnership with a processor.
Defining a Payment System
To define a payment system, go to Financials > Payments > Manage Payment Systems page in the Setup and
Maintenance work area.
On the Manage Payment Systems page, click Create. The Create Payment System page appears.
When you set up a payment system on the Create Payment System page, specify these values:
• Types of payment instruments the payment system supports for funds capture transactions
• Data file formats and transmission protocols accepted by the payment system
• Settings required by the payment system
• Settings required by the tokenization provider if your company has enabled tokenization
Note: You can transmit a payment file offline by downloading it to your local drive and then emailing it to your
payment system or bank. However, you may still require setting a payment system. The payment system and
payment system account setup capture several attributes, which are passed in the payment file or settlement batch
message. Without these attributes, a payment file is invalid and rejected by bank.
215

Oracle Fusion Cloud Financials
Implementing Receivables Credit to Cash
Chapter 5
Configure Payment System Connectivity
Specifying Payment System Settings
In the Settings Required by Payment System section, specify the settings that the payment system requires from each
internal payer or payee. These settings can be used to identify the internal payer or payee as a client of the payment
system or to provide other processing information. You can specify the type of data required for each setting and decide
whether it's advisable to secure the setting's values by masking.
Tip: The payment system generally provides the values for the payment system settings, which you enter as part of
the payment system account.
Understanding Payment System Accounts
You define your company's account with the payment system on the Edit Payment System Accounts page. The payment
system account contains a value for each of the attributes required by the payment system. For example, the payment
system may require a Submitter ID and Submitter Password to be included in any message sent to it.
You can configure a secure payment system account by entering a password. For secured settings, the values captured
in the payment system account are masked.
Tip: You can set up multiple payment system accounts in Payments for a single payment system.
Using Payment System for PayPal
You can set PayPal as a payment option for transactions in self-service applications like Oracle Public Sector Cloud.
PayPal is a globally accepted secured payment method.
Here are the details of preconfigured payment system for PayPal:
Attribute Value
Name
PayPal
Code
ppal
Processing Model
Gateway
In the Settings Required by Payment System section of this payment system, these attributes are used:
Name Code Data Type Secured
Agency Identifier
AGENCY_ID
Character
No
Alternate Account Identifier
ALT_ACCOUNT_IDENTIFIER
Character
No
Business Unit
BU_NAME
Character
No
216

Oracle Fusion Cloud Financials
Implementing Receivables Credit to Cash
Chapter 5
Configure Payment System Connectivity
Name Code Data Type Secured
Merchant Client ID
MERCHANT_CLIENT_ID
Character
Yes
Merchant Client Key
MERCHANT_CLIENT_KEY
Character
Yes
Payment endpoint URL
PAYMENT_ENDPOINT
Character
No
Security endpoint URL
SECURITY_ENDPOINT
Character
No
Note: You can use these settings to create a new payment system account.
Payment System Accounts
A payment system account is an account identifier that's composed of values for parameters. The payment system
provides you with the values that it requires to identify each payment or settlement batch file.
Stored in the payment system account are values for settings and your company's identifiers. Your company can have
multiple payment system accounts with a single payment system.
Payment system accounts are associated with the following setup objects:
• Internal payees
• Funds capture process profiles
• Payment process profiles
The following table lists setup objects and the action they perform relative to the payment system.
Setup Object Setup Object Action
Payment system
• Tells Payments where to send the funds capture transactions.
• Tells Payments where to send the disbursements transaction.
Payment system account
Tells Payments how to identify itself to the payment system
Transmission configuration
Tells Payments how to transmit the transaction to the payment system
Internal Payees
You can set up routing rules that are assigned to an internal payee. Routing rules specify which payment system
account a transaction is transmitted to, based on the values of various transaction attributes.
217

Oracle Fusion Cloud Financials
Implementing Receivables Credit to Cash
Chapter 5
Configure Payment System Connectivity
If you don't need granular routing rules to determine which the correct payment system account for a transaction, or if
you want a fallback value should none of the routing rules apply, you can set up one default payment system account on
each internal payee for each payment method.
Funds Capture Process Profiles
The funds capture process profile tells Oracle Fusion Payments how to process a funds capture transaction and how
to communicate with the payment system. A funds capture process profile is specific to one payment system and its
payment system accounts.
For each payment system account that's enabled on the funds capture process profile, you can select up to three
transmission configurations, one each for authorization, settlement, and acknowledgment.
Payment Process Profiles
The payment process profile tells Payments how to process a disbursement transaction and how to communicate with
the payment system to transmit a payment file or a positive pay file. When an electronic transmission is required, a
payment process profile is specific to one payment system and its payment system accounts. For each payment system
account that's enabled on the payment process profile, you select a transmission configuration.
Related Topics
•
How You Set Up a Payment System
How You Set Up Payment System Connections for
Multiple Business Units
You can configure separate merchant accounts and secure acceptance profile combinations for each BU in each
country. This can be achieved when you implement credit card functionality in multiple countries. A merchant account
is a merchant identifier that you set up with CyberSource, the
For multiple business units, here's what you do:
1. First, configure connection settings for each merchant account and secure acceptance profile combination in
CyberSource for each BU in a country.
2. Then, you must enter corresponding connection settings in Oracle Payments at the payment system account
level.
In this scenario, the parameters configured at the payment system level act as the default connection setup. If, however,
there is no payment system account for a business unit, the application uses the parameter values from the payment
system level. Similarly, if you have only one merchant account, then you configure payment system connections at the
payment system level.
This figure shows how the setup in CyberSource relates to the setup in the application.
218

Oracle Fusion Cloud Financials
Implementing Receivables Credit to Cash
Chapter 5
Configure Payment System Connectivity
Prerequisite
Before you can set up payment system connections for multiple business units, you must enable tokenization on the
Manage System Security Options page.
Setting Up Multiple Merchant Account and Secure Acceptance Profile
Combinations
Before you can use credit card features in Oracle Public Cloud Applications, you must follow these steps in CyberSource:
1. Establish a merchant account with CyberSource.
2. Create an active CyberSource Secure Acceptance profile.
219

Oracle Fusion Cloud Financials
Implementing Receivables Credit to Cash
Chapter 5
Configure Payment System Connectivity
Setting Up Payment System Connections
If you have only one merchant account and secure acceptance profile combination, then you must enter the connection
settings on the Create Payment System page.
These settings are used on the Create Payment System page and on the Create Transmission Configuration page. Enter
these connection settings in the Value fields in the Tokenization Payment System Settings section on both pages.
CyberSource Payments Setting Payments Page Payments Field
Secure Acceptance profile
generates the Secure Acceptance
Access Key
Secure Acceptance Access Key
Create Payment System page
Securely cut and paste the Secure
Acceptance Access Key in the
Value field.
Secure Acceptance profile
generates the Secure Acceptance
Signature Key
Secure Acceptance Signature Key
Create Payment System page
Securely cut and paste the Secure
Acceptance Signature Key in the
Value field.
CyberSource Secure Acceptance
Hosted Checkout Integration Guide
Tokenization Servlet Base URL
Create Payment System page
Copy this constant value from the
CyberSource Secure Acceptance
Hosted Checkout Integration Guide
and paste the Tokenization Servlet
Base URL in the Value field.
Note:
Tokenization Servlet Base URL
is referred to as iFrame Create
Payment Token Endpoint in
CyberSource documentation.
Secure Acceptance profile
automatically generates the Profile
ID when the profile is saved.
Client Identifier, which is the same
as the Profile ID.
Create Payment System page
Enter the Profile ID in the Value
field.
Not applicable
Token Creation Module
Create Payment System page
Select CyberSource Secure
Acceptance Web from the Value
choice list.
CyberSource Secure Acceptance
Hosted Checkout Integration Guide
Tokenization Payment URL
Create Payment System page
Copy this constant value from the
CyberSource Secure Acceptance
Hosted Checkout Integration
Guide and paste the Tokenization
Payment URL in the Value field.
Note:
Tokenization Payment URL
is referred to as iFrame
Transaction Endpoint in
CyberSource documentation.
220

Oracle Fusion Cloud Financials
Implementing Receivables Credit to Cash
Chapter 5
Configure Payment System Connectivity
CyberSource Payments Setting Payments Page Payments Field
CyberSource SOAP Tool Kits for
Web Services Developer Guide
SOAP Transaction URL
Create Transmission Configuration
page
Copy this value from the
CyberSource SOAP Tool Kits for
Web Services Developer Guide and
paste the SOAP Transaction URL in
the Value field.
Setting up Merchant Connections
If you have multiple merchant account and secure acceptance profile combinations, enter the connection settings on
the Edit Payment System Accounts page.
Enter these connection settings in the Value fields in the Settings section on the Edit Payment System Accounts page.
CyberSource Payments Setting Payments Page Payments Field
Not applicable
Commerce Indicator
Edit Payment System Accounts
page
Enter internet in the Value field.
Transaction Security Key page
generates the Transaction Security
Key.
SOAP API Security Key
Edit Payment System Accounts
page
Enter the Transaction Security
Key in the Value field that you
downloaded previously.
Secure Acceptance profile
generates the Secure Acceptance
Access Key
Secure Acceptance Access Key
Edit Payment System Accounts
page
Securely cut and paste the Secure
Acceptance Access Key in the
Value field.
Secure Acceptance profile
generates the Secure Acceptance
Signature Key
Secure Acceptance Signature Key
Edit Payment System Accounts
page
Securely cut and paste the Secure
Acceptance Signature Key in the
Value field.
Secure Acceptance profile
automatically generates the Profile
ID when the profile is saved.
Client Identifier, which is the same
as the Profile ID.
Edit Payment System Accounts
page
Enter the Profile ID in the Value
field.
Related Topics
•
How You Set Up a Payment System
•
How You Configure a Communication Channel to a Payment System
•
How You Enable Credit Card Tokenization
221

Oracle Fusion Cloud Financials
Implementing Receivables Credit to Cash
Chapter 5
Configure Payment System Connectivity
Import and Export Tokenization Setup Data
Your tokenization setup data is comprised of values, or keys, that are set up on the Create Payment System and
Payment System Accounts pages. On these pages in your test environment, you enter values for the Secure Acceptance
Access Key and the Secure Acceptance
This figure shows the steps to complete to export tokenization setup data from your test environment, copy
tokenization setup data from your production environment to your test environment, and after you complete credit card
testing, import the same tokenization setup data that you exported.
To test credit cards and tokenization setup data in a production-like environment, complete these steps:
1. Export tokenization setup data from your test environment to your local drive and save it as a file.
2. Copy your production tokenization setup data to your test environment, which overwrites the test environment
with production-like tokenization setup data.
222

Oracle Fusion Cloud Financials
Implementing Receivables Credit to Cash
Chapter 5
Configure Payment System Connectivity
3. Import the same tokenization setup data file you previously exported into the production-like environment to
restore it to the original test environment.
Exporting Tokenization Setup Data
To export tokenization setup data from your test environment to your local drive, complete these steps:
1. Navigate to Tools > Scheduled Processes.
2. On the Overview page, click Schedule New Process.
3. On the Schedule New Process page, search and select the Import Security Credential Job.
4. From the Credential File Type choice list, select Export Tokenization Setup.
5. Click Submit.
6. Navigate to Tools > File Import and Export.
7. From the Account choice list, select fin/payments/import.
8. Click Search.
9. In the Search Results section, click your file and save it to your local drive.
Copying Production Tokenization Setup Data to Test Environment
To copy your production tokenization setup data to your test environment, follow your standard practice. Your copy
procedure overwrites your test environment with production tokenization setup data. Now you can test your credit cards
in a production-like environment.
Uploading Exported Tokenization Setup Data
Before you can import the tokenization setup data, you must upload the file you previously downloaded from your local
drive to UCM. To upload the file, complete these steps:
1. Navigate to Tools > File Import and Export.
2. Click on the + icon in the Search Results section.
3. In the Upload File dialog box, click Choose file to browse to the file you want to upload.
4. From the Account choice list, select fin/payments/import.
5. Click Save and Close.
Importing Tokenization Setup Data
To import tokenization setup data from your local drive to your production-like environment, complete these steps:
1. Navigate to Tools > Scheduled Processes.
2. On the Overview page, click Schedule New Process.
3. On the Schedule New Process page, search and select the Import Security Credential Job.
4. From the Credential File Type choice list, select Import Tokenization Setup.
5. From the UCM File Name choice list, select the file that you uploaded.
6. Click Submit.
Related Topics
•
PCI DSS Credit Card Processing Requirements
223

Oracle Fusion Cloud Financials
Implementing Receivables Credit to Cash
Chapter 5
Configure Payment System Connectivity
Import a Security Credential File
To secure your electronic transmissions, you can upload, import, and assign a security credential file to transmission
configurations. A security credential file is a digital file that stores your security key.
The application uses this key to encrypt or authenticate data transmitted to remote third-party systems such as banks.
The security credential file can be used for transmission security by any future process that runs and references the
transmission configuration. The application understands which credential files are used by which protocols and displays
only the appropriate ones in the setup pages.
Payments supports a variety of security-related credential files, including wallet files, trust store files, and digital
certificates.
Note: This procedure is applicable to Oracle Cloud implementations only.
Before you can import a security credential file with its key into Payments, you must first create a Payments master
encryption key.
Creating a Wallet File and a Master Encryption Key Automatically
To create a wallet file and a master encryption key automatically, complete these steps:
1. In the Setup and Maintenance work area, go to Financials > Payments > Manage System Security Options.
2. On the Manage System Security Options page, click Apply Quick Defaults.
3. Select the Automatically create wallet file and master encryption key check box.
4. Click the Save and Close.
Uploading the Wallet Security Credential File
Before you can import the security credential file, you must first upload it to Payments.
CAUTION: Ensure that the credential file is password-protected when you create it. It must be deleted from Oracle
Fusion Applications as soon as the import process completes.
1. Go to Tools > File Import and Export.
2. Click the Upload icon to open the Upload File dialog box
3. Browse to the file you created and stored locally.
4. From the Account choice list, select fin/payments/import.
5. Click the Save and Close button.
Importing the Wallet Security Credential File
To import security-related credential files, use the Import Security Credential Job process. These files include wallets
and private keys used in advanced security features.
1. Go to Tools > Scheduled Processes to open the Scheduled Processes page.
2. Click the Schedule New Process button to open the Schedule New Process dialog box.
224

Oracle Fusion Cloud Financials
Implementing Receivables Credit to Cash
Chapter 5
Configure Payment System Connectivity
3. Search and select the case-sensitive Import Security Credential Job to open the Process Details dialog box.
4. From the Credential File Type choice list, select the appropriate file type for your credential.
5. In the Security Credential Name field, enter a name for the credential file.
6. From the UCM (Universal Content Management) File Name choice list, select the file you previously uploaded.
7. Click the Submit button.
A confirmation message indicates the process ran successfully.
8. Click the Close button.
9. Click the Refresh icon. The Import Security Credential Job appears in the Search Results section with a status
of Succeeded.
Assigning the Wallet File to a Transmission Configuration
To assign the credential file to a transmission configuration, complete these steps:
1. In the Setup and Maintenance work area, go to Financials > Payments > Manage Transmission
Configurations.
2. On the Manage Transmission Configurations page in the Search section, select your protocol from the Protocol
choice list and click Search.
3. In the Search Results section, click the applicable configuration link to open the Edit Transmission Configuration
page.
4. In the Value field for your protocol's applicable parameter, select the file you created, uploaded, and imported.
The name of the specific parameter used to import a security credential file depends upon the protocol.
You can now securely transmit electronic files using this transmission configuration.
FAQs for Configure Payment System Connectivity
What's a format type?
A type or categorization that indicates what a format is used for. Examples of format types include payment file,
remittance advice, and bank statement.
Each format that you create in Oracle Fusion Payments is associated with a format type so the application knows how
the format is used. Format types are either disbursement formats that relate to payment files or funds capture formats
that relate to settlements or reports.
The following table lists several examples of format types.
Disbursement Format Types Funds Capture Format Types
Disbursement separate remittance advice
Funds capture authorization and settlement
Disbursement positive pay file
Funds capture accompanying letter
Disbursement payment process request
status report
Funds capture payer notification
225

Oracle Fusion Cloud Financials
Implementing Receivables Credit to Cash
Chapter 5
Configure Payment System Connectivity
Disbursement Format Types Funds Capture Format Types
The format type you associate with a format specifies the following:
• Type of message that is created
• Data extract that is used by the template to format the transaction data
Related Topics
•
How You Set Up Formats
•
How You Use Oracle Analytics Publisher to Modify Templates for Use with Formats
Can I set up payment system connections for multiple business
units?
Yes. When you implement credit card functionality in different countries, you can configure separate merchant account
and secure acceptance profile combinations in CyberSource for each business unit in each country. Then, you enter
corresponding connection settings in Oracle Payments at the payment system account
Related Topics
•
How You Set Up Payment System Connections for Multiple Business Units
•
How You Configure a Communication Channel to a Payment System
•
How You Set Up a Payment System
•
How You Enable Credit Card Tokenization
226

Oracle Fusion Cloud Financials
Implementing Receivables Credit to Cash
Chapter 6
Define Funds Capture
6 Define Funds Capture
Funds Capture Process Profiles
A funds capture process profile is a key setup entity that contains all the rules necessary for processing funds capture
transactions. It tells Oracle Fusion Payments how to communicate with a specific payment system, and includes the
payment system accounts to be used for
A funds capture process profile contains rules that control each of the following steps of the funds capture process:
• Formatting messages
• Building settlements into a settlement batch
• Transmitting messages to the payment system
Formatting Messages
When the processing type is Bank Account, a Verification section is displayed on the Create Funds Capture Process
Profile page. When the processing type is Credit Card, an Authorization section is displayed instead of the Verification
section. In either case, you select the format in which your payment system expects to receive the online message. This
outbound format instructs Oracle Fusion BI Publisher how the message should look. You also select the format in which
you expect to receive an inbound response from the payment system.
The Settlement section on the Create Funds Capture Process Profile page enables you to select a settlement message
format that your payment system accepts. The settlement is online for a gateway-type payment system and in a batch
for a processor-type payment system. Online settlement transactions are typically transmitted in a group, although
they're processed as individual transactions. You also select the format in which you expect to receive an inbound
response from the payment system.
You can select formats for contacting your payment system to retrieve an acknowledgment. You can also select
other formats for receiving responses from the payment system that specifies whether a transaction succeeded or
failed. Acknowledgments can be pushed by the payment system to your company, or your company can retrieve
acknowledgments from the payment system.
In the Notification to Payer section on the Create Funds Capture Process Profile page, you select a notification
format and delivery method to the payer. A payer notification is a message sent to each payer after the settlement or
settlement batch is transmitted. The message notifies each payer of a funds capture transaction that charges their
credit card or bank account.
Building Settlements into a Settlement Batch
In the Creation Rules tab on the Create Funds Capture Process Profile page, you select settlement grouping attributes.
When a specific grouping attribute is enabled, Payments ensures that settlements within one settlement batch all share
the same value. Settlements with disparate attribute values trigger the creation of as many settlement batches as there
are unique value combinations. For example, if you select Business Unit as a grouping rule, then only settlements with
the same business unit are grouped in a settlement batch.
You can also limit the size of the settlement batch by amount or number of settlements.
227

Oracle Fusion Cloud Financials
Implementing Receivables Credit to Cash
Chapter 6
Define Funds Capture
Transmitting Messages to the Payment System
A funds capture process profile is specific to one payment system and its payment system accounts. In the Accounts tab
on the Create Funds Capture Process Profile page, you specify payment system accounts for use with the funds capture
process profile. For each payment system account you enable, you select up to three transmission configurations, one
each for authorizations or verifications, settlements, and acknowledgments. The payment system account identifies
Payments to the payment system, and the transmission configurations tell Payments how to transmit transactions to
the payment system.
Related Topics
•
Payment System Accounts
•
Transmission Configurations
•
PCI DSS Credit Card Processing Requirements
External Settlement of Credit Card and Bank Accounts
A customer or a deploying organization can integrate Receivables with their legacy application. Receivables handles the
billing and receipt creation, but the actual credit card account handling and integration with service provider may be
outside Oracle Cloud. Receivables can record these transactions. However, the
You can now manage these transactions seamlessly on Oracle Cloud, without creating a settlement batch or
transmission. This option adds the flexibility to meet bank-specific, region-specific, or regulatory compliance
requirements.
Here's how you enable this feature:
1. In the Setup and Maintenance work area, go to the Manage Funds Capture Process Profiles task:
a. Offering: Financials
b. Functional area: Payments
c. Task: Manage Funds Capture Process Profiles
2. Select the processing type and click Create.
Note: This option is available for all three processing types (Credit Card, Debit Card, and Bank Account).
3. Select the Use for external settlement check box.
Note: Use the external payee bank account as the routing rule condition. The invoice should also use the
same routing rule.
How External Settlement is Processed
When the automatic receipt processing is complete, the authorization and verification status of the receipt is marked as
Succeeded. This doesn't involve any actual processing with the payment system.
Similarly, when you create and submit a remittance batch, the settlement is automatically updated with a Succeeded
status. You need not create a settlement batch or submit offline transactions.
228

Oracle Fusion Cloud Financials
Implementing Receivables Credit to Cash
Chapter 6
Define Funds Capture
Examples of Settlement Grouping Rules
Settlement grouping is configured by selecting one or more check boxes in the Settlement Grouping Rules section on
the Create Funds Capture Process Profile page. Selection of settlement grouping attributes specifies that settlements
with the same attribute are included in a unique settlement batch
Funds Capture Process Profile 1
In this example, Funds Capture Process Profile 1 has the following settlement grouping options selected:
• Business unit
• First-party legal entity
• Settlement date
Create Settlement Batches
During funds capture transaction processing, the Create Settlement Batches program selects the settlements listed in
the following table.
Settlement Amount External Payer Business Unit that
Owns the Transaction
First-Party Legal
Entity that Owns the
Transaction
Settlement Date
A
1000 USD
Customer 1
California
North America
February 1, 2012
B
250 USD
Customer 2
California
North America
February 1, 2012
C
500 USD
Customer 3
Oregon
North America
February 1, 2012
D
750 USD
Customer 4
California
North America
March 1, 2012
The Create Settlement Batches program then groups the settlements into the following settlement batches:
Settlement Batch 1
Settlement Batch 1 contains Settlements A and B because both settlements have the same settlement grouping
attributes as follows:
• Business unit = California
• First-Party legal entity = North America
• Settlement date = February 1, 2012
229

Oracle Fusion Cloud Financials
Implementing Receivables Credit to Cash
Chapter 6
Define Funds Capture
Settlement Batch 2
Settlement Batch 2 contains Settlement C because it has the following settlement grouping attributes:
• Business Unit = Oregon
• First-Party legal entity = North America
• Settlement date = February 1, 2012
Settlement Batch 3
Settlement Batch 3 contains Settlement D because it has the following settlement grouping attributes:
• Business Unit = California
• First-Party legal entity = North America
• Settlement date = March 1, 2012
Routing Rules
Routing rules route a funds capture transaction to the correct payment system account. Based on attributes of the
transaction, the routing rules determine which funds capture process profile to use. For example, Oracle Fusion
Payments compares attributes of a transaction, such as payment method,
You assign routing rules to internal payees during the setup of internal payees. Each payee can have prioritized routing
rules. The routing rule with the highest priority is evaluated by Payments first. If the values in the requested funds
capture transaction match the conditions in the routing rule, that transaction is routed to the applicable payment
system account for processing.
Here's what you do to create a routing rule.
1. 1. Click Navigator > My Enterprise > Setup and Maintenance.
2. In the Setup and Maintenance work area, go to the Manage Internal Payees task.
◦
Offering: Financials
◦
Functional Area: Customer Payments
◦
Task: Manage Internal Payees
3. On the Manage Internal Payees page in the Payee field, enter a payee and click Search.
4. Select an internal payee ion the Search Results section and click Manage Routing Rules.
5. Go to the Routing Rules section on the Manage Routing Rules page, and select a payment method and click
Create.
6. On the Create Routing Rule page, configure the routing rules. Click Save and Close to save the rules and exit.
If the attributes in the requested funds capture transaction don't match the conditions in a routing rule, the routing rule
is disregarded and Payments evaluates the next routing rule. If all routing rules are evaluated and none apply, Payments
looks for a payment system account and funds capture process profile specific to the payment method type entered for
the payee in the Default Routing section on the Set Rules page.
The payment system account and funds capture process profile that are used for an authorization are automatically
used for additional actions, including settlement and any subsequent refunds.
230

Oracle Fusion Cloud Financials
Implementing Receivables Credit to Cash
Chapter 6
Define Funds Capture
Routing Rules for Multiple Payment Gateways
You can configure routing rules that let you use multiple payment gateways simultaneously for tokenized credit cards.
To do this, you should first configure multiple tokenization payment systems and payment system accounts. The next
step is to configure routing rules based on the combination of business unit and other parameters.
Here's how you use business unit as a criterion for routing rules.
1. Navigate to the Manage Internal Payee page and search for the internal payee.
2. Select the payee record and click Manage Routing Rules.
3. Go to the Tokenization and Transaction Routing Rules section, select Credit Card as payment method, and then
click Create.
4. On the Create Routing Rules page, create rules with Business Unit as one of the criteria.
5. Click Save and Close.
6. Click Reorder Priority to change the priority of various routing rules.
7. Save the changes.
For more details on using multiple payment gateways, see the instructions in Payment Gateway Integration and Credit
Card Processing.
Reevaluate Routing Rules During Receipt Remittance
Reevaluate routing rules for direct debit transactions during receipt remittance. Receipts can be routed using different
routing rules if user changes the remittance bank account on the receipt during remittance. For this feature, you can
enable the setup in Manage Funds Capture Process Profile.
Users can select 2 different accounts for creating receipts and for the actual remittance. When the receipt creation uses
authorization for direct debits, the routing rules are evaluated at the time of receipt creation. However, these routing
rules remain the same for the transactions that follow. If the user selects a different bank account for remittance, the
routing rules must be reevaluated.
To enable reevaluation of routing rules, perform the following steps:
1. In the Setup and Maintenance work area, go to the Manage Funds Capture Process Profiles task.
◦
Offering: Financials
◦
Functional area: Payments
◦
Task: Manage Funds Capture Process Profiles
2. Select Bank account as the processing type.
Note: Reevaluation of routing rules is currently available only for bank accounts.
3. In the Settlement section, select Reevaluate routing rules.
Note: If the direct debit authorization isn't enabled, enabling the reevaluation of routing rules has no effect.
231

Oracle Fusion Cloud Financials
Implementing Receivables Credit to Cash
Chapter 6
Define Funds Capture
How You Use Oracle Analytics Publisher to Modify
Templates for Use with Formats
Each format in Oracle Fusion Payments corresponds to one Oracle Analytics Publisher template. Payments uses
Analytics Publisher templates to format funds capture and funds disbursement transactions according to the formatting
requirements of financial institutions and payment systems.
Each template contains prescribed formatting attributes, such as data location. Banks, payment systems, and countries
have specific electronic formatting requirements for payment files and settlement batches.
You can use existing Analytics Publisher templates or modify them with minimal effort by using a standard text editor,
such as Microsoft Word. For example, when a payment system requires a change to its payment file format, you can
quickly make the change by modifying the appropriate template.
Whether you modify an existing template or create a new one, determines whether you also create a new format and
a new payment process profile. Each payment process profile is associated with a format. The following table lists two
template scenarios and indicates the resulting action you take.
Actions Scenario 1 Scenario 2
Create a new template or modify an existing
template.
Create a new template.
Modify an existing template.
Name the template.
Rename the template.
Keep the same name.
Where to save the new or modified template.
Payments folder by the Custom folder or
Payments folder by the Financials folder.
Payments folder by the Custom folder.
Create a new format.
Yes
No
Create a new payment process profile.
Yes
No
To modify a template, you can:
• Download a copy of the applicable template.
• Upload a copy of the modified template.
Download a Copy of the Applicable Template
To download a copy of a predefined template, perform the following steps:
1. Sign in to Oracle Analytics Publisher.
2. On the Home tab, click the Catalog Folders link. The Catalog tab appears with a hierarchy of folders.
3. Expand the Financials folder.
4. Expand the Payments folder.
5. Locate the predefined template type that you want to modify and click the More link.
232

Oracle Fusion Cloud Financials
Implementing Receivables Credit to Cash
Chapter 6
Define Funds Capture
6. From the menu, select Customize. All the templates that are associated with the predefined template type that
you want to modify are copied to a folder by the Custom folder.
7. You can now download the files from the Custom folder and modify them or you can continue with step 8.
Note: Do not modify predefined templates. When you apply a new patch or a new release, it overrides any
changes you made to the predefined template. You can, however, copy a predefined template and then
modify it.
8. On the Data Model tab, to copy a predefined template and save it to your local drive as a RTF file, click the Edit
link of the applicable template. Then click the Save button.
9. Navigate to the location where you want to save the copy of the template and click the Save button.
10. Navigate to the saved RTF file and open it.
Upload a Copy of the Modified Template
To upload a copy of a modified template, perform the following steps:
1. Using a text editor, modify the RTF file on your local drive.
2. Save as Other Formats, change the file name, click the Save button, and close the file.
3. To upload a copy of your modified template to Oracle Analytics Publisher, navigate to the applicable tab, and
click the Add New Layout link.
4. Click the Upload icon. The Upload Template File dialog box appears.
5. In the Layout Name field, enter a name for the template you modified.
6. In the Template File field, browse to the location of the modified template on your local drive and click the
Open button.
7. From the Type choice list, select RTF Template.
8. From the Locale choice list, select the language for the modified template.
9. Click the Upload button. The modified template appears on the Data Model tab of the applicable tab.
Note: The modified template is also copied to the Payments folder that is within the Custom folder.
10. To open the modified template, click the Edit link.
11. To confirm that the modified template is saved, click the Catalog link. The Catalog tab appears with a hierarchy
of folders.
12. Navigate as follows: Custom folder > Financials folder > Payments folder.
13. Select the Payments folder.
14. For the applicable template, click the Edit link. Your modified template appears.
FAQs for Define Funds Capture
What's a payment code?
Oracle Fusion Payments enables you to specify payment codes that are required by financial institutions. Payment
codes can provide details to banks or payments systems about transaction handling, bank charges, or payment reasons
for regulatory reporting purposes.
Payment code types include:
• Bank instruction codes
233

Oracle Fusion Cloud Financials
Implementing Receivables Credit to Cash
Chapter 6
Define Funds Capture
• Delivery channel codes
• Payment reason codes
What's a bank instruction code?
Bank instruction codes are values that contain instructions that must be passed to a bank or financial institution at the
payment file level.
A payment process profile can have up to two bank instructions. When this payment process profile is used during the
creation of a payment file, the bank instruction values are copied directly to it. The extract makes the values available to
the formatting process. If the payment format specifies the use of bank instructions, the values are passed to the bank
in the header level of the payment file.
Oracle Payments provides many predefined bank instruction codes.
What's a delivery channel code?
Delivery channels are instructions that tell the bank how to make the payment to the payee. You can set a default
delivery channel for the supplier, supplier address, or supplier site.
A value automatically populates from the lowest of these levels to the invoice in Oracle Fusion Payables. On the invoice,
it's displayed with the installments and you can manually override it.
When an installment is paid, the delivery channel is copied from the document payable to the payment when payment
documents have the same delivery channel. When you select delivery channel as a grouping rule on the profile, all
documents that share the same delivery channel are grouped into a payment.
Oracle Fusion Payments provides many predefined delivery channel codes.
What's a payment reason code?
Payment reason codes are used for regulatory reporting purposes. These country-specific identifiers are used to
provide additional details about a payment reason to the payment system or bank. The country's government or central
bank generates these codes.
Oracle Payments includes many predefined payment reason codes.
What's an online verification?
Before capturing funds from a payer's bank account, you can send an online message to the payment system
requesting that it contact the bank and verify that the payer's bank account is valid. This process does not put a hold on
any funds
234

Oracle Fusion Cloud Financials
Implementing Receivables Credit to Cash
Chapter 6
Define Funds Capture
You enable online verification in a funds capture process profile by selecting an outbound format and an inbound
response format for verification.
Note: Online payer verification is an optional feature and is not offered by all payment systems.
How can I record a credit card or bank account settlement
performed outside Oracle Cloud?
You can update your funds capture process profile to allow the use of externally-settled receipts. The authorization and
verification status of these receipts is marked as successful without any actually processing with the payment system.
Remittance batches are also recorded as successfully settled without
235

Oracle Fusion Cloud Financials
Implementing Receivables Credit to Cash
Chapter 6
Define Funds Capture
236

Oracle Fusion Cloud Financials
Implementing Receivables Credit to Cash
Chapter 7
Define Payments Security
7 Define Payments Security
Options for System Security
Implement application security options on the Manage System Security Options page. You can set the application
security to align with your company's security policy.
You can set security options for encryption and tokenization of credit cards and bank accounts, as well as for masking
the payment instrument. Both funds capture and disbursement processes use security options.
Note: You must enable encryption or tokenization of credit cards in Payments before you can import credit cards into
Expenses.
Ask yourself these security questions to improve the security of your sensitive data:
• Which security practices do I want to employ?
• Do I want to tokenize my credit card data?
• Do I want to encrypt my bank account data?
• Do I want to encrypt my credit card data?
• How frequently do I want to rotate the master encryption key and the subkeys?
• Do I want to mask credit card and bank account numbers? How do I accomplish that?
To set up application security options, go to Financials > Payments > Manage System Security Options in the Setup
and Maintenance work area.
Best Security Practices
These actions are considered best security practices for payment processing:
• Comply with the Payment Card Industry Data Security Standard (PCI DSS). PCI DSS is the security standard
required for processing most types of credit cards.
◦
Comply with all requirements for accepting credit card payments.
◦
Minimize the risk of exposing sensitive customer data.
• Create the master encryption key.
◦
Rotate the master encryption key periodically.
Implementation Process of Master Encryption Key and Encryption
Before you can enable encryption for credit card or bank account data, you must automatically create a master
encryption key. Oracle Platform Security Services stores your master encryption key. The application uses your master
encryption key to encrypt your sensitive data.
Automatic creation of the master encryption key ensures that it's created and stored in the proper location and with all
necessary permissions.
237

Oracle Fusion Cloud Financials
Implementing Receivables Credit to Cash
Chapter 7
Define Payments Security
Credit Card Tokenization
If you tokenize your credit card data, you're complying with PCI DSS requirements. PCI DSS requires companies to use
payment applications that are PCI DSS compliant.
Tokenization is the process of replacing sensitive data, such as credit card data, with a unique number, or token, that
isn't considered sensitive. The process uses a third-party payment system that stores the sensitive information and
generates tokens to replace sensitive data in the applications and database fields. Unlike encryption, tokens can't be
mathematically reversed to derive the actual credit card number.
Click Edit Tokenization Payment System on the Manage System Security Options page to set up your tokenization
payment system. Then, click Tokenize in the Credit Card Data section to activate tokenization for credit card data.
Credit Card Data Encryption
You can encrypt your credit card data to assist with your compliance of cardholder data protection requirements with
these initiatives:
• Payment Card Industry Data Security Standard
• Visa's Cardholder Information Security Program
Credit card numbers entered in Oracle Receivables and Oracle Collections are automatically encrypted. Encryption is
based on the credit card encryption setting you specify on the Manage System Security Options page.
Note: If you import card numbers into Payments, you should run the Encrypt Credit Card Data program immediately
afterward.
Bank Account Data Encryption
You can encrypt your supplier and customer bank account numbers.
Bank account encryption doesn't affect internal bank account numbers. Internal bank accounts are set up in Cash
Management. They are used as disbursement bank accounts in Payables and as remit-to bank accounts in Receivables.
Supplier, customer, and employee bank account numbers entered in Oracle applications are automatically encrypted.
Encryption is based on the bank account encryption setting you specify on the Manage System Security Options page.
Note: If you import bank account numbers into Payments, you should run the Encrypt Bank Account Data program
immediately afterward.
Master Encryption Key and Subkey Rotation
For payment instrument encryption, Payments uses a chain key approach. The chain key approach is used for data
security where A encrypts B and B encrypts C. In Payments, the master encryption key encrypts the subkeys and the
subkeys encrypt the payment instrument data. This approach enables easier rotation of the master encryption key.
The master encryption key is stored on Oracle Platform Security Services. Oracle Platform Security Services stores
data in an encrypted format. The master encryption key can be rotated, or generated, which also encrypts subkeys, but
doesn't result in encrypting the bank account numbers again.
If your installation has an existing master encryption key, click Rotate to automatically generate a new one.
238
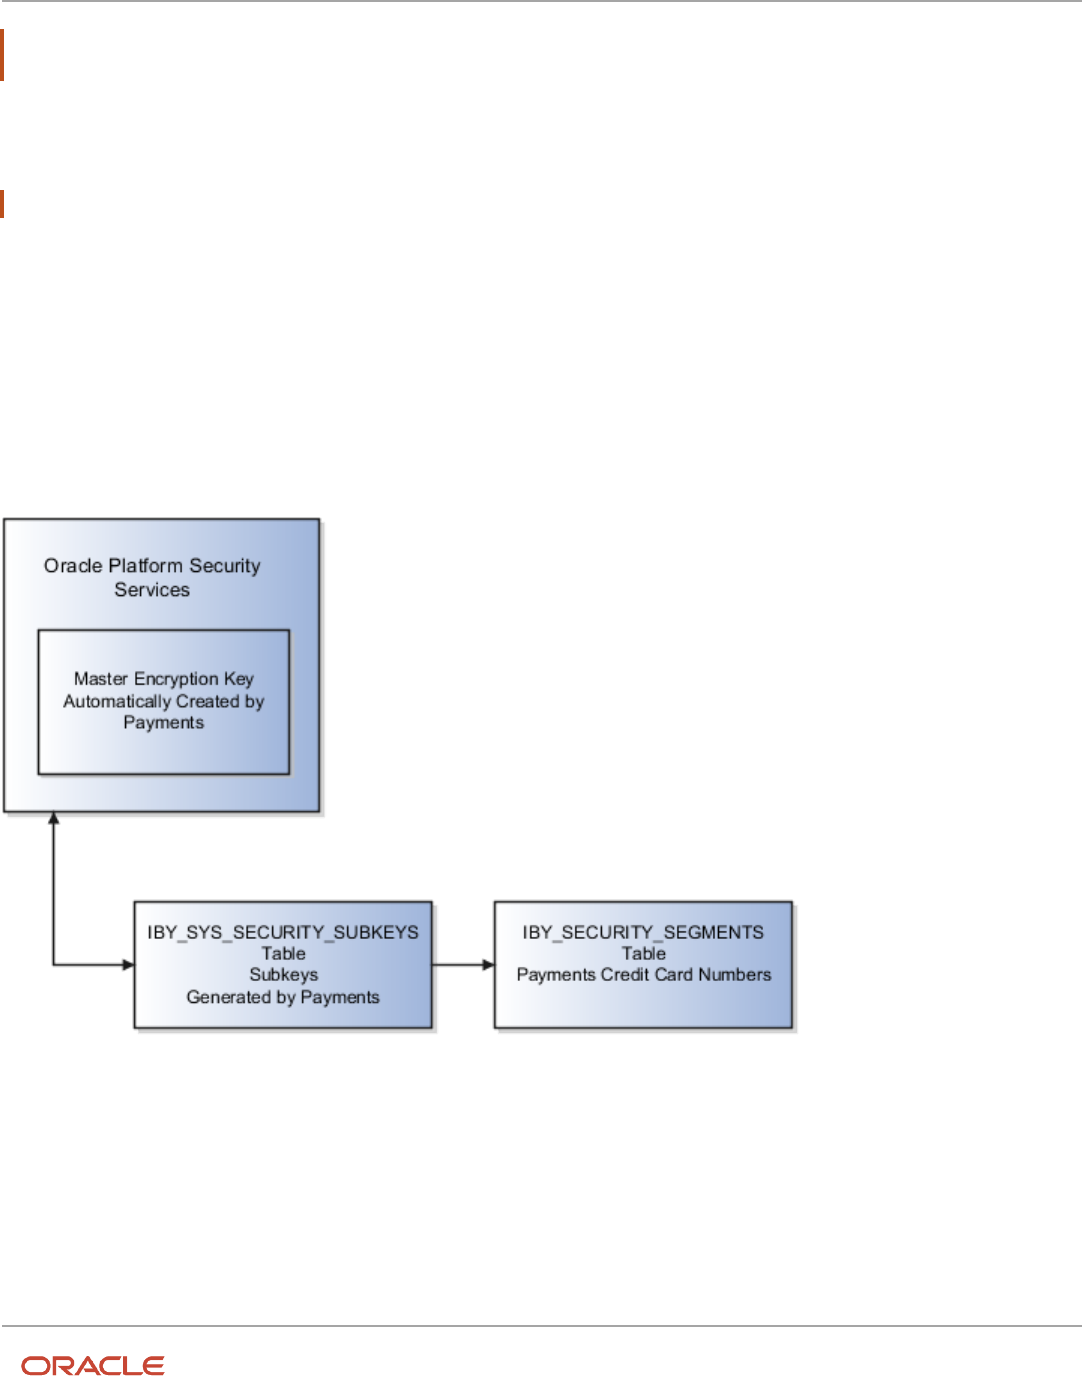
Oracle Fusion Cloud Financials
Implementing Receivables Credit to Cash
Chapter 7
Define Payments Security
Note: To secure your payment instrument data, you should rotate the master encryption key annually or according to
your company's security policy.
You can also select the frequency with which new subkeys are automatically generated, based on usage or on the
maximum number of days. To specify a subkey rotation policy, click Edit Subkey Rotation Policy.
Note: To secure your payment instrument data, you're advised to schedule regular rotation of the subkeys.
The security architecture for credit card data and bank account data encryption is composed of these components:
• Oracle Platform Security Services
• Payments master encryption key
• Payments subkeys
• Sensitive data encryption and storage
This figure illustrates the security architecture of the Oracle Platform Security Services repository, the master encryption
key, and the subkeys.
Credit Card and Bank Account Number Masking
Payments serves as a payment data repository for customer and supplier information. It stores all of the customer and
supplier payment information and their payment instruments, such as credit cards and bank accounts. It provides data
security by letting you mask bank account numbers.
On the Manage System Security Options page, you can mask credit card numbers and external bank account numbers.
You just have to select the number of digits to mask and display. For example, a bank account number of XX558012
displays the last six digits and masks all the rest. These settings specify masking for payment instrument numbers in
the user interfaces of multiple applications.
239

Oracle Fusion Cloud Financials
Implementing Receivables Credit to Cash
Chapter 7
Define Payments Security
Note: For credit cards, you can unmask only up to the first or last four digits of the credit card number. On the other
hand, you can unmask up to the first or last six digits of a bank account number.
Related Topics
•
Enable Encryption of Sensitive Payment Information
•
PCI DSS Credit Card Processing Requirements
Enable Encryption of Sensitive Payment Information
Financial transactions contain sensitive information, which must be protected by a secure, encrypted mode. To protect
your credit card and external bank account information, you can enable encryption.
Encryption encodes sensitive data, so it can't be read or copied. To enable encryption, you must create a master
encryption key. Oracle Platform Security Services is a repository that stores your master encryption key. The application
uses your master encryption key to encrypt your sensitive data.
Note: Before you can import credit cards into Expenses, you must enable encryption or tokenization of credit cards in
Payments. If you're using credit card data anywhere other than Expenses, you must enable tokenization in Payments.
To secure your credit card or bank account data, complete these steps:
1. In the Setup and Maintenance work area, go to Financials > Payments > Manage System Security Options.
2. On the Manage System Security Options page, click Apply Quick Defaults.
3. Select all the check boxes:
◦
Automatically create wallet file and master encryption key
◦
Encrypt credit card data
◦
Encrypt bank account data
4. Click Save and Close.
PCI DSS Credit Card Processing Requirements
The Payment Card Industry (PCI) has developed security requirements for managing and processing cardholder
information and has created a published standard called the Payment Card Industry Data Security Standard (PCI DSS).
The security requirements defined in the PCI DSS apply to all members, merchants,
Oracle Payments is engaged in the PCI certification process. Credit card processing is currently available only in the
Oracle data centers where Oracle Payments is certified by the latest PCI Data Security Standard (PCI DSS v3.2.1). Credit
card processing is included in all Oracle Fusion Applications that use Oracle Payments: Receivables, Payables, Expenses,
Advanced Collections, and Bill Management.
240

Oracle Fusion Cloud Financials
Implementing Receivables Credit to Cash
Chapter 7
Define Payments Security
Oracle Fusion Cloud Service
Oracle Fusion Cloud Applications Suite provides the integration services that facilitate credit card tokenization and
payment processing using supported payment gateways. Individual organizations are responsible for their ongoing
agreements with the supported payment gateway services.
Organization responsibilities for credit card data processing using Oracle Fusion Applications include:
• Credit Card Tokenization and Masking: Credit card numbers must be tokenized or truncated. A truncated
credit card number displays no more than the first six or last four digits of the full card number, with the
remaining digits masked or removed.
• Movement of Credit Card Data: All credit card data, including credit card tokens, must be sent within
the supported business flows only. Alternative communication flows, including file transfer, email, email
attachments, descriptive flexfields, and other similar attributes are prohibited.
Oracle Payments supports a select number of payment gateways for tokenization and credit card payment processing
services. For details on the certified Oracle data centers and supported gateways, refer to Is Credit Card Processing
Supported In Oracle Fusion Applications (1949941.1). You can refer to this document as more data centers become PCI
certified.
Related Topics
•
Is Credit Card Processing Supported In Oracle Fusion Applications? (Doc ID 1949941.1)
How You Enable Credit Card Tokenization
Credit card tokenization is the process of replacing sensitive data with a unique surrogate number, or token, that
isn't considered sensitive. The process uses services of a third-party token service provider that stores the sensitive
information and generates tokens to replace sensitive data
Note: Before you can import credit cards into Expenses, you must enable encryption or tokenization of credit cards in
Payments.
To enable credit card tokenization, you perform steps in the following setup pages:
• Manage System Security Options page
• Create Payment System page
Manage System Security Options
To enable credit card tokenization on the Manage System Security Options page, click Edit Tokenization Payment
System. Select CyberSource as the tokenization payment system. Now you can view CyberSource as the read-only
tokenization payment system in the Tokenization section.
Create Payment System
To enable credit card tokenization on the Create Payment System page, follow these steps:
1. In the Tokenization Payment System Settings subsection, select the Credit card tokenization check box.
2. In the Tokenization Payment System Settings section, enter values that relate to the following fields:
241

Oracle Fusion Cloud Financials
Implementing Receivables Credit to Cash
Chapter 7
Define Payments Security
◦
Name
◦
Code
◦
Data Type
◦
Secured: Specify Yes or No.
◦
Value
Note: The tokenization settings are already predefined for the CyberSource payment system. You only need to enter
the values.
Related Topics
•
PCI DSS Credit Card Processing Requirements
How Imported Legacy Credit Cards Are Processed
Use the Import Legacy Credit Cards process to import tokenized legacy credit cards data into Oracle Payments Cloud
from legacy and external sources through a batch, flat file-based interface. You can download a spreadsheet template to
enter your legacy credit cards data. The spreadsheet
CAUTION: Before you can import legacy credit card numbers into Payments, you must ensure that they are tokenized
to maintain strict compliance with the PCI (Payment Card Industry) rules protecting Oracle Applications Cloud from
audit.
This figure illustrates the flow of importing legacy credit cards data into the application, as well as correcting errors.
242

Oracle Fusion Cloud Financials
Implementing Receivables Credit to Cash
Chapter 7
Define Payments Security
Note: You can't use the IbyLegacyCreditCardsImportTemplate.xlsm spreadsheet template to import tokens for
customers created directly on the UI.
To access the IbyLegacyCreditCardsImportTemplate.xlsm spreadsheet template, complete these steps:
1. Navigate to the File-Based Data Import for Oracle Financials Cloud guide.
2. In the Table of Contents, click the File-Based Data Imports link.
3. Click the Import Legacy Credit Cards link.
4. In the File Links section, click the link to the Excel template.
Before you can import legacy credit cards data, you must complete these steps:
1. Enable tokenization in Payments.
243

Oracle Fusion Cloud Financials
Implementing Receivables Credit to Cash
Chapter 7
Define Payments Security
2. Configure at least one payment system with tokenization enabled. The tokenization service provider is
CyberSource.
3. Configure the ORA_IBY_DTK_RUN lookup that enables the Import Legacy Credit Cards program.
4. Tokenize the legacy credit cards data using a batch file upload process in CyberSource.
Follow these guidelines when preparing your data in the spreadsheet template:
• Enter the required information for each column. Refer to tool tips on each column header for the expected data
type or for detailed instructions.
• Don't change the order of the columns in the spreadsheet template.
If you change the order of the columns, the upload process fails.
• You can hide or skip columns you don't use, but don't delete them.
If you delete columns, the upload process fails.
Spreadsheet Tabs that Affect the Import Legacy Credit Cards Process
The following table contains the name of the spreadsheet tabs in the Legacy Credit Cards Import spreadsheet template
and a brief description of their content.
Spreadsheet Tab Description
Instructions and CSV Generation
• Overview of the process
• CSV generation button
• Revision history
Tokenized Credit Card Details
Column headings for entering tokenized card details
How Import Legacy Credit Cards Data Is Processed
The following table describes the flow of data when you import tokenized legacy credit cards into Payments.
Sequence Action Result
1
From the guide titled File-Based Data
Import for Oracle Financials Cloud,
download the spreadsheet template named
IbyLegacyCreditCardsImportTemplate.xlsm. It is
located in the File-Based Data Imports chapter,
Legacy Credit Cards Import section.
The file-based data import spreadsheet
template is downloaded.
2
1. Enter data in the spreadsheet template.
2. Refer to the bubble text on each column
header either for detailed instructions on
entering the data in that column, or for a
description of the data and data type that
the column requires.
3. Don't delete row number 5, which shows
text in capital letters.
The spreadsheet template is ready for CSV file
generation.
244

Oracle Fusion Cloud Financials
Implementing Receivables Credit to Cash
Chapter 7
Define Payments Security
Sequence Action Result
4. Each credit card is assigned to the
customer at the customer account or
customer account site use level.
3
1. Click Generate CSV File.
2. Save the CSV file with a unique name.
A CSV file is generated that is compressed into
a ZIP file.
4
To upload the ZIP file to Oracle Universal
Content Management:
1. Navigate: Tools > File Import and Export.
2. On the File Import and Export page, click
the plus (Upload) icon. The Upload File
dialog box appears.
3. In the File field, browse for and select your
ZIP file.
4. From the Account choice list, select fin/
payments/import.
5. Click Save and Close.
The ZIP file is uploaded.
5
To submit the Import Legacy Credit Cards
process:
1. Sign in to the central Oracle Enterprise
Scheduler server.
2. Navigate: Tools > Scheduled Processes.
3. Click Schedule New Process.
The Schedule New Process dialog box
appears.
4. From the Name choice list, search and
select Tokenize Credit Card Data.
5. Click OK.
The Process Details dialog box appears.
6. From the Credit Card Data Import File
choice list, select your ZIP file.
7. Click Submit.
The Import Legacy Credit Cards process first
validates the credit cards and associated data
and then imports the data from the uploaded
file into the following Payments tables:
• IBY_CREDITCARD
• IBY_PMT_INSTR_USES_ALL
After you submit the Import Legacy Credit
Cards process, the following data appears in
Payments:
• Credit card data
• Assignment data
The log output of the Import Legacy Credit
Cards process reports the number of successful
and rejected records.
6
To correct import errors:
1. View the log output from the Import
Legacy Credit Cards process.
2. Identify the rejected records based on
details provided in the log file.
3. Create a new spreadsheet that contains
only rejected records that you copy from
the old spreadsheet template.
4. For the Origin Site Purpose Source
Reference column, enter a different unique
value.
5. Make necessary corrections to the data.
6. Load the data using a new spreadsheet.
7. Generate the CSV File, upload the ZIP file,
and continue.
Failed records are visible in the log output from
the Import Legacy Credit Cards process. A
new spreadsheet that contains only corrected
records is uploaded and processed again.
245

Oracle Fusion Cloud Financials
Implementing Receivables Credit to Cash
Chapter 7
Define Payments Security
Sequence Action Result
7
Import legacy credit cards data at one of the
following levels if you have their associated
identifiers:
• Customer account
• Customer account site
In the spreadsheet, if the Owner Level column is
CUST_ACCOUNT, then credit cards are assigned
at the customer account level.
In the spreadsheet, if the Owner Level column
is CUST_ACCT_SITE_USE, then credit cards are
assigned at the customer account site level.
Related Topics
•
How You Enable Credit Card Tokenization
•
How You Set Up a Payment System
•
How You Configure a Communication Channel to a Payment System
•
Import Legacy Customer Credit Card Data
Removal of Personally Identifiable Information
The General Data Protection Regulation is a regulation in European Union (EU) law. It protects the data and privacy of all
individuals within the EU and the European Economic Area.
Your organization can comply with the GDPR regarding the collection and use of personal data of EU residents.
You can remove an individual's personal data:
• If requested by an individual
• If the individual is no longer working with your organization
CAUTION: If you remove personally identifiable information, it can't be retrieved.
To run the removal process, you must have the Remove Personally Identifiable Information in Financials privilege.
To remove an individual's personally identifiable information for any product in Oracle Financials applications, you
submit the Remove Personally Identifiable Information in Financials process.
1. Navigate: Navigator > Tools > Scheduled Processes.
2. On the Scheduled Processes page, click Schedule New Process.
3. Search and select Remove Personally Identifiable Information in Financials.
4. From the Party choice list, select the person's name for whom you want to remove personally identifiable
information.
5. Click Submit.
Table and Column Details for Potential Removal of Personally Identifiable
Information
Here's a table that lists applications and their corresponding tables and columns that store sensitive data. It also lists the
data type stored in each column, whether you can redact the data from the column, and the reason for redaction.
246

Oracle Fusion Cloud Financials
Implementing Receivables Credit to Cash
Chapter 7
Define Payments Security
Sequence Number
and Product
Table Column Data Type Redact? Reason for Redaction
1
Oracle Payments
IBY_CREDITCARD
CC_NUMBER_HASH1
VARCHAR2(64 CHAR)
No
Unreadable data.
2
Oracle Payments
IBY_CREDITCARD
CC_NUMBER_HASH2
VARCHAR2(64 CHAR)
No
Unreadable data.
3
Oracle Payments
IBY_CREDITCARD
CCNUMBER
VARCHAR2(30 CHAR)
No
Tokenized or
encrypted data.
4
Oracle Payments
IBY_CREDITCARD
CHNAME
VARCHAR2(80 CHAR)
No
Nonsensitive since
card is secured.
5
Oracle Payments
IBY_CREDITCARD
EXPIRYDATE
DATE
No
Nonsensitive since
card is secured.
6
Oracle Payments
IBY_CREDITCARD
MASKED_CC_
NUMBER
VARCHAR2(30 CHAR)
No
Nonsensitive since
card is secured.
7
Oracle Payments
IBY_EXT_BANK_
ACCOUNTS
BANK_ACCOUNT_
NAME
VARCHAR2(80 CHAR)
Yes
Sensitive data.
8
Oracle Payments
IBY_EXT_BANK_
ACCOUNTS
BANK_ACCOUNT_
NAME_ALT
VARCHAR2(320 CHAR)
Yes
Sensitive data.
9
Oracle Payments
IBY_EXT_BANK_
ACCOUNTS
BANK_ACCOUNT_
NUM
VARCHAR2(100 CHAR)
Yes
Sensitive when
bank account isn't
encrypted or masked.
10
Oracle Payments
IBY_EXT_BANK_
ACCOUNTS
BANK_ACCOUNT_
NUM_ELECTRONIC
VARCHAR2(100 CHAR)
Yes
Sensitive when
bank account isn't
encrypted or masked.
11
Oracle Payments
IBY_EXT_BANK_
ACCOUNTS
BANK_ACCOUNT_
NUM_HASH1
VARCHAR2(64 CHAR)
No
Unreadable data.
12
Oracle Payments
IBY_EXT_BANK_
ACCOUNTS
BANK_ACCOUNT_
NUM_HASH2
VARCHAR2(64 CHAR)
No
Unreadable data.
247

Oracle Fusion Cloud Financials
Implementing Receivables Credit to Cash
Chapter 7
Define Payments Security
Sequence Number
and Product
Table Column Data Type Redact? Reason for Redaction
13
Oracle Payments
IBY_EXT_BANK_
ACCOUNTS
IBAN
VARCHAR2(50 CHAR)
Yes
Sensitive when
bank account isn't
encrypted or masked.
14
Oracle Payments
IBY_EXT_BANK_
ACCOUNTS
IBAN_HASH1
VARCHAR2(64 CHAR)
No
Unreadable data.
15
Oracle Payments
IBY_EXT_BANK_
ACCOUNTS
IBAN_HASH2
VARCHAR2(64 CHAR)
No
Unreadable data.
16
Oracle Payments
IBY_EXT_BANK_
ACCOUNTS
MASKED_BANK_
ACCOUNT_NUM
VARCHAR2(100 CHAR)
Yes
Denormalized value.
Sensitive when
bank account isn't
encrypted or masked.
17
Oracle Payments
IBY_EXT_BANK_
ACCOUNTS
MASKED_IBAN
VARCHAR2(50 CHAR)
Yes
Denormalized value.
Sensitive when
bank account isn't
encrypted or masked.
18
Oracle Payments
IBY_FNDCPT_TX_
EXTENSIONS
INSTRUMENT_
SECURITY_CODE
VARCHAR2(10 CHAR)
No
No longer store card
verification value.
19
Oracle Payments
IBY_TRXN_
SUMMARIES_ALL
DEBIT_ADVICE_EMAIL
VARCHAR2(255 CHAR)
Yes
Denormalized value.
Sensitive data.
20
Oracle Payments
IBY_PAYMENTS_ALL
EXT_BANK_
ACCOUNT_NAME
VARCHAR2(360 CHAR)
Yes
Nonsensitive when
person data is
redacted.
21
Oracle Payments
IBY_PAYMENTS_ALL
EXT_BANK_
ACCOUNT_NUMBER
VARCHAR2(100 CHAR)
Yes
Denormalized value.
Sensitive when
bank account isn't
encrypted or masked.
22
Oracle Payments
IBY_PAYMENTS_ALL
EXT_BANK_
ACCOUNT_IBAN_
NUMBER
VARCHAR2(50 CHAR)
Yes
Denormalized value.
Sensitive when
bank account isn't
encrypted or masked.
23
Oracle Payments
IBY_PAYMENTS_ALL
PAYEE_NAME
VARCHAR2(360 CHAR)
Yes
Payee name is
sensitive data.
24
IBY_PAYMENTS_ALL
PAYEE_ADDRESS1
VARCHAR2(240 CHAR)
Yes
Address data.
248

Oracle Fusion Cloud Financials
Implementing Receivables Credit to Cash
Chapter 7
Define Payments Security
Sequence Number
and Product
Table Column Data Type Redact? Reason for Redaction
Oracle Payments
25
Oracle Payments
IBY_PAYMENTS_ALL
PAYEE_ADDRESS2
VARCHAR2(240 CHAR)
Yes
Address data.
26
Oracle Payments
IBY_PAYMENTS_ALL
PAYEE_ADDRESS3
VARCHAR2(240 CHAR)
Yes
Address data.
27
Oracle Payments
IBY_PAYMENTS_ALL
PAYEE_ADDRESS4
VARCHAR2(240 CHAR)
Yes
Address data.
28
Oracle Payments
IBY_PAYMENTS_ALL
PAYEE_CITY
VARCHAR2(60 CHAR)
Yes
Address data.
29
Oracle Payments
IBY_PAYMENTS_ALL
PAYEE_POSTAL_CODE
VARCHAR2(60 CHAR)
Yes
Address data.
30
Oracle Payments
IBY_PAYMENTS_ALL
PAYEE_STATE
VARCHAR2(120 CHAR)
Yes
Address data.
31
Oracle Payments
IBY_PAYMENTS_ALL
PAYEE_PROVINCE
VARCHAR2(120 CHAR)
Yes
Address data.
32
Oracle Payments
IBY_PAYMENTS_ALL
PAYEE_COUNTY
VARCHAR2(120 CHAR)
Yes
Address data.
33
Oracle Payments
IBY_PAYMENTS_ALL
PAYEE_COUNTRY
VARCHAR2(60 CHAR)
Yes
Address data.
34
Oracle Payments
IBY_PAYMENTS_ALL
REMIT_ADVICE_
EMAIL
VARCHAR2(255 CHAR)
Yes
Address data.
35
Oracle Payments
IBY_PAYMENTS_ALL
PAYEE_PARTY_NAME
VARCHAR2(360 CHAR)
Yes
Party name is sensitive
data.
36
Oracle Payments
IBY_PAYMENTS_ALL
PAYEE_LE_
REGISTRATION_NUM
VARCHAR2 (50 CHAR)
Yes
Denormalized value.
Sensitive data.
249

Oracle Fusion Cloud Financials
Implementing Receivables Credit to Cash
Chapter 7
Define Payments Security
Sequence Number
and Product
Table Column Data Type Redact? Reason for Redaction
37
Oracle Payments
IBY_PAYMENTS_ALL
PAYEE_TAX_
REGISTRATION_NUM
VARCHAR2 (50 CHAR)
Yes
Denormalized value.
Sensitive data.
38
Oracle Payments
IBY_PAYMENTS_ALL
PAYEE_ADDRESS_
CONCAT
VARCHAR2 (2000
CHAR)
Yes
Address data.
39
Oracle Payments
IBY_PAYMENTS_ALL
BENEFICIARY_NAME
VARCHAR2 (360
CHAR)
Yes
Beneficiary name is
sensitive data.
40
Oracle Payments
IBY_PAYMENTS_ALL
PAYEE_ALTERNATE_
NAME
VARCHAR2 (360
CHAR)
Yes
Payee alternate name
is sensitive data.
41
Oracle Payments
IBY_PAYMENTS_ALL
EXT_BANK_
ACCOUNT_ALT_NAME
VARCHAR2 (320
CHAR)
Yes
Bank account alternate
name is sensitive data.
42
Oracle Payments
IBY_PAYMENTS_ALL
EXT_BANK_
ACCOUNT_NUM_
ELEC
VARCHAR2 (100
CHAR)
Yes
Denormalized value.
Sensitive when
bank account isn't
encrypted or masked.
43
Oracle Payments
IBY_PAYMENTS_ALL
EXT_BANK_ACCT_
OWNER_PARTY_
NAME
VARCHAR2 (360
CHAR)
Yes
Owner party name is
sensitive data.
44
Oracle Payments
IBY_EXTERNAL_
PAYEES_ALL
REMIT_ADVICE_
EMAIL
VARCHAR2(255 CHAR)
Yes
Sensitive data.
45
Oracle Payments
IBY_EXTERNAL_
PAYERS_ALL
DEBIT_ADVICE_EMAIL
VARCHAR2(255 CHAR)
Yes
Sensitive data.
46
Oracle Payables
AP_CHECKS_ALL
ADDRESS_LINE1
VARCHAR2(240 CHAR)
Yes
Address data.
47
Oracle Payables
AP_CHECKS_ALL
ADDRESS_LINE2
VARCHAR2(240 CHAR)
Yes
Address data.
48
Oracle Payables
AP_CHECKS_ALL
ADDRESS_LINE3
VARCHAR2(240 CHAR)
Yes
Address data.
250

Oracle Fusion Cloud Financials
Implementing Receivables Credit to Cash
Chapter 7
Define Payments Security
Sequence Number
and Product
Table Column Data Type Redact? Reason for Redaction
49
Oracle Payables
AP_CHECKS_ALL
CITY
VARCHAR2(60 CHAR)
Yes
Address data.
50
Oracle Payables
AP_CHECKS_ALL
COUNTRY
VARCHAR2(60 CHAR)
Yes
Address data.
51
Oracle Payables
AP_CHECKS_ALL
ZIP
VARCHAR2(60 CHAR)
Yes
Address data.
52
Oracle Payables
AP_CHECKS_ALL
VENDOR_NAME
VARCHAR2(240 CHAR)
Yes
Supplier name is
sensitive data.
53
Oracle Payables
AP_CHECKS_ALL
BANK_ACCOUNT_
NUM
VARCHAR2(30 CHAR)
Yes
Denormalized value.
54
Oracle Payables
AP_CHECKS_ALL
ADDRESS_LINE4
VARCHAR2(240 CHAR)
Yes
Address data.
55
Oracle Payables
AP_CHECKS_ALL
COUNTY
VARCHAR2(150 CHAR)
Yes
Address data.
56
Oracle Payables
AP_CHECKS_ALL
IBAN_NUMBER
VARCHAR2(40 CHAR)
Yes
Denormalized value.
57
Oracle Cash
Management
CE_PAYEES
TAX_REGISTRATION_
NUMBER
VARCHAR2(20 CHAR)
Yes
Sensitive data.
58
Oracle Receivables
AR_CUSTOMER_ALT_
NAMES
ALT_NAME
VARCHAR2(320 CHAR)
Yes
Alternate customer
name using Zengin
characters.
59
Oracle Receivables
AR_PAYMENT_
SCHEDULES_ALL
DEL_CONTACT_
EMAIL_ADDRESS
VARCHAR2(1000
CHAR)
Yes
Email of the customer
bill-to contact who
receives printed
transactions.
60
Oracle Receivables
RA_CUSTOMER_TRX_
ALL
DEL_CONTACT_
EMAIL_ADDRESS
VARCHAR2(1000
CHAR)
Yes
Email of the customer
bill-to contact who
receives printed
transactions.
251

Oracle Fusion Cloud Financials
Implementing Receivables Credit to Cash
Chapter 7
Define Payments Security
Sequence Number
and Product
Table Column Data Type Redact? Reason for Redaction
61
Oracle Advanced
Collections
IEX_DUNNINGS
CONTACT_
DESTINATION
VARCHAR2(240 CHAR)
Yes
Contact who receives
the dunning.
252

Oracle Fusion Cloud Financials
Implementing Receivables Credit to Cash
Chapter 8
Define Customer
8 Define Customer
Define Customer Account
Customer Account Relationships
Use customer account relationships to manage the sharing of billing and shipping services and payment activities
between two accounts.
Account relationships let you identify customer accounts that can receive shipments or invoices for another account, as
well as accounts that can pay for the open debit items of other accounts.
How You Use Customer Account Relationships
Use the Relationships tab of the Edit Account page to create and maintain account relationships for a particular
customer account.
A customer account relationship is either a one-way relationship or a reciprocal relationship. By default an account
relationship is one-way, meaning that the parent account can apply receipts to open debit items of the related account,
but receipts in the related account can't be applied to open debit items of the parent account. If you want to allow the
two accounts to pay for each other's open debit items, then enable the Reciprocal option for the relationship definition.
Enable the Bill To and Ship To options for relationships that involve billing and shipping services. In a one-way
relationship, the parent account can process invoices and receive shipments for the related account. In a reciprocal
relationship, either account can manage these services for the other account.
You can use the Allow payment of unrelated transactions Receivables system option to help manage customer
account relationships. Don't enable this option if you want to restrict the sharing of receipt application and billing and
shipping services to the account relationships that you define for each customer account.
If you do enable the Allow payment of unrelated transactions Receivables system option, then any customer account
can pay for the open debit items of any other customer account. You can still use account relationships to manage
billing and shipping services.
Related Topics
•
What's the difference between an account relationship and a paying relationship?
Customer Account Information
Use the customer account record to maintain detailed information about each of your customer accounts.
Review these activities related to entering and updating customer account information:
• Payment Details
• Communication Information
253

Oracle Fusion Cloud Financials
Implementing Receivables Credit to Cash
Chapter 8
Define Customer
• Account Relationships
• Account Profiles
Payment Details
Use the Payment Details section to maintain active receipt methods and payment instruments for use by each
customer account. During transaction and receipt entry, Receivables assigns the primary receipt method and payment
instruments as the default. You can override these defaults at the transaction or receipt level with another active receipt
method or payment instrument belonging to the customer account.
• Receipt Methods: Assign automatic and manual receipt methods to each customer account. Start and end
dates for each receipt method can't overlap.
◦
Assign automatic receipt methods for use with automatic receipts. Automatic receipt methods
determine the required processing steps for automatic receipts, including confirmation, remittance, and
reconciliation.
◦
Assign manual receipt methods to indicate which form of receipt to use to collect payment for
transactions belonging to this account.
The primary manual receipt method on bill-to customer accounts and sites is assigned by default to the
respective customer invoices and debit memos created manually in the related Create Transaction page.
• Payment Instruments: Assign credit cards and bank accounts to each customer account. The payment
instrument information that you create for a customer account is stored in Oracle Payments for use during
funds capture processing.
◦
Assign bank accounts for use with automatic receipts. The bank accounts you specify are used by the
automatic receipt process to transfer funds from these accounts to your remittance bank accounts.
◦
Define multiple customer bank accounts in different currencies and assign bank accounts to customer
addresses. The primary bank account for a particular currency is used as the default account during
automatic receipt processing. You can define multiple, non-primary accounts in the same currency, even
if the date ranges overlap.
Communication Information
Use the Communication section to maintain customer contact persons for each customer account. Information that you
can maintain for each contact includes:
• Name and job title.
• Contact points, such as phone and fax numbers, email and instant message addresses, and URLs.
• Job responsibilities.
• Addresses. You can either enter new addresses specific to the contact, or you can enter addresses of account
sites belonging to the customer account.
You can create a new contact person or add an existing contact person for a customer account or account site. If you're
adding an existing contact person, you must define a party relationship at the customer level for each party and assign
the party the Contact role type.
Account Relationships
Use customer account relationships to manage the sharing of billing and shipping services and payment activities
between two accounts.
254

Oracle Fusion Cloud Financials
Implementing Receivables Credit to Cash
Chapter 8
Define Customer
Account Profiles
The account profile is the profile class record assigned to a customer account for a specified time period. You use the
profile class record to organize your customer accounts into categories that reflect the needs of your enterprise. If you
assign the same profile class to more than one customer account, you can modify individual profiles according to the
needs of a given customer account.
Related Topics
•
Overview of Extending the CX Sales Applications
Guidelines for Customer Addresses
Enter and maintain address information for your Receivables customer account site records.
When you create a customer, you must enter account and address information. This address becomes an account site
record of the customer.
When you create additional customer accounts for the customer, you can either enter new address information to create
a new account site, or you can use an existing account site. If you assign an existing account site to the new account,
you can modify the address information itself, but you will receive a warning if this address is shared by other parties.
These guidelines apply to entering and updating customer addresses:
• Reference Data Set for Account Sites
• Update Sharing
• Inactive Customer Sites with Open Transactions
• Account Address Details
• Address Business Purposes
• Reference Accounts
Reference Data Set for Account Sites
Before creating or importing customers, you must create a reference data set for use with customer account sites. You
can share this reference data set across one or more business units, according to your requirements.
To access the new reference data set on customer account sites, provision the appropriate data role to the designated
users in order to grant them access to the job role for the given business units and reference data sets.
Update Sharing
If you update an address due to incorrect or missing information, these updates are shared with all account sites that
use this address.
Update sharing applies to address information only, and not to account address details or business purposes.
Inactive Customer Sites with Open Transactions
If you inactivate a customer site, you can still create and apply receipts using this site. This is because an inactive site
may still have open transactions that must be paid.
255

Oracle Fusion Cloud Financials
Implementing Receivables Credit to Cash
Chapter 8
Define Customer
An inactive customer site is disabled for new transaction creation.
Account Address Details
Use the Account Address Details subsection to identify these values for the account site:
• Customer Category Code: Used to classify this customer according to the needs of your enterprise. You define
these category codes using the Trading Community Model.
• Translated Customer Name: Used to enter the customer name in another language. The translated name
replaces the customer name on external documents.
Address Business Purposes
Assign address business purposes to account sites to identify the functions performed by each particular customer
account site. You can designate one account site as Primary for each address business purpose.
Common address business purposes include:
• Bill-to: Assign the bill-to business purpose to account sites designated to receive and process bills. You must
create at least one bill-to site to process transactions for a customer.
• Ship-to: Assign the ship-to business purpose to account sites designated to receive goods purchased by the
customer account.
If you create a ship-to business purpose, you must indicate the related bill-to site that processes the bills for the
shipped goods.
Bill-to sites available for association with ship-to sites either belong to the same customer account or to related
customer accounts.
• Deliver-to: Assign the deliver-to business purpose to sites that receive all or part of goods sent to a ship-to site.
• Bills of lading: Assign the bills of lading business purpose to sites that manage contracts for carriers that ship
customer goods.
• Dunning: Assign the dunning business purpose to sites that receive dunning letters from you.
• Late Charge: Assign the late charge business purpose to the site assigned the late charge policy for this
customer account.
Note: If the Statement, Dunning, and Late Charges Site Profiles Used profile option is set to Yes,
then Receivables uses the late charge policy assigned to the late charge site to calculate late charges on
transactions. If the profile option is set to No, then Receivables uses the late charge policy assigned to the bill-
to site assigned to the transaction.
If you need to remove an address business purpose from an active account site, apply an end date to the business
purpose instead of deleting it. This way you can restore the business purpose at a later time by updating or removing
the end date. If you delete a business purpose, then you must create a new record for the same business purpose to
activate it again.
Reference Accounts
Assign distributions for revenue, freight, receivable, AutoInvoice clearing, tax, unbilled receivable, and deferred revenue
accounts to customer bill-to sites. If AutoAccounting depends on Bill-to Site, then Receivables uses the bill-to site of the
transaction to determine the related segment for these distributions.
256

Oracle Fusion Cloud Financials
Implementing Receivables Credit to Cash
Chapter 8
Define Customer
Related Topics
•
Reference Data Sets
How You Display Additional Customer Sites
By default the Manage Customers page displays in the Sites section the account sites assigned to the selected customer
account.
You can use the Advanced search to search for sites by site number. The search results display all sites across all
customers and customer accounts that match the search value.
You can also enable the Show related contact sites option to display in the Sites section additional sites belonging to a
customer account that don't display by default.
Additional sites may belong to related parties that, through some action of the party, were used as account sites. For
example, an employee placed an order on behalf of the customer account, but used his or her personal address as the
shipping address. This created an account site for the customer account with the employee address as the account site
address.
Additional sites may also be part of data migration, such as existing account sites from other systems that are linked to
the customer account.
Manage Receivables Customer Profile Classes
How You Use Customer Profile Classes
Use profile classes to organize your customer accounts into categories that reflect the needs of your enterprise.
The profile class record contains generic options that you can set in different ways to group your customers into broad
categories, such as by industry, location, size, creditworthiness, business volume, or payment cycles.
For example, you might define three profile classes that reflect customer payment behavior: one for customers who pay
promptly; one for late paying customers with high late charge rates; and a third for customers who for the most part pay
on time, with discount incentives for early payment.
Profile Class Management
When you create a customer account, Receivables assigns the profile class DEFAULT. Use the Edit Account page to
modify this profile class or assign another profile class to the customer account.
When you create a customer site, Receivables doesn't assign either the DEFAULT profile class or the profile class of the
customer account. Instead you must use the Create Site Profile page to assign the first profile class to the site. Use the
Edit Site page either to update the existing profile or to assign a new profile class to the site.
After you assign a profile class to a customer account or site, you can modify details of the profile class to meet specific
requirements for that account or site. For example, a particular site may transact business in a separate currency, or the
257

Oracle Fusion Cloud Financials
Implementing Receivables Credit to Cash
Chapter 8
Define Customer
site may be subject to additional late charges or penalty charges. These updates apply only to that particular account or
site and don't affect the profile class record itself.
Profile class updates and assignments are managed using effective date ranges. Each profile class that you assign
or update supersedes the previous profile class for the given date range. In this way you can manage over time the
changes that take place in customer behavior or customer requirements. The date of a given transaction or receipt
determines which account or site profile applies to the activity. The profile history for an account or site provides details
of when a given version of a profile class is active.
How You Update and Version Profile Classes
After you update an existing profile class, Receivables presents you with three options for how to save your updates.
You can update the profile class record only, or you can update the profile class record along with updating the profiles
that make use of this record.
The three options for updating profile class records are:
• Apply changes to new profiles only.
• Apply changes to unmodified profiles and version existing unmodified profiles.
• Apply changes to all profiles and version all existing profiles.
This update process is managed by the Propagate Customer Profile Class Update program.
Apply changes to new profiles only
This option updates the profile class record only. It doesn't apply your updates to any account or site profile that uses
this profile class.
The changes you make to this profile class will apply to new account or site profiles that are assigned this profile class.
Apply changes to unmodified profiles and version existing unmodified profiles
This option applies versioning to profiles that don't have modified settings. The update process for this option is:
• Updates the profile class record.
• Applies your updates to unmodified account and site profiles that use this profile class.
• Creates a new version of account and site profiles that use this profile class, using the system date as the
effective start date.
• Assigns the previous version of account and site profiles that use this profile class an effective end date of the
day before the system date. This previous version remains valid within its effective date range.
Use the Profile History tab of customer account and site records to view the versions of a profile.
Apply changes to all profiles and version all existing profiles
This option applies versioning to all profiles. The update process for this option is:
• Updates the profile class record.
• Applies your updates to all account and site profiles that use this profile class.
258

Oracle Fusion Cloud Financials
Implementing Receivables Credit to Cash
Chapter 8
Define Customer
• Creates a new version of account and site profiles that use this profile class, using the system date as the
effective start date.
• Assigns the previous version of account and site profiles that use this profile class an effective end date of the
day before the system date. This previous version remains valid within its effective date range.
Use the Profile History tab of customer account and site records to view the versions of a profile.
How You Set Up a Customer Profile for Credit Checks
The Credit Check service in the quote-to-cash process evaluates credit authorization requests according to the credit
settings in the customer or customer account profile.
Set up the Credit and Collections section of each customer or customer account profile with the settings that you want
to use to determine credit authorizations.
The settings used for credit authorization are:
• Credit Limit field: Enter the total credit limit that the customer or customer account has available in the given
currency.
• Tolerance field: Enter the percentage that a customer can exceed their credit limit.
• Conversion Rate Type field: Enter the conversion rate type to use to convert transaction amounts to the credit
currency.
• Include in credit check option:
◦
If you enable this option, then the application compares the available credit in the applicable currency to
the requested amount.
◦
If you don't enable this option, then the customer or customer account is excluded from the credit check
process.
• Expiration Offset Days field: Enter the number of days to use in the calculation of the expiration date of a
credit authorization.
How the Credit Authorization Expiration Date is Derived
Receivables derives the expiration date of a credit authorization depending on the available date information for the
transaction and the value in the Expiration Offset Days field, if there is one.
The logic for deriving the credit authorization expiration date is as follows:
• If the Expiration Offset Days field contains a value, then:
◦
If the fulfillment/shipment date is provided, then: Expiration Date = Fulfillment/Shipment date + Offset
Days.
◦
If fulfillment/shipment date isn't provided, but the sales order date is provided, then: Expiration Date =
Sales Order Date + Offset Days.
◦
If neither the fulfillment/shipment date nor the sales order date is provided, then: Expiration Date =
Credit Authorization Date + Offset Days.
• If the Expiration Offset Days field doesn't contain a value, then:
◦
If the fulfillment/shipment date is provided, then: Expiration Date = Fulfillment/Shipment date + 5.
259

Oracle Fusion Cloud Financials
Implementing Receivables Credit to Cash
Chapter 8
Define Customer
◦
If fulfillment/shipment date isn't provided, but the sales order date is provided, then: Expiration Date =
Sales Order Date + 5.
◦
If neither the fulfillment/shipment date nor the sales order date is provided, then: Expiration Date =
Credit Authorization Date + 5.
Related Topics
•
Components of the Credit Profile
FAQs for Manage Receivables Customer Profile Classes
When are profile class defaults used?
The customer profile class shares these default settings with other parts of Receivables: Match Receipts By; AutoMatch
rule set; AutoCash rule set; AutoInvoice grouping rule; payment terms; and tax printing options.
Each of these settings is used according to the hierarchy required by the transaction or receipt process.
For receipt processing:
• Receivables searches for a Match Receipts By document type reference to use for receipt and transaction
comparison in the order: customer site profile, customer account profile, lockbox (for lockbox processing), and
Receivables system options.
• Receivables searches for an AutoMatch rule set to determine how receipts are applied automatically and
transactions recommended for manual application in the order: customer site profile, customer account profile,
lockbox (for lockbox processing), and Receivables system options.
• If Receivables can't match receipts to transactions, the application searches for an AutoCash rule set to use to
apply receipts in the order: customer site profile, customer account profile, and Receivables system options.
For transaction processing:
• During AutoInvoice import, Receivables searches for an AutoInvoice grouping rule to use to group transaction
lines into transactions in the order: transaction source, customer site profile, customer account profile, and
Receivables system options.
• Receivables searches for the payment terms to use on a transaction in the order: customer site profile,
customer account profile, and transaction type. If the payment terms come from the site profile or account
profile, and the Override terms option is enabled, then you can update the default payment terms on the
transaction.
• Receivables searches for the tax printing option to use to print tax on transactions in the order: customer site
profile, customer account profile, and Receivables system options. If no value is found, then Receivables uses
Total Tax Only as the default value to print transactions.
260

Oracle Fusion Cloud Financials
Implementing Receivables Credit to Cash
Chapter 8
Define Customer
Manage Customers
Customer and Party Structure
You create customers to properly record and account for sales transactions, as well as to identify other attributes of the
selling relationship.
Recording a sales transaction requires that a customer, stored as a party in the trading community model, has both a
customer account and customer site with a bill-to business purpose.
The key concepts related to customers and customer activities in the trading community model are:
• Party
• Customer
• Customer Account
• Site
• Relationship
• Contact
Party
A party is an entity that can enter into a business relationship with another party, such as buying and selling goods
or offering services. A party can be either an organization or a person. A party exists separately from any business
relationship that it enters into with another party.
Customer
A customer is a party, either an organization or a person, with whom you have a selling relationship. This selling
relationship can result, for example, from the purchase of products and services or from the negotiation of terms and
conditions that provide the basis for future purchases.
Customer Account
A customer account represents the attributes of the business relationship that a party can enter into with another party.
The customer account has information about the terms and conditions of doing business with the party.
For example, you can create a commercial account for purchases made by a company for internal use, and a reseller
account for purchases made by the same company for sales of your products to end users.
You can create multiple customer accounts for a party to maintain information about different categories of business
activities. For example, to track invoices for different types of purchases, you can maintain an account for purchasing
office supplies and another account for purchasing furniture.
You can also maintain multiple customer accounts for a customer that transacts business with more than one line of
business in your organization.
You can share information about a party, such as profile information, creditworthiness, addresses, and contacts, across
the customer accounts of the party. In addition, you can also maintain separate profiles and contacts, along with contact
addresses and contact points, for each customer account.
261

Oracle Fusion Cloud Financials
Implementing Receivables Credit to Cash
Chapter 8
Define Customer
Site
A site is a point in space described by an address. A party site is the place where a party is physically located.
A customer site is a party site used in the context of a customer account. A single customer account can have multiple
sites.
A customer address is a site used for billing, shipping, or other purposes that are part of the selling relationship. An
identifying address is the party site address that identifies the location of the party. Every party has only one identifying
address, but a party can have multiple party sites.
Relationship
A party relationship is the role of the party in the context of another party. Examples include affiliate, subsidiary,
partner, employee, or contact.
An account relationship between different customer accounts of a party allows for the sharing of billing, shipping, and
payment information.
Contact
A contact is a person who communicates for or acts on behalf of a party or customer account. A contact can exist for a
customer at the account or site level.
A person usually acts as a contact for an organization, but can also act as a contact for another person. For example, an
administrative assistant is often the contact for an executive.
Related Topics
•
Customer Hierarchies and Paying Relationships
How You Use Party Relationships
Use party relationships to model your customer records according to the way you conduct your business. Party
relationships can help you better understand and make decisions about the customers that you do business with.
Define party relationships to use with your customer records. A party relationship record contains the name of the party
that relates to the customer, the way in which the party relates to the customer (relationship role), and the period of time
that this particular relationship exists. You can then add these parties as contacts belonging to the accounts or account
sites of a given customer.
A party relationship represents the way two entities interact with each other, based on the role that each entity takes
with respect to the other. For example, the employment relationship between a person and an organization is defined
by the role of the person as the employee and the organization as the employer.
A relationship can be reciprocal. Each entity is either the subject or object, depending on the perspective, or direction.
The party that you define relationships for is the subject, and the party that you relate to is the object. For example,
if Joe is the employee of Oracle, then Joe is the subject and Oracle is the object. Oracle as the employer of Joe, which
reverses the subject and object, still describes the same relationship.
262

Oracle Fusion Cloud Financials
Implementing Receivables Credit to Cash
Chapter 8
Define Customer
How You Use Customer Tax Profiles
Use the tax profile to maintain optional tax information about your customers and customer sites. You create third-
party tax profiles using Oracle Tax, and you can update these tax profiles for the applicable customer or customer site.
Receivables doesn't populate a customer site record with the tax profile belonging to the customer record. You must
define a separate tax profile for each customer site, according to the requirements of the site. Tax profile records defined
at the customer site level take precedence over the tax profile record defined at the customer level.
For example, a customer level tax profile might not include tax exemptions. However, one of the related customer
sites may be located in a developing country or region, where tax incentives for businesses include tax exemptions on
specific products or services. In this case, you should define and maintain a separate tax profile for this customer site.
Related Topics
•
Party Tax Profiles
How You Merge Customers
If you have Data Quality installed, the Trading Community Model manages the merging of duplicate and redundant
customer records.
You can manually merge two customer records from the Manage Customers page in this way:
1. Search for the customer or customers that you want.
2. Select a customer.
3. Select the Merge Record command from the Actions menu to open the Merge window.
4. In the Merge window, select the original record and the duplicate records, and complete the merge request.
5. Repeat steps 2 to 4 for each customer that you want.
Related Topics
•
How you Consolidate Confirmed Duplicate Records
FAQs for Manage Customers
Does a new customer belong to a customer account?
No, creating a customer person or organization only establishes this party as having some kind of selling relationship
with you.
You need to create at least one customer account and one customer account site with a bill-to purpose for the customer
record in order to properly record and account for both sales transactions with the party and other attributes of the
selling relationship with the party.
When you create a customer manually, the customer account is assigned the profile DEFAULT. When you import
customers, there is no default profile assigned to the customer account. You must designate a customer account
263

Oracle Fusion Cloud Financials
Implementing Receivables Credit to Cash
Chapter 8
Define Customer
profile in the RA_CUSTOMER_PROFILES_INT_ALL table by specifying information for the CUST_ORIG_SYSTEM
and CUST_ORIG_SYSTEM_REFERENCE attributes, and leaving blank the CUST_SITE_ORIG_SYSTEM and
CUST_SITE_ORIG_SYS_REF attributes.
What happens if I enter customer information that already exists?
If you have Data Quality installed, the Trading Community Model manages the control of duplicate and redundant party
information.
If you enter party information resembling or matching existing information, then depending on your setup you're
prompted in different ways to manage this information.
This can include:
• Prevention of data entry.
• Inclusion with confirmation of data entry.
• Review and selection of matching or similar data.
How can I update other customer information?
Use the Edit Account pages to update information related to the customer accounts created for this customer.
You inactivate a customer account or site by populating the respective end date.
If you inactivate a customer party ID, you must also inactivate its related customer account. Otherwise the customer
account continues to remain an available choice for transaction and receipt creation.
Use the Edit Site pages to update information related to the customer sites created for each of the customer accounts.
This includes address information and the tax profile for the related account site.
Manage Customer Data Uploads
How You Import Customer Data
Use the Customer Import process to upload customer data into Receivables and the Trading Community Model registry.
Customer data includes Parties, Party Sites, Accounts, Account Sites, and Site Uses, along with associated customer
attributes, such as customer profiles, customer payment methods, and customer bank accounts.
Download a Customer Import FBDI template to prepare your data. The template contains an instruction sheet to help
guide you through the process of entering your information.
Note: You can also use the Upload Customers from Spreadsheet process to perform an upload of customer data
only, without data for the Trading Community Model registry. Use the Upload Customers from Spreadsheet process
to download a simplified Customer Import FBDI template and upload the data for customers, customer contacts,
customer bill-to site reference accounts, and customer bank accounts only.
To access the template, complete the following steps:
1. Navigate to the File-Based Data Import for Financials guide.
264

Oracle Fusion Cloud Financials
Implementing Receivables Credit to Cash
Chapter 8
Define Customer
2. In the Table of Contents, click Customer Data Model.
3. Click Customer Import.
4. In the File Links section, click the link to the Excel template.
Follow these guidelines when preparing your data in the worksheet:
• Enter the required information for each column. Refer to the tool tips on each column header for detailed
instructions.
• Don't change the order of the columns in the template.
• You can hide or skip the columns you don't use, but don't delete them.
• To remove existing values from specific fields in a customer profile, enter the exclamation point character (!) in
the corresponding columns.
After you have completed the template, upload it using the Load Interface File for Import process:
1. In the Import Process field, select Import Trading Community Data in Bulk.
2. In the Data File field, enter the completed template.
3. The Load Interface File for Import process uploads the data for each customer included in the template.
Settings That Affect the Customer Import Template
The Customer Import FBDI template contains an instructions tab and nineteen tabs for each of the interface tables used
to import customer information:
Spreadsheet Tab Description
Instructions and CSV Generation
Contains instruction information about preparing and loading data, the format of the template,
submitting the Customer Import process, and correcting import errors.
Customer Import Interface Tables
Use the applicable tabs to enter customer data for each of the interface tables. These tables are:
• HZ_IMP_PARTIES_T
• HZ_IMP_PARTYSITES_T
• HZ_IMP_PARTYSITEUSES_T
• HZ_IMP_ACCOUNTS_T
• HZ_IMP_ACCTSITES_T
• HZ_IMP_ACCTSITEUSES_T
• HZ_IMP_ACCOUNTRELS
• HZ_IMP_ACCTCONTACTS_T
• HZ_IMP_CONTACTPTS_T
• HZ_IMP_CONTACTROLES
• HZ_IMP_CONTACTS_T
• HZ_IMP_LOCATIONS_T
• HZ_IMP_RELSHIPS_T
• HZ_IMP_ROLERESP
• HZ_IMP_CLASSIFICS_T
• HZ_IMP_PERSONLANG
• RA_CUSTOMER_PROFILES_INT_ALL
265

Oracle Fusion Cloud Financials
Implementing Receivables Credit to Cash
Chapter 8
Define Customer
Spreadsheet Tab Description
• RA_CUST_PAY_METHOD_INT_ALL
• RA_CUSTOMER_BANKS_INT_ALL
How Customer Data Is Processed
The imported data is loaded into the corresponding Receivables and the Trading Community Model tables. You can
monitor and preview data before finally processing data.
For Receivables customer data, each customer must have a unique combination of customer number, customer account
number, and customer site number.
Note: Best practice is to import a maximum of 50,000 records per tab.
Related Topics
•
Examples of Validations in Customer Spreadsheet Upload Data
•
Guidelines for Uploading Customer Data Using a Simplified Spreadsheet
•
Guidelines for Uploading Customer Data Using a Simplified
Spreadsheet
Use the Upload Customers from Spreadsheet process to upload customer data using the simplified Customer Import
FBDI (File-Based Data Import) template.
The single upload process performs all the operations of generating a batch, transferring the customer data in the
spreadsheet template to the interface tables, and importing the data from the interface tables into Oracle Applications.
Download the simplified Customer Import FBDI template and prepare your customer data. The template contains
an instruction sheet and sample data to help guide you through the process of entering your customer information:
Customers, Contacts, Reference Accounts, Customer Bank Accounts.
Note: You can also use the Customer Import process to download a Customer Import FBDI template, available from
the FBDI Customer Data Model, to prepare and upload customer data into Receivables and the Trading Community
Model registry.
Set Up Related Customer Information
Set up the business objects you need in advance of the customer data upload.
This can include:
• Account address sets: Set up the reference data sets you need for your customer account sites.
• Customer profile classes: Set up one or more profile classes for your customer records.
• Reference accounts: Set up general ledger accounts that you intend to use as reference accounts for customers.
266

Oracle Fusion Cloud Financials
Implementing Receivables Credit to Cash
Chapter 8
Define Customer
• Customer bank accounts: Set up banks and bank account information.
• Tax information: Set up tax registration numbers and tax rate codes using Oracle Tax.
• Descriptive flexfields.
Enter Data in the Spreadsheet Columns
Enter data in the designated columns in each of the four worksheets: Customers, Contacts, Reference Accounts,
Customer Bank Accounts.
These rules apply to entering data in columns:
• Column labels with an asterisk (*) denote required columns.
• Use the Show Extensible Attributes and Hide Extensible Attributes buttons to show or hide additional
columns.
• Don't move or delete existing columns, and don't insert new columns.
• Enter data in the correct format. In most cases, the columns will format the data that you enter according to the
requirements of the upload.
• To remove existing values from specific fields in an existing customer profile, enter the exclamation point
character (!) in the corresponding column.
• Each customer must have a unique combination of these values:
◦
Customer number.
◦
Customer account number.
◦
Customer site number.
• Each customer contact must have a unique person number.
Examples of Validations in Customer Spreadsheet Upload Data
During upload processing, the Upload Customers from Spreadsheet process checks for unique values in certain
columns of the Customers and Contacts worksheets. If the values are unique, the record is created. If the values aren't
unique, the record fails with an upload error.
The columns with this validation are:
• Customers worksheet:
◦
Customer Number
◦
Account Number
◦
Site Number
• Contacts worksheet:
◦
Person Number
The following sections provide examples of the validation process. The assumption in these examples is that all records
have the same Source System value.
267

Oracle Fusion Cloud Financials
Implementing Receivables Credit to Cash
Chapter 8
Define Customer
Customers Worksheet: Customer Number Validation
The Customer Number validation looks for a unique combination of values across the Customer Number, Customer
Source Reference, and Customer Name columns.
The records in the following table fail the uniqueness validation on the customer number, because, for the same
customer name, there are two different customer numbers and customer source references.
Customer Number Customer Source Reference Customer Name
VCORP 256113
VCORP 256113
Vision Corporation
VCORP 256114
VCORP 256114
Vision Corporation
The records in the following table also fail the uniqueness validation on the customer number, because, for the same
combination of customer number and customer source reference, there are two different customer names.
Customer Number Customer Source Reference Customer Name
VCORP 256113
VCORP 256113
Vision Corporation
VCORP 256113
VCORP 256113
Vision ABC Corporation
The records in the following table also fail the uniqueness validation on the customer number, because, for the same
customer number, there are two different customer source references.
Customer Number Customer Source Reference Customer Name
VCORP 256113
VCORP 256113
Vision Corporation
VCORP 256113
VCORP 256114
Vision Corporation
In like manner, the Account Number validation looks for a unique combination of values across the Account Number,
Account Source Reference, and Account Description columns. The Site Number validation looks for a unique
combination of values across the Site Number, Site Source Reference, and Site Name columns.
Contacts Worksheet: Person Number Validation
The Person Number validation looks for a unique combination of values across the Person Number, Person Source
Reference, and First Name and Last Name columns.
The records in the following table fail the uniqueness validation on the person number, because, for the same
combination of person number and person source reference, there are two different first name and last name
combinations.
268

Oracle Fusion Cloud Financials
Implementing Receivables Credit to Cash
Chapter 8
Define Customer
Person Number Person Source Reference First Name Last Name
1000228801
1000228801
Rodney
Jones
1000228801
1000228801
John
Jones
The records in the following table also fail the uniqueness validation on person number, because, for the same person
number, there are two different person source references.
Person Number Person Source Reference First Name Last Name
1000228801
1000228801
Rodney
Jones
1000228801
1000228802
Rodney
Jones
The records in the following table pass the uniqueness validation. The validation process allows a combination of two
different person numbers and person source references with the same first name and last name combination. This is
because two different people may have the same name.
Person Number Person Source Reference First Name Last Name
1000228801
1000228801
Rodney
Jones
1000228802
1000228802
Rodney
Jones
Customer Listing Report
Use the Customer Listing Report to review your customer information. You can review existing customer information,
as well as customer information entered manually, uploaded using the Upload Customers from Spreadsheet process, or
imported using the Data Import process.
Because customer records can contain large amounts of information, you may find that you need to review customer
information that isn’t present in the predefined report, or filter the displayed information differently. You can copy
and modify the full dashboard or individual reports of the dashboard using features of Oracle Transactional Business
Intelligence. This lets you replace or add columns to the report that are available from the Receivables Customer Real
Time subject area.
The Customer Real Time subject area makes available many additional data attributes for display, including, for
example, customer relationships, customer creditworthiness, preferred billing practices, calculation of late charges and
penalty charges, and payment preferences.
Use this report when entering new customer information or updating existing customer information.
269

Oracle Fusion Cloud Financials
Implementing Receivables Credit to Cash
Chapter 8
Define Customer
Selected Report Parameters
Enter a value in at least one of the required parameters to select customer data.
Use additional parameters to refine your customer selections. Additional parameters are available on each tab of
the dashboard to accommodate narrowing the selected data based on the type of data, such as customer contacts,
customer addresses, and payment information.
Last Update Date
Use this parameter to review uploaded data.
Enter the submission date of a customer upload:
• Enter a submission date in the first field and leave the second field blank to include all customer data from the
submission date to the system date.
• Enter the same date in both fields to see the results of customer uploads for a given day.
Tip: If you run the report at the end of the day, and if there were multiple uploads in the course of the day, the report
will include all of the customer data uploaded. For large volumes of data, you may need to use additional parameters,
such as a range of customer names, to filter the data according to your needs.
Because customer records are subject to manual update at any time, best practice is to run the report as soon as the
submission of the customer upload has completed.
Customer Name
Enter a range of customers to display. The report retrieves and displays customer names in alphanumeric order.
To display one customer only, enter the same name in both fields. If you enter a customer name in the first field only,
the report displays all customers in alphanumeric order beginning with the first name you enter.
Customer Registry ID
Enter the related party identifier for the customer that you want to display. Use this parameter, for example, to ensure
that all accounts for a customer are selected, which in some cases may be more reliable than the customer name.
Customer Class
Display customers belonging to one classification only, for example, Commercial or Government.
Report Output
The predefined report displays customer information in a format similar to the customer upload spreadsheet template.
There are five tabs:
• Customer General Information: Customer name, customer class, customer profile class, related identifiers
(customer registry ID, D-U-N-S, Taxpayer ID, customer account number, site number).
• Customer Address Information: Address of each customer site and all site-related information.
• Customer Contact Information: Contact names for each customer account, with full contact details.
270

Oracle Fusion Cloud Financials
Implementing Receivables Credit to Cash
Chapter 8
Define Customer
• Customer Reference Account Information: General ledger reference accounts for each customer bill-to site:
revenue, freight, receivable, AutoInvoice clearing, tax, unbilled receivable, and deferred revenue.
When AutoAccounting depends on Bill-to Site, Receivables uses the bill-to site of the transaction to determine
the related segment values for the transaction distributions.
• Customer Payment Information: Bank account information for each customer account.
The predefined report displays all records for a customer account site, even if a record contains no information, such
as contacts or payment information. This can help, for example, to identify data that may have been missing from a
customer upload. If you don’t need to display records with no values, you can modify the individual reports to display
only the sites that have the information you need by using the standard functionality of Oracle Transactional Business
Intelligence.
You can export information from the report in PDF, Excel, or CSV format for viewing offline.
Related Topics
•
Receivables Subject Areas, Folders, and Attributes
Import Legacy Customer Credit Card Data
You can import legacy customer credit card data into Oracle Applications Cloud using a data import process.
The data import process includes the following phases:
• Uploading customer credit card data to CyberSource
• Downloading tokens from CyberSource
• Importing customer addresses using a simplified spreadsheet
• Uploading tokens to Oracle Applications Cloud
CAUTION: Before you import legacy customer credit card data, you must maintain strict compliance with the
Payment Card Industry Data Security Standard (PCI DSS) rules that protect Oracle Applications Cloud from audit. The
PCI DSS requires all companies that process, store, or send customer credit card information to maintain a secure
environment. No customer credit card data can interact with any part of the Oracle Applications Cloud deployment.
Prerequisites
Before you can import legacy customer credit card data, you must perform the following steps:
• Set up Oracle Payments Cloud as tokenization-enabled.
• Configure at least one payment system as tokenization-enabled.
• Tokenize legacy customer credit card data through your tokenization provider.
Note: Use the IbyLegacyCreditCardsImportTemplate.xlsm spreadsheet template to import legacy credit card data.
However, you can't use this template to import tokens for customers created directly on the UI.
271

Oracle Fusion Cloud Financials
Implementing Receivables Credit to Cash
Chapter 8
Define Customer
Uploading Customer Credit Card Data to CyberSource
Summary: Retrieve and complete the CyberSource spreadsheet with your legacy customer credit card data, and upload
it to CyberSource.
To upload your customer credit card data to CyberSource to generate token numbers, perform the following steps:
1. Navigate to the CyberSource Test Business Center at https://ebctest.cybersource.com/ebctest.
2. Sign in to CyberSource with your Merchant ID, user name, and password.
3. Navigate to: Tools & Settings > Batch Transactions > Templates to download the spreadsheet from
CyberSource. From the Template choice list, select New subscriptions (Created).
4. Save the spreadsheet to your local drive as a .csv file.
5. Prepare the CyberSource spreadsheet.
a. Open the CyberSource spreadsheet in EditPlus and complete the following required fields:
- Batch ID: Identifier must be unique for every batch.
- Statement billing address
- Card holder name: first and last
- Actual customer credit card number
- Card brand code: For example, Visa has a card type value of 001.
- Expiry card details: month and year
6. Navigate to: Tools & Settings > Batch Transactions > Upload to open the Transaction Batch Upload page.
a. Enter a reference note about the batch.
b. Enter your email address to receive notifications about the status of your batch.
c. Browse for and select the .csv file you just prepared and click Submit. You'll receive a confirmation email
when all validations are passed.
Downloading Tokens from CyberSource
To download your tokenized customer credit card data spreadsheet from CyberSource, perform the following steps:
1. In CyberSource, navigate to: Reports > Report Search to open the Report Search page.
a. From the Report choice list, select the report you want to download that has your batch ID in the name,
and select the frequency.
b. Ensure that the daily report search date is the current date, and click Submit. The Report Search Results
page appears.
c. Find your report by the batch ID in the file name, oraclepayments<BATCHID>.reply.aa.csv, click the
download link, and save the report spreadsheet to your local drive.
2. On your local drive, open the spreadsheet in EditPlus. A few more fields appear in the spreadsheet.
Tip: To view the full content of a cell with scientific notation, select the cell to see the full value in the field.
3. View the token numbers in Column C. An example of a token number is:
paySubscriptionCreateReply_subscriptionID=9903000066742619.
Tip: No column exists in the spreadsheet that associates token numbers with corresponding customer credit
card numbers.
Importing Customer Statement Billing Addresses
Summary: Retrieve and complete the simplified customer import spreadsheet, generate the .csv consolidated .zip file,
and upload it to Oracle Receivables Cloud.
272

Oracle Fusion Cloud Financials
Implementing Receivables Credit to Cash
Chapter 8
Define Customer
To import your legacy customer credit card statement billing address to Receivables using a simplified customer import
spreadsheet, perform the following steps:
1. To retrieve the simplified spreadsheet you, perform the following steps:
a. Sign in to Oracle Applications Cloud as a Receivables manager.
b. Navigate to the Setup and Maintenance work area.
c. Search for and select the task titled Manage Customer Uploads.
d. In the Search Results section, click the Download Customer Spreadsheet Template button to download
the simplified spreadsheet.
e. Save the spreadsheet to your local drive.
2. On your local drive, open the spreadsheet, select the Customers tab, and enter data in the required fields.
3. In Column AY, Purpose, you must enter CC_Billing as the customer credit card statement billing address. These
addresses are ultimately associated with customer credit card token numbers that you later import to Oracle
Applications Cloud.
4. Select the Instructions tab and click the Generate CSV File button to create individual spreadsheets, along with
a consolidated .zip file that contains one or more .csv files.
5. Navigate to: Receivables > Billing > Billing work area > Tasks icon > Upload Customers from Spreadsheet
link to open the Manage Customer Uploads page.
6. Click the Upload Customers from Spreadsheet button to open the Upload Customers from Spreadsheet
dialog box.
7. Enter a batch name.
8. Browse for the .zip file you generated in Step 4 and click Submit.
a. You can track the progress of the upload by navigating to: Navigator > Customer Data Management >
Data Import. The process might take awhile.
9. In the Search Results section on the Manage Customer Uploads page, verify that the simplified customer
import spreadsheet has a Status of successful as indicated by a check mark.
10. Verify that customer data was uploaded by querying customer data that was populated in the simplified
customer import spreadsheet.
Uploading Tokens to Oracle Applications Cloud
Summary: Retrieve and prepare the tokenized spreadsheet, upload it to Oracle Applications Cloud, run the Tokenize
Credit Card process, and verify the tokens were imported.
To upload your tokenized customer credit card data to Oracle Applications Cloud, perform the following steps:
1. Prepare the tokenized spreadsheet.
a. On https://cloud.oracle.com/home, navigate to Oracle Financials Cloud Documentation and click the
Books link for the latest release. By the category of Development, click the File-Based Data Import for
Financials Cloud link.
b. Open the File-Based Data Imports chapter and click the Legacy Credit Card Token Import link.
c. Click the LegacyCreditCardTokenImportTemplate.xlsm link and download the spreadsheet to your
local drive.
d. From your local drive, open the spreadsheet file in EditPlus so you can view complete token numbers
instead of scientific notation.
e. Enter values for the following columns:
i. Column A is Origin Source System: Enter the value for the source system that's in your customer
import spreadsheet in Column A, Source System.
ii. Column B is Token Number: Enter the token number created for the credit card that's in Column C
of the tokenized spreadsheet you downloaded from CyberSource.
273

Oracle Fusion Cloud Financials
Implementing Receivables Credit to Cash
Chapter 8
Define Customer
iii. Column C is Origin Site Purpose Source Reference: Enter any unique reference number for this
spreadsheet file.
iv. Column D is Expiry Date: Enter the year and month that the credit card expires.
v. Column E is Card Brand: For example, in capital letters, enter VISA, MASTERCARD, DISCOVER,
AMEX, DINERS, JCB, ENROUTE, or CARTE.
vi. Column F is Origin System Reference of Owner: Enter the value that's in your customer import
spreadsheet in Column AX, Site Purpose Source Reference, to assign tokens at the site level,
or enter the value that's in your customer import spreadsheet in Column J, Account Source
Reference, to assign tokens at the account level.
vii. Column G is Description: Enter free text.
viii. Column H is Purchase Card: Enter N for No or Y for Yes.
ix. Column I is Purchase Card Subtype: Leave this field empty or enter values. Enter values like B
(Business Card), C (Corporate Card), P (Purchase Card), or U (Unknown). Values must match
standard lookup values with type of IBY_PURCHASECARD_SUBTYPE.
x. Column J is Owner Level: Enter CUST_ACCT_SITE_USE to assign token numbers at the site level,
or enter CUST_ACCT_USE to assign token numbers at the account level.
xi. Column K is Masked Credit Card Number: Enter a series of X's followed by the last four digits of the
actual credit card. For example, if the credit card number is 16 digits, enter 12 X's followed by four
digits with no spaces anywhere.
Note: Masked credit card is a required field. If user doesn't enter this, other card details are
unusable.
xii. Column L is Card Holder Name: Enter the first and last name of the cardholder.
xiii. Column M is Billing Address: Enter the billing address reference, which is the same as the Origin
Site Purpose Source Reference column in this sheet.
f. After you finish entering data, click the Generate CSV File button on the Instructions and CSV
Generation tab of the spreadsheet.
g. Save the .csv file to your local drive with a unique name.
2. Upload the tokenized spreadsheet.
a. Sign in to Oracle Applications Cloud as an implementor.
b. Navigate to: Navigator > Tools File Import and Export to open the File Import and Export page.
c. Click the Upload (+) icon in the Search Results section to open the Upload File dialog box.
d. Browse to the .csv file that you saved locally and select the file.
e. From the Account choice list, select fin/payments/import and click Save and Close. You can see the
saved .csv file in the Search Results section.
3. Run the Tokenize Credit Card process.
a. Navigate to: Navigator > Tools > Scheduled Processes.
b. Click the Schedule New Process button to open the Schedule New Process dialog box.
c. From the Name choice list, search for and select the Tokenize Credit Card process and click OK to open
the Process Details page.
d. From the Credit Card Data Import File choice list, select the .csv file you uploaded and click Submit.
e. In the Search Results section of the Scheduled Processes page, click the Refresh icon. The status of the
submitted process appears, along with the output.
f. Click the Attachment link to open the Attachments dialog box.
g. Click the .txt link associated with your process to open the .txt file. You can view the unique, original
system reference number that you entered in the tokenized spreadsheet. This indicates that the
tokenized spreadsheet was uploaded.
4. Verify the importation of tokens.
274

Oracle Fusion Cloud Financials
Implementing Receivables Credit to Cash
Chapter 8
Define Customer
a. Sign in to Receivables as a Receivables manager.
b. Navigate to: Receivables > Accounts Receivable to open the Accounts Receivable work area.
c. Select the Tasks icon and click the Manage Customers link to open the Manage Customers page.
d. In the Organization Name field, enter the organization that you're looking for and click Search.
e. Scroll down the page to the Search Results section and select the customer.
f. Find and click the site number in the Sites table to open the Edit Site page.
g. Click the Payment Details tab.
h. In the Payment Instruments section, Credit Card tab, you can see the last four digits of the credit card
number.
Related Topics
•
How You Enable Credit Card Tokenization
•
PCI DSS Credit Card Processing Requirements
FAQs for Manage Customer Data Uploads
Why can't I upload the customer spreadsheet?
You can only upload the .zip file that contains all of the .csv files. You can't select an individual .csv file or the
completed .xlsm file template itself.
Why are there errors in the customer upload batch?
Either because of invalid data or duplicate records.
Invalid data includes missing information or information in an incorrect format. You can correct some information
directly in the Correct Customer Data spreadsheet. If the invalid data is related to the customer profile class, payment
method, reference account, or customer bank account, then you must import the correct data using a new spreadsheet
upload.
To avoid duplicating existing records, ensure that each customer in the Customers worksheet has a unique combination
of these values:
• Customer number
• Customer account number
• Customer site number
Ensure that each contact in the Contacts worksheet has a unique person number.
275

Oracle Fusion Cloud Financials
Implementing Receivables Credit to Cash
Chapter 8
Define Customer
Manage Data Import
Data Import for Customers and Consumers
Use the File-Based Data Import process to import data from a CSV or XML file. You use the Data Import dashboard to
monitor the import process and view reports and statistics.
You can choose to pause a File-Import batch, and then use the Data Import work area to configure data quality services
for the batch. You can pause import activities if the HZ_IMP_PAUSE_FILE_IMPORT profile option is set to Yes. If the
profile option is set to Yes, all submitted import activities are sent for administrator review and appear in the Data
Import Batches Overview page.
Before importing data into the registry, you must decide if you want to use the data quality services and if so, how you
want to configure the following data quality services:
• Batch deduplication
• Registry deduplication
• Import to registry options
Batch Deduplication
Batch deduplication lets you identify and resolve duplicates within the imported batch.
To define batch deduplication, you must:
• Select the match configuration rule you want to use to identify duplicates for each entity.
• Specify the action to perform on the duplicate records within the batch. These actions are performed when the
data is imported into the registry.
Registry Deduplication
Registry deduplication, similar to the batch deduplication, identifies duplicates between the data in the batch and
the data in the registry before the data is imported into the registry. Similar to batch deduplication, with registry
deduplication you select the match configuration and specify the action for duplication records.
Import to Registry Options
You use the Import to Registry options for these definitions:
• Import Process mode: You can run the import process in preview mode, or load the data directly into the
registry without previewing the data. In preview mode, you can review information, such as the number of
duplicates, incorrect addresses in the batch data, the number of records that will be updated, and the number
of records that will be created, before the data is actually imported. After reviewing the batch, you can decide to
either import the batch, or amend the match configuration rules and actions and then rerun the batch to review
the data again.
• Cleanse Addresses: You can choose to validate the addresses in the interface tables before importing them into
the registry. The addresses are validated using an integrated third-party service that verifies addresses and
corrects them if incorrect.
276

Oracle Fusion Cloud Financials
Implementing Receivables Credit to Cash
Chapter 8
Define Customer
• Geography Validation: You can configure geography validation for data import by setting the
HZ_IMP_DEFAULT_GEO_VALID_ADDRESS profile option to Yes. This validates the addresses in an import
batch against geography data before importing them into the registry. Geography validation uses the
geography-based address validation settings for each country, and imports only valid addresses.
Note: Geography Name Referencing is run on all imported addresses regardless of this profile option setting.
• Error Handling Limit: You can define how many process errors can be generated by the import batch process
before the process terminates automatically.
Example of a Data Import Batch for Customers and Consumers
This example demonstrates how to create a data import batch, and how to define the import process data quality
services you want to use on the data prior to completing the import.
Note: Once an import is completed, the data is loaded into the registry.
To import customer and consumer data:
• Create a data import batch containing customer and consumer objects.
• Load the import data into the interface tables.
• Configure the data import process for deduplication.
• Run the batch in preview mode to check that all duplicate data is removed, then submit the batch.
Create a data import batch
To create a data import batch for customers and consumers:
1. In the Billing work area, click Customers: Manage Data Import.
2. In the Manage Data Import Batches page, click the plus (+) icon.
3. In the Create Data Import Batch window, complete the fields as shown in this table:
Field Value
Batch Name
Customer Import Batch
Source System
Comma separated values
Object
Customer and Consumer
Estimated Number of Records
300
Batch Description
Import of customer data
277

Oracle Fusion Cloud Financials
Implementing Receivables Credit to Cash
Chapter 8
Define Customer
4. Click Save and Close. The Manage Data Import Batches page displays the new batch with the batch ID.
5. After creating the import batch, load your data into the interface tables using the FBDI template.
Load the Import Data
To load the import data into the interface tables:
1. Prepare the FBDI spreadsheet with your customer data.
2. In the Parties tab, enter the batch ID of the batch you created into the Batch Identifier column.
3. Generate the .zip file and upload your data using either of these methods:
◦
Run the Load Interface File for Import process.
◦
Use the ERP integration service.
4. Run the import batch according to the steps indicated in the following sections.
Define the Data Import Process: Batch Deduplication
You want to check the batch for address, organization, and person duplicates; you also want to remove all of these
duplicates from the batch.
1. Ensure that you have uploaded your customer data to the interface tables using the FBDI template.
2. In the Manage Data Import Batches page, select the row of the batch you want.
3. Select Import from the Actions menu.
4. In the Define Import: Batch Deduplication page, enable the Check for duplicates within the batch before
import option.
5. Complete the fields in the Select Match Configuration to Determine Duplicates Within the Import Batch
section, as shown in this table:
Field Value
Addresses
Address Duplicate Identification
Organizations
Account Duplicate Identification
Persons
Contact Duplicate Identification
6. Complete the fields in the Override Default Actions section, as shown in this table:
Field Value
Select Action for Persons and
Organizations
Remove all duplicates
Select Action for Addresses
Remove all duplicates
7. Click Next.
278

Oracle Fusion Cloud Financials
Implementing Receivables Credit to Cash
Chapter 8
Define Customer
Define the Data Import Process: Registry Deduplication
You want to check for address, organization, and person duplicates between the import batch and the registry, and
prevent the import of duplicate records.
1. In the Define Import: Registry Deduplication page, enable the Check for duplicates between the import batch
and the registry before import option.
2. Complete the fields in the Select Match Configuration to Determine Duplicates Between the Import Batch
and Registry section, as shown in this table:
Field Value
Addresses
Address Duplicate Identification
Organizations
Account Duplicate Identification
Persons
Contact Duplicate Identification
3. Complete the fields in the Override Default Actions section, as shown in this table:
Field Value
Select Action for Persons and
Organizations
Don't import duplicate records
Select Action for Addresses
Don't import duplicate records
4. Click Next.
Define the Data Import Process: Import to Registry
You want to configure the data import process so that you can view the batch in preview mode, in order to review the
data after preprocessing. You want to cleanse addresses before import, and specify an error limit for the batch. You also
want to validate all addresses in the import batch against geography data. This validates all incoming addresses as per
the geography structure and validation level setup in the Manage Geographies task. The addresses that are reported as
Error during validation aren't imported.
1. In the Define Import: Import to Registry page, click the Run the batch in preview mode radio button.
2. Enable the Cleanse addresses before import option.
3. Enable the Validate addresses against master reference geography option.
4. In the Error Limit field, enter 200.
5. Click Submit.
279

Oracle Fusion Cloud Financials
Implementing Receivables Credit to Cash
Chapter 8
Define Customer
Data Import for Resources and Partners
Use the File-Based Data Import process to import data from a CSV or XML file. You can use the Data Import dashboard
to monitor the import process and view reports and statistics.
You can pause a File-Import batch, and then use the Data Import work area to configure data quality services for the
batch. You can pause import activities if the HZ_IMP_PAUSE_FILE_IMPORT profile option is set to Yes. If the profile
option is set to Yes, all submitted import activities are sent for administrator review and appear in the Data Import
Batches Overview page.
When defining an import process, you decide whether to run the import process in preview mode, or load the data
directly into the registry without previewing the data. You can also cleanse addresses prior to import, validate addresses
in an import batch against geography data, and define an error limit for the batch.
Import Process Mode
Run the import batch in preview mode, or load the data directly into the registry. In preview mode, you can review
information about the level of duplicates or incorrect addresses in the batch. Additionally, you can review the number
of records that will be created or updated for each entity. You can then import the batch, or update the match
configuration rules and resubmit the batch.
Import to Registry Options
You can use the import to registry options to:
• Cleanse addresses: You can choose to validate the addresses in the interface tables before importing them into
the registry. The addresses are validated using an integrated third-party service that verifies addresses and
corrects them if incorrect.
• Define geography validation: You can choose to validate the addresses in an import batch against geography
data before importing them into the registry.
• Configure error handling limit: You can define how many process errors can be generated by the import batch
process before the process terminates automatically.
Geography Validation
You can configure geography validation for data import by setting the HZ_IMP_DEFAULT_GEO_VALID_ADDRESS
profile option to Yes. This validates the addresses in an import batch against geography data before importing them
into the registry. Geography validation uses the geography-based address validation settings for each country. The
addresses with validation errors aren't imported.
Note: Geography Name Referencing is run on all imported addresses regardless of the profile option setting.
Error Handling Limit
You can define how many process errors can be generated by the import batch process before the process terminates
automatically. Error reports are generated by the application for you to review.
280

Oracle Fusion Cloud Financials
Implementing Receivables Credit to Cash
Chapter 8
Define Customer
Example of a Data Import Batch for Resources and Partners
This example demonstrates how to create a data import batch, and how to activate the data quality address cleansing
service you want to use on the data prior to completing the import.
Note: Once an import is completed, the data is loaded into the registry.
To import resource and partner data:
• Create a data import batch containing resource and partner objects.
• Load the import data into the interface tables.
• Run the batch in preview mode to check the address cleansing results, then submit the batch.
Create a data import batch
To create a data import batch for resources and partners:
1. In the Billing work area, click Customers: Manage Data Import.
2. In the Manage Data Import Batches page, click the plus (+) icon.
3. In the Create Data Import Batch window, complete the fields as shown in this table:
Field Value
Batch Name
Customer Import Batch
Source System
Comma separated values
Object
Customer and Consumer
Estimated Number of Records
300
Batch Description
Import of customer data
4. Click Save and Close. The Manage Data Import Batches page displays the new batch with the batch ID.
5. After creating the import batch, load your data into the interface tables using the FBDI template.
Load the Import Data
To load the import data into the interface tables:
1. Prepare the FBDI spreadsheet with your customer data.
2. In the Parties tab, enter the batch ID of the batch you created into the Batch Identifier column.
3. Generate the .zip file and upload your data using either of these methods:
◦
Run the Load Interface File for Import process.
281

Oracle Fusion Cloud Financials
Implementing Receivables Credit to Cash
Chapter 8
Define Customer
◦
Use the ERP integration service.
4. Run the import batch according to the steps indicated in the following section.
Define the Data Import Process: Import to Registry
You can configure the following in the Import to Registry page:
• Select if you want run the batch in preview mode.
• Configure address cleansing.
• Define geography validation. This validates all incoming addresses as per the geography structure and
validation level setup in the Manage Geographies task. The addresses that are reported as Error during
validation aren't imported.
• Specify an error limit.
You want to configure the data import process so that you can view the batch in preview mode, in order to review the
data after preprocessing. You want to cleanse addresses before import, and specify an error limit for the batch. You also
want to validate all addresses in the import batch against geography data.
To configure registry import options:
1. Ensure that you have uploaded your customer data to the interface tables using the FBDI template.
2. In the Manage Data Import Batches page, select the row of the batch you want.
3. Select Import from the Actions menu.
4. Click Import to Registry in the navigation train.
5. In the Define Import: Import to Registry page, click the Run the batch in preview mode radio button.
6. Enable the Cleanse addresses before import option.
7. Enable the Validate addresses against master reference geography option.
8. In the Error Limit field, enter 200.
9. Click Submit.
Example of a What-If Analysis on a Data Import Batch
This example demonstrates how to perform a What-If analysis on a data import batch that has been processed and
completed with the status Preimport Completed.
The match configuration is redefined and the import process is resubmitted. The batch deduplication actions are then
amended, and the batch import is completed.
The following table summarizes key decisions for this scenario:
Decisions to Consider In This Example
Do you want to redefine batch
deduplication match configuration?
Yes, a different match configuration is selected for the Organizations entity.
Do you want to redefine registry
deduplication match configuration?
Yes, a different match configuration is selected for the Persons entity.
282
Oracle Fusion Cloud Financials
Implementing Receivables Credit to Cash
Chapter 8
Define Customer
Decisions to Consider In This Example
What actions do you want to take on
Persons, Organizations, and Addresses
duplicates?
• Within registry deduplication, choose Don't import duplicate records for Persons and
Organizations.
• Within registry deduplication, choose Import duplicate records for Addresses.
Prerequisites
1. The data import batch has been created.
2. The data is uploaded into the interface tables.
3. The batch is imported and has completed with a status of Preimport Completed.
View the What-If Analysis
1. In the Billing work area, click Customers: Manage Data Import.
2. In the Manage Data Import Batches page, click the batch ID link of the Preimport batch you want.
3. In the Edit Data Import Batch page, review the summary and import process performance information. Click the
Import Details button to open the Import Process Details page.
4. In the Import Process Details page, click the Batch Deduplication tab. Check the batch deduplication results.
5. In the Import Process Details page, click the Address Cleansing tab. Check the address cleansing results.
6. In the Import Process Details page, click the Registry Deduplication tab. Check the registry deduplication
results.
Redefine the Match Configuration and Resubmit the Import Process
After your review, you decide that the results of the batch and registry deduplication aren't as expected. The match
configurations need to be redefined.
1. Click Cancel in the Import Process Details page, and in the Edit Data Import Batch page.
2. In the Manage Data Import Batches page, select the row of the batch.
3. Select Import from the Actions menu.
4. In the Define Import: Batch Deduplication page, choose a different match configuration for the Organizations
entity. Click Registry Deduplication.
5. In the Define Import: Registry Deduplication page, choose a different match configuration for the Persons
entity. Click Import to Registry.
6. In the Define Import: Import to Registry page, click Submit.
Change the Action for Duplicates within the What-If Analysis
You want to view the What-If analysis for the new match configurations that you selected for the batch.
1. In the Manage Data Import Batches page, click the batch ID link of the batch.
2. In the Edit Data Import Batch page, review the summary and import process performance information. Click the
Import Details button to open the Import Process Details page. The new match configurations have produced
satisfactory results, but you would like to change the actions that will be carried out on duplicates.
3. In the Import Process Details page, click the Registry Deduplication tab.
4. In the Select Action for Persons and Organizations section, select Don't import duplicate records from the
Action field.
5. In the Select Action for Addresses section, select Import duplicate records from the Action field.
6. Click Complete Import.
283

Oracle Fusion Cloud Financials
Implementing Receivables Credit to Cash
Chapter 8
Define Customer
Data Quality Services and Data Import
Data Quality Services ensure the quality of data being imported into the registry. You can configure a data import or file
import process to activate these services before importing data into the database.
You can use the following data quality services:
• Batch Deduplication: Allows you to define deduplication within the data being loaded.
• Registry Deduplication: Allows you to define deduplication of the data being loaded against the records that
already exist in the registry.
• Import to Registry options: Allows you to define the import process mode, data cleansing, and geography
validation.
Data Quality Services for File-Based Import
You can define Registry deduplication options in the file-based import process. You can't define the other Data Quality
Services, such as Batch Deduplication and Import to Registry options, for a file-based import activity during the file-
based import process. However, an import activity can be paused and sent for administrator review after preprocessing
and before importing the data. The administrator can review the import process and configure data quality services.
Import activities are paused and sent for administrator review if the HZ_IMP_PAUSE_FILE_IMPORT profile option is set
to Yes.
Data Quality Services for Data Import
You can configure data quality services for data import. For both registry and batch deduplication methods, you select a
match configuration to identify duplicates and duplicate resolution action. You can specify:
• Run the import process in preview mode.
• Cleanse data before import.
• Perform geography validation of data before import.
You can configure geography validation for data import at the site level by setting the
HZ_IMP_DEFAULT_GEO_VALID_ADDRESS profile option to Yes. The addresses are validated against the master
reference geography data, according to the geography-based address validation settings for each country. The
addresses with validation errors aren't imported.
FAQs for Manage Data Import
Why can't I view the import process details?
The import process details are only available when you run the batch in preview mode, and submit the batch for import.
Can I import a batch again?
Yes, you can reimport a batch to correct validation errors if the import process status is one of the following: Preimport
Completed, Completed With Errors, Error, or Terminated When Error Limit Reached.
284

Oracle Fusion Cloud Financials
Implementing Receivables Credit to Cash
Chapter 8
Define Customer
Can I redefine the data import process for an already imported batch and reimport it?
Yes. If the data is still available in the interface tables and the batch status is Preimport Completed, Completed with
Errors, Error, or Terminated when Error Limit Reached, you can redefine the data import process and reimport the
batch.
Once a batch has been successfully imported, you can't reimport the batch, even if the data is present in the interface
tables.
How can I view the errors that occurred during preimport processing?
In the Manage Data Import Batches page, click the batch ID of the batch you want. Then in the Edit Data Import Batch
page, click the Report button to display the Error Report window.
What happens if I purge a data import batch?
You permanently remove all records in the batch from the import interface tables. You should purge batches after the
batch has been imported successfully, and you have ensured that the data in the interface tables is no longer required.
Purging the interface tables improves import performance. To archive imported data, you should copy the data to a set
of custom tables.
Why can't I purge a data import batch?
You can't purge data import batches with the status Processing. Purging a batch purges the batch data in the interface
tables; this process can't be carried out while the batch is importing the data from the interface tables into the registry.
285

Oracle Fusion Cloud Financials
Implementing Receivables Credit to Cash
Chapter 8
Define Customer
286

Oracle Fusion Cloud Financials
Implementing Receivables Credit to Cash
Chapter 9
Define Bills Receivable
9 Define Bills Receivable
Enable System Options for Bills Receivable
Enable Receivables system options that help you manage the processing of bills receivable transactions and receipts.
Set these Cash Processing Receivables System Options to enable and manage bills receivable:
• Allow payment of unrelated transactions option: Enable this option if you want to apply transactions of
unrelated customers to a bill receivable.
If you don't enable this option, then you can only apply transactions that belong to the customer drawee and its
related customers.
• Enable bills receivable option: You must enable this option to use bills receivable.
• Bills Receivable Transaction Source: You can optionally select a default bills receivable transaction source.
The transaction source that you select appears by default on all bills receivable transactions.
You must set up bills receivable transaction sources before you can set this option.
• Allow factoring of bills receivable without recourse option: Enable this option if you want to create factored
bills receivable remittances without recourse.
Enabling this option lets you disable the Factored with recourse option on the Bills Receivable Remittance
Batch pages. If you don't enable this option, then the Factored with recourse option is enabled and read only.
Related Topics
•
What's a drawee?
•
Bills Receivable Risk
Create a Bills Receivable Creation Receipt Method
Create bills receivable creation receipt methods to create bills receivable from transactions automatically using the
Create Bills Receivable Batch process.
The receipt method designates the transaction type, maturity date, bill number, and if necessary the minimum and
maximum bill amounts, and determines how transactions are grouped into bills receivable.
After you create bills receivable creation receipt methods, you must assign both a bills receivable creation receipt
method and a bill-to customer defined as drawee to transactions that you want to automatically batch for bills
receivable.
To create a new bills receivable creation receipt method:
1. Navigate to the Create Receipt Class and Methods page.
2. Name the receipt class and, in the Creation Method field, select Bills Receivable.
3. Create a receipt method.
287

Oracle Fusion Cloud Financials
Implementing Receivables Credit to Cash
Chapter 9
Define Bills Receivable
4. Navigate to the Bills Receivable tab.
5. If applicable, enable the Bills receivable inherit transaction numbers option to use the transaction number as
the bill number.
This only applies if there is one transaction in the bill receivable. If the bill receivable contains more than one
transaction, then Receivables assigns the bill number according to the settings in the bills receivable transaction
source.
6. In the Number of Bills Receivable Rule field, select the rule to use to group transactions into bills receivable:
a. One per Customer: Group all transactions belonging to a single customer drawee into one bill receivable.
b. One per Customer Due Date: Group all transactions belonging to a single customer drawee that have
the same payment schedule due date into one bill receivable.
If a transaction uses the payment terms Immediate, then this transaction is included in the first available
bill receivable that can accommodate the transaction amount, without regard to the due date. In this case
the effective grouping rule is the same as One per Customer.
c. One per Invoice: Group all payment schedules for a single transaction into one bill receivable.
d. One per Payment Schedule: Create a separate bill receivable for each transaction payment schedule (no
grouping).
e. One per Site: Group all transactions for a single customer drawee site into one bill receivable.
f. One per Site Due Date: Group all transactions for a single customer drawee and bill-to site that have the
same payment schedule due date into one bill receivable.
If a transaction uses the payment terms Immediate, then this transaction is included in the first available
bill receivable that can accommodate the transaction amount, without regard to the due date. In this case
the effective grouping rule is the same as One per Site.
7. In the Bills Receivable Maturity Date Rule field, select Earliest or Latest to indicate whether to derive the
maturity date for a bill receivable from the earliest or latest due date of all transactions applied to the bill.
8. Enter the bills receivable transaction type to use with this receipt method. All bills receivable created from
transactions use the settings of this transaction type.
9. In the Lead Days field, enter the number of days before the transaction due date that a transaction can be
applied to a bill receivable.
10. Use the Minimum Amount and Maximum Amount fields to enter minimum and maximum amounts for bills
receivable created from transactions.
◦
If you enter a minimum amount, then a bill receivable isn't created for the applicable transactions unless
their sum is greater than this amount.
◦
If you enter a maximum amount, then the total amount of the bill receivable must match this amount
exactly.
After applying a transaction to a bill receivable, a partial transaction amount that exceeds the maximum
amount of the bill can remain unapplied. For example, an invoice of $1000 applied to a bill receivable with
a maximum amount of $900 leaves an open amount of $100 on the transaction.
Related Topics
•
Prepare Transactions for Bills Receivable Batches
•
Guidelines for Batching Transactions for Bills Receivable
288

Oracle Fusion Cloud Financials
Implementing Receivables Credit to Cash
Chapter 9
Define Bills Receivable
Prepare Transactions for Bills Receivable Batches
If you plan to generate bills receivable from transactions using the Create Bills Receivable Batch process, you must
prepare transactions to make them eligible for inclusion in a bills receivable batch.
To prepare transactions for bills receivable batches, review and, if necessary, complete tasks related to each of the
following activities:
• Prepare Customers
• Assign Bills Receivable Creation Receipt Methods
• Review Eligible Transactions for a Bills Receivable Batch
• Set Up the Customer Drawee Bank Account
Prepare Customers
Prepare customers for bills receivable transactions. You must define customers as drawees, and assign drawees to the
applicable transactions.
Perform these two tasks:
1. Define customers as drawees.
Define bill-to customer sites as drawee sites for bills receivable. You must define a drawee site for each
customer account for which you plan to create bills receivable.
For each applicable site already defined as a bill-to site:
a. Navigate to the Edit Site page: Site Details tab.
b. Assign the business purpose Drawee.
c. Enter the bills receivable reference accounts: bills receivable, unpaid bills receivable, remitted bills
receivable, and factored bills receivable.
2. Assign drawees to transactions as the bill-to customer.
Assign a customer drawee to each applicable transaction as the bill-to customer. The drawee, as the responsible
party for the goods and services on the transaction, must be designated as the bill-to customer.
Assign Bills Receivable Creation Receipt Methods
Assign a bills receivable creation receipt method to each transaction that you want to apply to bills receivable. The bills
receivable creation receipt method designates the transaction type, maturity date, bill receivable number, and minimum
and maximum bill amounts for each bill receivable, and determines how transactions are grouped into bills receivable.
You can assign bills receivable creation receipt methods to transactions manually or automatically.
To assign bills receivable creation receipt methods automatically:
1. Open the Edit Site page for a bill-to site that you defined as a customer drawee.
2. In the Payment Details tab, add one or more bills receivable creation receipt methods.
289

Oracle Fusion Cloud Financials
Implementing Receivables Credit to Cash
Chapter 9
Define Bills Receivable
3. Set one of these receipt methods as Primary.
Receivables automatically assigns the primary receipt method to transactions belonging to this bill-to customer
drawee site that you enter manually or import using AutoInvoice.
To assign a bills receivable creation receipt method manually:
1. Open the transaction in the Edit Transaction page.
2. Open the Payment tab and select the receipt method that you want in the Receipt Method field. The Receipt
Method field choice list contains all receipt methods assigned to the bill-to customer drawee.
Note: If the bills receivable creation receipt method uses the Number of Bills Receivable Rule of either One Per
Customer or One Per Customer Due Date, then you must also set Drawee as the primary business purpose for the
applicable bill-to customer drawee site in order to generate bills receivable automatically. This is because the customer
drawee is the defining element of transactions.
Review Eligible Transactions for a Bills Receivable Batch
When you run the Create Bills Receivable Batch process, the process selects all eligible transactions based on the
customer drawees belonging to the business unit and the parameter values that you enter for the process run.
This table describes rules that apply to selecting transactions for a bills receivable batch.
Feature Rule
Ineligible Transactions
You can't assign disputed transactions or other bills receivable to a bill receivable using the Create Bills
Receivable Batch process.
Currency
If you enter a value in the Currency parameter, the process only selects transactions in this currency to
create bills receivable.
If you don't enter a value in the Currency parameter, the process creates bills receivable in different
currencies, according to the currencies of the transactions selected.
The process generates bills receivable from all eligible transactions with the same currency and
conversion rate.
Debit Memos and Credit Memos
If you're batching debit memos and credit memos with the payment terms Immediate, Receivables
includes these debit memos and credit memos in the first available bill receivable, without regard to the
due date grouping rule assigned to the bill.
Note:
The amounts of debit memos and credit memos must still respect the maximum amount of the
bill receivable, if defined. If the sum of debit memos and credit memos applied to a bill exceeds the
designated maximum amount of the bill, then the process excludes one or more debit memos or
credit memos in order to bring the bill to the proper amount.
Set Up the Customer Drawee Bank Account
The currency, conversion rate, bill-to customer bank account, and the settings assigned to the bills receivable creation
receipt method determine how transactions are grouped into bills receivable.
290

Oracle Fusion Cloud Financials
Implementing Receivables Credit to Cash
Chapter 9
Define Bills Receivable
The customer drawee bank account on eligible transactions acts as an additional rule for grouping transactions into bills
receivable. The Create Bills Receivable Batch process creates individual bills receivable from transactions with the same
customer drawee bank account.
Note: The customer drawee bank account must be in the same currency as the transactions applied to the bill
receivable.
To automatically assign the customer drawee bank account to transactions that you enter manually or import using
AutoInvoice:
1. In the Edit Site page: Site Details tab, for each applicable customer drawee site, assign the additional business
purpose Bill-to.
2. In the Edit Site page: Payment Details tab: Bank Accounts section, enter the customer drawee bank account for
the bill-to site.
3. Set this bank account as Primary.
Bills receivable created by the Create Bills Receivable Batch process inherit the bank account on the transaction if both
of these conditions apply:
• The customer drawee site is also a bill-to site.
• The bills receivable creation receipt method doesn't use the Number of Bills Receivable Rule of either One Per
Customer or One Per Customer Due Date.
If the Number of Bills Receivable Rule on the bills receivable creation receipt method is One Per Customer or One Per
Customer Due Date, then bills receivable created by the Create Bills Receivable Batch process inherit the bank account
on the transaction only if both of these conditions apply:
• The bank account is assigned to the customer drawee site marked as Primary.
• The primary drawee site is also a bill-to site.
If the bank account on eligible transactions isn't assigned to the primary drawee site, then the process creates bills
receivable without a customer drawee bank account.
Related Topics
•
Create a Bills Receivable Creation Receipt Method
•
Why can't I create bills receivable from transactions?
•
Guidelines for Batching Transactions for Bills Receivable
Create a Bills Receivable Remittance Receipt Method
Create bills receivable remittance receipt methods to use with bills receivable remittance batches. A bills receivable
remittance batch processes all eligible bills receivable and prepares them for remittance to your bank.
These settings on the Create and Edit Receipt Class and Methods pages apply to bills receivable remittance receipt
methods:
• Creation Method field: Select Bills Receivable Remittance.
291

Oracle Fusion Cloud Financials
Implementing Receivables Credit to Cash
Chapter 9
Define Bills Receivable
• Remittance Method field: Select Standard for standard bills receivable and Factoring for factored bills
receivable with or without recourse.
• Debit Memos Inherit Receipt Numbers option: Enable this option if you want debit memo reversals of receipts
applied to a bill receivable that are remitted with this receipt method to inherit the receipt number.
• Receipts inherit bills receivable number option: Enable this option if you want receipts created for bills
receivable remitted with this receipt method to inherit the bill numbers.
• Remittance Bank Accounts tab: Click this tab and create a remittance bank account to use with this receipt
method.
The remittance bank contains both the bank account information to use for remittances and the accounting for
remitted bills receivable and the subsequent receipt.
Related Topics
•
Create a Remittance Bank Account for Bills Receivable
•
Overview of Bills Receivable Remittances
•
Create a Bills Receivable Remittance Batch
•
Create and Clear Receipts for Bills Receivable Remittances
Create a Remittance Bank Account for Bills Receivable
Create a remittance bank account to use with bills receivable remittance receipt methods. The remittance bank account
determines how bills receivable are grouped and remitted, and provides accounting information for both bills receivable
transactions and receipts.
These settings on the Create and Edit Remittance Bank Account pages apply to bills receivable remittance bank
accounts:
• Primary option: Enable this option if this is the primary bank account for this receipt method. If you're creating
more than one remittance bank account in the same currency, then you must set one bank account as Primary.
• Override bank option: Enable this option if you want to be able to change the remittance bank information on
a bills receivable remittance batch after it's created.
• Clearing Days field:
◦
If this receipt method is for standard remitted bills receivable, enter the number of days it will take for the
bank to clear the customer drawee receipt.
◦
If this receipt method is for bills receivable factored with recourse, enter the number of days it will take for
the bank to clear the cash advance (short-term debt) receipt.
• Risk Elimination Days field: If this receipt method is for bills receivable factored with recourse, enter the
number of days after the maturity date to clear the short-term debt.
• Remitted Bills Receivable and Factored Bills Receivable fields: Enter the remitted bills receivable and factored
bills receivable accounts used for bills receivable transactions.
• Collection Days field: If this receipt method is for standard remitted bills receivable, enter the minimum
number of days that the remittance bank uses to collect on a bill remitted after the maturity date.
• Short Term Debt field: Enter the short-term debt account to use for factored bills receivable with this receipt
method.
292

Oracle Fusion Cloud Financials
Implementing Receivables Credit to Cash
Chapter 9
Define Bills Receivable
Note: The Factoring field isn't used for bills receivable. Bills receivable receipts aren't factored, but rather
created as remitted.
Related Topics
•
Create a Bills Receivable Remittance Batch
•
Create and Clear Receipts for Bills Receivable Remittances
FAQs for Define Bills Receivable
How can I create a customer drawee?
By creating at least one customer site for the customer account with both the business purposes Drawee and Bill-to. You
must create a bill-to customer drawee site for each customer account for which you plan to use bills receivable.
If you plan to create bills receivable from customer transactions, then you must also assign the customer drawee site as
the bill-to customer on these transactions.
What's the difference between a signed and unsigned bill
receivable?
A signed bill receivable requires acceptance by the customer drawee before you can complete the bill and make it
available for remittance.
You can initiate an unsigned bill receivable without requiring acceptance by the customer drawee. The unsigned bill
receivable itself becomes the document necessary to claim repayment.
To create an unsigned bill receivable transaction type, leave both the Signed and Issued by drawee options unchecked.
When is a bill receivable issued by the drawee?
When the customer drawee wants to create a bill receivable with a promise to repay a specific amount on a specific date.
This is also called a promissory note. Promissory notes are usually guaranteed by the bank that issues the note.
How can I present late charges on bills receivable?
You can only present late charges on bills receivable as a debit memo or invoice. You can't present late charges as an
adjustment, because you can't make adjustments to bills receivable transactions.
293

Oracle Fusion Cloud Financials
Implementing Receivables Credit to Cash
Chapter 9
Define Bills Receivable
If you select Adjustment as the late charge type, then late charges are generated for all overdue transactions except bills
receivable.
294

Oracle Fusion Cloud Financials
Implementing Receivables Credit to Cash
Chapter 10
Define Revenue Management Configuration for Receivables
10 Define Revenue Management
Configuration for Receivables
Guidelines for Defining Revenue Policies
Use the Manage Revenue Policies page to define revenue policies for each applicable business unit. Receivables uses
the revenue policy definition to make automatic revenue recognition decisions for manually entered and imported
transactions.
Receivables compares each transaction against the revenue policy, and assigns revenue contingencies to the
transaction or transaction lines that deviate from the policy definitions.
Credit Classification
Use credit classifications to identify your high risk, noncreditworthy customers. You can assign up to three levels of risk.
Receivables compares these risk levels to the credit classification assigned to the customer profile.
When you enter or import a transaction for a customer with a credit classification that matches one of the credit
classifications in the revenue policy, Receivables:
• Assigns the Customer Creditworthiness contingency to the transaction.
• Defers revenue on the entire transaction.
• Recognizes revenue on the transaction only to the extent of payments received.
Refund Policy Threshold
Use the Refund Policy Threshold column to enter the standard refund period in days that you typically offer to your
customers.
When you enter or import a transaction with a line associated with a contract, Receivables analyzes the contract details.
If the contract offers a refund period that exceeds the refund policy, Receivables:
• Assigns the Refund contingency to the transaction line.
• Defers revenue on the transaction line.
• Recognizes revenue on the transaction line only after the refund period on the transaction line expires.
Payment Terms Threshold
Use the Payment Terms Threshold column to enter the maximum time period in days before payment terms become
extended.
When you enter or import a transaction with payment terms or an installment schedule that exceeds the payment terms
policy, Receivables:
• Assigns the Extended Payment Terms contingency to the transaction.
• Defers revenue on the entire transaction.
295

Oracle Fusion Cloud Financials
Implementing Receivables Credit to Cash
Chapter 10
Define Revenue Management Configuration for Receivables
• Recognizes revenue on the transaction only to the extent of payments received.
For example, you enter a payment terms threshold of 180 days on your revenue policy, and you later enter or import an
invoice with payment terms that have four installments:
• Net 60
• Net 90
• Net 120
• Net 200
Receivables defers the entire revenue amount on the invoice because the last installment exceeds the 180-day threshold
by 20 days.
Related Topics
•
What's a revenue contingency?
•
Guidelines for Defining Payment Terms
•
How You Recognize Revenue on Transactions
How Event-Based Revenue Management Works
Receivables automates the timing of revenue recognition for both manually entered transactions and transactions
imported using AutoInvoice. This automated revenue management process helps you to comply with the strict revenue
recognition requirements mandated by US GAAP and International Accounting Standards.
The event-based revenue management process evaluates each transaction and decides whether to immediately
recognize revenue, or temporarily defer revenue to an unearned revenue account based on the contingencies assigned
to the transaction. Revenue is subsequently recognized according to the removal event assigned to each contingency.
Note: Even if you set up for automated revenue recognition, you can still manually adjust revenue on transactions.
Once you manually adjust revenue, Receivables discontinues the automatic monitoring of contingencies.
Settings That Affect Event-Based Revenue Management
These settings affect event-based revenue management:
• Require salesperson Receivables system option: You must enable the Require salesperson system option to
use revenue recognition.
• AR_INTERFACE_CONTS_ALL table: You can use the AR_INTERFACE_CONTS_ALL table to assign revenue
contingency IDs to billing lines, before importing transactions using AutoInvoice.
Note: When importing parent and child transaction lines, AutoInvoice automatically copies any
contingencies from the parent line to the child lines.
• Revenue Contingencies: The revenue contingencies assigned to transactions, and their corresponding removal
events, determine what revenue is deferred and for how long.
• Revenue Policy: Your revenue policy may trigger the assignment of contingencies to transactions.
296

Oracle Fusion Cloud Financials
Implementing Receivables Credit to Cash
Chapter 10
Define Revenue Management Configuration for Receivables
• Revenue Contingency Assignment Rules: Your active revenue contingency assignment rules may trigger the
assignment of contingencies to transactions.
• Revenue Scheduling Rules: If a revenue scheduling rule is assigned to the transaction, then revenue is
recognized according to the revenue scheduling rule details and rule start date.
How Event-Based Revenue Management Is Calculated
The event-based revenue management process for deferring and later recognizing revenue on transactions follows
these steps:
1. Receivables evaluates a transaction either entered manually or imported using AutoInvoice for revenue
recognition.
2. If one or more contingencies exist, Receivables defers the corresponding revenue to an unearned revenue
account and records the reason for the deferral.
3. Receivables monitors the contingencies until an event occurs that can remove the contingency and trigger
revenue recognition.
4. When a removal event occurs, Receivables recognizes the appropriate amount of unearned revenue on the
transaction.
The revenue is recognized either according to the revenue scheduling rule or the last contingency removal date.
Related Topics
•
Guidelines for Defining Revenue Policies
•
Guidelines for Receivables System Option Settings
Revenue Contingencies
You can use predefined revenue contingencies to assign to your customer transactions. You can define your own
contingencies based on the predefined contingencies, and you can define revenue contingency assignment rules to
control which contingencies are assigned to which transactions.
This table describes the predefined revenue contingencies and their corresponding contingency removal events.
Contingency Name Contingency Removal Event
Cancellation
Contingency expiration date or expiration period
Compliance Deferral
Contingency expiration date or expiration period
Customer Creditworthiness
Receipt application
Delivery
Proof of Delivery
Doubtful Collectibility
Receipt application
297

Oracle Fusion Cloud Financials
Implementing Receivables Credit to Cash
Chapter 10
Define Revenue Management Configuration for Receivables
Contingency Name Contingency Removal Event
Explicit Acceptance
Customer acceptance
Extended Payment Terms
Receipt application
Forfeitures
Contingency expiration date or expiration period
Installation
Customer acceptance
Milestone
Invoicing
Prior Billing Acceptance
Invoicing
Refund
Contingency expiration date or expiration period
Payment-Based Revenue Contingencies
Revenue recognition of payment-based revenue contingencies depends upon payments made against open
transactions. You use payment-based contingencies for customers, or for certain transactions, where you want to
recognize revenue only when you receive payment.
If a transaction or transaction line contains payment-based contingencies, these rules apply:
• Receivables initially defers revenue on the sum of all line balances, excluding taxes, freight, and late charges.
If the payment-based contingency is on one line only, then under either of these circumstances Receivables
defers revenue for the relevant line only:
◦
Payment-based contingency was assigned by default to all the lines of the transaction, and the
contingency was expired manually on certain lines.
◦
Payment-based contingency was manually applied to one or more lines.
• During AutoInvoice import, full or partial receipt application on an imported transaction can trigger automatic
recognition of previously deferred revenue. In such cases, Receivables initiates the distribution of revenue
in the amount of the applied receipt from an unearned revenue account to the appropriate earned revenue
account.
• When you apply a receipt to a transaction with payment-based contingencies, the total amount of revenue
recognized can never exceed the original amount due on the transaction, less any applicable credit memo.
• If you later need to reverse a receipt, then Receivables automatically moves the amount of the reversed receipt
back to the unearned revenue account.
298

Oracle Fusion Cloud Financials
Implementing Receivables Credit to Cash
Chapter 10
Define Revenue Management Configuration for Receivables
Using Payment-Based Contingencies
Payment-based revenue management occurs when deferred revenue exists on a transaction due to any of these
revenue contingencies: Creditworthiness, Extended Payment Terms, Doubtful Collectibility.
• Creditworthiness: You can assign a credit classification that indicates noncreditworthiness to a customer or site
profile. You can also assign up to three such credit classifications to your revenue policy.
If Receivables can't associate the customer on the transaction with any of these credit classifications, then
the customer is presumed to be creditworthy. If Receivables can associate a customer with one of these credit
classifications, then Receivables assigns the Creditworthiness contingency to all transaction lines and defers
the entire transaction amount.
• Extended Payment Terms: You define the payment terms threshold on your revenue policy.
If the payment terms on a transaction exceeds the stated threshold, then Receivables assigns the Extended
Payment Terms contingency to all transaction lines and defers the entire transaction amount.
• Doubtful Collectibility: Collectibility of late charges is typically in doubt, and isn't considered earned revenue
until payment is received.
Decisions about doubtful collectibility are typically made in feeder systems, before AutoInvoice import occurs.
Deferred revenue can exist on a transaction due to a combination of these contingencies , as well as time-based
contingencies. In such cases, applied payments initiate revenue recognition only if time-based contingencies have
expired.
The following types of receipt application have no impact on revenue recognition:
• You apply a miscellaneous receipt. Only standard receipts have potential revenue recognition implications.
• You apply a receipt against a transaction that had revenue manually deferred.
• You apply a receipt against a transaction that had revenue deferred due to unexpired time-based
contingencies.
In this case, Receivables keeps the revenue amount for the transaction or transaction line in the unearned
revenue account, but marks the transaction as revenue pending recognition until after the contingency expires.
Payment-Based Contingencies on In Arrears Transactions
You can use payment-based contingencies to recognize revenue on transactions that use the In Arrears invoicing rule.
The In Arrears invoicing rule normally recognizes revenue based on the revenue scheduling rule assigned to transaction
lines.
When you assign a payment-based revenue contingency to a transaction line, this temporarily defers revenue
recognition until payment is received.
Note: You can't assign payment-based contingencies to transaction lines that have the revenue scheduling rule
Deferred Revenue option enabled. You must schedule revenue manually for these transaction lines using the Manage
Revenue Adjustments page.
To enable the assignment of payment-based contingencies to transactions that use the In Arrears invoicing rule:
1. Navigate to the Manage Receivables Lookups page.
2. Search for the AR_FEATURES lookup type.
299

Oracle Fusion Cloud Financials
Implementing Receivables Credit to Cash
Chapter 10
Define Revenue Management Configuration for Receivables
3. Create and enable the AR_CONT_INV_INARREARS_RULE lookup under AR_FEATURES.
If you make a partial receipt application against an In Arrears transaction, the amount allocated to any transaction line
with a payment-based contingency is considered for relieving the contingency. The applied receipt amount is further
prorated across the revenue scheduling periods proportionate to the amounts deferred.
Activities such as credit memos and adjustments against an In Arrears transaction after the creation of revenue
contingencies are treated as reductions against unearned revenue. The corresponding amount is reversed from the
unearned revenue account as part of the activity accounting.
Related Topics
•
How Event-Based Revenue Management Works
Revenue Contingency Removal Events
The event-based revenue management process in Receivables manages the recognition of revenue on transactions
with revenue contingencies. If a transaction has one or more revenue contingencies, Receivables defers revenue to an
unearned revenue account until the contingencies expire.
The extent of the revenue deferral, and the subsequent timing of revenue recognition, depends on the nature of the
contingency:
• Time-based contingencies must expire before the contingency can be removed and revenue recognized.
• Payment-based contingencies require payment before the contingency can be removed and revenue
recognized.
• Post-billing customer acceptance clauses must expire (implicit acceptance), or be manually accepted (explicit
acceptance), before the contingency can be removed and revenue recognized.
• Prior billing customer acceptance clauses require the recording of customer acceptance in the feeder system, or
its expiration, before importing into Receivables for invoicing. Customer acceptance or its expiration must occur
before the contingency can be removed, and the order can be imported into Receivables for invoicing.
Each contingency that Receivables provides has a corresponding removal event. The removal event determines the
action or event necessary to remove the contingency from a transaction or transaction line.
This table lists the revenue contingencies with their corresponding removal events:
Contingency Name Contingency Removal Event
Cancellation
Contingency expiration date or expiration period
Customer Creditworthiness
Receipt application
Delivery
Proof of delivery
Doubtful Collectibility, due to conditions
such as late charges and other fees
Receipt application
300

Oracle Fusion Cloud Financials
Implementing Receivables Credit to Cash
Chapter 10
Define Revenue Management Configuration for Receivables
Contingency Name Contingency Removal Event
Explicit Acceptance
Customer acceptance
Extended Payment Terms
Receipt application
Installation
Customer acceptance
Prior Billing Acceptance
Invoicing
Refund
Contingency expiration date or expiration period
Related Topics
•
How Event-Based Revenue Management Works
Revenue Contingency Assignment Rules
Use the Revenue Contingency Assignment Rules pages to define rules for automatically assigning revenue
contingencies to transactions.
A revenue contingency assignment rule consists of:
• Rule name and optional description.
• Revenue contingency to assign to transactions.
• One or more parameters that contain the conditions under which the contingency is assigned.
The rule parameters available for rule definition include:
• Revenue Scheduling Rule
• Transaction Source
• Bill-to Customer
• Bill-to Site
• Customer Profile Class
• Memo Lines
• Business Unit
• Ship-to Customer
• Ship-to Site
• Transaction Type
You can define multiple rules with different matching criteria that return the same contingency, and you can also define
multiple rules with the same matching criteria that return multiple contingencies.
301

Oracle Fusion Cloud Financials
Implementing Receivables Credit to Cash
Chapter 10
Define Revenue Management Configuration for Receivables
After you create an assignment rule, you can test the rule to ensure that all expressions are accurate and the rule
functions as expected.
Scenario
Revenue contingency assignment rules let you automate the assignment of contingencies to transactions in a way that
reflects the practical needs of your enterprise. You typically use these rules to support the contingency assignment
requirements that aren't supported by your revenue policy setup.
For example, you may want to require Customer ABC to manually accept an item before recognizing revenue on the
related transactions. To make this a mandatory process:
1. Create a new revenue contingency assignment rule.
2. Select the revenue contingency Explicit Acceptance for this rule.
3. Select Bill-to Customer as the rule parameter.
4. Enter the related customer condition.
With this defaulting rule in place, Receivables assigns the Explicit Acceptance contingency to all transaction lines for
Customer ABC, and defers revenue until the customer acknowledges acceptance of each line item.
FAQs for Define Revenue Management Configuration for
Receivables
What's a revenue contingency?
A revenue contingency is the terms and conditions in a sales contract or business agreement that prevents revenue
from being immediately recognized, based on the revenue recognition requirements mandated by US GAAP and
International Accounting Standards.
Typical contingencies that can delay revenue recognition include customer creditworthiness, nonstandard payment
terms, and nonstandard refund policies.
When do I use a revenue policy with a contingency?
You can assign a contingency to a transaction based on the revenue policy of your enterprise.
You have these options:
• Credit Classification: The contingency is assigned to the transaction if the applicable customer has a credit
classification that matches one of the credit classifications defined in your revenue policy.
• Payment Terms: The contingency is assigned to the transaction if its payment terms exceed the payment terms
threshold of your revenue policy.
• Refund: The contingency is assigned to the transaction if it includes a refund policy that exceeds the refund
policy threshold of your revenue policy.
302

Oracle Fusion Cloud Financials
Implementing Receivables Credit to Cash
Chapter 10
Define Revenue Management Configuration for Receivables
Select None if you don't want to consider any details of your revenue policy for the contingency.
When do I create revenue contingency assignment rules?
You must create revenue contingency assignment rules if you want to automatically assign contingencies to
transactions. For each rule that you define, you specify one or more matching criteria. Whenever the rule criteria match,
Receivables assigns the specified contingency to the applicable transaction lines.
There are two cases where you don't need to create revenue contingency assignment rules:
• Revenue policy violations: Receivables automatically assigns the appropriate revenue contingencies to
transactions whenever any revenue policy is violated.
• Deferred revenue scheduling rules: Transactions assigned a deferred revenue scheduling rule have all revenue
deferred until either the related contingency expires or you manually schedule revenue.
303

Oracle Fusion Cloud Financials
Implementing Receivables Credit to Cash
Chapter 10
Define Revenue Management Configuration for Receivables
304

Oracle Fusion Cloud Financials
Implementing Receivables Credit to Cash
Chapter 11
Define Credit Management
11 Define Credit Management
Components of the Credit Profile
Maintain credit profiles for your customers and customer accounts.
The credit profile contains settings that are used to:
• Create a line of credit for a customer.
• Provide an ongoing review of the credit profile of a customer.
• Contribute to the credit review process for a customer.
The credit profile is integral to managing the credit policies of your enterprise and the creditworthiness of each of your
customers.
Define a Credit Profile
You can either enter data directly into a profile page, or use the File-Based Data Import customer import template to
enter and upload credit-related information for your customer and customer account profiles.
You can define and maintain credit profiles at the customer level and customer account level only:
• Define a credit-only profile at the customer, or party, level. The customer credit profile facilitates credit reviews
at the company level and contributes to the overall credit picture of a company.
By default, the settings of the customer credit profile apply to all accounts of the customer. You can update
the default settings of the customer credit profile in individual customer account profiles, according to your
business requirements.
• Define a credit profile at the customer account level, as part of your account profile setup. The settings of the
customer account credit profile apply to all customer sites.
You can also define customer profile classes, with the credit settings you want, and apply individual profile classes to
customers or customer accounts.
When necessary, you can enter an effective end date for a profile and apply a new or updated profile to the customer or
customer account, according to your business requirements.
Credit Profile Settings
The following table describes each of the settings in the credit profile. Some of these settings are used in the customer
profile only or the customer account profile only.
Setting Usage
Effective Start/End Dates
The date range that a customer profile is active. A new effective start date begins the day after a
previous effective end date.
305

Oracle Fusion Cloud Financials
Implementing Receivables Credit to Cash
Chapter 11
Define Credit Management
Setting Usage
Credit Analyst
The default credit analyst assigned to credit case folders for the customer. This includes case folders
created due to credit authorization failures or the periodic review process.
Credit Classification
The credit classification of the customer. The combination of the credit classification and the case
folder review type determine the credit case folder template to use to create a credit case folder for this
customer.
Credit Limit
The total amount of credit in the credit currency assigned to the customer.
If the Include in credit check option is enabled and the Tolerance value is 0, and the outstanding
credit balance exceeds this amount, then the requested credit authorization fails.
You can use the Customer Import FBDI template to remove any existing value from this field in
customer credit profiles by entering the exclamation point character (!) in the Credit Limit column.
Order Amount Limit
The amount limit in the credit currency for an individual order for the customer.
If the Include in credit check option is enabled, and an individual transaction amount exceeds this
amount, then the requested credit authorization fails.
You can use the Customer Import FBDI template to remove any existing value from this field in
customer credit profiles by entering the exclamation point character (!) in the Order Amount Limit
column.
Credit Currency
The currency of the credit limit value and order amount limit value. The credit currency is used to
display all amount-based values in credit case folders created for the customer or customer account.
The credit currency doesn't have to be the currency of customer transactions. Depending on your
business requirements, you can, for example, define a credit currency for all customers belonging to a
certain global region or business sector.
Tolerance
The percentage that a customer or customer account can exceed the credit limit value.
For example, if the Include in credit check option is enabled and the Tolerance value is 10, the
effective credit limit is the credit limit defined in the profile plus 10% of the credit limit value.
Risk Code
The code that identifies the level of credit risk for the customer or customer account. You can define
additional risk codes using the Customer Credit Risk lookup type.
Credit Rating
The credit rating for the customer or customer account. You can define additional credit rating names
using the Credit Rating for Customers lookup type.
Conversion Rate Type
The conversion rate type to use in credit calculations, when the requested authorization amounts are in
a currency different from the credit currency.
Expiration Offset Days
The number of days before a credit authorization expires. Enter a number according to your business
requirements and your credit policy for the customer or customer account.
Credit Review Cycle
The review cycle period to use for regular credit reviews of the creditworthiness of the customer or
customer account. Valid values are Quarterly, Semiannually, Annually.
306

Oracle Fusion Cloud Financials
Implementing Receivables Credit to Cash
Chapter 11
Define Credit Management
Setting Usage
You can use the Customer Import FBDI template to remove any existing value from this field in
customer credit profiles by entering the exclamation point character (!) in the Credit Review Cycle
column.
Last Review Date
The date of the last credit review for the customer or customer account.
This date is updated every time a credit case folder is created for the customer or customer account,
either manually or automatically by the periodic review process or credit check failure.
You can use the Customer Import FBDI template to remove any existing value from this field in
customer credit profiles by entering the exclamation point character (!) in the Last Review Date column.
Next Review Date
The default date of the next credit review, based on the last review date and the review cycle period
assigned to the profile.
If the Last Review Date value is updated, the Next Review Date value is recalculated accordingly.
You can use the Customer Import FBDI template to remove any existing value from this field in
customer credit profiles by entering the exclamation point character (!) in the Next Review Date
column.
Include in credit check
This option is enabled by default.
When enabled, a credit check is performed when the credit checking service is called for the customer
or customer account.
Credit hold
This option isn't enabled by default.
If you enable this option, the following actions take place on the applicable customer or customer
account credit record:
• Order Management places any existing order on hold.
• The credit checking service returns a message acknowledging the hold and doesn't check
available credit.
• You can't import invoices from Order Management into Receivables using AutoInvoice.
You can still create new Receivables transactions manually for the customer or customer account.
Related Topics
•
How You Use Customer Profile Classes
•
How the Credit Limit is Derived in a Party Hierarchy
Credit Analysts and Credit Managers
Designate users as credit analysts and credit managers to operate, maintain, and manage the credit review process for
your customers and customer accounts.
307

Oracle Fusion Cloud Financials
Implementing Receivables Credit to Cash
Chapter 11
Define Credit Management
Use the Security Console to assign the credit manager role and privileges to users, and to use the credit manager role to
create a credit analyst role.
The credit manager setup includes:
• Role code: ORA_AR_CREDIT_MANAGER_JOB.
• Function security policy: ORA_AR_CREDIT_MANAGER_JOB.
The credit analyst setup includes:
• Role code: User-defined.
• Function security policy: Define the credit analyst role using the function security policy of
ORA_AR_CREDIT_MANAGER_JOB as a starting point, and then remove the privileges that a credit analyst
doesn't need, such as the Manage Credit Review Advanced privilege.
Credit Analyst
The credit analyst is responsible for monitoring the creditworthiness of customer accounts and assisting in the
resolution of credit-related issues.
The credit analyst entered on a credit profile is by default assigned all case folders for the customers and customer
accounts with this profile. Credit analysts are also assigned any case folders that they themselves create manually.
Credit analysts can reassign their own case folders to other credit analysts, but can't reassign the case folders of other
analysts.
You can use the Customer Import FBDI Template to import credit analyst information into your customer account and
site profiles, under the Credit Analyst column of the RA_CUSTOMER_PROFILES_INT_ALL tab.
By default, the Customer Import FBDI Template only accepts the value of credit analyst name in the Credit Analyst
column. You can instead use the credit analyst email address as a value in the Credit Analyst column by defining the
CR_ANALYST_EMAIL_CUST_PROFILE lookup.
To define the CR_ANALYST_EMAIL_CUST_PROFILE lookup:
1. Navigate to the Setup and Maintenance work area.
2. Search for the setup task Manage Receivables Lookups.
3. In the Manage Receivables Lookups page, search for the AR_FEATURES lookup type.
4. Enter a new row for the lookup code.
5. In the Lookup Code field, enter CR_ANALYST_EMAIL_CUST_PROFILE.
6. In the Reference Data Set field, select Common Set.
7. Select the Enabled option.
8. In the Meaning field, enter a description of this lookup code.
9. Save your work.
Credit Manager
The credit manager has responsibility for a team of credit analysts.
Credit managers have access to the case folders and credit review information of their own customers and customer
accounts, and of the customers and customer accounts assigned to all credit analysts on their team. Credit managers
are responsible for the final approval of a case folder.
308

Oracle Fusion Cloud Financials
Implementing Receivables Credit to Cash
Chapter 11
Define Credit Management
The credit manager can perform all of the credit analyst duties. In addition, the credit manager can perform these tasks,
as part of the Manage Credit Review Advanced privilege:
• Reassign case folders from one credit analyst to another.
• Approve or reject all case folders belonging to the team.
Related Topics
•
How You Import Customer Data
Create a Scoring Model
Create scoring models to use in the calculation of customer credit scores. You can create a different scoring model for
each type of credit review that you need. This lets you apply standard and consistent scoring guidelines across your
customers and customer accounts.
You assign scoring models to credit case folder templates. When a credit review is initiated and a case folder created, the
appropriate template and scoring model is assigned to the case folder for the credit review process.
A scoring model includes the data points and scoring method that are appropriate for a particular credit review. When
you create a scoring model, for each data point:
• Enter all of the ranges of values that you need to define for a given data point.
• Assign a score to each range of values.
• Assign a relative weighting factor to the data point, as it relates to all other data points.
During a credit analysis, the scores that you assigned to each data point range of values are used to calculate the score.
Note: Credit scores are calculated as whole integers, with decimal values .5 or greater rounded up. For example, 70.5
becomes 71, and 70.4 becomes 70.
To create a scoring model:
1. Navigate to Setup and Maintenance > Manage Credit Scoring Models page.
2. Click the Plus (+) icon to open the Create Credit Scoring Model page.
3. In the Name and Description fields, enter the name and description for this scoring model.
You may want to use a name that identifies the type of scoring model, either as it relates to a case folder
template or to a subset of your customers.
4. In the Start Date field, enter the date that you want this scoring model to become active. The default is the
system date, but you can change it to a future date.
309

Oracle Fusion Cloud Financials
Implementing Receivables Credit to Cash
Chapter 11
Define Credit Management
5. Use the End Date field to define a limit of active operation for a scoring model. The only valid end date is the
current date.
When you create a new case folder or attach a scoring model to a case folder template, you can only select a
scoring model that either has no end date or has an end date later than the case folder or case folder template
creation date.
Note: Once you enter an end date and save your work, you can no longer change or remove the end date.
This ensures that your credit policies are strictly enforced and that comparisons across scoring models
remain meaningful.
6. In the Currency field, select the scoring model currency.
All data point values used in the calculation of the credit score convert to the scoring model currency.
7. Use the Convert Null Values to Zero Values option to indicate how the scoring model should treat data points
with null values. This option is enabled by default.
Note: If you disable this option, then the scoring model doesn't calculate a credit score if data points contain
null values. In this case, after case folder creation the credit review process stops and the credit analyst must
manually enter values for these data points.
8. In the Data Points section, click the Plus (+) icon to open the Add Data Points window.
9. In the Add Data Points window, search for and select the data points you want.
Use the Category field to display all data points belonging to a particular category. You can select multiple data
points and click the Apply button to assign them to the scoring model. You can then search for data points
belonging to a different category and continuing selecting and applying data points to the scoring model.
10. After adding all of the data points you want, click the OK button to return to the Create Credit Scoring Model
page.
11. In the Data Points section, select the first data point.
12. In the Weight field, enter the relative weight of this data point.
The weight that you assign indicates the relative importance of the data point in the scoring model.
13. In the Details section, click the Plus (+) icon to open a row for entering the first range of values and
corresponding score for this range.
14. In the From Range and To Range fields, enter the range of values. You can enter up to 15 characters for each
value in the range. Ranges can't have gaps or overlaps.
For numeric data points, the To Range value of the first row must be the same as the From Range value of the
second row.
This table shows numeric ranges with no gaps:
Range From To Score
Current Balance
0
1000
10
Current Balance
1000
2000
20
Current Balance
2000
3000
30
310

Oracle Fusion Cloud Financials
Implementing Receivables Credit to Cash
Chapter 11
Define Credit Management
For alphanumeric data points, enter only one value per row of ranges. This means both the From Range and To
Range values must be the same.
This table shows two range values:
Range From To Score
Range 1
A2B
A2B
10
Range 2
B3B
B3B
5
15. In the Score Value field, enter a numeric score for this range of values.
Though not required, a common principle for assigning a score is: The higher the score, the lower the credit
risk. Your scores then decrease in number as you enter your ranges of values, with the score for the highest
level of risk at or near zero (0).
16. Continue to add rows and enter ranges of values and corresponding scores for each range.
The ranges that you enter should include all possible values for the given data point, from the point of view of
establishing credit risk.
17. Repeat steps 11 to 16 for each data point.
18. Select the Enabled option to activate the scoring model.
You can later deselect the Enabled option to render the scoring model inactive. You may want to do this
instead of entering an end date if your credit requirements change temporarily, but you want the scoring model
available for later use.
Note: If you disable a scoring model you must ensure that it isn't used by an active case folder or case folder
template.
19. Save your work.
Related Topics
•
Create a Credit Case Folder Template
•
Overview of Data Points
How You Define a Scoring Model Calculation
Use the Scoring Model pages to create and update a scoring model to use in the calculation of the credit score for a
customer or customer account.
The scoring model calculation for the credit score depends upon these scoring attributes assigned to each data point in
the scoring model:
• Data point ranges of values.
• Score assigned to each data point range of values.
311
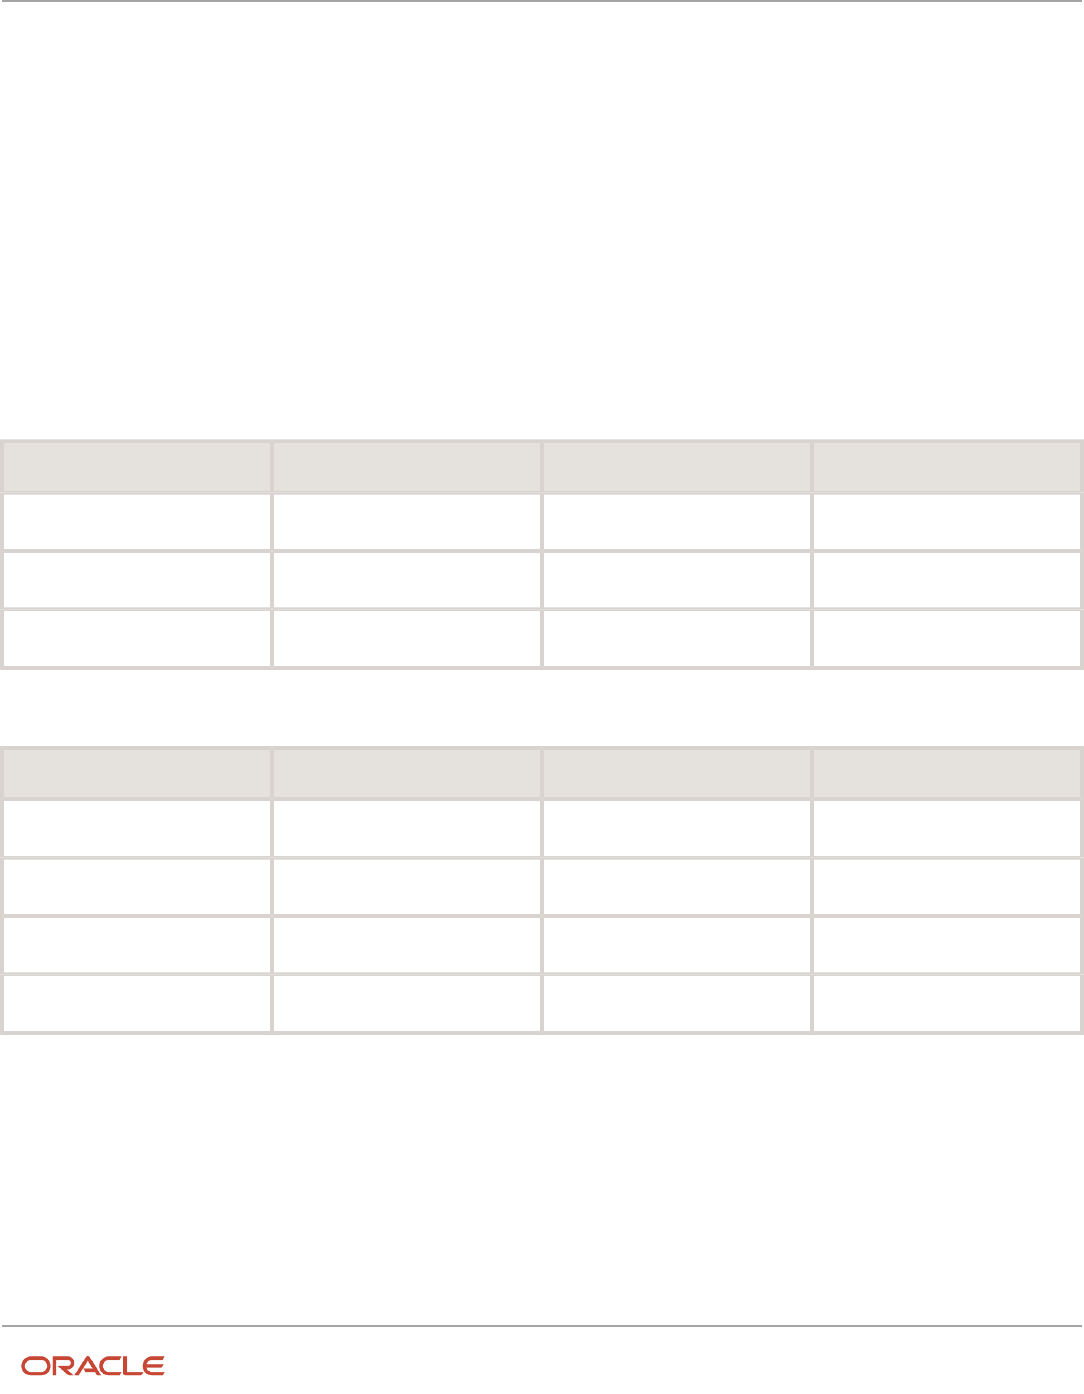
Oracle Fusion Cloud Financials
Implementing Receivables Credit to Cash
Chapter 11
Define Credit Management
• Weights assigned to each data point.
The totality of the data points, their relative weights, and the scores for each of their range of values is the scoring
model calculation used to arrive at a credit score.
Assign Scores
For each data point that the scoring model includes, you must assign a range of values and a corresponding score for
each range. The ranges of values for a data point typically represent levels of credit risk.
For ranges, you can enter numeric ranges, and alphanumeric ranges with one range value per row for data points that
are scorable.
For scores, you must enter numeric values. The corresponding credit risk is either the result of ascending or descending
numeric scores, depending on how you arrange them.
This table illustrates sample ranges and scores for the Percentage of Invoices Paid Late data point:
Credit Risk From Range To Range Score
Low
0
10
100
Moderate
10
60
50
High
60
100
0
This table illustrates sample ranges and scores for the Days Sales Outstanding (DSO) data point:
Credit Risk From Range To Range Score
Low
0
10
100
Moderate
10
25
60
High
25
50
25
Highest
50
100
10
Assign Weights
Assign a weighting factor to each data point to indicate the relative importance of each data point in the scoring model.
Your definition of "relative importance" depends on how you plan to use a scoring model.
For example, if you're creating a scoring model to determine a credit limit increase for an existing customer with years
of credit history with your enterprise, you might assign a higher weighting factor to the Percentages of Invoices Paid
Late data point, and a lower weighting factor to, for example, data points that represent credit agency scores or ratings.
312

Oracle Fusion Cloud Financials
Implementing Receivables Credit to Cash
Chapter 11
Define Credit Management
To continue with the example, this table illustrates the possible weighting factors for the two data points Percentage of
Invoices Paid Late and the Days Sales Outstanding (DSO) data points:
Data Point Weight
Percentage of Invoices Paid Late
75
Days Sales Outstanding (DSO)
25
In this example, the respective weights contribute to the total credit score in this way:
• Percentage of Invoices Paid Late weight is 75/(25+75)=75% or 0.75
• Days Sales Outstanding (DSO) weight is 25/(25+75)=25% or 0.25
The Percentage of Invoices Paid Late weight contributes 75% toward the total credit score. The Days Sales Outstanding
(DSO) weight contributes 25% toward the total credit score.
Calculate the Score
This scoring example illustrates how the credit score is calculated, based on the scoring model defined in the previous
examples.
The calculation of a credit score is the sum of the weighted points earned expressed as a percentage. A point earned is
the score assigned to a data point value, determined by the scores assigned to the data point ranges. A weighted point
earned is the product of the point earned and the weight assigned to the data point.
This table shows the points earned for the credit case folder that uses this scoring model:
Category Data Point Value Points Earned
Billing and Payments
Percentage of Invoices Paid Late
57%
50
Billing and Payments
Days Sales Outstanding (DSO)
15 days
60
The Percentage of Invoices Paid Late for this customer is 57%, which in the scoring model falls into the Moderate Risk
range of 10% > 60%. The score assigned to this range is 50, the points earned are 50.
The weight assigned to this data point in the scoring model is 75%, or .75. The weighted points earned (points earned x
weight) for the Percentage of Invoices Paid Late data point is 50 x .75 = 37.5.
The Days Sales Outstanding (DSO) for this customer is 15 days, which in the scoring model falls into the Moderate Risk
range of 10 > 25 days. The score assigned to this range is 60, so the points earned are 60.
The weight assigned to this data point in the scoring model is 25%, or .25. The weighted points earned (points earned x
weight) for the Days Sales Outstanding (DSO) data point is 60 x .25 = 15.
The credit score formula, as the sum of the weighted points earned expressed as a percentage is:
Credit score = points earned 1 x weight 1 (in percentage) + points earned 2 x weight 2 (in percentage) + ...
313

Oracle Fusion Cloud Financials
Implementing Receivables Credit to Cash
Chapter 11
Define Credit Management
In this case, points earned 1 = 50, weight 1 in percentage is 0.75; points earned 2 = 60, weight 2 in percentage is 0.25. So:
Credit score = 50x0.75 + 60x0.25 = 52.5 (out of 100)
Create a Credit Case Folder Template
Create credit case folder templates to use in the creation of your credit case folders.
The credit case folder template defines:
• Data points to display in the case folder.
• Definition of the required and optional data points in the case folder that are made available for a given credit
review.
• If applicable, the scoring model to use in a case folder for a customer or customer account.
A credit case folder is created for a combination of credit classification and review type. You can set up your case
folder templates for each of these combinations. You can create more than one case folder template with the same
combination, according to your credit policies, but only one template with a given combination can be active and
enabled at any one time.
For example, during an Ad Hoc Review, a High Risk customer might require additional collateral and bank reference data
points on which to base a credit decision. Or during a Periodic Review of a Moderate Risk with D&B customer, you may
rely mainly on the D&B Paydex Score and D&B Rating data point values.
When a credit review is initiated and a case folder created, a case folder template is assigned based on the credit
classification and review type combination. If a template can't be found with this combination, then the case folder
template you designated as the default is used.
To create a case folder template:
1. Navigate to Setup and Maintenance > Manage Credit Case Folder Templates page.
2. Click the Plus (+) icon to open the Create Credit Case Folder Template page
3. In the Name and Description fields, enter the name and description for this case folder template.
You may want to use a name that identifies the type of case folder template, as it relates to the combination of
credit classification and review type.
4. In the Start Date field, enter the date that you want this case folder template to become active. The default is
the system date, but you can change it to a date earlier than or later than the system date.
Active and enabled case folder templates are available for use with case folders created on or after the case
folder template start date.
5. Use the End Date field to define a limit of active operation for a case folder template. You can create more than
one case folder template for a given combination of credit classification and review type, if your credit policies
change, or you anticipate that they will change in the near future. To do this, apply a future end date to the
current template and create a new template with a start date after the current template end date.
Note: Once you enter an end date and save your work, you can no longer change or remove the end date.
6. In the Scoring Model field, optionally enter the scoring model to use with this case folder template.
If you don't select a scoring model, the data points you set for this template are used by the credit analyst for
credit determination, but no credit score is calculated.
314

Oracle Fusion Cloud Financials
Implementing Receivables Credit to Cash
Chapter 11
Define Credit Management
7. In the Data Points section, use the Category field to display the data points of a specific category only. By
default, the Data Points section displays all data points for all categories
8. Use the fields in the Include in Case Folder column to identify the data points to include in the case folder
template:
◦
No: The default. These data points don't appear in the template after you save it, and don't appear in any
case folder created using this template
◦
Required: The data point is included in the template and a value is required for credit determination and
to calculate the credit score in the credit case folder that uses this template.
In the credit case folder, required data points that don't have a value are labeled with a warning icon.
◦
Optional: The data point is included in the template, but a value isn't required. Optional data points
provide credit analysts with additional flexibility in determining the values needed for a particular credit
determination.
Note: If you selected a scoring model for this template, you still need to set the scoring model data points
as Required or Optional in order for them to appear in a credit case folder that uses this template. If the
credit analyst enters a scorable value in an optional data point, then this value is included in the credit score
calculation.
9. After you have set all of the data points you want for the template, save your work.
How You Maintain the Summary Tables for Data Points
The values for many of the data points are maintained in the Receivables summary tables AR_TRX_BAL_SUMMARY and
AR_TRX_SUMMARY.
AR_TRX_BAL_SUMMARY
The AR_TRX_BAL_SUMMARY table maintains summary data related to customers and customer accounts.
The table includes summary data in these data point categories:
• Aging: All open counts and amounts; and past due, adjustment, and at risk amounts.
• Billing and Payments: Payment-related data.
• Business Information and Credit: Current receivables balance.
The lowest level of granularity for a data point value stored in this table is at the level of a customer bill-to site of a given
customer account in a specified currency.
A data point value from the AR_TRX_BAL_SUMMARY table displayed in the case folder for a customer or customer
account is derived in this way:
• Add up all values across all bill-to sites (for customer account case folders) or all customer accounts (for
customer case folders).
• Convert the values to the credit currency using the values defined for currency and conversion rate type in the
customer or customer account profile.
• If the credit currency defined in the customer or customer account profile isn't the same as the scoring model
currency, the data point values used for scoring are converted to the scoring model currency.
315

Oracle Fusion Cloud Financials
Implementing Receivables Credit to Cash
Chapter 11
Define Credit Management
AR_TRX_SUMMARY
The AR_TRX_SUMMARY table maintains summary data related to customer and customer account transactions.
The table includes summary data in these data point categories:
• Billing and Payments: Transaction counts, amounts, and percentages.
• Business Information and Credit: Credit amounts and dates.
The data in the AR_TRX_SUMMARY table is over a 12-month time period. The display of summarized order, invoice, and
payment data over this period of time can provide you with an overall picture of your relationship with the customer or
customer account, and can help you predict future performance.
The lowest level of granularity for a data point value stored in this table is at the level of a customer bill-to site of a given
customer account in a specified currency in the given 12-month period.
A data point value from the AR_TRX_SUMMARY table displayed in the case folder for a customer or customer account is
derived in this way:
• Add up all values with the most recent As-of date across all bill-to sites (for customer account case folders) or
all customer accounts (for customer case folders).
• Convert the values to the credit currency using the values defined for currency and conversion rate type in the
customer or customer account profile.
• If the credit currency defined in the customer or customer account profile isn't the same as the scoring model
currency, the data point values used for scoring are converted to the scoring model currency.
Run the Process Receivables Transactions for Customer Account
Summaries Process
During the life of a case folder, customer data is likely to change with new transactions, adjustments, payments,
disputes, and other transaction and balance updates.
You can update the data in the AR_TRX_BAL_SUMMARY and AR_TRX_SUMMARY tables to reflect all of these change
by using the Process Receivables Transactions for Customer Account Summaries process.
Schedule a regular run of the Process Receivables Transactions for Customer Account Summaries process to refresh the
applicable customer account summary data for all related data points.
After the AR_TRX_BAL_SUMMARY and AR_TRX_SUMMARY tables are refreshed, you can open any applicable case
folder and select Refresh Data from the Actions menu to refresh the data points in the case folder.
How You Import Third-Party Credit Data for Data Points
You can import credit data from third-party credit services for use as data point values in your scoring models.
You can import credit data for these data point categories:
• Bank References
• Business Information and Credit
316

Oracle Fusion Cloud Financials
Implementing Receivables Credit to Cash
Chapter 11
Define Credit Management
• Collateral
• Financial Data
• Guarantors
• References
• Trade References
• Venture Funding
• Additional data points (data not covered by the available categories)
Use the Upload Credit Data Template worksheet to enter customer credit data from third parties using data point
categories, data points, and data point values. Use the Import Credit Data process of the Load Interface File for Import
process to upload the completed worksheet.
To upload credit data from a third party credit service:
1. Download the Upload Credit Data Template.
Review the information on the template Instructions tab.
2. Complete each row in the worksheet for the customers and data point values you want. For each data point
value, enter:
◦
Customer party number (registry ID)
◦
Customer account number, if the data is applicable to a customer account only
◦
Data point category
◦
Data point name
◦
Data point value
◦
Data point value currency
Note: You can only enter one data point value for the same combination of customer, customer account,
data point category, and data point name.
Note: The Currency column is required for most data points that take a numeric value, such as Bank
References average balance and current balance, Venture Funding amounts, and most Financial Data. See the
Upload Customer Credit Data Template instructions for details.
3. After completing the template, generate the .zip file for upload.
4. Navigate to Scheduled Processes.
5. Navigate to the Load Interface File for Import process.
6. In the Import Process parameter, select Import Credit Data.
7. In the Data File parameter, select the .zip file you generated in step 3.
8. Submit the Load Interface File for Import process.
Note: If data point values already exist, the newly imported data overwrites the existing values.
9. Review the completed upload process, and review the log file for upload errors and for any rows that failed to
import successfully.
317

Oracle Fusion Cloud Financials
Implementing Receivables Credit to Cash
Chapter 11
Define Credit Management
How You Import Credit Management Data Points
Use the Import Credit Data process to import credit data from third-party organizations for use as data point values in
your scoring models.
You can download a customer credit data FBDI template to use to prepare your data. The template contains an
instruction sheet to help guide you through the process of entering your information.
To access the template, complete the following steps:
1. Navigate to the File-Based Data Import for Oracle Financials Cloud guide.
2. In the Table of Contents, click File-Based Data Imports.
3. Click Credit Management Data Points Import.
4. In the File Links section, click the link to the Excel template.
Follow these guidelines when preparing your data in the worksheet:
• Enter the required information for each column. Refer to the tool tips on each column header for detailed
instructions.
• Don't change the order of the columns in the template.
• You can hide or skip the columns you don't use, but don't delete them.
After you have completed the template, upload it using the Load Interface File for Import process:
1. In the Import Process field, select Import Credit Data.
2. In the Data File field, enter the completed template.
3. The Load Interface File for Import process uploads the credit data for each customer included in the template.
The import process checks for the uniqueness of the customer (party) number and customer account number
(if entered).
Settings That Affect the Upload Customer Credit Data Template
The Upload Customer Credit Data import template contains an instructions tab and a Customer Credit Data tab:
Spreadsheet Tab Description
Instructions and CSV Generation
Contains instruction information about preparing and loading data, the format of the template,
submitting the Import Credit Data process, and correcting import errors.
CustomerCreditData
Enter credit data point information for each applicable customer and customer account.
How Customer Credit Data Is Processed
You can import credit data from third-party organizations for these data point categories:
• Bank References
• Business Information and Credit
• Collateral
318

Oracle Fusion Cloud Financials
Implementing Receivables Credit to Cash
Chapter 11
Define Credit Management
• Financial Data
• Guarantors
• References
• Trade References
• Vendor Funding
• Additional (for user-defined data points)
You enter one data point value for the same combination of customer, customer account, data point category, and data
point name. If the data point takes a numeric value, then in many cases you need to add a currency.
The validated data points become available for use in scoring models created for the applicable customers and
customer accounts.
Related Topics
•
How You Import Third-Party Credit Data for Data Points
•
How You Maintain the Summary Tables for Data Points
•
Overview of Data Points
Descriptive Flexfields in Credit Case Folders
Use descriptive flexfields to pass additional source transaction information for credit check requests. This information is
passed to credit case folders created as a result of a credit checking failure.
You can pass information about the source transaction requesting the credit check, including, for example, Contract
Start Date, Contract Billing Frequency, and Contract Invoicing Rule. The descriptive flexfields are displayed in the
Additional Information section of the Edit and View Credit Case Folder pages.
You can edit these additional attribute values before the case folder is approved. Once the case folder is approved, these
values are displayed as read-only.
You must ensure that the credit case folder descriptive flexfields you define match the values passed through the credit
checking service. If the data types for the attributes don't match, or if the descriptive flexfields aren't defined, these
additional attributes don't appear in case folders created as a result of a credit check failure.
Related Topics
•
Flexfield Components
•
Overview of Flexfield Configuration
•
Flexfields at Runtime
319

Oracle Fusion Cloud Financials
Implementing Receivables Credit to Cash
Chapter 11
Define Credit Management
FAQs for Define Credit Management
What's the difference between credit rating and credit
classification?
The credit rating, and the risk code, are user-definable values available for use as internal commentary or notes about a
customer or customer account. These values don't have a programmatic usage.
The credit classification is an integral part of managing the creditworthiness of a customer. The combination of the
credit classification on the credit profile and the case folder review type (Ad Hoc Review, Periodic Review, Credit Check
Failure) determine which credit case folder template to use to create a case folder for a customer credit review.
For example, a customer profile with a credit classification of High Risk and a review type of Credit Checking Failure may
create a case folder requiring a detailed review of the customer's credit history, while a customer profile with a credit
classification of New Customer and a review type of Ad Hoc Review may require only a formal review process.
What happens if no credit currency is defined?
You can use the AR: Default Credit Management Currency profile option to define a default credit currency. The credit
checking process uses this currency if no credit currency is defined in the applicable customer, customer account, or
party profiles.
If the AR: Default Credit Management Currency profile option isn't defined, the credit checking process uses US dollars
(USD) as the credit currency.
If no conversion rate type is defined, then the credit checking process uses the conversion rate type Corporate.
Why can't I edit or delete a scoring model?
Because it's used by a case folder or case folder template. You can't delete or update the contents of a scoring model in
use.
In the Manage Credit Scoring Models page, you can disable or apply an end date to a scoring model. If you apply an end
date, you must either assign a new scoring model or ensure that a comparable end date is applied to the applicable case
folder or case folder template.
Why can't I add data points to a scoring model?
You can only add scorable data points to a scoring model. A scorable data point uses ranges of values that you assign
score values to. These score values are used to calculate the credit score.
320

Oracle Fusion Cloud Financials
Implementing Receivables Credit to Cash
Chapter 11
Define Credit Management
Non-scorable data points provide reference information only. You can add non-scorable data points to a case folder to
help with the evaluation of a customer's credit.
What's the difference between a null data point value and a zero
data point value?
A null data point value indicates no activity. A zero data point value indicates that activity has occurred in the past, but
no current value exists for the data point.
For example, for the Count of Invoices Paid Late data point, a null value means that no payments have been made, while
a zero value means that all invoices were paid on time.
What's the difference between the credit currency and the scoring
model currency?
You define the credit currency in customer credit profiles.
The credit case folders for a customer or customer account display all amount-based values in the credit currency,
including available credit, credit limit, and data point values.
The scoring model currency is used to display all amount-based values for data points and data point ranges in the
Scoring Model pages.
A scoring model, as part of a case folder template, is used to calculate credit scores for many different customers. If a
credit case folder uses a scoring model, the amount-based data point values appear in the credit currency in the Credit
Case Folder pages and in the scoring model currency in the Scoring Details page.
Depending on your business requirements, you may want to use a globally recognized currency, such as US dollars or
Euros, as the scoring model currency, and a currency representative of a certain global region or business sector as the
credit currency.
Why do I add a scoring model to a case folder template?
To calculate a credit score in credit case folders created with this credit case folder template.
If all of the data points have values during case folder creation, the credit score is calculated automatically. During the
credit review, you can enter, add, and update data point values and recalculate the score.
If a case folder template doesn't use a scoring model, then case folders created with this template display the data
points you set as Required and Optional without calculating a score. You can use these data points to evaluate the
creditworthiness of a customer or customer account. You can also use third-party credit ratings, available as data point
values.
321

Oracle Fusion Cloud Financials
Implementing Receivables Credit to Cash
Chapter 11
Define Credit Management
How can I assign a default case folder template?
The default case folder template is assigned to case folders during a credit review when no template can be found with a
specific credit classification and review type combination.
You can only have one default case folder template. The default case folder template must be enabled and have a start
date on or before the current date, but with no end date. You can't use a case folder template with an end date as the
default.
In the Manage Credit Case Folder Templates page, select a template and click the Set as Default button. Any previous
default template is reassigned to the new designated template.
Can I edit a case folder template?
Yes. If the template hasn't been used to create a case folder, you can edit the entire contents of the template, except for
the template name.
If the template has been used to create a case folder, you can only apply an end date to the template or deselect the
Enabled option. If you make either of these updates, you must ensure that this doesn't affect any current case folders.
322

Oracle Fusion Cloud Financials
Implementing Receivables Credit to Cash
Chapter 12
Define Cash Management and Banking Configuration
12 Define Cash Management and Banking
Configuration
How Bank, Branch, and Account Components Work
Together
Banks, branches, and accounts fit together on the premise of the Bank Account model.
The model enables you to define and keep track of all bank accounts in one place and explicitly grant account access to:
• multiple business units
• functions
• users
This eliminates the redundant duplicate bank account setup in different business units when these business units share
the same bank account.
Banks
Creating a bank is the first step in the bank account creation. You can:
• Search for existing banks to view and update
• Create a new bank from an existing party
Consider the following:
• The option to create from an existing party is implicitly implemented by the matching option.
• The option is available only after the existing party has been found with the same bank.
• If you select the matching option, the page repopulates the information from the matched party.
Branches
Once you have created your bank, the next step is creating a branch or branches associated to the bank. The matching
option is also available when creating branches. To create a new branch without using the matching option, manually
enter the required information. You can also define other branch- related attributes in the same page.
If you don't use the matching option when an existing party is found, a branch with the same party name is created.
Accounts
The four areas associated with defining an account are:
• General information
• Control of the account
• Security and access to the account
323

Oracle Fusion Cloud Financials
Implementing Receivables Credit to Cash
Chapter 12
Define Cash Management and Banking Configuration
• Business unit assignment
Once the bank and branch are created, proceed to the bank account setup by doing the following:
• Select the bank branch you want to associate to your bank account.
• Assign the owner of the bank account.
Note: To create a bank account for Payables or Receivables, add the Business Unit Access first for the
business units to use the bank account.
Consider the following:
• The Oracle Fusion Account Payables or Receivables accounts are identified by the business unit.
• The Oracle Fusion Payroll accounts are identified by the legal entity.
• The program, Inactivates Banks and Bank Branches enables you to inactivate all banks and bank branches that
have no active internal and external bank accounts.
• Optionally, secure the access to bank account information based on the user's legal entity data access, by
enabling the opt-in Legal Entity-Based Data Access for Bank Account Setup.
• Legal entity-based data access for bank account setup:
◦
Improves security and increases control of bank account setup by limiting user access to bank account
information.
◦
Helps decentralized organizations that require users only to manage the bank account information for
the organizations they are authorized for.
Related Topics
•
Considerations When You Create Accounts
•
Reconciliation Matching Rules
•
Assign Data Access to Users
Considerations When You Create Accounts
Banks, branches and accounts fit together on the premise of the Bank Account model. The Bank Account model enables
you to define and track all bank accounts in one place.
The Bank Account Model can explicitly grant account access to multiple business units, functions, and users. Consider
the following when you set up bank accounts:
• Assign a unique general ledger cash account to each account, and use it to record all cash transactions for the
account. This facilitates book to bank reconciliation.
• Grant bank account security. Bank account security consists of bank account use security, bank account access
security, and user and role security.
Legal Entity-Based Data Access for Bank Account Setup
By default, users with the necessary function security privileges have access to create and manage all internal bank
accounts.
324

Oracle Fusion Cloud Financials
Implementing Receivables Credit to Cash
Chapter 12
Define Cash Management and Banking Configuration
Optionally, restrict access to bank account information based on the user's legal entity data access. This allows cash
managers to add, review, or modify only the bank accounts associated with the legal entities that the user has access
to. For example, only users who have been assigned the Manage Bank Account (CE_MANAGE_BANK_ACCOUNT_PRIV)
privilege for Vision Operations legal entity, can create, review, or modify internal bank accounts associated with this
legal entity.
Decentralized organizations will benefit with improved security by ensuring that users only manage the bank account
setup for the organizations they're authorized for.
Business benefits include:
• Improve security and increase control of bank account setup by limiting user access to bank account
information.
• Helps decentralized organizations that require users only to manage the bank account information for the
organizations they're authorized for.
To enable the feature Legal Entity-Based Data Access for Bank Account Setup, you must:
1. Use the Opt in UI to enable the feature.
2. Assign users to the appropriate legal entity security context:
a. In the Setup and Maintenance work area, Select the Offering as Financials, Functional Area as Users and
Security, and Task as Manage Data Access for Users.
b. On the Manage Data Access for Users page, create data access for users by entering the user name, Cash
Manager as role, legal entity as security context, and legal entity name as security context value, to create
the data access for the user.
c. Save the changes.
Once the feature is enabled, legal entity-based data access security is applied when an internal bank account is created
or managed using either the UI or REST API.
Account Use
Account Use refers to accounts created for:
• Oracle Fusion Payables
• Oracle Fusion Receivables
• Oracle Fusion Payroll
Select the appropriate use or uses when creating an account in one or more of these applications.
Account Access
Payables and Receivables account access is secured by business unit. Before the bank account is ready for use by
Payables or Receivables, you must:
1. Select the appropriate use for the application.
2. Grant access to one or more business units.
Note: You can only assign access to the business units that use the same ledger as the bank accounts owning the
legal entity,
325

Oracle Fusion Cloud Financials
Implementing Receivables Credit to Cash
Chapter 12
Define Cash Management and Banking Configuration
User and Role Security
You can further secure the bank account so that it can only be used by certain users and roles. The default value for
secure bank account by users and roles is No. For Payables and Receivables, you must have the proper business unit
assigned to access a bank account even if the secure bank account by users and roles is No. If the secure bank account
by users and roles is set to Yes, you must be named or carry a role assigned to the bank account to use it.
• To set up banks, branches, and accounts, your custom role must have the security duty role Cash
Management Administration. You must have the assigned the Manage Bank Account Security privilege
(CE_MANAGE_BANK_ACCOUNT_SECURITY_PRIV) to modify the User and Role Security.
• To restrict the access to the Security tab, you must create a custom role and remove the Manage Bank Account
Security (CE_MANAGE_BANK_ACCOUNT_SECURITY_PRIV) privilege. For example, you'd copy the Cash
Management Administration duty role, rename it, and remove the privilege.
GL Cash Account Segments
Consider selecting the option to enable multiple cash account combinations for reconciliation to reconcile journal lines
of multiple cash account combinations matching the same natural account and other specified segment values.
For example, if you set up 01-000-1110-0000-000 as your cash account, and select Account and Subaccount as GL
Cash Account Segments, you can manually or automatically reconcile journal lines entered on different account code
combinations matching the same natural account '1110' and subaccount '0000'.
Related Topics
•
Assign Data Access to Users
Cash Management Profile Options
Profile options in Oracle Fusion Cash Management provide ways to improve and promote efficiency in your business
practices. How you configure these profile options can affect the interaction with other applications. Enabling these
profile options can streamline your processes between those applications.
The following table lists and describes the Cash Management profile options:
Profile Option Profile Display Name Applies To Default Setting
CE_DISABLE_BANK_VAL
Disable Country Specific Bank
Validations
Internal Bank Accounts
External Bank Accounts
No
CE_GL_RECON_ENABLED
Journal Reconciliation Enabled
Bank Reconciliation
Yes
CE_MASK_INTERNAL_BANK_
ACCT_NUM
Mask Internal Bank Account
Numbers
Internal Bank Accounts
No Masking
326

Oracle Fusion Cloud Financials
Implementing Receivables Credit to Cash
Chapter 12
Define Cash Management and Banking Configuration
Profile Option Profile Display Name Applies To Default Setting
CE_USE_EXISTING_BANK_
BRANCH
Use Existing Banks and Branches
Employee Bank Accounts
Payee Bank Accounts
No
Note: Internal bank accounts are set up in Oracle Fusion Cash Management. Assign the disbursement bank account
to Oracle Fusion Account Payables and the remit-to bank accounts to Oracle Fusion Account Receivables.
Note: External bank accounts are set up and used for suppliers, customers, ad hoc payees, and employees.
Enabling Profile Options: Points to Consider
The following information provides details on configuring profile options, how they influence other applications, and
how they can streamline your business practices.
1. Disable Country Specific Validations
This profile option manages the country-specific validations for the bank code, branch number, account
number, check digit, and IBAN. You can set this profile option at the site or user level. The profile option default
is set to No at the site level. If the profile option is set to Yes, this eliminates the country-specific validation
process for the bank code, branch number, account number, check digit, and IBAN. This profile option affects
internal and external bank accounts. It doesn't affect the checks for unique banks, branches, accounts, and the
mandatory requirement of the bank account number.
2. Journal Reconciliation Enabled
This profile option enables the manual and automatic reconciliation of bank statement lines directly from GL
Journal manual entries. You can set this profile option at the site level. The profile option default is set to Yes. If
the profile option is set to No, it disables the journal source transaction on the Manage Reconciliation Matching
Rules, the Manual Reconciliation page, and the reconciliation processes. Note: This profile can only be set to No
if there are zero Journal Entries that have been reconciled.
3. Mask Internal Account Numbers
This profile option allows the masking of the internal bank account number. You can set this profile option at
the site or user level. The profile option default is set to No Masking at the site level. You can select Display first
four or Display last four digits. For example, an internal bank account number of XXXX8012 displays the last
four digits and masks all the rest. This profile option affects only the internal bank accounts.
4. Use Existing Banks and Branches
Enable this profile option to pre-load the bank branch data information when creating an employee or ad hoc
payee bank account. You can choose to pre-load the bank branch data and have your employees select the pre-
loaded data when entering their bank accounts. Alternatively, you can have your employees enter all the bank,
branch, and account information related to their account. Customers can set their preference to pre-load the
bank branch data through this profile. You can set this profile option at the site or user level. By default, the
profile option is set to No and that means pre-loaded information can't be used. In this case, the Bank, Bank
Code, Bank Branch, Branch Number, and BIC Code fields will be displayed as free text field, and a new bank and
bank branch will be created for the bank account.
If the bank name isn't entered, the default name CE_EMP_UNSPECIFIED_BANK will be used. If the branch name
isn't entered, the default name CE_EMP_UNSPECIFIED_BRANCH will be used.
327

Oracle Fusion Cloud Financials
Implementing Receivables Credit to Cash
Chapter 12
Define Cash Management and Banking Configuration
If you set the profile option to Yes, the existing bank and branch information is available and displayed in the list
of values when creating the employee or ad hoc payee bank account.
Overview of Parse Rule Sets
Oracle Fusion Cash Management supports parse rule sets to transform data during the bank statement import process.
Parse rules are used to move data from one field to another.
The parse rule set is associated to a bank account in the bank account setup. The parse rule set is most commonly used
to parse data from the statement line addenda field into more specific statement line fields. Each parse rule within a
parse rule set consists of the following fields:
• Sequence: Determines the order in which to process the rules.
• Transaction Code: The code used to determine the statement line type.
• Source Field: The interface table field that contains the data to be parsed.
• Target Field: The statement line field that the data is to be parsed to.
• Rule: Contains the syntax for determining the data within the source field to be parsed.
• Overwrite: Used to control whether to overwrite existing data in a target field or skip parsing the data.
The parse rule syntax is described in the following:
[LITERAL](<[MATCHING TOKEN],[START-END]>)[LITERAL]
Where
LITERAL represents a string or character value represented by an identifier that should match the source data exactly.
MATCHING TOKEN represents a token (or set of tokens) which describes the data to extract. The following table lists the
valid tokens with their descriptions:
Token Description
N
Extract a valid number
.
Decimal position
X
Extract an alphanumeric
~
Extract everything in the source field from the parse position to either the end of the data or up to the
next literal.
START
A position to begin extracting data, offset by the parse position. It must be a valid numeric.
END
A position to stop extracting data. END can be either a valid numeric or the ~ token.
328

Oracle Fusion Cloud Financials
Implementing Receivables Credit to Cash
Chapter 12
Define Cash Management and Banking Configuration
The following table lists some examples:
Description Source Data Rule Target Data
Extract numeric rate data from a
source field
EST/TRX RTE 3.76 USD/LIBOR
CPTY: PRU
RTE (N.NN)
3.76
Extract value date from a source
field
Dt.01/01/2011?Receipt
Dt.(1-10)?Receipt
01/01/2011
Extract check number from a
source field
Account Number 1005
Account Number.(X~)
1005
Extract currency from a source field
$^EUR:Dt
$^(1-3):Dt.
EUR
Extract the counterparty of an
unknown string length from the
same source field
EST/TRX RTE 3.76 USD/LIBOR
CPTY:PRU
CPTY: (X~)
PRU
Extract the currency from the
same source field using positional
matching
PRU EST/TRX RTE 3.76 USD/
LIBOR CPTY: PRU
RTE(7-9)
USD
Extract Contract ID from Additional
Entry Information
TXT:AR:Receipt
Num:CEF-1:For:2010$^USD:Dt.01/01/2011?
Receipt Method:CE-
Foreign:Receipt
Type:Standard:BU:Vision
Operations:Customer:World of
Business:Account No.1001
Account Number(NNNN)
1001
Extract Transaction ID from
Customer Reference
CustRef # A.23@orlc.com
CustRef (X~).com
# A.23@orlc
Overview of Transaction Type Mapping
The transaction type mapping enables you to associate a cash transaction type to an application transaction.
The following must be created to associate and mapped to cash transaction types:
• Oracle Fusion Account Payables payment methods
• Oracle Fusion Account Receivables payment methods
• Oracle Fusion Payroll payment types
Assigning cash transaction types to application transactions result in a more efficient bank statement reconciliation
process.
329

Oracle Fusion Cloud Financials
Implementing Receivables Credit to Cash
Chapter 12
Define Cash Management and Banking Configuration
Bank statement lines are also associated with cash transaction types and matching rules can be created using this
common attribute.
Overview of Tolerance Rules
Tolerance rules enables you to specify date and amount tolerances that prevent or warn you when reconciliation would
be a breach of a defined tolerance.
• Amount tolerances are most often used when reconciling foreign currency transactions where there may be
differences due to rounding or fluctuations in the conversion rate. They can also be used if a bank includes a
processing fee in the bank statement line amount.
• Date tolerances are primarily used for checks that may be issued on one day and not clear the bank until days
or weeks later.
Consider the following when defining your tolerance rules:
• Applying tolerances you can automate the reconciliation and accounting for these types of transactions.
• If no date or amount tolerance is defined within a rule, it requires an exact match.
• For manual reconciliation, a tolerance rule can optionally be assigned to a bank account.
• For automatic reconciliation, a tolerance rule can be associated with a matching rule in the Rule Set setup
and can be applied if the matching rule matches on date and amount or both. However, when you assign
a tolerance rule that includes amount tolerances to a matching rule that isn't a one to one match type, the
amount tolerance is ignored.
Date Tolerance
Reconciliation date tolerances are defined as day ranges. The date tolerances are to validate that the source transaction
date or dates are within a certain number of days before and after the bank statement line date or dates.
In manual reconciliation, if a date tolerance is specified in the tolerance rule assigned to the bank account it applies to all
matching scenarios. In the event of a date tolerance breach, a warning message is displayed, but the user is allowed to
reconcile the statement line or lines and the transaction or transactions. If no date tolerance is assigned or specified it's
required to be an exact date match and a warning message is displayed.
In automatic reconciliation, a tolerance rule that includes date tolerances can be associated with a matching rule. If the
matching rule matches on the date, then the date tolerance is applied. In this scenario a date tolerance breach prevents
reconciliation.
Amount Tolerance
Reconciliation amount tolerances can only be used in one to one matching scenarios for both manual and automatic
reconciliation. No reconciliation amount tolerances are allowed in one to many, many to one, or many to many matching
scenarios. In these scenarios the amount of the bank statement line or lines must be equal to the amount of the
transaction or transactions. Reconciliation amount tolerances can be defined as percentage or amount ranges or both.
If both percentages and amounts are applied, the application uses the most conservative tolerance depending upon the
statement line amount.
For example, if the amount tolerance equals plus or minus $5, the percentage tolerance equals plus or minus 1%, and
the statement line amount is $100, the application first calculates the percentage amount (1% of $100 dollars = $1). It
330

Oracle Fusion Cloud Financials
Implementing Receivables Credit to Cash
Chapter 12
Define Cash Management and Banking Configuration
then compares this to the $5 amount and uses the smaller amount. In this case it's $1 dollar, so to reconcile a transaction
to this line it must be between $99 and $101.
In automatic reconciliation, a tolerance rule that includes percentage, amount, or both types of tolerance ranges can be
associated with a matching rule. But the tolerance can only be applied if the matching rule is a one to one match type
rule. In this scenario of a one to one type match, any amount difference within tolerance is automatically created as an
external transaction in cash management.
Related Topics
•
Reconciliation Matching Rules
•
Overview of Reconciliation Rules Sets
Reconciliation Matching Rules
Reconciliation Matching rules help you match bank statement lines and system transactions to minimize the need for
manual intervention.
Define bank statement automatic reconciliation matching rules and assign them to bank statement automatic
reconciliation rule sets. After you assign the rule sets to the bank account, the Autoreconciliation process picks up the
reconciliation matching rules to achieve a higher match rate.
Specify the following for each matching rule:
• Transaction Sources: Payables, Receivables, Payroll, Journals, or External.
• Matching Type: One to One, One to Many, Many to One, Many to Many, or Zero Amount. The following table
explains the different matching types available in Oracle Fusion Cash Management:
Matching Type Description
One to One
A bank statement line is matched with a system transaction and reconciled against each other
One to Many
A bank statement line is reconciled against many system transactions
Many to One
Many bank statement lines are grouped and reconciled against a system transaction
Many to Many
Many statement lines are grouped and reconciled against many system transactions
Zero Amount
Zero amount system transactions not reported in bank statements
• Grouping Attributes: Used to group bank statement lines and system transactions based on the matching type
you select. The combination of the attributes you select also determine what you can use as the matching
criteria. You can use date, transaction type, and reconciliation reference as matching criteria only after you
select these as grouping attributes. The following table displays the required grouping attributes for a selected
matching type:
331

Oracle Fusion Cloud Financials
Implementing Receivables Credit to Cash
Chapter 12
Define Cash Management and Banking Configuration
Matching Type Statement Line Grouping Attributes System Transaction Grouping Attributes
One to One
Not applicable
Not applicable
One to Many
Not applicable
Grouping attributes required
Many to One
Grouping attributes required
Not applicable
Many to Many
Grouping attributes required
Grouping attributes required
Zero Amount
Not applicable
Not applicable
Note:
◦
During automatic reconciliation of zero amount system transactions, the transactions are
grouped by transaction date and transaction source selected in the reconciliation matching rule.
◦
The zero amount system transaction date is used as cleared date of the reconciliation group.
In Many to One matching, the grouping attributes are used to group bank statement lines. In One to Many
matching, the grouping attributes are used to group system transactions.
The following is a list of common grouping attributes that can be used to group bank statement lines:
◦
Transaction date
◦
Structured payment reference
◦
Transaction currency
◦
Transaction type
◦
Reconciliation reference
◦
Bank transaction code
◦
Transaction code identifier
◦
Counterparty bank account
◦
Value date
◦
Value date in string format
The following is a list of common grouping attributes that can be used to group system transactions:
◦
Bank deposit number
◦
Transaction date
◦
Business unit
◦
Counterparty bank account
332

Oracle Fusion Cloud Financials
Implementing Receivables Credit to Cash
Chapter 12
Define Cash Management and Banking Configuration
◦
Counterparty name
◦
Journal batch name
◦
Journal line description
◦
Journal name
◦
Payment file identifier
◦
Payment process request name
◦
Payment instruction identifier
◦
Payment server order number
◦
Logical group number
◦
Payment method
◦
Structured payment reference
◦
Receipt batch number
◦
Receipt class
◦
Reconciliation match date
◦
Reconciliation reference
◦
Remittance batch number
◦
Unique remittance identifier
◦
Transaction currency
◦
Transaction Type
◦
Transaction source
• Matching Criteria: Includes a list of commonly used matching attributes. You can simply select the attributes
to include them in the matching rule you selected. The selected attributes define the matching conditions
between the bank statement lines and the system transactions to be matched successfully when they're
reconciled.
Note: On the Create Reconciliation Matching Rule page, the delivered setting for the matching type is One to
One, and the check boxes for Reconciliation Reference, Date and Transaction Type are enabled. When you
change the matching type to One to Many, Many to One, or Many to Many, the check boxes are disabled.
The matching criteria attributes are:
◦
Amount
◦
Date
◦
Reconciliation reference
◦
Transaction type
333

Oracle Fusion Cloud Financials
Implementing Receivables Credit to Cash
Chapter 12
Define Cash Management and Banking Configuration
• Advanced Matching Criteria: Enables you to specify additional matching logic or filtering conditions that must
be true for the bank statement lines and system transactions to match successfully. Consider the following:
◦
You have the option to enable or disable the Case Sensitive Comparison check box while creating a
condition.
◦
The data types on either side of the expressions, must be the same and correspond to each other when
selected to match in the criteria. For example, if the attribute Statement Booking Date is selected on one
334

Oracle Fusion Cloud Financials
Implementing Receivables Credit to Cash
Chapter 12
Define Cash Management and Banking Configuration
side, then Transaction Date can be selected as the matching criteria. Date is the data type that's the same
and corresponds to your search.
◦
For literal expression type, the operand value should match the database value. For example:
Statement.Transaction Type equals ACH
The list of statement attributes available in the Create Condition page differs according to the matching type
you select. The following lists some of the common statement attributes:
◦
Statement.Account servicer reference
◦
Statement.Additional entry information
◦
Statement.Booking date
◦
Statement.Check number
◦
Statement.Clearing system reference
◦
Statement.Contract ID
◦
Statement.Counterparty bank account
◦
Statement.Customer reference
◦
Statement.End to End ID
◦
Statement.Instruction ID
◦
Statement.Reconciliation match amount
◦
Statement.Reconciliation reference
◦
Statement Structured Payment reference
◦
Statement.Transaction ID
◦
Statement.Transaction currency
◦
Statement.Transaction type
◦
Statement.Value date
◦
Statement.Value date in string format
The list of transaction attributes available in the Create Condition page differs according to the matching type
you select. The following lists some of the common transaction attributes:
◦
Transaction.Bank Deposit Number
◦
Transaction.Business Unit Identifier
◦
Transaction.Counterparty Bank Account Identifier
◦
Transaction.Counterparty Name
◦
Transaction.Counterparty Site
◦
Transaction.Journal Batch Name
◦
Transaction.Journal Line Description
◦
Transaction.Journal Line Number
◦
Transaction.Journal Name
◦
Transaction.Logical Group Number
◦
Transaction Payment Process Request Name
335

Oracle Fusion Cloud Financials
Implementing Receivables Credit to Cash
Chapter 12
Define Cash Management and Banking Configuration
◦
Transaction Payment Server Order Number
◦
Transaction Payment File Identifier
◦
Transaction Payment Instruction Identifier
◦
Transaction Payment or Receipt Method
◦
Transaction.Payment Reference
◦
Transaction.Receipt Batch Number
◦
Transaction.Receipt Class
◦
Transaction.Reconciliation Match Amount
◦
Transaction.Reconciliation Match Date
◦
Transaction.Reconciliation Reference
◦
Transaction.Remittance Batch Number
◦
Transaction Structured Payment Reference
◦
Transaction.Status
◦
Transaction.Transaction Currency
◦
Transaction.Transaction Date
◦
Transaction.Transaction Number
◦
Transaction.Transaction Source
◦
Transaction.Transaction Type
◦
Transaction.Unique Remittance Identifier
You can select one or multiple transaction sources in a rule. Consider the following:
• If multiple sources are selected in a one to one or many to one matching rule, the autoreconciliation program
looks for a matching transaction across the selected sources.
• If multiple sources are selected in a one to many or many to many matching rule, the program first finds all
available transactions across the selected sources and then applies grouping rule to the whole data pool. This
means that the statement lines can be reconciled to a group that includes transactions across the different
sources.
• If you want transactions included in a group to be from the same transaction source then you can specify
Transaction Source as a grouping attribute.
Note:
◦
Cash Management supports the journal reconciliation reference import using spreadsheet-
based tools such as, file-based data import and the Oracle Fusion ADF Desktop Integration.
◦
Once the required setups are completed the reconciliation reference is uploaded and stored to
the journal lines.
336

Oracle Fusion Cloud Financials
Implementing Receivables Credit to Cash
Chapter 12
Define Cash Management and Banking Configuration
Related Topics
•
Overview of Tolerance Rules
•
Overview of Reconciliation Rules Sets
•
Automatic Reconciliation
•
Set Up Clearing Accounts Reconciliation
•
Reconciliation References and Journal Lines
Overview of Reconciliation Rules Sets
Bank statement reconciliation rule sets are a group of matching rules and tolerance rules. They are assigned to a bank
account and used to reconcile bank statement lines with transactions.
Consider the following when creating your rules:
• Build the rule set and the rule set detail as a parent-child relationship.
• Each rule set consists of one or more matching rules that can be prioritized or sequenced.
• The rules should be ordered to achieve a greater reconciliation success rate. It's strongly recommended that
one to one rules be sequenced ahead of rules of other types.
• To provide an optimum reconciliation rate, you should change the sequence number depending on how
accurately the given rule is likely to reconcile against the correct bank transactions.
For example, transactions from sources for which the bank provides you a reference ID are likely to have a higher
reconciliation rate. These rules should be placed at the beginning with a lower sequence number. Conversely,
transactions with no reference ID are likely to have duplicates or lower reconciliation rates, and you should place them at
the end with a higher sequence number.
Automatically Reconciling Rejected Payments
You must enable the Opt in feature, Automatic Reconciliation of Reject Payments to automatically reconcile rejected
payments reported on the imported bank statement. Follow these steps to enable the feature:
• Select the transaction type as Reversal in the bank transaction code.
• The application identifies the rejections on the bank statement lines with this transaction code and reversal
indicator.
• The autoreconciliation process identifies the rejection and un-reconciles the original settled payment and
reconciles the original statement line with the rejected statement line.
Related Topics
•
Reconciliation Matching Rules
•
Overview of Tolerance Rules
337

Oracle Fusion Cloud Financials
Implementing Receivables Credit to Cash
Chapter 12
Define Cash Management and Banking Configuration
Overview of Bank Statement Transaction Codes
Bank statement transaction codes are the internal codes that are used on a bank statement line to identify the type of
transaction being reported. These are also referred to as:
• Transaction codes
• Statement codes
The following codes are examples:
• 115- Lockbox Deposit
• 475- Check paid
• 698- Miscellaneous Fee
Oracle Fusion Cash Management maintains a single set of these codes and transform externally reported transaction
codes from other formats into this single normalized set. You can use code map groups to map transaction codes
reported on the external data file to the ones defined internally in the application. This configuration is done through
Oracle Fusion Payments Code map group setup.
How You Map Configurable BAI2 Transaction Codes
When importing BAI2 bank statements, the flow indicator (DR/CR) of the bank statement line is determined by the
transaction code associated to that line.
Configurable BAI2 transaction codes can be mapped to standard BAI2 codes to derive the desired statement line flow
indicator when the file is imported.
Mapping Configurable BAI2 Transaction Codes
In this example, a credit code of 856 and a debit code of 868 are mapped as transaction codes using the following steps:
1. In the Setup and Maintenance work area, go to the following:
2. Offering: Financials
3. Functional Area: Payments or Customer Payments
4. Task: Manage Code Map Groups
5. Search for the Name: BAI2 Bank Statements and click edit.
6. In Mappings, enter a new record Field: CE_TRX_CODE.
7. For the parent CE_TRX_CODE, add 2 rows in the Field values enter the following:
Line Number Input and Output Values
Line 1
Enter Input Value: 856, Output Value: 275 (standard CREDIT BAI2 code).
Line 2
Enter Input Value: 868, Output Value: 575 (standard DEBIT BAI2 code).
338
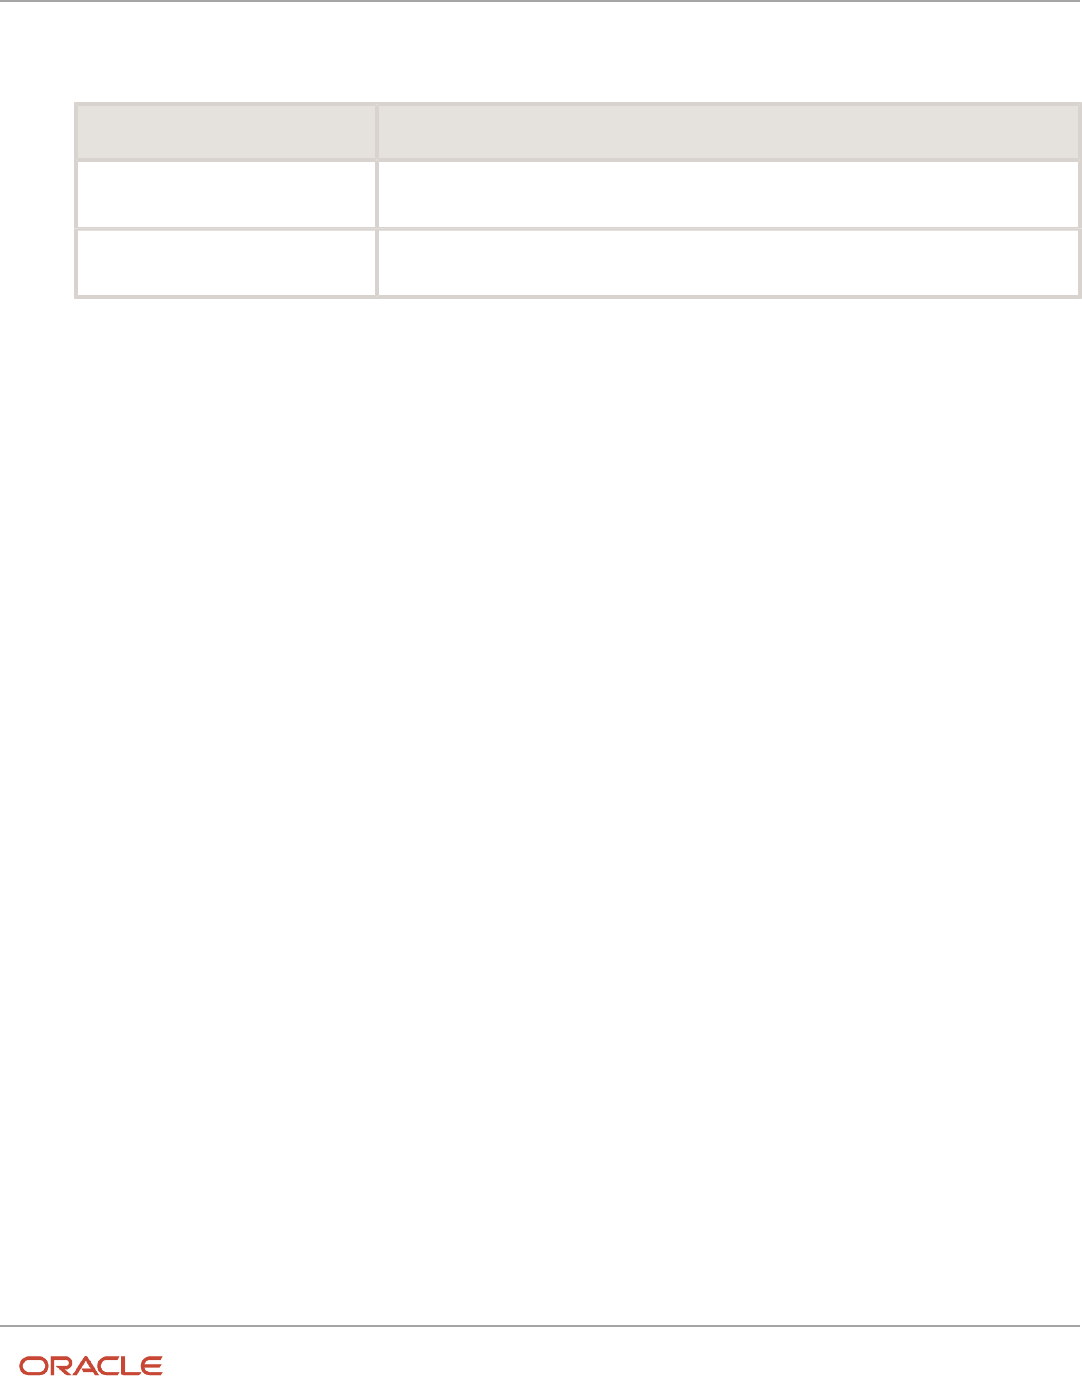
Oracle Fusion Cloud Financials
Implementing Receivables Credit to Cash
Chapter 12
Define Cash Management and Banking Configuration
8. Save and Close.
9. After loading and importing the BAI2 format bank statement, result in the following:
Transaction Code Results
Defined Input Value: 856
Are imported with code 275 and the flow indicator as CREDIT.
Defined Input Value: 868
Are imported with code 575 and the flow indicator as DEBIT.
How You Set Up Wildcard Support for Bank Statement
Processing Using UCM Protocol
You can retrieve multiple bank statements using the Universal Content Management (UCM) Protocol with a wildcard.
The capability to retrieve multiple files using a wildcard reduces the effort of downloading files individually. Support for
UCM protocol improves your integration capability with banks that use this protocol.
Setting up Wildcard Support for Bank Statement Processing Using UCM
Protocol
Here’s how you set up wildcard support:
1. Set up Transmission Configuration using the Universal Content Management Protocol:
a. In the Setup and Maintenance work area, go to the Manage Transmission Configuration task:
- Offering: Financials
- Functional Area: Payments
- Task: Manage Transmission Configuration
b. Select Universal Content Management Protocol from LOV
c. Click Create.
2. Upload bank statements to respective account in UCM:
a. Navigate to File Import and Export
b. Select the respective account
3. Run Process Electronic Bank Statements
4. During parameter selection, select transmission configuration created in step 1
Overview of Bank Statement Transaction Creation Rules
Bank Statement Transaction Creation Rules are used by Oracle Fusion Cash Management to identify an unreconciled
bank statement line or lines and create and account for a transaction.
339

Oracle Fusion Cloud Financials
Implementing Receivables Credit to Cash
Chapter 12
Define Cash Management and Banking Configuration
Configure Bank Statement Transaction Creation Rules by specifying some of the attributes and characteristics of the
created transactions. Consider the following when configuring your rules:
• Create as a separate business object.
• Assign to a bank account in the Manage Bank Account page.
• Arrange in order and group to be processed sequentially.
The group of sequenced rules on the bank account constitutes the bank accounts rule set that's used when running the
Bank Statement Transaction Creation program.
Process the Bank Statement Transaction Creation Rules by running the Bank Statement Transaction Creation
program to create transactions from unreconciled bank statement lines. The program is used to create transactions and
account for first notice items such as bank charges, fees, or interest. You must perform the following prior to running
the program.
• Run autoreconciliation for the bank statement.
• Perform any manual reconciliation on the bank statement.
This avoids creating external transaction from bank statement lines that already have transactions recorded in the
application.
Create Banks, Branches, and Accounts in Spreadsheet
Overview of Cash Management Rapid Implementation
Use Microsoft Excel templates to rapidly implement the following setup objects:
• Banks
• Bank Branches
• Bank Accounts
Functional Setup Manager Tasks
The following are the Functional Setup Manager tasks that are required to be performed to rapidly create the setup
objects data. To access these tasks, create an implementation project that includes the Define Financials Configuration
for Rapid Implementation task list:
• Create Banks, Branches, and Accounts in Spreadsheet: Downloads the rapid implementation excel spreadsheet
template. Enter the bank, branch, and bank account data in this spreadsheet, and generate the data file to be
loaded.
• Upload Banks, Branches, and Accounts: Launches the Upload Banks, Branches, and Accounts process with the
data file to be uploaded as the parameter. You must upload the data file generated from the previous task.
Preparing Data
Prepare your bank, branch, and account information to enter into the spreadsheet template.
• Bank information requires the country, name, and number.
• Branch information requires name, number, BIC code, and alternate name.
340

Oracle Fusion Cloud Financials
Implementing Receivables Credit to Cash
Chapter 12
Define Cash Management and Banking Configuration
• Account information requires name, number, currency, legal entity, type, and IBAN.
After you finish preparing the data in the spreadsheet, click the Generate Banks, Branches, and Accounts File button.
Save the generated XML file.
Loading Data
Use the following steps to load your data.
• In the Setup and Maintenance work area, create an implementation project that includes the Define Financials
Configuration for Rapid Implementation task list. From your implementation project, go to the Upload Banks,
Branches, and Accounts task. This task launches the Upload Banks, Branches, and Accounts process.
• Select the XML file you have saved earlier and submit the process.
• Verify in the process monitor that the process completed successfully.
• Review the banks, branches, and accounts created.
Best Practices
The following are recommended best practices:
• Determine the Legal Entity for each bank account. The Legal Entity must be associated to a primary ledger.
• Determine the use for each bank account: Payable, Receivable, or both.
• Determine the Cash and Cash Clearing account for each bank account. Enter the entire account combination
based on your chart of accounts, for example 01-000-1110-0000-000.
Related Topics
•
How You Process Electronic Bank Statements
Set Up Cash Positioning and Forecasting
How You Set Up Oracle Fusion Payments for Cash Management
To make ad hoc payments you must do the following:
• Create a payee in Oracle Fusion Cash Management.
• Review the Payment Methods in the tab; Usage Rules, for Cash Management in Oracle Fusion Payments.
• Review the payment method defaulting rules in Oracle Fusion Payments and prioritize the Cash Management
Payment Method accordingly.
Creating a payee in Cash Management is a separate task than setting up suppliers in procurement. The setup done in
Cash Management is strictly used for making ad hoc payments from the application. You must also review and edit the
set ups in Payments to successfully make payments.
Creating a Payee in Cash Management
1. Create the payee in Cash Management. Enter the following payee information:
341

Oracle Fusion Cloud Financials
Implementing Receivables Credit to Cash
Chapter 12
Define Cash Management and Banking Configuration
Field Required Description
Name
Yes
Name of the payee.
Tax Registration Number
No
Description of the payee.
Tax Registration Number
No
Unique identifier assigned to a payee by a
tax authority.
Active
No, but recommended.
Check box indicating if the payee is active or
inactive.
2. Create the bank account information. Enter the following bank account information:
Field Description
Country
Country of the bank where the bank account belongs.
Account Number
Bank account number of the payee bank account.
Currency
Currency of the payee bank account
Account Type
Type of payee bank account. For example, checking or savings.
Check Digit
The account number validation.
Account Name
Name of the bank account holder.
Secondary Account Reference
Additional account reference such as the Building Society Role Number in the UK.
Bank
Name of the payee bank.
Bank Branch
Name of the payee bank branch.
Routing Transit Number
The routing transit number for electronic transfers.
BIC Code
The code used to SWIFT to identify the bank or bank branch.
342

Oracle Fusion Cloud Financials
Implementing Receivables Credit to Cash
Chapter 12
Define Cash Management and Banking Configuration
Field Description
Active
Check to indicate the bank account is active. The default is set to active.
3. Click the Save and Close button to save your information.
Setting Up Usage Rules in Oracle Fusion Payments for Cash Management
1. Navigate to Oracle Fusion Payments and the Create Payment Methods page.
2. Enter the following required fields: Name, Code, and From Date.
3. Select the Usage Rules tab.
4. Select the Cash Management tab
5. Select the check box Enable for use in Cash Management.
6. Determine select All or Specific.
7. Review the delivered Payment Process Transaction Types for Cash Management. Apply the appropriate
payment types. The valid values are:
◦
Bank Account Transfer
◦
Ad Hoc Payment
8. Review the payment method defaulting rules in Oracle Fusion Payments and prioritize the Cash Management
Payment Method accordingly.
Related Topics
•
Payment Methods
•
Payment Method Defaulting
•
Usage Rules
How You Set Up Cash Positioning and Forecasting
Use the following to set up your cash positioning and forecasting reporting requirements:
• Specify Cash Positioning and Forecasting Options
• Manage Cash Positioning and Forecasting Transaction Grouping
Specify Cash Positioning and Forecasting Options
Use the options page to define the extraction period used to transfer data to the Essbase cube. Transactions with
transaction dates within that period are extracted to the cube. You can also select different GL accounting calendars to
lay out the time dimension structure in the cubes.
Configure the following options:
Field Name Available Values Default Value
Extraction Duration
• Last 3 months
• Last 6 months
Last 2 years
343

Oracle Fusion Cloud Financials
Implementing Receivables Credit to Cash
Chapter 12
Define Cash Management and Banking Configuration
Field Name Available Values Default Value
• Last 1 year
• Last 2 years
• Last 3 years
Reporting Currency
List of currencies defined in the application
USD - US Dollars
Balance Code
Internal Balance Codes lookups (LOV)
Closing booked
Balance Date Threshold Days
Number days defined before a missing bank
statement is reported
2
Transaction Calendar
List of transaction calendars defined in the
application, if not defined, everyday (7) is
considered a business day.
No default
Time Periods
List of accounting calendars defined in the
application
No default
Note: Once the cube is created and locked, the update is disabled in this page. You can't update the cube until you
submit the Cash Position Data Deletion program to clear the details in the cube.
Manage Cash Positioning and Forecasting Transaction Grouping
You create or edit configurable dimensions for cash positioning and forecasting from this page.
You must have the Manage Cash Positioning and Forecasting Transaction Grouping privilege
(ORA_CE_MANAGE_CASH_POSITIONING_AND_FORECASTING_TRANSACTION_GROUPING_PRIV) to access the Create
or Edit Cash Position Dimension page:
• Search for the configurable dimensions defined in the application.
• Create configurable dimensions to meet your company-specific requirements
• Modify and edit configurable dimensions to meet reporting requirements.
• Entering a description is optional but recommended.
The following table contains the fields to be completed:
Field Name Description
Name
Required and must be unique
Application
Required and valid values are Oracle Fusion Applications or Other.
Source
Required and the following are possible values:
• Payables invoices
344

Oracle Fusion Cloud Financials
Implementing Receivables Credit to Cash
Chapter 12
Define Cash Management and Banking Configuration
Field Name Description
• Payables payments
• Receivables receipts
• Receivables transactions
• Bank statement
• External cash transactions
Source Table
List of tables from the selected Application and Source
Source Column
List of the columns from the selected Source Table.
Note: Once the cube is created and locked, you can't update this page. You must submit the Cash Position Data
Deletion program to clear the details in the cube to do an update.
Related Topics
•
Overview of Cash Positioning and Forecasting
•
Cash Positioning
•
Considerations for Cash Forecasting
Bank Account Validation
Bank Account Validation by Country: Albania to Guatemala
This outlines the country specific bank account validation rules performed in Oracle Fusion Cash Management.
The following countries have country specific validations:
• Albania
• Algeria
• Andorra
• Argentina
• Australia
• Austria
• Azerbaijan
• Bahrain
• Belarus
• Belgium
• Bosnia and Herzegovina
• Brazil
345

Oracle Fusion Cloud Financials
Implementing Receivables Credit to Cash
Chapter 12
Define Cash Management and Banking Configuration
• British Virgin Islands
• Bulgaria
• Canada
• Colombia
• Costa Rica
• Croatia
• Cyprus
• Czech Republic
• Denmark
• Dominican Republic
• Egypt
• El Salvador
• Estonia
• Faroe Islands
• Finland
• France
• French Guiana
• Georgia
• Germany
• Gibraltar
• Greece
• Greenland
• Guadeloupe
• Guatemala
When entering bank accounts, different countries can have certain rules governing the format and content of the
following related fields:
1. Bank Code
2. Branch Number
3. Account Number
4. Check Digit
5. IBAN
Use the Disable Country Specific Bank Validations profile option to disable the country-specific validations pertaining
to the bank code, branch number, account number, check digit, and IBAN. You can set this profile option at the site
or user level. The profile is predefined with a default value of No at the site level. If the profile is set to Yes, these
validations aren't performed. The checks for unique banks, branches, accounts, and the mandatory requirement of bank
account number aren't affected by this profile.
Note: Mandatory IBAN validation is only valid for internal bank accounts. For external bank accounts, IBAN will be
optional except for employee bank accounts which are governed by country-specific UI rules.
For countries where the validations are not listed, the following default validations are applied.
Validation Rules
346

Oracle Fusion Cloud Financials
Implementing Receivables Credit to Cash
Chapter 12
Define Cash Management and Banking Configuration
The fields are checked for validity by adopting the following rules:
Field Rule
Bank Code
• Optional
Branch Number
• Optional
Account Number
• Mandatory
Check Digit
• Optional
IBAN
• Optional, if entered, the following rules apply.
• The modulus-97 rule is used to calculate the validity of the IBAN.
Albania
Validation Rules
The fields are checked for validity by adopting the following rules:
Field Rule
Bank Code
• Optional
Branch Number
• Optional
Account Number
• Mandatory
Check Digit
• Optional
IBAN
• Optional, if entered, the following rules apply.
• The modulus-97 rule is used to calculate the validity of the IBAN.
• Length can't be more than 28 characters. Spaces are removed from the left and right. Spaces in
the middle aren't removed.
• The first 2 characters are letters.
• The third and fourth characters are numbers.
Algeria
Validation Rules
The fields are checked for validity by adopting the following rules:
347

Oracle Fusion Cloud Financials
Implementing Receivables Credit to Cash
Chapter 12
Define Cash Management and Banking Configuration
Field Rule
Bank Code
• Optional
Branch Number
• Optional
Account Number
• Mandatory
Check Digit
• Optional
IBAN
• Optional, if entered, the following rules apply.
• The modulus-97 rule is used to calculate the validity of the IBAN.
• Length can't be more than 26 characters. Spaces are removed from the left and right. Spaces in
the middle aren't removed.
• The first 2 characters are letters.
• The third and fourth characters are numbers.
Andorra
Validation Rules
The fields are checked for validity by adopting the following rules:
Field Rule
Bank Code
• Optional
Branch Number
• Optional
Account Number
• Mandatory
Check Digit
• Optional
IBAN
• Optional, if entered, the following rules apply.
• The modulus-97 rule is used to calculate the validity of the IBAN.
• Length should be 24 characters. Spaces are removed from the left and right. Spaces in the middle
aren't removed.
• The first 2 characters are letters.
• The third and fourth characters are numbers.
Argentina
Validation Rules
The fields are checked for validity by adopting the following rules:
348

Oracle Fusion Cloud Financials
Implementing Receivables Credit to Cash
Chapter 12
Define Cash Management and Banking Configuration
Field Rule
Bank Code
• Optional
Branch Number
• Optional
Account Number
• Mandatory
• Length should be a maximum of 22 characters.
• Spaces and hyphens are allowed.
Check Digit
• Optional
IBAN
• Optional
Australia
Validation Rules
The fields are checked for validity by adopting the following rules:
Field Rule
Bank Code
• Optional
• If entered, the length should be either 2 or 3 numeric characters.
Branch Number
• Mandatory
• The combined length of the Branch Number and Bank Code should be 6 numeric characters.
Hence, the valid length values (3,4,6) depend upon the Bank Code (3,2,0).
• This field is labeled as Bank State Branch.
Account Number
• Mandatory
• Length should be between 5 to 10 characters.
• If the account currency is Australian Dollar, account number should be numeric. For foreign
currencies, alphanumeric values are allowed
Check Digit
• Optional
IBAN
• Optional, if entered, the following rules apply.
• The modulus-97 rule is used to calculate the validity of the IBAN.
• Length can't be more than 34 characters. Spaces are removed from the left and right. Spaces in
the middle aren't removed.
• The first 2 characters are letters.
• The third and fourth characters are numbers.
349

Oracle Fusion Cloud Financials
Implementing Receivables Credit to Cash
Chapter 12
Define Cash Management and Banking Configuration
Austria
Validation Rules
The fields are checked for validity by adopting the following rules:
Field Rule
Bank Code
• Optional
• Length should be of 5 numeric characters.
Branch Number
• Optional
• Length should be of 5 numeric characters.
Account Number
• Mandatory
• Length should be between 4 to 11 numeric characters.
Check Digit
• Optional
IBAN
• Mandatory
• If the IBAN isn't entered, a warning message is displayed: IBAN hasn't been entered. This bank
account is defined in a country that requires IBAN for payment processing.
• The modulus-97 rule is used to calculate the validity of the IBAN
• Length should be 20 characters. Spaces are removed from the left and right. Spaces in the middle
aren't removed.
• The first 2 characters are letters.
• The third and fourth characters are numbers.
Azerbaijan
Validation Rules
The fields are checked for validity by adopting the following rules:
Field Rule
Bank Code
• Optional
Branch Number
• Optional
Account Number
• Mandatory
Check Digit
• Optional
IBAN
• Optional, if entered, the following rules apply.
• The modulus-97 rule is used to calculate the validity of the IBAN.
350

Oracle Fusion Cloud Financials
Implementing Receivables Credit to Cash
Chapter 12
Define Cash Management and Banking Configuration
Field Rule
• Length can't be more than 28 characters. Spaces are removed from the left and right. Spaces in
the middle aren't removed.
• The first 2 characters are letters.
• The third and fourth characters are numbers.
Bahrain
Validation Rules
The fields are checked for validity by adopting the following rules:
Field Rule
Bank Code
• Optional
Branch Number
• Optional
Account Number
• Mandatory
Check Digit
• Optional
IBAN
• Optional, if entered, the following rules apply.
• The modulus-97 rule is used to calculate the validity of the IBAN.
• Length can't be more than 22 characters. Spaces are removed from the left and right. Spaces in
the middle aren't removed.
• The first 2 characters are letters.
• The third and fourth characters are numbers.
Belarus
Validation Rules
The fields are checked for validity by adopting the following rules:
Field Rule
Bank Code
• Optional
Branch Number
• Optional
Account Number
• Mandatory
Check Digit
• Optional
351

Oracle Fusion Cloud Financials
Implementing Receivables Credit to Cash
Chapter 12
Define Cash Management and Banking Configuration
Field Rule
IBAN
• Optional, if entered, the following rules apply.
• The modulus-97 rule is used to calculate the validity of the IBAN.
• Length can't be more than 28 characters. Spaces are removed from the left and right. Spaces in
the middle aren't removed.
• The first 2 characters are letters.
• The third and fourth characters are numbers.
Belgium
Validation Rules
The fields are checked for validity by adopting the following rules:
Field Rule
Bank Code
• Optional
Branch Number
• Optional
Account Number
• Mandatory
• Length should be of 12 numeric characters.
• It should be in the format 999-9999999-99.
• A check algorithm is applied on the Account Number.
Check Digit
• Optional
IBAN
• Mandatory
• If the IBAN isn't entered, a warning message is displayed: IBAN hasn't been entered. This bank
account is defined in a country that requires IBAN for payment processing.
• The modulus-97 rule is used to calculate the validity of the IBAN.
• Length should be 16 characters. Spaces are removed from the left and right. Spaces in the middle
aren't removed.
• The first 2 characters are letters.
• The third and fourth characters are numbers.
Check Algorithm for Account Number
1. The entered check digit CD1, is the last two digits of the Account Number
2. The calculated check digit CD2, is derived by concatenating the first two sections of the Account Number and
calculating the remainder on dividing this by 97. If the remainder is equal to 0, then the calculated check digit's
taken to be 97.
3. If the entered check digit (CD1) and calculated check digit (CD2) are equal, then the Account Number is valid,
else the check has failed.
352

Oracle Fusion Cloud Financials
Implementing Receivables Credit to Cash
Chapter 12
Define Cash Management and Banking Configuration
4. Additionally, if the entered check digit (that's, the last section) is '00', then the Account Number is invalid
because the calculated check digit can never be 00 as per the 3rd point.
Example using account number 123-4567890-78
◦
The entered check digit (CD1) is '78'. The concatenation of the first two sections gives '1234567890'
◦
Divide the result by '97'. 1234567890 / 97 = 12727504
◦
Derive the remainder. 1234567890 - (12727504 * 97) = 2 Therefore CD2 = 2
◦
Here CD1 <> CD2, therefore the Account Number isn't valid.
In this case, a valid Account Number would be '123456789-02'.
Bosnia and Herzegovina
Validation Rules
The fields are checked for validity by adopting the following rules:
Field Rule
Bank Code
• Optional
Branch Number
• Optional
Account Number
• Mandatory
Check Digit
• Optional
IBAN
• Mandatory
• If the IBAN isn't entered, a warning message is displayed: IBAN hasn't been entered. This bank
account is defined in a country that requires IBAN for payment processing.
• The modulus-97 rule is used to calculate the validity of the IBAN.
• Length should be 20 characters. Spaces are removed from the left and right. Spaces in the middle
aren't removed.
• The first 2 characters are letters.
• The third and fourth characters are numbers.
Brazil
Validation Rules
The fields are checked for validity by adopting the following rules:
Field Rule
Bank Code
• Mandatory
• Length should be a maximum of 3 numeric characters.
353

Oracle Fusion Cloud Financials
Implementing Receivables Credit to Cash
Chapter 12
Define Cash Management and Banking Configuration
Field Rule
• If the length is less than 3, then it's converted to a 3 digit number by prefixing it with as many
leading zeroes as is necessary.
Branch Number
• Mandatory
• Length should be a maximum of 5 numeric characters.
Account Number
• Mandatory
Check Digit
• Optional
Company Code
• Optional.
• This is entered in the Account Creation form.
• If entered, length should be a maximum of 15 numeric characters
Secondary Account Reference
• This field is labeled as Company Code.
IBAN
• Optional, if entered, the following rules apply.
• The modulus-97 rule is used to calculate the validity of the IBAN.
• Length can't be more than 29 characters. Spaces are removed from the left and right. Spaces in
the middle aren't removed.
• The first 2 characters are letters.
• The third and fourth characters are numbers.
British Virgin Islands
Validation Rules
The fields are checked for validity by adopting the following rules:
Field Rule
Bank Code
• Optional
Branch Number
• Optional
Account Number
• Mandatory
Check Digit
• Optional
IBAN
• Optional, if entered, the following rules apply.
• The modulus-97 rule is used to calculate the validity of the IBAN.
• Length can’t be more than 24 characters. Spaces are removed from the left and right. Spaces in
the middle aren't removed.
• The first 2 characters are letters.
354

Oracle Fusion Cloud Financials
Implementing Receivables Credit to Cash
Chapter 12
Define Cash Management and Banking Configuration
Field Rule
• The third and fourth characters are numbers.
Bulgaria
Validation Rules
The fields are checked for validity by adopting the following rules:
Field Rule
Bank Code
• Optional
Branch Number
• Optional
Account Number
• Mandatory
Check Digit
• Optional
IBAN
• Mandatory
• If the IBAN isn't entered, a warning message is displayed: IBAN hasn't been entered. This bank
account is defined in a country that requires IBAN for payment processing.
• The modulus-97 rule is used to calculate the validity of the IBAN.
• Length should be 22 characters. Spaces are removed from the left and right. Spaces in the middle
aren't removed.
• The first 2 characters are letters.
• The third and fourth characters are numbers.
Canada
Validation Rules
The fields are checked for validity by adopting the following rules:
Field Rule
Bank Code
• Optional
Branch Number
• Optional
• This field is labeled as Routing Transit Number.
Account Number
• Mandatory
Check Digit
• Optional
355

Oracle Fusion Cloud Financials
Implementing Receivables Credit to Cash
Chapter 12
Define Cash Management and Banking Configuration
Field Rule
IBAN
• Optional, if entered, the following rules apply.
• The modulus-97 rule is used to calculate the validity of the IBAN.
• Length can't be more than 34 characters. Spaces are removed from the left and right. Spaces in
the middle aren't removed.
• The first 2 characters are letters.
• The third and fourth characters are numbers.
Colombia
For Colombia, there are no validations for Bank Code, Branch Number, Account Number, or Check Digit fields as
illustrated in the following table:
Field Rule
Bank Code
• Optional
Branch Number
• Optional
Account Number
• Mandatory
Check Digit
• Optional
Tax Payer ID
• Optional
• Length should be a maximum of 15 numeric characters 14 digits for Tax Payer ID plus the last digit
for check digit.
• it's unique within the country.
• Cross Validations of Tax Payer ID in Customers, Suppliers, and Companies. If the Tax Payer ID is
used by a Customer, Supplier, or a Company, then the Customer name, Supplier name, or the
Company name should match with the Bank name.
• A check digit's applied on the Tax Payer ID.
IBAN
• Optional, if entered, the following rules apply.
• The modulus-97 rule is used to calculate the validity of the IBAN.
• Length can't be more than 34 characters. Spaces are removed from the left and right. Spaces in
the middle aren't removed.
• The first 2 characters are letters.
• The third and fourth characters are numbers.
Check Algorithm for Tax Payer ID
The first 15 digits are multiplied by the associated factor, as illustrated in the following table.
356

Oracle Fusion Cloud Financials
Implementing Receivables Credit to Cash
Chapter 12
Define Cash Management and Banking Configuration
Digit Factor
1st
71
2nd
67
3rd
59
4th
53
5th
47
6th
43
7th
41
8th
37
9th
29
10th
23
11th
19
12th
17
13th
13
14th
7
15th
3
1. These 15 products are added and the sum is divided by 11.
2. If the remainder is 1 or 0, then the Check Digit should be 1 or 0 respectively.
3. If the remainder isn't 1 or 0, then the remainder is subtracted by 11 and that should be the Check Digit.
Costa Rica
Validation Rules
The fields are checked for validity by adopting the following rules:
Field Rule
Bank Code
• Optional
357

Oracle Fusion Cloud Financials
Implementing Receivables Credit to Cash
Chapter 12
Define Cash Management and Banking Configuration
Field Rule
Branch Number
• Optional
Account Number
• Mandatory
Check Digit
• Optional
IBAN
• Optional, if entered, the following rules apply.
• The modulus-97 rule is used to calculate the validity of the IBAN.
• Length can't be more than 22 characters. Spaces are removed from the left and right. Spaces in
the middle aren't removed.
• The first 2 characters are letters.
• The third and fourth characters are numbers.
Croatia
Validation Rules
The fields are checked for validity by adopting the following rules:
Field Rule
Bank Code
• Optional
Branch Number
• Optional
Account Number
• Mandatory
Check Digit
• Optional
IBAN
• Mandatory
• If the IBAN isn't entered, a warning message is displayed: IBAN hasn't been entered. This bank
account is defined in a country that requires IBAN for payment processing.
• The modulus-97 rule is used to calculate the validity of the IBAN.
• Length should be 21 characters. Spaces are removed from the left and right. Spaces in the middle
aren't removed.
• The first 2 characters are letters.
• The third and fourth characters are numbers.
Cyprus
Validation Rules
358

Oracle Fusion Cloud Financials
Implementing Receivables Credit to Cash
Chapter 12
Define Cash Management and Banking Configuration
The fields are checked for validity by adopting the following rules:
Field Rule
Bank Code
• Optional
Branch Number
• Optional
Account Number
• Mandatory
Check Digit
• Optional
IBAN
• Mandatory
• If the IBAN isn't entered, a warning message is displayed: IBAN hasn't been entered. This bank
account is defined in a country that requires IBAN for payment processing.
• The modulus-97 rule is used to calculate the validity of the IBAN.
• Length should be 28 characters. Spaces are removed from the left and right. Spaces in the middle
aren't removed.
• The first 2 characters are letters.
• The third and fourth characters are numbers.
Czech Republic
Validation Rules
The fields are checked for validity by adopting the following rules:
Field Rule
Bank Code
• Optional
Branch Number
• Optional
Account Number
• Mandatory
Check Digit
• Optional
IBAN
• Mandatory
• If the IBAN isn't entered, a warning message is displayed: IBAN hasn't been entered. This bank
account is defined in a country that requires IBAN for payment processing.
• The modulus-97 rule is used to calculate the validity of the IBAN.
• Length should be 24 characters. Spaces are removed from the left and right. Spaces in the middle
aren't removed.
• The first 2 characters are letters.
359

Oracle Fusion Cloud Financials
Implementing Receivables Credit to Cash
Chapter 12
Define Cash Management and Banking Configuration
Field Rule
• The third and fourth characters are numbers.
Denmark
Validation Rules
The fields are checked for validity by adopting the following rules:
Field Rule
Bank Code
• Optional
Branch Number
• Optional
Account Number
• Length should be a maximum of 10 numeric characters
Check Digit
• Optional
IBAN
• Mandatory
• If the IBAN isn't entered, a warning message is displayed: IBAN hasn't been entered. This bank
account is defined in a country that requires IBAN for payment processing.
• The modulus-97 rule is used to calculate the validity of the IBAN.
• Length should be 18 characters. Spaces are removed from the left and right. Spaces in the middle
aren't removed.
• The first 2 characters are letters.
• The third and fourth characters are numbers.
Dominican Republic
Validation Rules
The fields are checked for validity by adopting the following rules:
Field Rule
Bank Code
• Optional
Branch Number
• Optional
Account Number
• Mandatory
Check Digit
• Optional
IBAN
• Optional, if entered, the following rules apply.
360

Oracle Fusion Cloud Financials
Implementing Receivables Credit to Cash
Chapter 12
Define Cash Management and Banking Configuration
Field Rule
• The modulus-97 rule is used to calculate the validity of the IBAN.
• Length can't be more than 28 characters. Spaces are removed from the left and right. Spaces in
the middle aren't removed.
• The first 2 characters are letters.
• The third and fourth characters are numbers.
Egypt
Validation Rules
The fields are checked for validity by adopting the following rules:
Field Rule
Bank Code
• Optional
Branch Number
• Optional
Account Number
• Mandatory
Check Digit
• Optional
IBAN
• Optional, if entered, the following rules apply.
• The modulus-97 rule is used to calculate the validity of the IBAN.
• Length can't be more than 29 characters. Spaces are removed from the left and right. Spaces in
the middle aren't removed.
• The first 2 characters are letters.
• The third and fourth characters are numbers.
El Salvador
Validation Rules
The fields are checked for validity by adopting the following rules:
Field Rule
Bank Code
• Optional
Branch Number
• Optional
Account Number
• Mandatory
361

Oracle Fusion Cloud Financials
Implementing Receivables Credit to Cash
Chapter 12
Define Cash Management and Banking Configuration
Field Rule
Check Digit
• Optional
IBAN
• Optional, if entered, the following rules apply.
• The modulus-97 rule is used to calculate the validity of the IBAN.
• Length can't be more than 28 characters. Spaces are removed from the left and right. Spaces in
the middle aren't removed.
• The first 2 characters are letters.
• The third and fourth characters are numbers.
Estonia
Validation Rules
The fields are checked for validity by adopting the following rules:
Field Rule
Bank Code
• Optional
Branch Number
• Optional
Account Number
• Mandatory
Check Digit
• Optional
IBAN
• Mandatory
• If the IBAN isn't entered, a warning message is displayed: IBAN hasn't been entered. This bank
account is defined in a country that requires IBAN for payment processing.
• The modulus-97 rule is used to calculate the validity of the IBAN.
• Length should be 20 characters. Spaces are removed from the left and right. Spaces in the middle
aren't removed.
• The first 2 characters are letters.
• The third and fourth characters are numbers.
Faroe Islands
Validation Rules
The fields are checked for validity by adopting the following rules:
Field Rule
Bank Code
• Optional
362

Oracle Fusion Cloud Financials
Implementing Receivables Credit to Cash
Chapter 12
Define Cash Management and Banking Configuration
Field Rule
Branch Number
• Optional
Account Number
• Mandatory
Check Digit
• Optional
IBAN
• Optional, if entered, the following rules apply.
• The modulus-97 rule is used to calculate the validity of the IBAN.
• Length can't be more than 18 characters. Spaces are removed from the left and right. Spaces in
the middle aren't removed.
• The first 2 characters are letters.
• The third and fourth characters are numbers.
Finland
Validation Rules
The fields are checked for validity by adopting the following rules:
Field Rule
Bank Code
• Optional
Branch Number
• Optional
• If entered, it should be 6 numeric characters.
Account Number
• Mandatory
• Length should be between 8 to 14 numeric characters.
• A check algorithm is applied on the Account Number.
Check Digit
• Optional
• If entered, it should be 1 numeric digit.
IBAN
• Mandatory
• If the IBAN isn't entered, a warning message is displayed: IBAN hasn't been entered. This bank
account is defined in a country that requires IBAN for payment processing.
• The modulus-97 rule is used to calculate the validity of the IBAN.
• Length should be 18 characters. Spaces are removed from the left and right. Spaces in the middle
aren't removed.
• The first 2 characters are letters.
• The third and fourth characters are numbers.
363

Oracle Fusion Cloud Financials
Implementing Receivables Credit to Cash
Chapter 12
Define Cash Management and Banking Configuration
If 1st digit of Account Number is: Check Value Method
1
1
2
1
3
1
4
2
5
2
6
1
7
2
8
1
9
1
Method 1
The check is formed in the following two parts:
• The first part of the check is formed from the first 6 digits of the Account Number. To illustrate, if the account
number is 123456789, then the first part of check would be created as 123456.
• The second part of check is formed as an eight digit value, comprising the 8th to 15th digits of the Account
Number. If the length is less than 8, then it's converted to an 8 digit number by prefixing it with as many
leading zeroes as is necessary. Using the same example, the second part of check would be created as
00000089. check is then formed by concatenating the two parts. So, in our example the check is formed as
12345600000089.
Method 2
The check is formed in the following three parts:
• The first part of the check is formed from the first 6 digits of the Account Number. To illustrate, if the account
number is 123456789, then the first part of check would be created as 123456.
• The second part of check is formed as the 8th digit of the Account Number. Using the same example, the
second part of check would be created as 8.
• The third part of check is formed as a seven digit value, comprising the 9th to 15th digits of the Account
Number. If the length is less than 7, then it's converted to a 7 digit number by prefixing it with as many leading
zeroes as is necessary. Using the same example, the second part of check would be created as 0000009.
The check is then formed by concatenating the three parts. So, in our example the check is formed as
12345680000009.
A computed sum is then calculated based on the value of the check. Different calculations are performed depending on
the first two digits of the formed check value.
364

Oracle Fusion Cloud Financials
Implementing Receivables Credit to Cash
Chapter 12
Define Cash Management and Banking Configuration
If the first two digits of the check are '88', then:
• The Finnish government provides the following factor table. The 8th to 13th digits of the check number are
multiplied by the associated factor. The computed sum is then calculated by summing the totals.
Digit Factor
8th
1
9th
3
10th
7
11th
1
12th
3
13th
7
Example using check number 88345600000089: Multiply the given digits with the given factor.
Digit Value Factor Result
8th Digit
0
1
0
9th Digit
0
3
0
10th Digit
0
7
0
11th Digit
0
7
0
12th Digit
0
3
0
13th Digit
8
7
56
Total
N/A
N/A
56
So the computed sum for this example is 56.
The test fails unless either of the following applies:
• The 14th digit of the check should equal the value of 10 minus the last digit of the computed sum. For the check
value is '88345600000089', the last digit of the computed sum is 6. So 10 - 6 = 4. So, the 14th digit of the check
should equal 4. The test fails here as the 14th digit's 9.
365

Oracle Fusion Cloud Financials
Implementing Receivables Credit to Cash
Chapter 12
Define Cash Management and Banking Configuration
• Both the 14th digit of the check and the last digit of the computed sum are 0. Using the same example, the test
fails here as both values aren't 0.
If the first two digits of the check aren't '88', then the computed sum is calculated for each of the first 13 digits by adding
the even numbered digits to the following calculated sum for each odd numbered digit :
• Multiply the digit by 2.
• Divide the result by 10.
• From the result add the integer to the remainder.
Example using account number 123456800000089:
Digit Value Multiply (a) Divide (b) Integer Remainder Result
1st
1
2
0.2
0
2
2
2nd
2
N/A
N/A
N/A
N/A
2
3rd
3
6
0.6
0
6
6
4th
4
N/A
N/A
N/A
N/A
4
5th
5
10
1
1
0
1
6th
6
N/A
N/A
N/A
N/A
6
7th
0
16
1.6
1
6
0
8th
0
N/A
N/A
N/A
N/A
0
9th
0
0
0
0
0
0
10th
0
N/A
N/A
N/A
N/A
0
11th
0
0
0
0
0
0
12th
0
N/A
N/A
N/A
N/A
0
13th
8
16
1.6
1
6
7
Total
N/A
N/A
N/A
N/A
N/A
28
366

Oracle Fusion Cloud Financials
Implementing Receivables Credit to Cash
Chapter 12
Define Cash Management and Banking Configuration
The computed sum is then converted using the following process, before being used to see if the Account Number is
valid:
1. Computed sum is added to 9.
2. The result is divided by 10.
3. The integer result is multiplied by 10.
4. The result is subtracted by the original computed sum.
So the computed sum '282 is converted to '2' as:
1. 28 + 9 = 37
2. 37/10 = 3.7. Integer result therefore = 3
3. 3 * 10 = 30
4. 30 - 28 = 2
This number is then compared to the 14th digit of the Account Number. If it matches, then the test is passed, else it's
failed.
In our example, the test fails as the 14th digit of the account number is 9. If the 14th digit had been 2, then the test would
have been passed.
France
Validation Rules
The fields are checked for validity by adopting the following rules:
Field Rule
Bank Code
• Mandatory
• Length should be a maximum of 5 numeric characters.
• If the length is less than 5, then it's converted to a 5 digit number by prefixing it with as many
leading zeroes as is necessary.
Branch Number
• Mandatory
• Length should be a maximum of 5 numeric characters.
• If the length is less than 5, then it's converted to a 5 digit number by prefixing it with as many
leading zeroes as is necessary.
Account Number
• Mandatory
• Length should be a maximum of 11 numeric characters
• Special characters and spaces aren't allowed
Check Digit
• Optional
• If entered, length should be a maximum of 2 numeric characters.
• A check algorithm is applied on the check digit.
Account Type
• This field is labeled as Deposit Type.
IBAN
• Mandatory
367

Oracle Fusion Cloud Financials
Implementing Receivables Credit to Cash
Chapter 12
Define Cash Management and Banking Configuration
Field Rule
• If the IBAN isn't entered, a warning message is displayed: IBAN hasn't been entered. This bank
account is defined in a country that requires IBAN for payment processing.
• The modulus-97 rule is used to calculate the validity of the IBAN.
• Length should be 27 characters. Spaces are removed from the left and right. Spaces in the middle
aren't removed.
• The first 2 characters are letters.
• The third and fourth characters are numbers.
Check Algorithm for Check Digit
A check digit's calculated (CD1) from the Account Number, Bank Code, and Branch Number in the following manner.
This is then used as the basis for the check digit validity test.
CDI
For the check algorithm, the digits of the Account Number entered as characters A to Z. are converted to numeric
values, the French government provides the following conversion table:
Value Conversion
A, J
1
B, K, S
2
C, L, T
3
D, M, U
4
E, N, V
5
F, O, W
6
G, P, X
7
H, Q, Y
8
I, R, Z
9
Example using account number A1234567890:
The letter A is converted by applying the table to 1, so the account number becomes 11234567890.
368

Oracle Fusion Cloud Financials
Implementing Receivables Credit to Cash
Chapter 12
Define Cash Management and Banking Configuration
A value for CD1 is formed by joining together the bank fields in the following way:
• The Bank Code is concatenated with Branch Number concatenated to the converted Account Number. To
illustrate with the Bank Code as 12345, the Branch Number as 67890 and the converted Account Number as
11234567890. Then CD1 is created as 123456789011234567890.
• To this concatenated value, 00 is added as a suffix and the resulting value is divided by 97. The remainder
obtained as result of this division is then subtracted from 97. The result of this subtraction is the calculated
check digit.
• In our example, suffixing 00 gives 12345678901123456789000. Dividing by 97 and deriving the remainder. Mod
(12345678901123456789000, 97) = 86 Subtract from 97. 97 - 86 = 11
• If the user entered Check Digit's equal to this calculated value, then the validation is successful.
In the given example, as the user entered check digit'sn't 11, the check isn't valid.
French Guiana
Validation Rules
The fields are checked for validity by adopting the following rules:
Field Rule
Bank Code
• Optional
Branch Number
• Optional
Account Number
• Mandatory
Check Digit
• Optional
IBAN
• Mandatory
• If the IBAN isn't entered, a warning message is displayed: IBAN hasn't been entered. This bank
account is defined in a country that requires IBAN for payment processing.
• The modulus-97 rule is used to calculate the validity of the IBAN.
• Length should be 34 characters. Spaces are removed from the left and right. Spaces in the middle
aren't removed.
• The first 2 characters are letters.
• The third and fourth characters are numbers.
Georgia
Validation Rules
The fields are checked for validity by adopting the following rules:
369

Oracle Fusion Cloud Financials
Implementing Receivables Credit to Cash
Chapter 12
Define Cash Management and Banking Configuration
Field Rule
Bank Code
• Optional
Branch Number
• Optional
Account Number
• Mandatory
Check Digit
• Optional
IBAN
• Optional, if entered, the following rules apply.
• The modulus-97 rule is used to calculate the validity of the IBAN.
• Length should be 24 characters. Spaces are removed from the left and right. Spaces in the middle
aren't removed.
• The first 2 characters are letters.
• The third and fourth characters are numbers.
Germany
Validation Rules
The fields are checked for validity by adopting the following rules:
Field Rule
Bank Code
• Optional
• If entered, then the length should be 8 numeric characters.
Branch Number
• Optional
• If entered, then the length should be 8 numeric characters.
• If the Bank Code and Branch Number are entered, then both values must match.
Account Number
• Mandatory
• Length should be a maximum of 10 numeric characters.
Check Digit
• Optional
• If a value is entered for the check digit, then it must be a single digit and must match the last digit
of the Account Number.
IBAN
• Mandatory
• If the IBAN isn't entered, a warning message is displayed: IBAN hasn't been entered. This bank
account is defined in a country that requires IBAN for payment processing.
• The modulus-97 rule is used to calculate the validity of the IBAN.
• Length should be 22 characters. Spaces are removed from the left and right. Spaces in the middle
aren't removed.
• The first 2 characters are letters.
370

Oracle Fusion Cloud Financials
Implementing Receivables Credit to Cash
Chapter 12
Define Cash Management and Banking Configuration
Field Rule
• The third and fourth characters are numbers.
Gibraltar
Validation Rules
The fields are checked for validity by adopting the following rules:
Field Rule
Bank Code
• Optional
Branch Number
• Optional
Account Number
• Mandatory
Check Digit
• Optional
IBAN
• Mandatory
• If the IBAN isn't entered, a warning message is displayed: IBAN hasn't been entered. This bank
account is defined in a country that requires IBAN for payment processing.
• The modulus-97 rule is used to calculate the validity of the IBAN.
• Length should be 23 characters. Spaces are removed from the left and right. Spaces in the middle
aren't removed.
• The first 2 characters are letters.
• The third and fourth characters are numbers.
Greece
Validation Rules
The fields are checked for validity by adopting the following rules:
Field Rule
Bank Code
• Optional
• If entered, then the length should be of 3 numeric characters.
Branch Number
• Optional
• If entered, then the length should be of 4 numeric characters.
Account Number
• Mandatory
• Length should be between 8 to 16 alphanumeric characters.
371

Oracle Fusion Cloud Financials
Implementing Receivables Credit to Cash
Chapter 12
Define Cash Management and Banking Configuration
Field Rule
Check Digit
• Optional
• If a value is entered, then it must be one numeric character.
IBAN
• Mandatory
• If the IBAN isn't entered, a warning message is displayed: IBAN hasn't been entered. This bank
account is defined in a country that requires IBAN for payment processing.
• The modulus-97 rule is used to calculate the validity of the IBAN.
• Length should be 27 characters. Spaces are removed from the left and right. Spaces in the middle
aren't removed.
• The first 2 characters are letters.
• The third and fourth characters are numbers.
Greenland
Validation Rules
The fields are checked for validity by adopting the following rules:
Field Rule
Bank Code
• Optional
Branch Number
• Optional
Account Number
• Mandatory
Check Digit
• Optional
IBAN
• Optional, if entered, the following rules apply.
• The modulus-97 rule is used to calculate the validity of the IBAN.
• Length can't be more than 18 characters. Spaces are removed from the left and right. Spaces in
the middle aren't removed.
• The first 2 characters are letters.
• The third and fourth characters are numbers.
Guadeloupe
Validation Rules
The fields are checked for validity by adopting the following rules:
372

Oracle Fusion Cloud Financials
Implementing Receivables Credit to Cash
Chapter 12
Define Cash Management and Banking Configuration
Field Rule
Bank Code
• Optional
Branch Number
• Optional
Account Number
• Mandatory
Check Digit
• Optional
IBAN
• Mandatory
• If the IBAN isn't entered, a warning message is displayed: IBAN hasn't been entered. This bank
account is defined in a country that requires IBAN for payment processing.
• The modulus-97 rule is used to calculate the validity of the IBAN.
• Length should be 34 characters. Leading and trailing spaces are ignored. There should be no
spaces in the middle. .
• The first 2 characters are letters.
• The third and fourth characters are numbers.
Guatemala
Validation Rules
The fields are checked for validity by adopting the following rules:
Field Rule
Bank Code
• Optional
Branch Number
• Optional
Account Number
• Mandatory
Check Digit
• Optional
IBAN
• Optional, if entered, the following rules apply.
• The modulus-97 rule is used to calculate the validity of the IBAN.
• Length can't be more than 28 characters. Spaces are removed from the left and right. Spaces in
the middle aren't removed.
• The first 2 characters are letters.
• The third and fourth characters are numbers.
373

Oracle Fusion Cloud Financials
Implementing Receivables Credit to Cash
Chapter 12
Define Cash Management and Banking Configuration
Related Topics
•
Bank Account Validation by Country: Hungary to Norway
•
Bank Account Validation by Country: Pakistan to the United States
Bank Account Validation by Country: Hungary to Norway
This outlines the country-specific bank account validation rules performed in Oracle Fusion Cash Management.
The following countries have country-specific validations:
• Hungary
• Iceland
• India
• Ireland
• Israel
• Iran
• Iraq
• Italy
• Ivory Coast
• Japan
• Jordan
• Kazakhstan
• Kosovo
• Kuwait
• Latvia
• Lebanon
• Liechtenstein
• Lithuania
• Luxembourg
• Malta
• Martinique
• Mauritania
• Mauritius
• Mayotte
• Mexico
• Moldova
• Monaco
• Montenegro
374

Oracle Fusion Cloud Financials
Implementing Receivables Credit to Cash
Chapter 12
Define Cash Management and Banking Configuration
• Morocco
• Netherlands
• New Zealand
• Norway
When entering bank accounts, different countries can have certain rules governing the format and content of the
following related fields:
1. Bank Code
2. Branch Number
3. Account Number
4. Check Digit
5. IBAN
Use the Disable Country Specific Bank Validations profile option to disable the country-specific validations pertaining
to the bank code, branch number, account number, check digit, and IBAN. You can set this profile option at the site
or user level. The profile is predefined with a default value of No at the site level. If the profile is set to Yes, these
validations aren't performed. The checks for unique banks, branches, accounts, and the mandatory requirement of bank
account number aren't affected by this profile.
Note: Mandatory IBAN validation is only valid for internal bank accounts. For external bank accounts, IBAN will be
optional except for employee bank accounts which are governed by country-specific UI rules.
Hungary
Validation Rules
The fields are checked for validity by adopting the following rules:
Field Rule
Bank Code
• Optional
Branch Number
• Optional
Account Number
• Mandatory
Check Digit
• Optional
IBAN
• Mandatory
• If the IBAN isn't entered, a warning message is displayed: IBAN hasn't been entered. This bank
account is defined in a country that requires IBAN for payment processing.
• The modulus-97 rule is used to calculate the validity of the IBAN
• Length should be 28 characters. Spaces are removed from the left and right. Spaces in the middle
aren't removed.
• The first 2 characters are letters.
• The third and fourth characters are numbers.
375

Oracle Fusion Cloud Financials
Implementing Receivables Credit to Cash
Chapter 12
Define Cash Management and Banking Configuration
Iceland
Validation Rules
The fields are checked for validity by adopting the following rules:
Field Rule
Bank Code
• Optional
• If entered, then the length should be of 4 numeric characters.
• If the length is less than 4, then it's converted to a 4 digit number by prefixing it with as many
leading zeroes as is necessary.
Branch Number
• Optional
• If entered, then the length should be of 4 numeric characters.
• If the Bank Code and Branch Number are entered, then both values must match.
Account Number
• Mandatory
• Length should be a maximum of 18 numeric characters.
• If the length is less than 18, then it's converted to an 18 digit number by prefixing it with as many
leading zeroes as is necessary.
• A check algorithm is applied on the Account Number.
Check Digit
• Optional
• If a value is entered for the check digit, then it must be a single digit and must match the
seventeenth digit of the Account Number.
IBAN
• Mandatory
• If the IBAN isn't entered, a warning message is displayed: IBAN hasn't been entered. This bank
account is defined in a country that requires IBAN for payment processing.
• The modulus-97 rule is used to calculate the validity of the IBAN
• Length should be 26 characters. Spaces are removed from the left and right. Spaces in the middle
aren't removed.
• The first 2 characters are letters.
• The third and fourth characters are numbers.
Check Algorithm for Account Number
1. Check algorithm is performed against the Account Number (from digit 9 to 16). Each of these digits is
multiplied with the factors as given in the following table:
Digit Factor
9th
3
10th
2
376

Oracle Fusion Cloud Financials
Implementing Receivables Credit to Cash
Chapter 12
Define Cash Management and Banking Configuration
Digit Factor
11th
7
12th
6
13th
5
14th
4
15th
3
16th
2
These products are added and the sum is divided by 11. The remainder obtained as a result of this division is subtracted
from 11 to obtain the calculated check digit. If remainder is 0, then calculated check digit is taken as 0.
This calculated check digit should match the entered check digit (seventeenth digit of the Account Number), else the
Account Number isn't valid.
India
Validation Rules
The fields are checked for validity by adopting the following rules:
Field Rule
Bank Code
• Optional
Branch Number
• Optional
• This field is labeled as the IFSC Code
Account Number
• Mandatory
Check Digit
• Optional
IBAN
• Optional, if entered, the following rules apply.
• The modulus-97 rule is used to calculate the validity of the IBAN.
• Length can't be more than 34 characters. Spaces are removed from the left and right. Spaces in
the middle aren't removed.
• The first 2 characters are letters.
• The third and fourth characters are numbers.
377

Oracle Fusion Cloud Financials
Implementing Receivables Credit to Cash
Chapter 12
Define Cash Management and Banking Configuration
Ireland
Validation Rules
The fields are checked for validity by adopting the following rules:
Field Rule
Bank Code
• Optional
• If entered, then the length should be of 6 numeric characters.
Branch Number
• Optional
• If entered, then the length should be of 6 numeric characters.
• If the Bank Code and Branch Number are entered, then both values must match.
Account Number
• Mandatory
• Length should be 8 numeric characters.
Check Digit
• Optional
IBAN
• Mandatory
• If the IBAN isn't entered, a warning message is displayed: IBAN hasn't been entered. This bank
account is defined in a country that requires IBAN for payment processing.
• The modulus-97 rule is used to calculate the validity of the IBAN
• Length should be 22 characters. Spaces are removed from the left and right. Spaces in the middle
aren't removed.
• The first 2 characters are letters.
• The third and fourth characters are numbers.
Israel
Validation Rules
The fields are checked for validity by adopting the following rules:
Field Rule
Bank Code
• Mandatory
• If entered, the length should be a maximum 2 numeric characters
Branch Number
• Mandatory
• Length should be 3 numeric characters.
Account Number
• Mandatory
• Length should be a maximum of 13 numeric characters.
• Spaces aren't allowed.
378

Oracle Fusion Cloud Financials
Implementing Receivables Credit to Cash
Chapter 12
Define Cash Management and Banking Configuration
Field Rule
Check Digit
• Optional
IBAN
• Optional, if entered, the following rules apply.
• The modulus-97 rule is used to calculate the validity of the IBAN.
• Length can't be more than 23 characters. Spaces are removed from the left and right. Spaces in
the middle aren't removed.
• The first 2 characters are letters.
• The third and fourth characters are numbers.
Iran
Validation Rules
The fields are checked for validity by adopting the following rules:
Field Rule
Bank Code
• Optional
Branch Number
• Optional
Account Number
• Mandatory
Check Digit
• Optional
IBAN
• Optional, if entered, the following rules apply.
• The modulus-97 rule is used to calculate the validity of the IBAN.
• Length can't be more than 26 characters. Spaces are removed from the left and right. Spaces in
the middle aren't removed.
• The first 2 characters are letters.
• The third and fourth characters are numbers.
Iraq
Validation Rules
The fields are checked for validity by adopting the following rules:
Field Rule
Bank Code
• Optional
Branch Number
• Optional
379

Oracle Fusion Cloud Financials
Implementing Receivables Credit to Cash
Chapter 12
Define Cash Management and Banking Configuration
Field Rule
Account Number
• Mandatory
Check Digit
• Optional
IBAN
• Optional, if entered, the following rules apply.
• The modulus-97 rule is used to calculate the validity of the IBAN.
• Length can't be more than 23 characters. Spaces are removed from the left and right. Spaces in
the middle aren't removed.
• The first 2 characters are letters.
• The third and fourth characters are numbers.
Italy
Validation Rules
The fields are checked for validity by adopting the following rules:
Field Rule
Bank Code
• Mandatory
• Length should be a maximum of 5 numeric characters.
Branch Number
• Mandatory
• Length should be a maximum of 5 numeric characters.
Account Number
• Mandatory
• Length should be a maximum of 12 alphanumeric characters.
• If the length is less than 12, then it's converted to a 12 digit number by prefixing it with as many
leading zeroes as is necessary.
Check Digit
• Optional
• If entered, length should be a single alphabetic character and a check algorithm is applied on the
Check Digit.
IBAN
• Mandatory
• If the IBAN isn't entered, a warning message is displayed: IBAN hasn't been entered. This bank
account is defined in a country that requires IBAN for payment processing.
• The modulus-97 rule is used to calculate the validity of the IBAN
• Length should be 27 characters. Spaces are removed from the left and right. Spaces in the middle
aren't removed.
• The first 2 characters are letters.
• The third and fourth characters are numbers.
380

Oracle Fusion Cloud Financials
Implementing Receivables Credit to Cash
Chapter 12
Define Cash Management and Banking Configuration
Check Algorithm for Check Digit
The check digit is used to validate against the Bank Code, Branch Number, and Account Number. These are
concatenated to obtain a 22 character string.
Each character is assigned a value depending upon whether the character is in an odd position or an even position in
the string as given in the following table:
Even Position Values Odd Position Values
A/0 = 0
A/0 = 1
B/1 = 1
B/1 = 0
C/2 = 2
C/2 = 5
D/3 = 3
D/3 = 7
E/4 = 4
E/4 = 9
F/5 = 5
F/5 = 13
G/6 = 6
G/6 = 15
H/7 = 7
H/7 = 17
I/8 = 8
I/8 = 19
J/9 = 9
J/9 = 21
K = 10
K = 2
L = 11
L = 4
M = 12
M = 18
N = 13
N = 20
O = 14
O = 11
P = 15
P = 3
Q = 16
Q = 6
R = 17 R = 8
381

Oracle Fusion Cloud Financials
Implementing Receivables Credit to Cash
Chapter 12
Define Cash Management and Banking Configuration
Even Position Values Odd Position Values
S = 18
S = 12
T = 19
T = 14
U = 20
U = 16
V = 21
V = 10
W = 22
W = 22
X = 23
X = 25
Y = 24
Y = 24
Z = 25
Z = 23
The first character is an odd position. The values assigned are added up and the sum is divided 26.
The remainder obtained as a result of this division is converted into an alphabet as given in the following table:
Transformation Algorithm
Calculation Calculation Calculation
0 = A
9 = J
18 = S
1 = B
10 = K
19 = T
2 = C
11 = L
20 = U
3 = D
12 = M
21 = V
4 = E
13 = N
22 = W
5 = F
14 = O
23 = X
6 = G
15 = P
24 = Y
7 = H
16 = Q
25 = Z
8 = I 17 = R N/A
382

Oracle Fusion Cloud Financials
Implementing Receivables Credit to Cash
Chapter 12
Define Cash Management and Banking Configuration
Calculation Calculation Calculation
This value should be the same as the user entered check digit or else the Check Digit validation fails.
Ivory Coast
Validation Rules
The fields are checked for validity by adopting the following rules:
Field Rule
Bank Code
• Optional
Branch Number
• Optional
Account Number
• Mandatory
Check Digit
• Optional
IBAN
• Optional, if entered, the following rules apply.
• The modulus-97 rule is used to calculate the validity of the IBAN.
• Length can't be more than 28 characters. Spaces are removed from the left and right. Spaces in
the middle aren't removed.
• The first 2 characters are letters.
• The third and fourth characters are numbers.
Japan
Validation Rules
The fields are checked for validity by adopting the following rules:
Field Rule
Bank Code
• Mandatory
• Length should be 4 numeric characters
Alternate Bank Name
• Optional
Branch Number
• Mandatory
• Length should be 3 numeric characters.
Alternate Branch Name
• Optional
383

Oracle Fusion Cloud Financials
Implementing Receivables Credit to Cash
Chapter 12
Define Cash Management and Banking Configuration
Field Rule
Account Number
• Mandatory
Account Type
• Mandatory
• This field is labeled as Deposit Type.
Check Digit
• Optional
IBAN
• Optional, if entered, the following rules apply.
• The modulus-97 rule is used to calculate the validity of the IBAN.
• Length can't be more than 34 characters. Spaces are removed from the left and right. Spaces in
the middle aren't removed.
• The first 2 characters are letters.
• The third and fourth characters are numbers.
Jordan
Validation Rules
The fields are checked for validity by adopting the following rules:
Field Rule
Bank Code
• Optional
Branch Number
• Optional
Account Number
• Mandatory
Check Digit
• Optional
IBAN
• Optional, if entered, the following rules apply.
• The modulus-97 rule is used to calculate the validity of the IBAN.
• Length can't be more than 30 characters. Spaces are removed from the left and right. Spaces in
the middle aren't removed.
• The first 2 characters are letters.
• The third and fourth characters are numbers.
Kazakhstan
Validation Rules
The fields are checked for validity by adopting the following rules:
384

Oracle Fusion Cloud Financials
Implementing Receivables Credit to Cash
Chapter 12
Define Cash Management and Banking Configuration
Field Rule
Bank Code
• Optional
Branch Number
• Optional
Account Number
• Mandatory
Check Digit
• Optional
IBAN
• Optional, if entered, the following rules apply.
• The modulus-97 rule is used to calculate the validity of the IBAN.
• Length can't be more than 20 characters. Spaces are removed from the left and right. Spaces in
the middle aren't removed.
• The first 2 characters are letters.
• The third and fourth characters are numbers.
Kosovo
Validation Rules
The fields are checked for validity by adopting the following rules:
Field Rule
Bank Code
• Optional
Branch Number
• Optional
Account Number
• Mandatory
Check Digit
• Optional
IBAN
• Optional, if entered, the following rules apply.
• The modulus-97 rule is used to calculate the validity of the IBAN.
• Length can't be more than 20 characters. Spaces are removed from the left and right. Spaces in
the middle aren't removed.
• The first 2 characters are letters.
• The third and fourth characters are numbers.
Kuwait
Validation Rules
The fields are checked for validity by adopting the following rules:
385

Oracle Fusion Cloud Financials
Implementing Receivables Credit to Cash
Chapter 12
Define Cash Management and Banking Configuration
Field Rule
Bank Code
• Optional
Branch Number
• Optional
Account Number
• Mandatory
• Length should be a maximum of 22 characters.
• Spaces and hyphens are allowed.
Check Digit
• Optional
IBAN
• Optional, if entered, the following rules apply.
• The modulus-97 rule is used to calculate the validity of the IBAN
• Length can't be more than 30 characters. Spaces are removed from the left and right. Spaces in
the middle aren't removed.
• The first 2 characters are letters.
Latvia
Validation Rules
The fields are checked for validity by adopting the following rules:
Field Rule
Bank Code
• Optional
Branch Number
• Optional
Account Number
• Mandatory
Check Digit
• Optional
IBAN
• Mandatory
• If the IBAN isn't entered, a warning message is displayed: IBAN hasn't been entered. This bank
account is defined in a country that requires IBAN for payment processing.
• The modulus-97 rule is used to calculate the validity of the IBAN
• Length should be 21 characters. Spaces are removed from the left and right. Spaces in the middle
aren't removed.
• The first 2 characters are letters.
• The third and fourth characters are numbers.
386

Oracle Fusion Cloud Financials
Implementing Receivables Credit to Cash
Chapter 12
Define Cash Management and Banking Configuration
Lebanon
Validation Rules
The fields are checked for validity by adopting the following rules:
Field Rule
Bank Code
• Optional
Branch Number
• Optional
Account Number
• Mandatory
Check Digit
• Optional
IBAN
• Optional, if entered, the following rules apply.
• The modulus-97 rule is used to calculate the validity of the IBAN.
• Length can't be more than 28 characters. Spaces are removed from the left and right. Spaces in
the middle aren't removed.
• The first 2 characters are letters.
• The third and fourth characters are numbers.
Liechtenstein
Validation Rules
The fields are checked for validity by adopting the following rules:
Field Rule
Bank Code
• Optional
Branch Number
• Optional
Account Number
• Mandatory
Check Digit
• Optional
IBAN
• Mandatory
• If the IBAN isn't entered, a warning message is displayed: IBAN hasn't been entered. This bank
account is defined in a country that requires IBAN for payment processing.
• The modulus-97 rule is used to calculate the validity of the IBAN
• Length should be 21 characters. Spaces are removed from the left and right. Spaces in the middle
aren't removed.
387

Oracle Fusion Cloud Financials
Implementing Receivables Credit to Cash
Chapter 12
Define Cash Management and Banking Configuration
Field Rule
• The first 2 characters are letters.
• The third and fourth characters are numbers.
Lithuania
Validation Rules
The fields are checked for validity by adopting the following rules:
Field Rule
Bank Code
• Optional
Branch Number
• Optional
Account Number
• Mandatory
Check Digit
• Optional
IBAN
• Mandatory
• If the IBAN isn't entered, a warning message is displayed: IBAN hasn't been entered. This bank
account is defined in a country that requires IBAN for payment processing.
• The modulus-97 rule is used to calculate the validity of the IBAN
• Length should be 20 characters. Spaces are removed from the left and right. Spaces in the middle
aren't removed.
• The first 2 characters are letters.
• The third and fourth characters are numbers.
Luxembourg
Validation Rules
The fields are checked for validity by adopting the following rules:
Field Rule
Bank Code
• Optional
• If entered, then the length should be 3 numeric characters.
Branch Number
• Optional
• If entered, then the length should be 3 numeric characters.
• If the Bank Code and Branch Number are entered, then both values must match.
Account Number
• Mandatory
388

Oracle Fusion Cloud Financials
Implementing Receivables Credit to Cash
Chapter 12
Define Cash Management and Banking Configuration
Field Rule
• Length should be a maximum of 13 characters.
Check Digit
• Optional
• If entered, then the length should be 2 numeric characters
IBAN
• Mandatory
• If the IBAN isn't entered, a warning message is displayed: IBAN hasn't been entered. This bank
account is defined in a country that requires IBAN for payment processing.
• The modulus-97 rule is used to calculate the validity of the IBAN
• Length should be 20 characters. Spaces are removed from the left and right. Spaces in the middle
aren't removed.
• The first 2 characters are letters.
• The third and fourth characters are numbers.
Malta
Validation Rules
The fields are checked for validity by adopting the following rules:
Field Rule
Bank Code
• Optional
Branch Number
• Optional
Account Number
• Mandatory
Check Digit
• Optional
IBAN
• Mandatory
• If the IBAN isn't entered, a warning message is displayed: IBAN hasn't been entered. This bank
account is defined in a country that requires IBAN for payment processing.
• The modulus-97 rule is used to calculate the validity of the IBAN
• Length should be 31 characters. Spaces are removed from the left and right. Spaces in the middle
aren't removed.
• The first 2 characters are letters.
• The third and fourth characters are numbers.
Martinique
Validation Rules
The fields are checked for validity by adopting the following rules:
389

Oracle Fusion Cloud Financials
Implementing Receivables Credit to Cash
Chapter 12
Define Cash Management and Banking Configuration
Field Rule
Bank Code
• Optional
Branch Number
• Optional
Account Number
• Mandatory
Check Digit
• Optional
IBAN
• Mandatory
• If the IBAN isn't entered, a warning message is displayed: IBAN hasn't been entered. This bank
account is defined in a country that requires IBAN for payment processing.
• The modulus-97 rule is used to calculate the validity of the IBAN
• Length should be 34 characters. Spaces are removed from the left and right. Spaces in the middle
aren't removed.
• The first 2 characters are letters.
• The third and fourth characters are numbers.
Mauritania
Validation Rules
The fields are checked for validity by adopting the following rules:
Field Rule
Bank Code
• Optional
Branch Number
• Optional
Account Number
• Mandatory
Check Digit
• Optional
IBAN
• Optional, if entered, the following rules apply.
• The modulus-97 rule is used to calculate the validity of the IBAN.
• Length can't be more than 27 characters. Spaces are removed from the left and right. Spaces in
the middle aren't removed.
• The first 2 characters are letters.
• The third and fourth characters are numbers.
Mauritius
Validation Rules
390

Oracle Fusion Cloud Financials
Implementing Receivables Credit to Cash
Chapter 12
Define Cash Management and Banking Configuration
The fields are checked for validity by adopting the following rules:
Field Rule
Bank Code
• Optional
Branch Number
• Optional
Account Number
• Mandatory
Check Digit
• Optional
IBAN
• Mandatory
• If the IBAN isn't entered, a warning message is displayed: IBAN hasn't been entered. This bank
account is defined in a country that requires IBAN for payment processing.
• The modulus-97 rule is used to calculate the validity of the IBAN
• Length should be 30 characters. Spaces are removed from the left and right. Spaces in the middle
aren't removed.
• The first 2 characters are letters.
• The third and fourth characters are numbers.
Mayotte
Validation Rules
The fields are checked for validity by adopting the following rules:
Field Rule
Bank Code
• Optional
Branch Number
• Optional
Account Number
• Mandatory
Check Digit
• Optional
IBAN
• Mandatory
• If the IBAN isn't entered, a warning message is displayed: IBAN hasn't been entered. This bank
account is defined in a country that requires IBAN for payment processing.
• The modulus-97 rule is used to calculate the validity of the IBAN
• Length should be 34 characters. Spaces are removed from the left and right. Spaces in the middle
aren't removed.
• The first 2 characters are letters.
391

Oracle Fusion Cloud Financials
Implementing Receivables Credit to Cash
Chapter 12
Define Cash Management and Banking Configuration
Field Rule
• The third and fourth characters are numbers.
Mexico
Validation Rules
The fields are checked for validity by adopting the following rules:
Field Rule
Bank Code
• Optional
Branch Number
• Optional
Account Number
• Mandatory
• Length should be between 10 to 11 numeric characters.
• Spaces and hyphens are allowed.
Check Digit
• Optional
IBAN
• Optional
Secondary Account Reference
• Optional
• If entered:
◦
Should be of 18 digits
◦
Should be numeric
Moldova
Validation Rules
The fields are checked for validity by adopting the following rules:
Field Rule
Bank Code
• Optional
Branch Number
• Optional
Account Number
• Mandatory
Check Digit
• Optional
392

Oracle Fusion Cloud Financials
Implementing Receivables Credit to Cash
Chapter 12
Define Cash Management and Banking Configuration
Field Rule
IBAN
• Optional, if entered, the following rules apply.
• The modulus-97 rule is used to calculate the validity of the IBAN.
• Length can't be more than 24 characters. Spaces are removed from the left and right. Spaces in
the middle aren't removed.
• The first 2 characters are letters.
• The third and fourth characters are numbers.
Monaco
Validation Rules
The fields are checked for validity by adopting the following rules:
Field Rule
Bank Code
• Optional
Branch Number
• Optional
Account Number
• Mandatory
Check Digit
• Optional
IBAN
• Mandatory
• If the IBAN isn't entered, a warning message is displayed: IBAN hasn't been entered. This bank
account is defined in a country that requires IBAN for payment processing.
• The modulus-97 rule is used to calculate the validity of the IBAN
• Length can't be more than 27 characters. Spaces are removed from the left and right. Spaces in
the middle aren't removed.
• The first 2 characters are letters.
• The third and fourth characters are numbers.
Montenegro
Validation Rules
The fields are checked for validity by adopting the following rules:
Field Rule
Bank Code
• Optional
393

Oracle Fusion Cloud Financials
Implementing Receivables Credit to Cash
Chapter 12
Define Cash Management and Banking Configuration
Field Rule
Branch Number
• Optional
Account Number
• Mandatory
Check Digit
• Optional
IBAN
• Mandatory
• If the IBAN isn't entered, a warning message is displayed: IBAN hasn't been entered. This bank
account is defined in a country that requires IBAN for payment processing.
• The modulus-97 rule is used to calculate the validity of the IBAN
• Length should be 22 characters. Spaces are removed from the left and right. Spaces in the middle
aren't removed.
• The first 2 characters are letters.
• The third and fourth characters are numbers.
Morocco
Validation Rules
The fields are checked for validity by adopting the following rules:
Field Rule
Bank Code
• Optional
Branch Number
• Optional
Account Number
• Mandatory
Check Digit
• Optional
IBAN
• Optional, if entered, the following rules apply.
• The modulus-97 rule is used to calculate the validity of the IBAN.
• Length can't be more than 28 characters. Spaces are removed from the left and right. Spaces in
the middle aren't removed.
• The first 2 characters are letters.
• The third and fourth characters are numbers.
Netherlands
Validation Rules
The fields are checked for validity by adopting the following rules:
394

Oracle Fusion Cloud Financials
Implementing Receivables Credit to Cash
Chapter 12
Define Cash Management and Banking Configuration
Field Rule
Bank Code
• Optional
Branch Number
• Optional
Account Number
• Mandatory
• Two types of account numbers are validated:
• If the bank account number is numeric and consists of one of the following then bank account will
be considered as Post or Giro Account.
◦
length is 7 digits or less, or
◦
prefixed with 000, or
◦
prefixed with P or G
There's no check digit validation for Post or Giro accounts.
• For other account numbers, the length should be between 9 and 10 numeric characters. A check
algorithm is applied on the Account Number.
Check Digit
• Optional
IBAN
• Mandatory
• If the IBAN isn't entered, a warning message is displayed: IBAN hasn't been entered. This bank
account is defined in a country that requires IBAN for payment processing.
• The modulus-97 rule is used to calculate the validity of the IBAN
• Length should be 18 characters. Spaces are removed from the left and right. Spaces in the middle
aren't removed.
• The first 2 characters are letters.
• The third and fourth characters are numbers.
Check Algorithm for Non-Post or Giro Account Number
1. If the length is less than 10, then it's converted to a 10 digit number by prefixing it with as many leading zeroes
as is necessary.
2. The Netherlands government provides the following factor table for each of the 10 digits:
Digit Factor
1st
10
2nd
9
3rd
8
4th
7
395

Oracle Fusion Cloud Financials
Implementing Receivables Credit to Cash
Chapter 12
Define Cash Management and Banking Configuration
Digit Factor
5th
6
6th
5
7th
4
8th
3
9th
2
10th
1
These are multiplied and the sum of the products is calculated 4.
If the result so obtained is perfectly divisible by 11 (that's, no remainder on division by 11), then the test is successful,
otherwise the account number entered isn't valid.
New Zealand
Validation Rules
The fields are checked for validity by adopting the following rules:
Field Rule
Bank Code
• Mandatory
• Length should be 2 numeric characters.
Branch Number
• Mandatory
• Length should be 4 numeric characters.
• This field is labeled Bank State Branch.
Account Number
• Mandatory
• Length should be a maximum of 8 numeric characters.
• Account Suffix should be between 2 to 4 numeric characters.
Check Digit
• Optional
Description
• This field is labeled Reference.
IBAN
• Optional, if entered, the following rules apply.
• The modulus-97 rule is used to calculate the validity of the IBAN.
• Length can't be more than 34 characters. Spaces are removed from the left and right. Spaces in
the middle aren't removed.
396

Oracle Fusion Cloud Financials
Implementing Receivables Credit to Cash
Chapter 12
Define Cash Management and Banking Configuration
Field Rule
• The first 2 characters are letters.
• The third and fourth characters are numbers.
Norway
Validation Rules
The fields are checked for validity by adopting the following rules:
Field Rule
Bank Code
• Optional
Branch Number
• Optional
Account Number
• Mandatory
• Length should be of 11 numeric characters.
• A check algorithm is applied on the Account Number, if the 5th and 6th digits of the account
number aren't 00.
For example, for Account Number, 1234001234, the check algorithm won't be applied but for Account
Number 02056439653, the check algorithm will be applied as outlined in the Check Algorithm for
Account Number, following this table.
Check Digit
• Optional
IBAN
• Mandatory
• If the IBAN isn't entered, a warning message is displayed: IBAN hasn't been entered. This bank
account is defined in a country that requires IBAN for payment processing.
• The modulus-97 rule is used to calculate the validity of the IBAN
• Length should be 15 characters. Spaces are removed from the left and right. Spaces in the middle
aren't removed.
• The first 2 characters are letters.
• The third and fourth characters are numbers.
Check Algorithm for Account Number
1. The check digit is set as the last (that's, the 11th digit) of the Account Number. For example, if the account number is
02056439653, then the check digit is set to 3.
2. The Norwegian government provides the following factor table:
Digit Factor
1st
5
397

Oracle Fusion Cloud Financials
Implementing Receivables Credit to Cash
Chapter 12
Define Cash Management and Banking Configuration
Digit Factor
2nd
4
3rd
3
4th
2
5th
7
6th
6
7th
5
8th
4
9th
3
10th
2
The first ten digits of the account number are multiplied by the associated factor. The computed sum is then calculated
by summing the totals.
3. Example using account number 02056439653:
Multiply each digit with the given factor. The following table illustrates the factors that determine validation:
Digit Value Factor Result
1st
0
5
0
2nd
2
4
8
3rd
0
3
0
4th
5
2
10
5th
6
7
42
6th
4
6
24
7th
3
5
15
8th
9
4
36
398
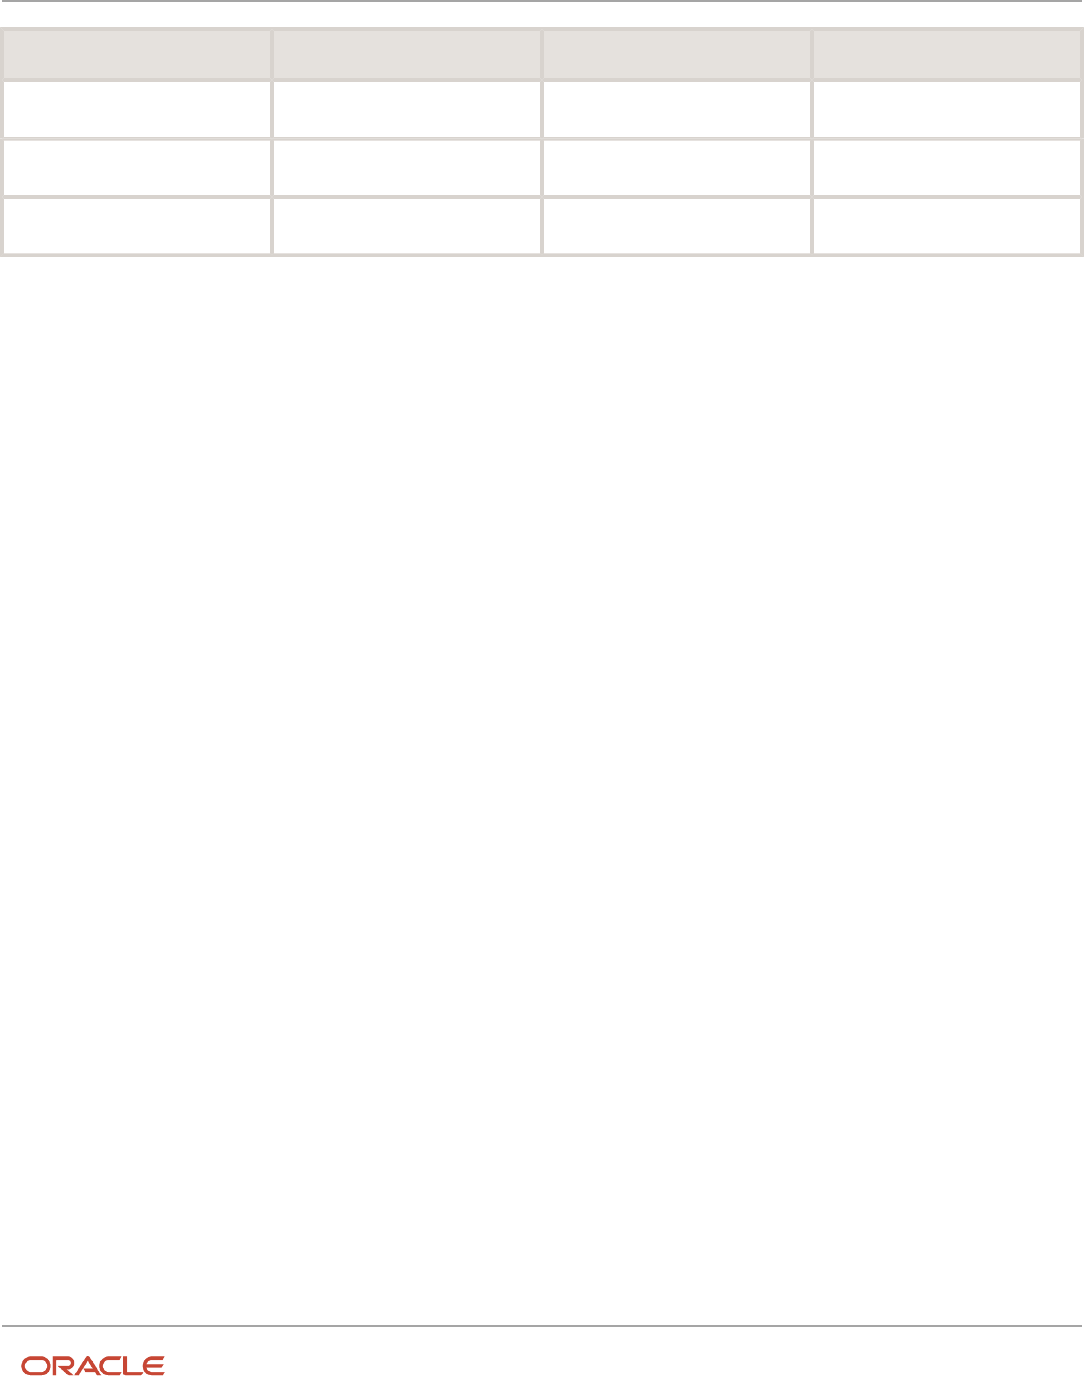
Oracle Fusion Cloud Financials
Implementing Receivables Credit to Cash
Chapter 12
Define Cash Management and Banking Configuration
Digit Value Factor Result
9th
6
3
18
10th
5
2
10
Total
N/A
N/A
163
So the computed sum for this example is 163.
4. The computed sum is then added to the check digit. In the example, 163 + 3 = 166.
5. Divide the result by 11. 166 / 11 = 15 6.
6. Derive the remainder. 166 - (11 * 15) = 1.
7. If the remainder is '0', then the validation is successful, else the check fails.
8. In the given example, the check fails the Account Number as the remainder is 1. If the 11th digit of the Account
Number was 2 (that's, the check digit would be 2), then the remainder would be 165 - (11 * 15) = 0 and the check on the
Account Number would be successful.
Related Topics
•
Bank Account Validation by Country: Albania to Guatemala
•
Bank Account Validation by Country: Pakistan to the United States
Bank Account Validation by Country: Pakistan to the United States
This outlines the country specific bank account validation rules performed in Oracle Fusion Cash Management.
The following countries have country specific validations:
• Pakistan
• Palestine
• Poland
• Portugal
• Qatar
• Reunion
• Romania
• Saint Barthelemy
• Saint Lucia
399

Oracle Fusion Cloud Financials
Implementing Receivables Credit to Cash
Chapter 12
Define Cash Management and Banking Configuration
• San Marino
• Saint Martin
• Saint Pierre and Miquelon
• Saudi Arabia
• Serbia
• Serbia and Montenegro
• Senegal
• Seychelles
• Singapore
• Slovakia
• Slovenia
• Spain
• Sweden
• Switzerland
• The Former Yugoslav Republic of Macedonia
• Tunisia
• Turkey
• Ukraine
• United Arab Emirates
• United Kingdom
• United States
When entering bank accounts, different countries can have certain rules governing the format and content of the
following related fields:
1. Bank Code
2. Branch Number
3. Account Number
4. Check Digit
5. IBAN
Use the Disable Country Specific Bank Validations profile option to disable the country-specific validations pertaining
to the bank code, branch number, account number, check digit, and IBAN. You can set this profile option at the site
or user level. The profile is predefined with a default value of No at the site level. If the profile is set to Yes, these
validations aren't performed. The checks for unique banks, branches, accounts, and the mandatory requirement of bank
account number aren't affected by this profile.
Note: Mandatory IBAN validation is only valid for internal bank accounts. For external bank accounts, IBAN will be
optional except for employee bank accounts which are governed by country-specific UI rules.
Pakistan
Validation Rules
The fields are checked for validity by adopting the following rules:
400

Oracle Fusion Cloud Financials
Implementing Receivables Credit to Cash
Chapter 12
Define Cash Management and Banking Configuration
Field Rule
Bank Code
• Optional
Branch Number
• Optional
Account Number
• Mandatory
Check Digit
• Optional
IBAN
• Optional, if entered, the following rules apply.
• The modulus-97 rule is used to calculate the validity of the IBAN.
• Length can't be more than 24 characters. Spaces are removed from the left and right. Spaces in
the middle aren't removed..
• The first 2 characters are letters.
Palestine
Validation Rules
The fields are checked for validity by adopting the following rules:
Field Rule
Bank Code
• Optional
Branch Number
• Optional
Account Number
• Mandatory
Check Digit
• Optional
IBAN
• Optional, if entered, the following rules apply.
• The modulus-97 rule is used to calculate the validity of the IBAN.
• Length can't be more than 29 characters. Spaces are removed from the left and right. Spaces in
the middle aren't removed.
• The first 2 characters are letters.
Poland
Validation Rules
The fields are checked for validity by adopting the following rules:
401

Oracle Fusion Cloud Financials
Implementing Receivables Credit to Cash
Chapter 12
Define Cash Management and Banking Configuration
Field Rule
Bank Code
• Optional
• If entered, the length should be of 8 numeric characters.
Branch Number
• Optional
• If entered, the length should be of 8 numeric characters.
• If the Bank Code and Branch Number are entered, then both values must match
Account Number
• Mandatory
• Length should be a maximum of 16 alphanumeric characters.
Check Digit
• Optional
IBAN
• Mandatory
• If the IBAN isn't entered, a warning message is displayed: IBAN hasn't been entered. This bank
account is defined in a country that requires IBAN for payment processing.
• The modulus-97 rule is used to calculate the validity of the IBAN
• Length should be 28 characters. Spaces are removed from the left and right. Spaces in the middle
aren't removed.
• The first 2 characters are letters.
• The third and fourth characters are numbers.
Portugal
Validation Rules
The fields are checked for validity by adopting the following rules:
Field Rule
Bank Code
• Mandatory
• Length should be of 4 numeric characters.
Branch Number
• Mandatory
• Length should be of 4 numeric characters.
Account Number
• Mandatory
• Length should be a maximum of 11 numeric characters.
Check Digit
• Optional
• Length should be of 2 numeric characters.
• If entered, a check algorithm is applied on the Check Digit.
IBAN
• Mandatory
• If the IBAN isn't entered, a warning message is displayed: IBAN hasn't been entered. This bank
account is defined in a country that requires IBAN for payment processing.
402

Oracle Fusion Cloud Financials
Implementing Receivables Credit to Cash
Chapter 12
Define Cash Management and Banking Configuration
Field Rule
• The modulus-97 rule is used to calculate the validity of the IBAN
• Length should be 25 characters. Spaces are removed from the left and right. Spaces in the middle
aren't removed.
• The first 2 characters are letters.
• The third and fourth characters are numbers.
Check Algorithm for Check Digit
• A check digit's formed (CD1) from the Bank Code, Branch Number, and Account Number by concatenating the
three numbers.
• For example, using Bank Code 1234, Branch Number 5678, and Account Number 12345678901. Then CD1 is set
as 1234567812345678901.
• The Portuguese government provides the following factor table:
Digit Factor
1st
73
2nd
17
3rd
89
4th
38
5th
62
6th
45
7th
53
8th
15
9th
50
10th
5
11th
49
12th
34
13th
81
403
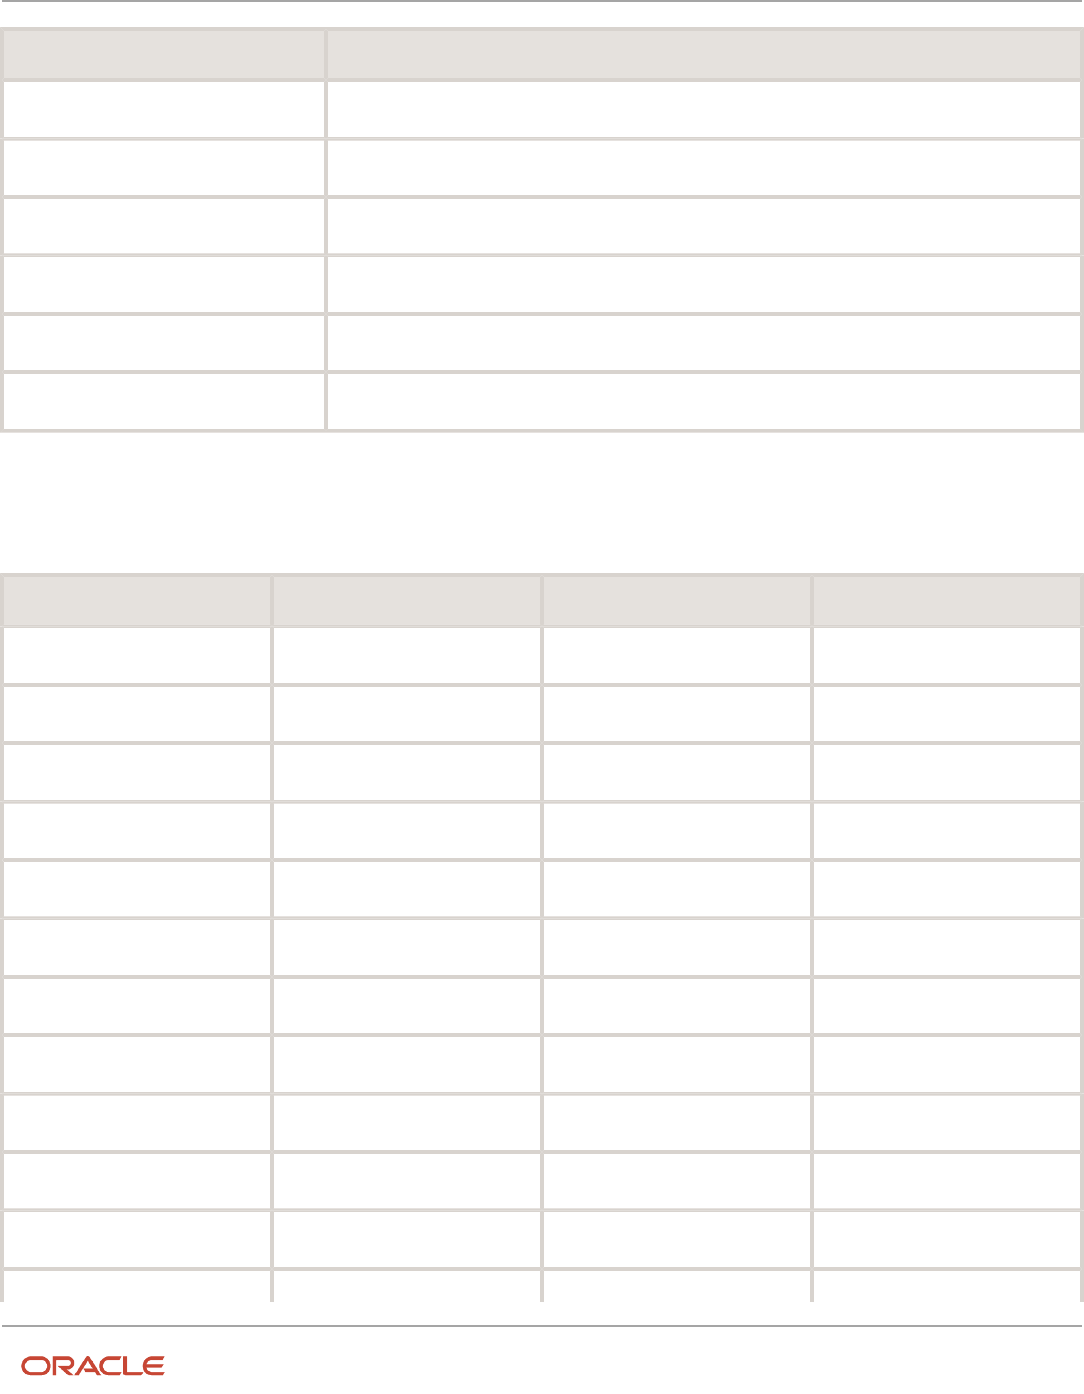
Oracle Fusion Cloud Financials
Implementing Receivables Credit to Cash
Chapter 12
Define Cash Management and Banking Configuration
Digit Factor
14th
76
15th
27
16th
90
17th
9
18th
30
19th
3
The nineteen digits of the created check digit (CD1) are multiplied by the associated factor. The multiple sum is then
calculated by summing the totals.
Example using the value for CD1:
Digit Value Factor Result
1st
1
73
73
2nd
2
17
34
3rd
3
89
267
4th
4
38
152
5th
5
62
310
6th
6
45
270
7th
7
53
371
8th
8
15
120
9th
1
50
50
10th
2
5
10
11th
3
49
147
12th 4 34 136
404

Oracle Fusion Cloud Financials
Implementing Receivables Credit to Cash
Chapter 12
Define Cash Management and Banking Configuration
Digit Value Factor Result
13th
5
81
405
14th
6
76
456
15th
7
27
189
16th
8
90
720
17th
9
9
81
18th
0
30
0
19th
1
3
3
Total
N/A
N/A
3794
• Divide the result by 97. 3794 / 97 = 39
• Derive the remainder. 3794 - (39 * 97) = 11
• CD1 is then derived by subtracting the remainder from 97. 97 - 11 = 86. So for this example CD1 = 86
• If the calculated value for CD1 isn't the same as the user entered check digit, then the check digit fails the
validation. In the given example, unless the user entered check digit's 86, the validation will fail.
Qatar
Validation Rules
The fields are checked for validity by adopting the following rules:
Field Rule
Bank Code
• Optional
Branch Number
• Optional
Account Number
• Mandatory
Check Digit
• Optional
IBAN
• Optional, if entered, the following rules apply.
• The modulus-97 rule is used to calculate the validity of the IBAN.
405

Oracle Fusion Cloud Financials
Implementing Receivables Credit to Cash
Chapter 12
Define Cash Management and Banking Configuration
Field Rule
• Length can't be more than 29 characters. Spaces are removed from the left and right. Spaces in
the middle aren't removed.
• The first 2 characters are letters.
Reunion
Validation Rules
The fields are checked for validity by adopting the following rules:
Field Rule
Bank Code
• Optional
Branch Number
• Optional
Account Number
• Mandatory
Check Digit
• Optional
IBAN
• Mandatory
• If the IBAN isn't entered, a warning message is displayed: IBAN hasn't been entered. This bank
account is defined in a country that requires IBAN for payment processing.
• The modulus-97 rule is used to calculate the validity of the IBAN
• Length can't be more than 34 characters. Spaces are removed from the left and right. Spaces in
the middle aren't removed.
• The first 2 characters are letters.
• The third and fourth characters are numbers.
Romania
Validation Rules
The fields are checked for validity by adopting the following rules:
Field Rule
Bank Code
• Optional
Branch Number
• Optional
Account Number
• Mandatory
Check Digit
• Optional
406

Oracle Fusion Cloud Financials
Implementing Receivables Credit to Cash
Chapter 12
Define Cash Management and Banking Configuration
Field Rule
IBAN
• Mandatory
• If the IBAN isn't entered, a warning message is displayed: IBAN hasn't been entered. This bank
account is defined in a country that requires IBAN for payment processing.
• The modulus-97 rule is used to calculate the validity of the IBAN
• Length should be 24 characters. Spaces are removed from the left and right. Spaces in the middle
aren't removed.
• The first 2 characters are letters.
• The third and fourth characters are numbers.
Saint Barthelemy
Validation Rules
The fields are checked for validity by adopting the following rules:
Field Rule
Bank Code
• Optional
Branch Number
• Optional
Account Number
• Mandatory
Check Digit
• Optional
IBAN
• Mandatory
• If the IBAN isn't entered, a warning message is displayed: IBAN hasn't been entered. This bank
account is defined in a country that requires IBAN for payment processing.
• The modulus-97 rule is used to calculate the validity of the IBAN
• Length can't be more than 34 characters. Spaces are removed from the left and right. Spaces in
the middle aren't removed.
• The first 2 characters are letters.
• The third and fourth characters are numbers.
Saint Lucia
Validation Rules
The fields are checked for validity by adopting the following rules:
Field Rule
Bank Code
• Optional
407

Oracle Fusion Cloud Financials
Implementing Receivables Credit to Cash
Chapter 12
Define Cash Management and Banking Configuration
Field Rule
Branch Number
• Optional
Account Number
• Mandatory
Check Digit
• Optional
IBAN
• Optional, if entered, the following rules apply.
• The modulus-97 rule is used to calculate the validity of the IBAN.
• Length can't be more than 32 characters. Spaces are removed from the left and right. Spaces in
the middle aren't removed.
• The first 2 characters are letters.
San Marino
Validation Rules
The fields are checked for validity by adopting the following rules:
Field Rule
Bank Code
• Optional
Branch Number
• Optional
Account Number
• Mandatory
Check Digit
• Optional
IBAN
• Mandatory
• If the IBAN isn't entered, a warning message is displayed: IBAN hasn't been entered. This bank
account is defined in a country that requires IBAN for payment processing.
• The modulus-97 rule is used to calculate the validity of the IBAN.
• Length can't be more than 27 characters. Spaces are removed from the left and right. Spaces in
the middle aren't removed.
• The first 2 characters are letters.
Saint Martin (French Section)
Validation Rules
The fields are checked for validity by adopting the following rules:
408
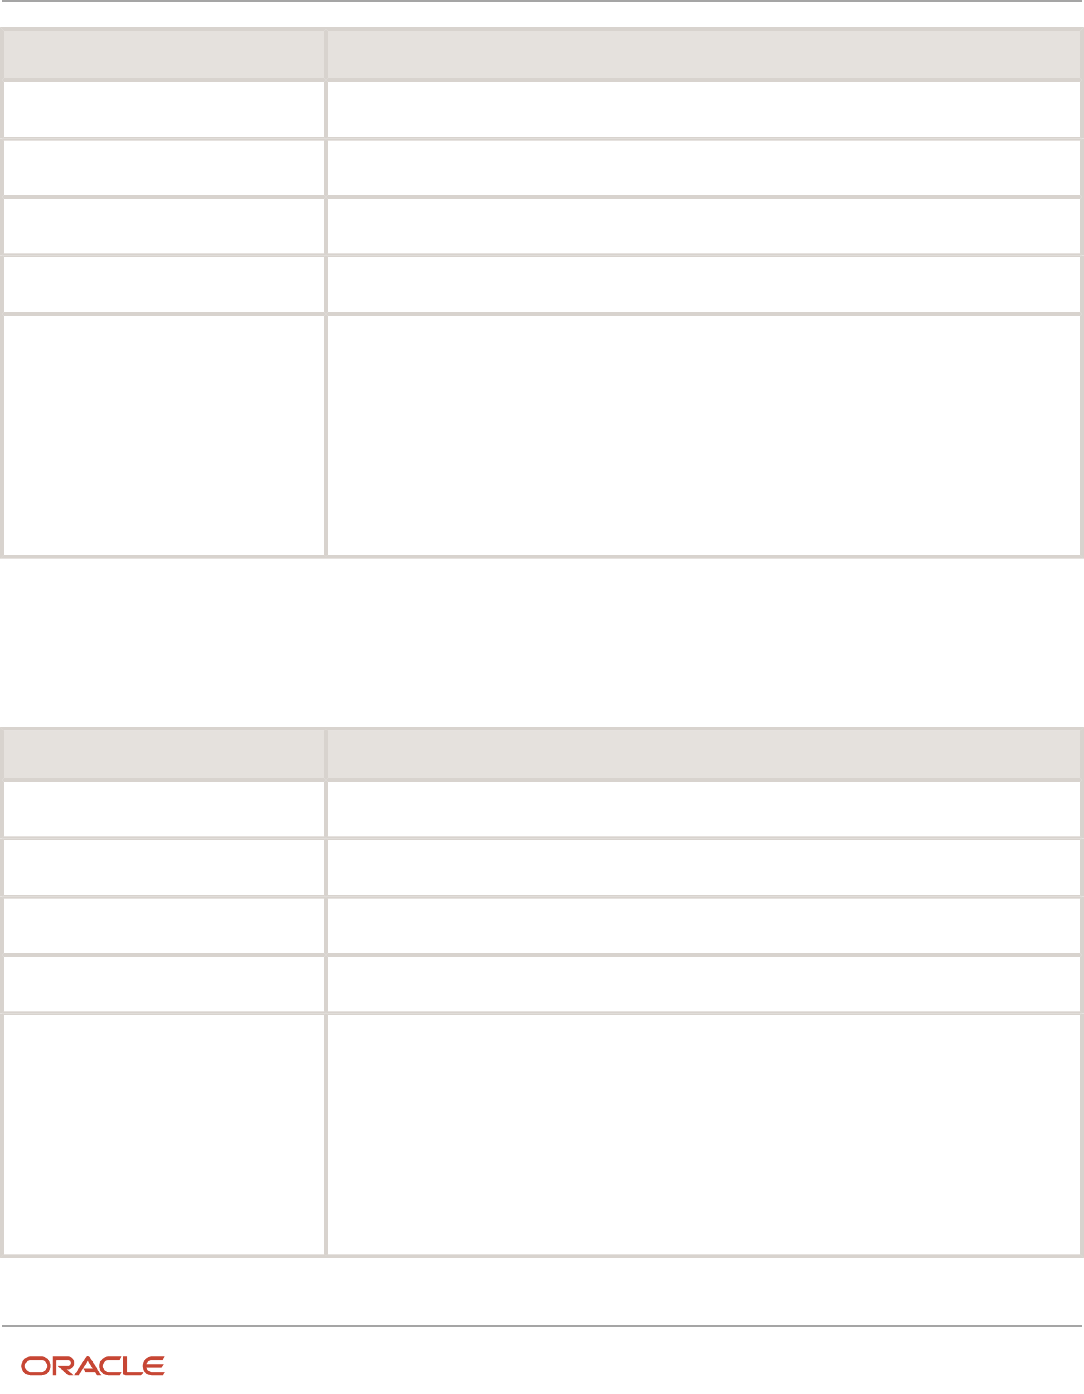
Oracle Fusion Cloud Financials
Implementing Receivables Credit to Cash
Chapter 12
Define Cash Management and Banking Configuration
Field Rule
Bank Code
• Optional
Branch Number
• Optional
Account Number
• Mandatory
Check Digit
• Optional
IBAN
• Mandatory
• If the IBAN isn't entered, a warning message is displayed: IBAN hasn't been entered. This bank
account is defined in a country that requires IBAN for payment processing.
• The modulus-97 rule is used to calculate the validity of the IBAN
• Length can't be more than 34 characters. Spaces are removed from the left and right. Spaces in
the middle aren't removed.
• The first 2 characters are letters.
• The third and fourth characters are numbers.
Saint Pierre and Miquelon
Validation Rules
The fields are checked for validity by adopting the following rules:
Field Rule
Bank Code
• Optional
Branch Number
• Optional
Account Number
• Mandatory
Check Digit
• Optional
IBAN
• Mandatory
• If the IBAN isn't entered, a warning message is displayed: IBAN hasn't been entered. This bank
account is defined in a country that requires IBAN for payment processing.
• The modulus-97 rule is used to calculate the validity of the IBAN
• Length can't be more than 34 characters. Spaces are removed from the left and right. Spaces in
the middle aren't removed.
• The first 2 characters are letters.
• The third and fourth characters are numbers.
409

Oracle Fusion Cloud Financials
Implementing Receivables Credit to Cash
Chapter 12
Define Cash Management and Banking Configuration
Saudi Arabia
Validation Rules
The fields are checked for validity by adopting the following rules:
Field Rule
Bank Code
• Optional
• If entered, then the length should be a maximum of 4 characters
Branch Number
• Optional
Account Number
• Mandatory
• Length should be a maximum of 25 characters.
Check Digit
• Optional
IBAN
• Optional, if entered the following rules apply.
• The modulus-97 rule is used to calculate the validity of the IBAN
• Length can't be more than 24 characters. Spaces are removed from the left and right. Spaces in
the middle aren't removed.
• The first 2 characters are letters.
Senegal
Validation Rules
The fields are checked for validity by adopting the following rules:
Field Rule
Bank Code
• Optional
Branch Number
• Optional
Account Number
• Mandatory
Check Digit
• Optional
IBAN
• Optional, if entered, the following rules apply.
• The modulus-97 rule is used to calculate the validity of the IBAN.
• Length can't be more than 28 characters. Spaces are removed from the left and right. Spaces in
the middle aren't removed.
• The first 2 characters are letters.
410

Oracle Fusion Cloud Financials
Implementing Receivables Credit to Cash
Chapter 12
Define Cash Management and Banking Configuration
Serbia
Validation Rules
The fields are checked for validity by adopting the following rules:
Field Rule
Bank Code
• Optional
Branch Number
• Optional
Account Number
• Mandatory.
Check Digit
• Optional
IBAN
• Optional, if entered, the following rules apply.
• The modulus-97 rule is used to calculate the validity of the IBAN.
• Length should be 22 characters. Spaces are removed from the left and right. Spaces in the middle
aren't removed.
• The first 2 characters are letters.
• The third and fourth characters are numbers.
Serbia and Montenegro
Validation Rules
The fields are checked for validity by adopting the following rules:
Field Rule
Bank Code
• Optional
Branch Number
• Optional
Account Number
• Mandatory
Check Digit
• Optional
IBAN
• Mandatory
• If the IBAN isn't entered, a warning message is displayed: IBAN hasn't been entered. This bank
account is defined in a country that requires IBAN for payment processing.
• The modulus-97 rule is used to calculate the validity of the IBAN
• Length can't be more than 34 characters. Spaces are removed from the left and right. Spaces in
the middle aren't removed.
411

Oracle Fusion Cloud Financials
Implementing Receivables Credit to Cash
Chapter 12
Define Cash Management and Banking Configuration
Field Rule
• The first 2 characters are letters.
• The third and fourth characters are numbers.
Seychelles
Validation Rules
The fields are checked for validity by adopting the following rules:
Field Rule
Bank Code
• Optional
Branch Number
• Optional
Account Number
• Mandatory
Check Digit
• Optional
IBAN
• Optional, if entered, the following rules apply.
• The modulus-97 rule is used to calculate the validity of the IBAN.
• Length can't be more than 31 characters. Spaces are removed from the left and right. Spaces in
the middle aren't removed.
• The first 2 characters are letters.
Singapore
Validation Rules
The fields are checked for validity by adopting the following rules:
Field Rule
Bank Code
• Mandatory
• Length should be 4 numeric characters.
Branch Number
• Mandatory
• Length should be 3 numeric characters.
Account Number
• Mandatory
Check Digit
• Optional
IBAN
• Optional, if entered, the rules following apply.
412

Oracle Fusion Cloud Financials
Implementing Receivables Credit to Cash
Chapter 12
Define Cash Management and Banking Configuration
Field Rule
• The modulus-97 rule is used to calculate the validity of the IBAN
• Length can't be more than 34 characters. Spaces are removed from the left and right. Spaces in
the middle aren't removed.
• The first 2 characters are letters.
• The third and fourth characters are numbers.
Slovakia
Validation Rules
The fields are checked for validity by adopting the following rules:
Field Rule
Bank Code
• Optional
Branch Number
• Optional
Account Number
• Mandatory
Check Digit
• Optional
IBAN
• Mandatory
• If the IBAN isn't entered, a warning message is displayed: IBAN hasn't been entered. This bank
account is defined in a country that requires IBAN for payment processing.
• The modulus-97 rule is used to calculate the validity of the IBAN
• Length can't be more than 24 characters. Spaces are removed from the left and right. Spaces in
the middle aren't removed.
• The first 2 characters are letters.
• The third and fourth characters are numbers.
Slovenia
Validation Rules
The fields are checked for validity by adopting the following rules:
Field Rule
Bank Code
• Optional
Branch Number
• Optional
Account Number
• Mandatory
413

Oracle Fusion Cloud Financials
Implementing Receivables Credit to Cash
Chapter 12
Define Cash Management and Banking Configuration
Field Rule
Check Digit
• Optional
IBAN
• Mandatory
• If the IBAN isn't entered, a warning message is displayed: IBAN hasn't been entered. This bank
account is defined in a country that requires IBAN for payment processing.
• The modulus-97 rule is used to calculate the validity of the IBAN
• Length can't be more than 19 characters. Spaces are removed from the left and right. Spaces in
the middle aren't removed.
• The first 2 characters are letters.
• The third and fourth characters are numbers.
Spain
Validation Rules
The fields are checked for validity by adopting the following rules:
Field Rule
Bank Code
• Mandatory
• Length should be a maximum of 4 numeric characters.
• If the bank code is less than 4 digits, then it's converted to a 4 digit number by prefixing it with as
many leading zeroes as is necessary.
Branch Number
• Mandatory
• Length should be a maximum of 4 numeric characters.
• If the bank code is less than 4 digits, then it's converted to a 4 digit number by prefixing it with as
many leading zeroes as is necessary.
Account Number
• Mandatory
• Length should be 10 numeric characters.
Check Digit
• Optional
• If entered, length should be a maximum of 2 numeric characters.
• A check algorithm is applied on the Check Digit.
IBAN
• Mandatory
• If the IBAN isn't entered, a warning message is displayed: IBAN hasn't been entered. This bank
account is defined in a country that requires IBAN for payment processing.
• The modulus-97 rule is used to calculate the validity of the IBAN
• Length should be 24 characters. Spaces are removed from the left and right. Spaces in the middle
aren't removed.
• The first 2 characters are letters.
414

Oracle Fusion Cloud Financials
Implementing Receivables Credit to Cash
Chapter 12
Define Cash Management and Banking Configuration
Field Rule
• The third and fourth characters are numbers.
Check Algorithm for Check Digit
Two check digits are calculated, CD1 from the Bank Code and Branch Number and CD2 from Account Number in the
following manner; these are then used as the basis for the check digit validity test:
CD1
1. For the Bank Code, the Spanish government provides the following factor table:
Digit Factor
1st
4
2nd
8
3rd
5
4th
10
The four digits of the Bank Code are multiplied by the associated factor. The computed sum is then calculated by
summing the totals.
Example using Bank Code '1234':
Multiply each digit with the given factor.
Digit Value Factor Result Digit Value Factor Result Digit Value Factor Result Digit Value Factor Result
1st
1
4
4
2nd
2
8
16
3rd
3
5
15
4th
4
10
40
Total
N/A
N/A
75
So the computed sum for this example is 75.
2. For the Branch Number, the Spanish government provides the following factor table:
415

Oracle Fusion Cloud Financials
Implementing Receivables Credit to Cash
Chapter 12
Define Cash Management and Banking Configuration
Digit Factor
1st
9
2nd
7
3rd
3
4th
6
The four digits of the Branch Number are multiplied by the associated factor. The computed sum is then calculated by
summing the totals.
Example using Branch Number '5678':
Multiply each digit with the given factor.
Digit Value Factor Result
1st
5
9
45
2nd
6
7
42
3rd
7
3
21
4th
8
6
48
Total
N/A
N/A
156
So the computed sum for this example is 156.
3. The computed sums from both the Bank Code and Branch Number calculations are then summed up. According to
the example, it's 75 + 156 = 231.
4. Divide the result by 11.
231 / 11 = 21
5. Derive the remainder
231 - (11 * 21) = 0.
6.CD1 is then derived by subtracting the remainder from 11. If difference is 11, then CD1 is 0 and if difference is 10, then
CD1 is 1 11 - 0 = 11. So for this example, CD1 = 11 = 0.
CD2
1. For the Account Number, the Spanish government provides the following factor table:
416

Oracle Fusion Cloud Financials
Implementing Receivables Credit to Cash
Chapter 12
Define Cash Management and Banking Configuration
Digit Factor
1st
1
2nd
2
3rd
4
4th
8
5th
5
6th
10
7th
9
8th
7
9th
3
10th
6
The ten digits of the bank number are multiplied by the associated factor. The computed sum is then calculated by
summing the totals.
Example using account number '1234567890':
Multiply each digit with the given factor.
Digit Value Factor Result
1st
1
1
1
2nd
2
2
4
3rd
3
4
12
4th
4
8
32
5th
5
5
25
6th
6
10
60
7th
7
9
63
417

Oracle Fusion Cloud Financials
Implementing Receivables Credit to Cash
Chapter 12
Define Cash Management and Banking Configuration
Digit Value Factor Result
8th
8
7
56
9th
9
3
27
10th
0
6
0
Total
N/A
N/A
280
So the computed sum for this example is 280.
2. Divide the result by 11
280 / 11 = 25
3. Derive the remainder.
280 - (11 * 25) = 5
4. CD2 is then derived by subtracting the remainder from 11. 11 - 5 = 6. So for this example CD2 = 6.
Check Digit Validity Test
The value in the user entered check digit field is compared to the calculated CD1 and CD2 using the following checks, if
both of the checks are true, then the validation is unsuccessful.
Check Description
1
CD1 is compared to the first digit of the entered check digit field.
2
CD2 is compared to the second digit of the entered check digit field.
Example of the test using the previously calculated CD1 and CD2:
Where CD1 = 0 and CD2 = 6 and suppose the user entered Check Digit Value is '05'. As CD2 does not match, the check
digit's invalid.
Sweden
Validation Rules
The fields are checked for validity by adopting the following rules:
Field Rule
Bank Code
• Optional
• If entered, then the length should be between 4 to 5 numeric characters.
418

Oracle Fusion Cloud Financials
Implementing Receivables Credit to Cash
Chapter 12
Define Cash Management and Banking Configuration
Field Rule
Branch Number
• Optional
• If entered, then the length should be between 4 to 5 numeric characters.
• If the Bank Code and Branch Number are entered, then both values must match.
Account Number
• Mandatory
• Length should be a maximum of 16 numeric characters.
Check Digit
• Optional
• Length should be a single numeric character.
IBAN
• Mandatory
• If the IBAN isn't entered, a warning message is displayed: IBAN hasn't been entered. This bank
account is defined in a country that requires IBAN for payment processing.
• The modulus-97 rule is used to calculate the validity of the IBAN
• Length should be 24 characters. Spaces are removed from the left and right. Spaces in the middle
aren't removed.
• The first 2 characters are letters.
• The third and fourth characters are numbers.
Switzerland
Validation Rules
The fields are checked for validity by adopting the following rules:
Field Rule
Bank Code
• Optional
• If entered, then the length should be between 3 to 5 numeric characters.
Branch Number
• Optional
• If entered, then the length should be between 3 to 9 numeric characters.
Account Number
• Mandatory
• Length should be a maximum of 17 numeric characters.
Check Digit
• Optional
Account Type
• Optional
IBAN
• Mandatory
• If the IBAN isn't entered, a warning message is displayed: IBAN hasn't been entered. This bank
account is defined in a country that requires IBAN for payment processing.
• The modulus-97 rule is used to calculate the validity of the IBAN
419

Oracle Fusion Cloud Financials
Implementing Receivables Credit to Cash
Chapter 12
Define Cash Management and Banking Configuration
Field Rule
• Length should be 21 characters. Spaces are removed from the left and right. Spaces in the middle
aren't removed.
• The first 2 characters are letters.
• The third and fourth characters are numbers.
The Former Yugoslav Republic of Macedonia
Validation Rules
The fields are checked for validity by adopting the following rules:
Field Rule
Bank Code
• Optional
Branch Number
• Optional
Account Number
• Mandatory
Check Digit
• Optional
IBAN
• Mandatory
• If the IBAN isn't entered, a warning message is displayed: IBAN hasn't been entered. This bank
account is defined in a country that requires IBAN for payment processing.
• The modulus-97 rule is used to calculate the validity of the IBAN
• Length should be 19 characters. Spaces are removed from the left and right. Spaces in the middle
aren't removed.
• The first 2 characters are letters.
• The third and fourth characters are numbers.
Tunisia
Validation Rules
The fields are checked for validity by adopting the following rules:
Field Rule
Bank Code
• Optional
Branch Number
• Optional
Account Number
• Mandatory.
420

Oracle Fusion Cloud Financials
Implementing Receivables Credit to Cash
Chapter 12
Define Cash Management and Banking Configuration
Field Rule
Check Digit
• Optional
IBAN
• Optional, if entered, the following rules apply.
• The modulus-97 rule is used to calculate the validity of the IBAN.
• Length should be 22 characters. Spaces are removed from the left and right. Spaces in the middle
aren't removed.
• The first 2 characters are letters.
• The third and fourth characters are numbers.
Turkey
Validation Rules
The fields are checked for validity by adopting the following rules:
Field Rule
Bank Code
• Optional
Branch Number
• Optional
Account Number
• Mandatory.
Check Digit
• Optional
IBAN
• Mandatory
• If the IBAN isn't entered, a warning message is displayed, IBAN hasn't been entered. This bank
account is defined in a country that requires IBAN for payment processing.
• The modulus-97 rule is used to calculate the validity of the IBAN.
• Length should be 26 characters. Spaces are removed from the left and right. Spaces in the middle
aren't removed.
• The first 2 characters are letters.
• The third and fourth characters are numbers.
Ukraine
Validation Rules
The fields are checked for validity by adopting the following rules:
Field Rule
Bank Code
• Optional
421
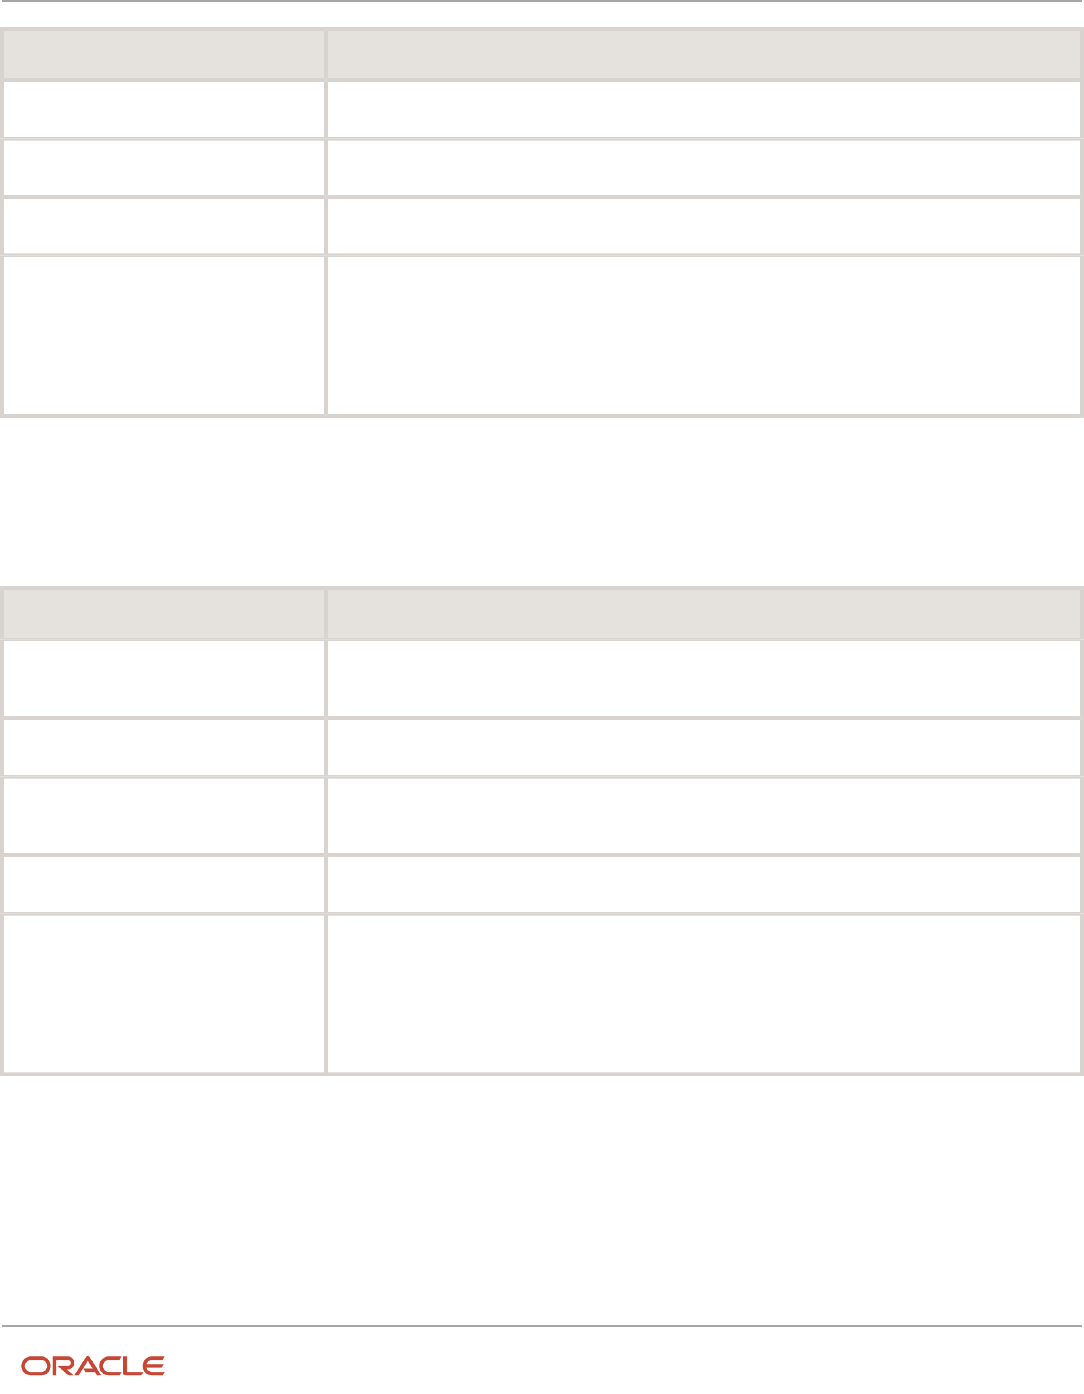
Oracle Fusion Cloud Financials
Implementing Receivables Credit to Cash
Chapter 12
Define Cash Management and Banking Configuration
Field Rule
Branch Number
• Optional
Account Number
• Mandatory
Check Digit
• Optional
IBAN
• Optional, if entered, the following rules apply.
• The modulus-97 rule is used to calculate the validity of the IBAN.
• Length can't be more than 29 characters. Spaces are removed from the left and right. Spaces in
the middle aren't removed.
• The first 2 characters are letters.
United Arab Emirates
Validation Rules
The fields are checked for validity by adopting the following rules:
Field Rule
Bank Code
• Optional
• If entered, the length should be a maximum of 4 characters.
Branch Number
• Optional
Account Number
• Mandatory
• Length should be a maximum of 21 characters.
Check Digit
• Optional
IBAN
• Mandatory
• The modulus-97 rule is used to calculate the validity of the IBAN.
• Length can't be more than 23 characters. Spaces are removed from the left and right. Spaces in
the middle aren't removed.
• The first 2 characters are letters.
United Kingdom
Validation Rules
The fields are checked for validity by adopting the following rules:
422

Oracle Fusion Cloud Financials
Implementing Receivables Credit to Cash
Chapter 12
Define Cash Management and Banking Configuration
Field Rule
Bank Code
• Optional
• If entered, then the length should be 6 numeric characters.
Branch Number
• Mandatory
• it's unique within the country.
• Length should be a maximum of 6 numeric characters.
• If the length is less than 6, then it's converted to a 6 digit number by prefixing it with as many
leading zeroes as is necessary.
• This field is labeled as Sort Code.
Account Number
• Mandatory
• Length should be between 7 to 8 characters.
• If the length is 7 characters, it's converted to 8 characters, by adding a zero as the lead or first
character.
Check Digit
• Optional
Secondary Account Reference
• Optional
• If entered, length should be a maximum of 18 characters.
• This field is labeled as Building Society Roll Number.
IBAN
• Mandatory
• If the IBAN isn't entered, a warning message is displayed, IBAN hasn't been entered. This bank
account is defined in a country that requires IBAN for payment processing.
• The modulus-97 rule is used to calculate the validity of the IBAN.
• Length should be 22 characters. Spaces are removed from the left and right. Spaces in the middle
aren't removed.
• The first 2 characters are letters.
• The third and fourth characters are numbers.
United States
Validation Rules
The fields are checked for validity by adopting the following rules:
Field Rule
Bank Code
• Optional.
Branch Number
• This field is labeled as Routing Transit Number.
• Length should be a maximum of 9 numeric characters.
• If the length is less than 9, then it's converted to a 9 digit number by prefixing it with as many
leading zeroes as is necessary.
423

Oracle Fusion Cloud Financials
Implementing Receivables Credit to Cash
Chapter 12
Define Cash Management and Banking Configuration
Field Rule
• Note that on padding the number to 9 digits, the first 8 digits can't be all zeroes.
• For example, 001 and 000007 are invalid Routing Transit Numbers because on padding to 9
digits, they become - 000000001, 000000007, and thus having 8 leading zeroes.
• A check algorithm is applied on the Routing Transit Number.
Account Number
• Mandatory
Check Digit
• Optional
IBAN
• Optional, if entered, the following rules apply.
• The modulus-97 rule is used to calculate the validity of the IBAN.
• Length can't be more than 34 characters. Spaces are removed from the left and right. Spaces in
the middle aren't removed.
• The first 2 characters are letters.
• The third and fourth characters are numbers.
Check Algorithm for Routing Transit Number
1. The ninth digit of the Number field is used to represent the Check Digit.
2. A calculated Check Digit's computed from the remaining 8 digits using Modulus 10 algorithm.
3. Multiply each digit in the Routing Transit Number by a weighting factor. The weighting factors for each digit
areas given in the following table:
Digit 1st 2nd 3rd 4th 5th 6th 7th 8th
Factor
3
7
1
3
7
1
3
7
• The digits of the Routing Transit Number are multiplied by the associated factor. The computed sum is then
calculated by summing the totals.
• Subtract the sum from the next highest multiple of 10. The result is the calculated Check Digit. This should be
the same as the 9th digit of the Branch Number or Routing Transit Number; otherwise the Branch Number or
Routing Transit Number is invalid.
For Example:
Routing
Number
0 7 6 4 0 1 2 5 Total
Multiply by
3
7
1
3
7
1
3
7
N/A
Sum
0
49
6
12
0
1
6
35
= 109
So the Check Digit = 1 (110 minus 109).
424

Oracle Fusion Cloud Financials
Implementing Receivables Credit to Cash
Chapter 12
Define Cash Management and Banking Configuration
In this example, the Routing Transit Number 076401251 passes validation.
Related Topics
•
Bank Account Validation by Country: Albania to Guatemala
•
Bank Account Validation by Country: Hungary to Norway
425

Oracle Fusion Cloud Financials
Implementing Receivables Credit to Cash
Chapter 12
Define Cash Management and Banking Configuration
426
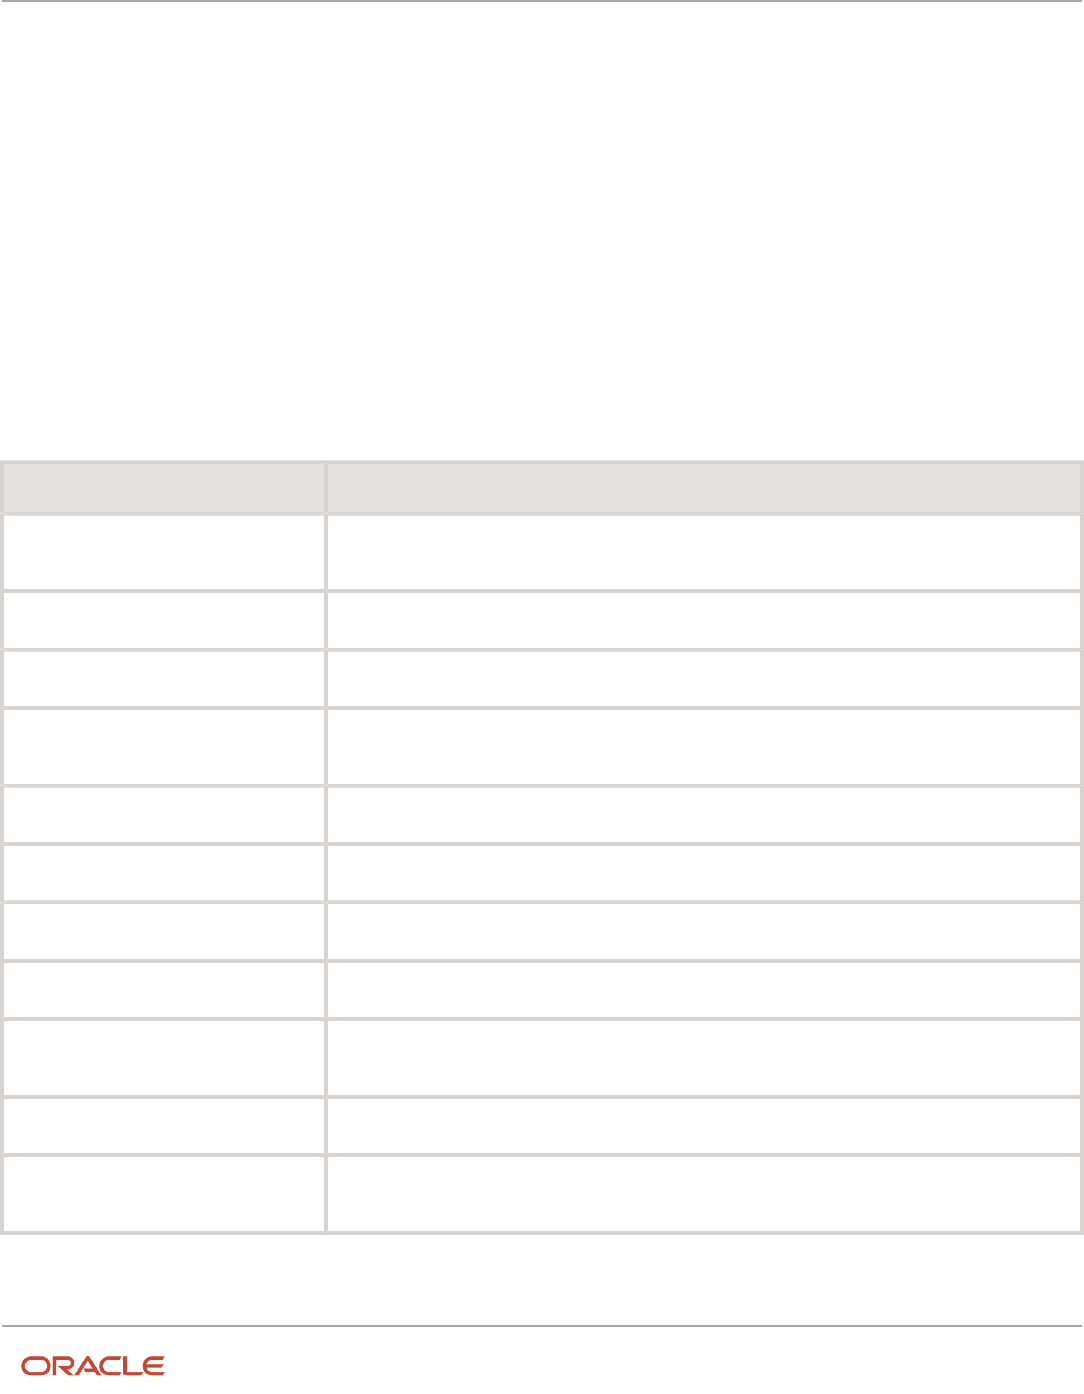
Oracle Fusion Cloud Financials
Implementing Receivables Credit to Cash
Chapter 13
Define Advanced Collections Configuration
13 Define Advanced Collections Configuration
Manage Collections Preferences
Guidelines for Setting Up Collections Preferences
Oracle Fusion Advanced Collections provides a user interface to guide you through the collection preferences. The two
required setup regions are: Global Preferences and Preferences.
You answer questions and make decisions about how the application functions, such as date ranges and defaults.
Consider the following decisions before defining preferences:
Decision Is This Oracle Fusion Applicable?
How many employees, locations and
organizations to create?
Yes, depends on the setup of the enterprise structure. Review and verify before setting up Advanced
Collections.
Which employees to create?
Yes, determine the number of employees who are involved with the collection process.
Assign collectors?
Yes, how are the collectors going to be assigned; by customer account, account, site or other criteria?
Set up Oracle Fusion Accounts
Receivables?
Yes, how's Receivables being set up and what's the impact on Advanced Collections.
Enable AR Transactions Summary Tables?
Yes, a profile option set in Receivables to update activities applied to transactions.
Set up Oracle Fusion Payments?
Yes, set up to use credit cards and automatic fund transfers to apply to transactions.
Set up Units of Measure?
Yes, a Receivables set up needed for transactions.
Set up Security and Users?
Yes, set up through Oracle Fusion Identity Management to grant access to collections.
Set up Notes?
Yes, is an Oracle Fusion Common Application Components (CAC) feature allowing collectors to
comment on interactions with customers.
Set up Tasks?
Yes, is a CAC feature allowing collectors or managers to assign follow-up tasks.
Set up Oracle Business Intelligence
Publisher?
Yes, but must be verified that Business Intelligence Publisher is working to run collection reports.
427

Oracle Fusion Cloud Financials
Implementing Receivables Credit to Cash
Chapter 13
Define Advanced Collections Configuration
Global Preferences
Selections made in the Global Preference region impact the view the collectors see from the Collections Customer Work
Area and Collections Dashboard. Global Preferences define the following:
• Default transaction class that appears
• Display of open transactions
• Display of closed transactions
• Number of days for prior and future transactions to be displayed
• Number of days to reschedule work on the dashboard
• Default aging method
• Delimiter used to separate data and the number of characters required to do a search
• Sender or return E-mail address for dunning correspondence
• Maximum grace days before a promise is broken
• Maximum number of days for a promise due date
• Enable bankruptcy
• Allow collector to update transaction attributes
Preferences
Selections made in the Preference region impact the defaults the collector encounters when going through the
collection process. Preferences define the following
• Preference set
• Collections business level
• Summarize or age credits
• default conversion rate
• Send method of dunning
• Default contact for unknown dunning recipients
Correspondence
Selections made in the Correspondence table impact the defaults the collector encounters when sending
correspondence during the collection process. Correspondence defines the following:
• Preference Set
• Send Dispute Notice
• Dispute Template
428

Oracle Fusion Cloud Financials
Implementing Receivables Credit to Cash
Chapter 13
Define Advanced Collections Configuration
• Send Payment Notice
• Payment Template
• Send Promise to Pay Notice
• Promise to Pay Template
Dunning Delivery Using Email
Use the Dunning Delivery Using Email section to configure the email body content of a dunning email. You can
configure the email body content in the Email Body field by selecting the Dunning Letter Templates from the Dunning
Letter Template drop-down list.
You can create the message with enhanced rich text content in the email body. You can choose various fonts, modify
font size and style, and insert logos and links using HTML. The enhanced content improves the user experience for
customers who receive dunning letters as an email attachment.
Note: If you've a custom data model, then replace it with the predefined Collections Send Dunning Letters data
model to use this feature.
Define Collections Preferences
This example demonstrates how to set preferences for Oracle Fusion Advanced Collections.
You have been tasked to set up the two sections for preferences: Global and Preferences. Configure your preferences
based on the following requirements:
• Your company requires collectors to review transaction that are 90 days past due and current ones 30 days into
the future.
• Collectors review customers by account and send out past due notices by E-mail.
• Notices are sent to the accounts payable manager if no contact information is available.
• Reviewing a customer's history requires viewing current and closed transactions.
• Your company allows up to two days for rescheduling work on the dashboard.
• Adjustments and disputes are handled within 1 business day of being recorded.
• Credits on an account are summarized.
• Aging is displayed by a 5 bucket aging method.
• The conversion rate is based on a rate set by the corporation.
• The delimiter symbol used to separate data is a pipe.
• A three-character minimum is required and recommended to perform a search on customer accounts.
• Allow updating invoice attributes and contacts on the transactions directly in collections.
Use the following tables to define the two sections for preferences:
Configuring Collections Preferences
1. Defining Global Preferences
429

Oracle Fusion Cloud Financials
Implementing Receivables Credit to Cash
Chapter 13
Define Advanced Collections Configuration
Field Value
Select the default Transaction Type for
the Transactions tab
Select Invoice, other transaction choices are all, credit, or debit memos.
Automatically display closed
transactions on Transaction tab
Yes is selected to view closed transactions as part of the customers history.
Automatically display current
transactions on Transaction tab
Yes is selected to view current or open transaction the customer has pending.
Enter the number of days before the
current date the transaction date range
should start
In this example, 90 days gives the collector 3 months of history. 1 to 9999 is the range that can
be used.
Enter the number of days after the
current date the transaction date range
should end
30 days of current or open transactions are displayed. 1-9999 is the range that can be used.
Enter the maximum number of days
work can be rescheduled on the
dashboard
Two days is the allowable change in schedule for work. 1-9999 is the range that can be used.
Enter the number of days after
submitting an adjustment or dispute
that an activity is generated
One day generates the disputes and adjustments. 1-9999 is the range that can be used.
Select the default Aging Method
5 Bucket Aging, several aging buckets can be defined and may be available.
Enter the delimiter used to separate
customer, account and site on the
Collections Dashboard
The pipe symbol, other available choices are the greater than, dash, and colon symbols.
Enter the minimum number of
characters required to perform a search
Three characters is the Oracle recommended number for a search. 1-9999 is the range that can
be used.
Enter the sender or return E-mail for
dunning correspondence
The default return E-mail for customers to respond
Allow collector to update transaction
attributes
Yes is selected to allow updating the below fields on the Collections page:
◦
PO Number
430

Oracle Fusion Cloud Financials
Implementing Receivables Credit to Cash
Chapter 13
Define Advanced Collections Configuration
Field Value
◦
Bill to Contact
◦
Comments
◦
Translated Description Field
◦
PO Revision
◦
PO Date
2. Defining Preferences
Preferences Table Column Name Field Value
Collections Preference Set
Select the value; Common Set.
Select the Collections Business Level
Account, other choices are customer and site.
Select whether open credits should be
aged or summarized by default
Summarized, credits can be displayed as aged.
Select the conversion rate type for
converting multicurrency transactions
Corporate, several choices can be defined and are displayed.
Select the default method to send
collections notifications
Select E-mail, other methods are fax or print.
Enter the default contact for unknown
dunning recipients
Accounts Payable Manager. User defined if no contact is listed.
Correspondence Table Column Name Field Value
Collections Preference Set
Select the value; Common Set.
Send Adjustment Notice
Select yes to notify the customer of adjustments made to their account.
Adjustment Template
Select the delivered template.
Send Dispute Notice
Select yes to notify the customer of disputes made to their account.
431

Oracle Fusion Cloud Financials
Implementing Receivables Credit to Cash
Chapter 13
Define Advanced Collections Configuration
Correspondence Table Column Name Field Value
Dispute Template
Select the delivered template.
Send Payment Notice
Select yes to notify the customer of payments made to their account.
Payment Template
Select the delivered template.
Send Promise Notice
Select yes to notify the customer of promises to pay on their account.
Promise Template
Select the delivered template.
3. Save or Save and Close to enable your preferences.
Related Topics
•
What's the difference between customer, account, and site at the Business Level?
•
Guidelines for Setting Up Collections Preferences
FAQs for Manage Collections Preferences
What's the difference between Global Preferences and Preferences?
The global preferences affect your Collections Customer Work Area. Using global preferences, you can change the
display of closed or open transactions and set date range parameters.
The preferences can be set uniquely for a specific business unit. Using preferences, you can change the default settings,
such as the method to send notifications.
What's the difference between customer, account, and site at the Business Level?
Transactions set at the customer level to view or modify, encompasses all of the transaction activity associated with the
customer. For example, a dunning letter at the customer level is inclusive of transactions at the customer and account
level.
Transactions set at the account level to view or modify, are for a particular account and include transactions for all the
bill to sites in that account.
Transactions set at the site level to view or modify, are specific to the bill-to location.
What's the difference between minimum dunning amount and minimum dunning
invoice amount?
The minimum dunning amount is the total amount set for all overdue transactions to generate the correspondence.
432

Oracle Fusion Cloud Financials
Implementing Receivables Credit to Cash
Chapter 13
Define Advanced Collections Configuration
If your minimum dunning amount is set to $100 and you have three overdue transactions of $25, $35, and $55. totaling
to $105. A dunning letter is generated listing all the three invoices as overdue.
The minimum dunning invoice amount is the amount set for a single overdue transaction to generate correspondence.
If your minimum dunning invoice amount is set to $25 and you have three overdue transactions of $15, $50, and $75. A
dunning letter is generated only for the $50 and $75 transactions.
Manage Aging Methods
Aging Methods
Aging methods are periods of time used to group receivables, debit and credit items to achieve an understanding of a
customer's delinquency profile.
By grouping transactions by buckets of time you can create an aging view of the customer. Using aged information you
can do the following:
• Effectively recover delinquent debt.
• Develop more effective policies to assign work and streamline your efficiency.
You can create aging methods based on the preconfigured aging methods according to your requirements.
Aging Method Features
Aging is the concept of calculating a customer's past due and current transactions. Using Oracle Fusion Advanced
Collections you can group the overdue debt by time. And assign work based on aging buckets of debt items. Here are
some features of the aging methods:
• Shows the amounts owed to the company by its customers and includes the length of time the amounts have
been outstanding. For example, aging categorizes receivables into buckets such as; current, 30 days, 60 days,
90 days, and 120 days and over.
• Manage aging methods from the Aging Methods Setup screen and Aging tab.
• Use aging methods while creating the dunning plans.
• View the transactions or receivables data to understand the overdue amounts viewed over time. This can help
you to take a payment or create an adjustment or dispute.
Related Topics
•
Overview of Dunning
Create an Aging Method
This example demonstrates how to create an aging method not predefined in Oracle Fusion Advanced Collections.
433

Oracle Fusion Cloud Financials
Implementing Receivables Credit to Cash
Chapter 13
Define Advanced Collections Configuration
Your company requires an aging method that is not a collections predefined aging method. You are to create a new
aging method. Use the default values except where indicated. Create an aging method named 1 to 120 Days Method,
with the following segments:
Sequence Bucket Type Aging Days From Aging Days To Aging Bucket Heading
1
Current
-9999
0
Current
2
Past Due
1
45
45 Past Due
3
Past Due
46
60
60 Past Due
4
Past Due
61
90
90 Past Due
5
Past Due
91
120
120 Past Due
6
Past Due
121
9999
121+ Past Due
Creating an Aging Method
1. Start from the Manage Aging Methods page.
2. From the Aging Method region, click the green plus sign to create an aging method.
3. Complete the fields, as shown in this table.
Field Value
Aging Method Name
1 to 120 Aging Day Method
Aging Type
Statement Aging; 4 bucket and 7 bucket aging are options, depends on the number of buckets
for your aging method.
Enable
Yes
Aging Method Set
Common Set
Aging Method Description
Current to 120 Day Aging method.
4. Click Save.
434

Oracle Fusion Cloud Financials
Implementing Receivables Credit to Cash
Chapter 13
Define Advanced Collections Configuration
5. From the 1 to 120 Aging Day Method: Details, complete the fields, as shown in this table.
Field Value
Sequence
1
Bucket Type
Past Due
Aging Days From
1
Aging Days To
45
Aging Bucket Heading
45 Past Due; Click the Create icon to create the row for the next sequence.
Sequence
2
Bucket Type
Past Due
Aging Days From
46
Aging Days To
60
Aging Bucket Heading
60 Past Due
6. Repeat the steps for sequences 4 to 6 and increase the Aging Days From and Aging Days To accordingly.
7. Click the Save and Close to complete the creation of a new aging method.
The following validation rules are in place when creating or modifying an aging method:
◦
A bucket must contain at least 2 bucket lines and at most 7 lines.
◦
A Bucket Type passes from the user interface as a fixed constant value.
◦
A bucket must have Aging Days From less than Aging Days To.
◦
All buckets must cover the range from -9999 to 9999 and there is no way to update a field with the value
of -9999 or 9999.
◦
Aging buckets cannot have any gaps between -9999 to 9999.
435

Oracle Fusion Cloud Financials
Implementing Receivables Credit to Cash
Chapter 13
Define Advanced Collections Configuration
FAQs for Manage Aging Methods
How can I modify a predefined aging method?
You can't modify the predefined aging methods. However, you can copy the predefined aging method to create a
duplicate and then modify the duplicate aging method.
To modify, go to the Manage Aging Methods page, select one of the delivered aging methods and click the Duplicate
button. By default, the duplicate aging method is renamed with copy as prefix. For example, 5 Bucket Aging becomes
Copy 5 Bucket Aging. Make the required changes and save the duplicate aging method.
Manage Collectors
Guidelines for Setting Up a Collector
A collector is an individual or a group of individuals, assigned to a customer to conduct various collections work.
Tasks include:
• Sending correspondence
• Reviewing customer history
• Collecting payment from customers
Note: Prior to creating a collector, the individual must be set up as an employee in Oracle Fusion Human Resources
and as a resource in Oracle Fusion Customer Relationships Management (CRM) applications.
Setting Up Collectors
Consider the following when setting up individuals as collectors:
• A collector can individually be assigned to one or more customers or can be a group member that collects from
one or more customers. Evaluate the most appropriate collection needs for your organizations.
• Collectors can be assigned at the customer, account or site level. Determine how your organization interacts
with customers.
• Research how your organization divides the work and tasks among collectors.
• Collections organization structures can be created in several ways based on the number of customers. For
example, you can group customers according to size, small to large or divide customers regionally or by the
monetary volume you do with a customer.
436

Oracle Fusion Cloud Financials
Implementing Receivables Credit to Cash
Chapter 13
Define Advanced Collections Configuration
Using Collector Groups
A collector group consists of a primary collector and one or more individual collectors. You use the collector group to
perform collection tasks as a team. The collectors in a collector group can perform the same collections tasks.
All collectors belonging to a collector group have the same visibility to the delinquent customers and strategy tasks
in the Collections work area. The Strategy Tasks info tile shows the list of open manual strategy tasks for the group.
Collectors from the group can reassign a task to themselves or to any other collector in the group. The Strategy Task list
displays the primary collector and the assigned collector for the tasks.
The activity assigned to a primary collector are not included in the count and listing of the activities of any collector in
the group.
Consider the following rules when adding a collector to a group:
• A collector can be designated as either a group member or a backup collector for a specified date range.
• A collector can belong to only one active collector group for a specified date range.
Related Topics
•
What's the difference between an employee assignment and a group assignment?
•
What's the difference between customer, account, and site at the Business Level?
Create Collectors
Let's understand how you can create collectors and allocate them as employee or group assignment.
Let's say your company wants to create five individuals as collectors. Set up your collectors based on the following
information:
• The Collections Department collects on a regional basis, north, south, east and west.
• Acme Corporation is a large customer and they want to assign one collector to this account.
• All five individuals have been created as a Person Party and Employee, a prerequisite to creating a collector.
• Collector groups can be setup for each region.
Here are the details required for each individual:
Field Action
Name
Employee Name
Description
Optional; detail information
Correspondence
Name used on sent correspondence
Telephone Number
Contact number
Employee Name Active employee list
437

Oracle Fusion Cloud Financials
Implementing Receivables Credit to Cash
Chapter 13
Define Advanced Collections Configuration
Field Action
Active or Inactive
Collector status
Create an Employee Assignment
1. Navigate to the Collectors Setup page in Functional Setup Manager. You can search or create a new collector
from this page.
2. Click the Add or Create Collector icon to create a new collector.
3. Enter the Collector Name.
4. Ensure to select Employee as the type of collector.
5. Select the name of the employee from the list of values in the Employee column.
6. The Enabled field is set to Yes by default.
7. Select the appropriate Collector Set.
8. Click the Save and Close button.
Create a Collector Group
A collections manager can create a collector group. Perform the following steps to create a collector group:
1. Navigate to the Manage Resources page.
2. Select a primary collector for the collector group you want to set up.
3. Navigate to the Collector Group section of the page.
4. Click the New icon to add a new collector group.
5. Enter a unique collector group name. The Enabled field is set to Yes by default.
6. Add members to the group by selecting their names from the Collector list. The Enabled field is set to Yes by
default along with the start date.
7. After adding all collectors to the group, click Save or Save and Close.
Related Topics
•
About Resource Role Assignment
•
Can I create an employee or contingent worker resource?
Overview of Collectors Descriptive Flexfield
You can use the Collectors Descriptive Flexfield to add custom attributes for collector information such as a
geographical region and collections experience.
For example you can create a descriptive flexfield to identify the collector location that can be used to assign them to
customers in or near their location. Tracking the experience of a collector can be used to determine which customer
accounts get assigned to a collector.
One descriptive flexfield is available in Oracle Fusion Advanced Collections.
438

Oracle Fusion Cloud Financials
Implementing Receivables Credit to Cash
Chapter 13
Define Advanced Collections Configuration
Descriptive Flexfield Description
Collectors
15 segment available to display additional information about collectors.
Defining Descriptive Flexfield Segments
Use the Manage Descriptive Flexfields task to define a segment or segments for a descriptive flexfield. You can add
more information related to collectors based on your collection needs and level of detail information about them.
Activating Descriptive Flexfields
Activate a descriptive flexfield after you have defined value sets and segment values by deploying the flexfield. You
must sign out and sign in to the application to see your descriptive flexfield.
Note: The Global segments for the Collectors Descriptive Flexfield are not available.
Related Topics
•
Set Up the Collectors Descriptive Flexfield
•
Overview of Descriptive Flexfields
•
Considerations for Managing Descriptive Flexfields
Set Up the Collectors Descriptive Flexfield
The Manage Collectors descriptive flexfield provides 15 segments to capture additional information. These segments
are made available to you as individual fields in the Manage Collectors page.
This example illustrates how to set up the descriptive flexfield using the context-sensitive segments, based on the
following scenario.
Scenario
You have been tasked with setting up collectors and want to capture more information about the collectors geographical
location and collections experience. You want to be able to search on this information and associate this information to
each collector you create. Set up the additional fields using the following information
Segment Name Value
Region
• East
• West
• Central
Experience
• Novice
• Junior
• Senior
439

Oracle Fusion Cloud Financials
Implementing Receivables Credit to Cash
Chapter 13
Define Advanced Collections Configuration
Setup Steps
1. Navigate to the Set Up and Maintenance in the Functional Setup Manager.
2. Select the All Tasks tab.
3. Search for the task Manage Value Sets Manage Value Sets.
4. Click the Go to Task icon.
5. Search on the Module field for Advanced Collections.
6. Click Search.
7. In the Search Results region click on the Create icon
8. In the Create Value Set page, enter the following information:
Create Value Set Value
Value Set Code
IEX_REGION
Description
Optional
Module
Advanced Collections
Validation Type
Independent
Value Data Type
Character
Definition Region Value
Value Subtype
Text
Maximum Length
20
Minimum Value
Leave Blank
Maximum Value
Leave Blank
Uppercase only
Unchecked
Zero fill
Unchecked
9. Click Save and Close button.
10. Search on the Value Set Code that you just created. Your set code appears in the search results.
440

Oracle Fusion Cloud Financials
Implementing Receivables Credit to Cash
Chapter 13
Define Advanced Collections Configuration
11. Click the Manage Values button in the search results.
12. On the Manage Values page, in the Search Results region, click the Create icon.
13. In the Create Values page create the East, West, and Central values.
14. Enter the following information:
Field or Check Box Value
Required Value
East
Description
Optional
Enabled
Checked
Start Date
Optional
End Date
Optional
Sort Order
Optional
15. Click the Save and Close button.
16. Repeat for the Central and West regions. Click the Create icon
17. Once you have completed entering each of the regions, click the Save and Close button.
18. Click the Save and Close button.
19. Click the Done button.
20. Click the Done button, a second and final time.
21. From the Manage Value Sets task, click on the Go to Task.
22. Click on the Create icon.
23. Enter in the following information from Create Value Set page:
Value Set Field Value
Value Set Code
IEX_EXPERIENCE
Description
Optional
Module
Advanced Collections
Validation Type
Independent
Value Data Type
Character
441

Oracle Fusion Cloud Financials
Implementing Receivables Credit to Cash
Chapter 13
Define Advanced Collections Configuration
Definition Region Field or Check Box Value
Value Subtype
Text
Maximum Length
20
Minimum Value
Leave Blank
Maximum Value
Leave Blank
Uppercase only
Unchecked
Zero fill
Unchecked
24. Click the Save and Close button.
25. Search on the Value Set Code that you just created. Your set code appears in the search results.
26. Click the Manage Values button.
27. On the Manage Values page in Search Results region click the Create icon
28. In the Create Values page create the Novice, Junior and Senior values.
Field or Check Box Value
Required Value
Novice
Description
Optional
Enabled
Checked
Start Date
Optional
End Date
Optional
Sort Order
Optional
29. Repeat the information for Junior and Senior values.
30. Click the Save and Close button.
31. Click the Save and Close button. a second time.
32. Click the Done button.
33. Click the Done button a second time.
442

Oracle Fusion Cloud Financials
Implementing Receivables Credit to Cash
Chapter 13
Define Advanced Collections Configuration
34. From the All Task tab, search for the Manage Descriptive Flexfields.
35. Click the Go to Task icon
36. In the Name field enter Collectors.
37. Click the Search button
38. In the Search Results region for Collectors, click the Edit icon.
39. In the Context Segment region in the Prompt field, enter Additional Information as the name for the Prompt
to be displayed on the Manage Collectors page.
40. Click the Manage Contexts button.
41. From the Manage Contexts page click the Create icon and enter the following:
Field Value
Display Name
Additional Information
Context Code
IEX ADD INFO (uppercase recommended)
42. Click the Save button.
43. In the Context Sensitive region click the Create icon and enter the following:
Field Value
Name
Region
Code
IEX REGION
Description
Optional
44. In the Column Assignment region enter the following:
Field Value
Data Type
Text
Table Column
Attribute 1
45. In the Validation region enter the following:
Field or Check Box Value
Value Set
IEX_Region
Description Optional
443

Oracle Fusion Cloud Financials
Implementing Receivables Credit to Cash
Chapter 13
Define Advanced Collections Configuration
Field or Check Box Value
Range Type
Not required
Required
Unchecked
Initial Default
Not required
46. In the Display Properties region enter the following:
Field or Check Box Value
Prompt
Collectors Region
Display Type
List of Values
Required
Unchecked
47. Click the Save and Close button
48. In the Context Sensitive region click the Create icon and enter the following:
Field Value
Name
Experience
Code
IEX EXPERIENCE
Description
Optional
49. In the Column Assignment region enter the following:
Field Value
Data Type
Text
Table Column
Attribute 2
50. In the Validation region enter the following:
444

Oracle Fusion Cloud Financials
Implementing Receivables Credit to Cash
Chapter 13
Define Advanced Collections Configuration
Field or Check Box Value
Value Set
IEX_Experience
Description
Optional
Range Type
Not required
Required
Unchecked
Initial Default
Not required
51. In the Display Properties region enter the following:
Field or Check Box Value
Prompt
Collector Experience
Short Prompt
Experience
Display Type
List of Values
Required
Unchecked
52. Click the Save and Close button.
53. click the Save and Close button, a second time.
54. Click the Done button.
55. Click the Save and Close button.
56. In the Manage Descriptive Flexfields page, search in name field for Collector.
57. In the Search Results region, the Descriptive Flexfield appears.
58. Click the Deploy Flexfield button.
59. Click OK in the pop-up window.
60. Activate the Descriptive Flexfield by signing out and signing back into the environment.
61. Navigate to Set Up and Maintenance. Search for Manage Collectors using All Tasks tab.
62. Click the Go to Task icon.
63. Verify the Additional Information field appears in the Search region with a List of Values of Region and
Experience.
64. Create a new collector and Expand the row. Verify the Additional Information with the 2 segments Region and
Experience appear with the appropriate values for each.
445

Oracle Fusion Cloud Financials
Implementing Receivables Credit to Cash
Chapter 13
Define Advanced Collections Configuration
Related Topics
•
Overview of Collectors Descriptive Flexfield
•
Considerations for Managing Descriptive Flexfields
•
Overview of Descriptive Flexfields
FAQs for Manage Collectors
What's the difference between an employee assignment and a group assignment?
An employee assignment is a collector assigned to one customer. You must create individuals as employees before you
can set them up as users, resources, and collectors.
A group assignment is created to assign work and customers to a group of collectors. You can have multiple employees
or collectors in one group.
Manage Dunning Configuration
Aged or Staged Dunning
The customer correspondence can be set up using aged and staged dunning methods.
The dunning methods are supported at the following levels:
• Customer
• Account
• Bill-to Site
Aged Dunning Method
The Aged Dunning method can be used by companies sending collection letters to their customers based on the oldest
aged transaction. Delinquent transactions are identified automatically when the Delinquency Identification concurrent
process is run. Preconfigured dunning notice templates are available, or the deploying company can create their own
dunning notice templates. As the oldest aged transaction moves into the next aging bucket, the content of the dunning
letter can change. A single consolidated letter can be sent to eliminate sending multiple aged dunning letters to the
same customer who has more than one delinquent transaction. The templates are associated to aging buckets in the
dunning configuration process.
Staged Dunning Method
The Staged Dunning method is based on the number of days since the last dunning letter was sent, rather than the
number of days transactions are past due. A single consolidated letter can be sent to eliminate sending multiple staged
dunning letters to the same customer who has more than one delinquent transaction. Delinquent transactions are
identified automatically when the Delinquency Identification concurrent process is run. In cases where transactions
have installment due dates, the staged dunning letter includes each overdue installment date in the body of the
446

Oracle Fusion Cloud Financials
Implementing Receivables Credit to Cash
Chapter 13
Define Advanced Collections Configuration
consolidated letter. Staged dunning letters are sent at delayed intervals defined in the Dunning Configuration process.
These intervals control the timing of each letter sent. Use preconfigured dunning templates or create new ones.
Related Topics
•
Customer Dunning Configuration Options
Customer Dunning Configuration Options
Configure dunning plans and letters to facilitate regular correspondence with your customers.
All of the following options except rerun the dunning process are created in the Correspondence Configuration in
Functional Setup Manager.
• Dunning letter options
• Delivery options for dunning letters
• Dunning configuration set
• Dunning transactions
• Rerun the dunning process
Dunning Letter Options
Use the preconfigured aged or staged dunning letters delivered by the application or create new dunning letters to meet
unique requirements. Configure dunning to run in one of two methods:
1. Aged Dunning is based on the oldest past due debit item.
2. Staged Dunning is based on the number of days since the previous letter was sent.
Delivery Options for Dunning Letters
Delivery of dunning letters to customer is:
• E-Mail
• Fax
• Regular mail
Dunning Transactions
Select the transactions and charges to include in the dunning letters.
• The Dunning Letter Generate program can include current invoices, disputed invoices, and credit memos.
• The dunning letters can include current transactions.
• Finance charges can be included as a line item.
• When you select the Include Disputed Invoices, the transactions awaiting dispute resolution are displayed and
included in the total.
447

Oracle Fusion Cloud Financials
Implementing Receivables Credit to Cash
Chapter 13
Define Advanced Collections Configuration
Dunning Configuration Set
Dunning can be configured by one business unit or multiple business units. Consider the following when defining sets:
• A Set defines a subset of a master list of business objects, such as suppliers, customers, or in this case a
Dunning Configuration Set.
• A Set Determinant is a business object, usually a type of organizational unit, that has a 1 to 1 relationship to Set.
When Set Determinant is visible, Set can be hidden.
• A Set of business objects can be associated with an organizational unit, such as Business Unit or Legal Entity, to
enforce data security. Then, when you are associated with organizational units, they automatically see only the
subset of business objects appropriate for their organizational units.
• A Set or Set Determinant field appears to you as a lookup code that determines which subset of a master list of
objects their organizational unit uses. For example, if you are performing a Purchasing transaction, the Set or
Set Determinant value would determine which Suppliers can be used.
Rerun the Dunning Process
Rerun the dunning process to correct errors or regenerate dunning letters:
• Rerun the dunning process should there be an error during any phase of the program.
• Regenerate a previous dunning letter if a customer request another copy.
Keep customers from receiving dunning letters by indicating them as Exclude from dunning on the Profile tab.
Post Installation for Dunning Configuration
Oracle Fusion Advanced Collections Dunning feature utilizes Oracle Business Intelligence Publisher to distribute
dunning letters to customers by Email, fax, or print.
To use this feature, you must configure Oracle Business Intelligence Publisher to connect to the deploying company's
internal Email, or the print or fax servers.
Configuring Oracle Business Intelligence Publisher: Configure Oracle Business Intelligence Publisher by adding an Email
server. Refer to the Oracle Fusion Middleware Administrator's Guide for Oracle Business Intelligence Publisher (Oracle
Fusion Applications Edition).
Adding the EMail Server
To add an Email server:
1. From the Administration page select Email. This displays the list of servers that have been added. Select Add
Server.
2. Enter the Server Name, Host, and Port for the Email server.
3. Select a Secure Connection method to use for connections with the Email server. The options are: None or
SSL. Use Secure Socket Layer. TLS (Transport Layer Security). Use TLS when the server supports the protocol;
SSL is accepted in the response. TLS Required. If the server does not support TLS, then the connection is not
made.
4. Optionally enter the following fields if appropriate: General fields; Port Security fields User name and Password.
448

Oracle Fusion Cloud Financials
Implementing Receivables Credit to Cash
Chapter 13
Define Advanced Collections Configuration
How You Split Send Dunning Letters Process by Currency
Splitting the dunning letters process by currency can be a helpful strategy for improving debt collection efforts,
especially when dealing with customers who have transactions in multiple currencies.
You can follow the steps below to split the Send Dunning Letters process by currency:
1. Sign in to Oracle Analytics Publisher.
2. On the Home tab, click the Catalog Folders link. The Catalog tab appears with a hierarchy of folders.
3. Expand the Financials folder.
4. Navigate as follow: Collections > Correspondence > Data Models
5. On the Data Model tab, click Edit - Collections Send Dunning Letters Data Model
6. Click Bursting
7. In the lower region, enter the following for this bursting definition: Split By - Select Currency.
8. Save changes.
Rerun Send Dunning Letters when the changes are saved.
FAQs for Manage Dunning Configuration
What's the difference between an aged and staged dunning method?
Aged dunning sends dunning letters based on the age of the oldest transaction. Managers identify the dunning letter to
be sent for each aging bucket.
Staged dunning sends dunning letters based on the age of the oldest transaction and the number of days since the last
letter was sent. Managers specify how long to wait before executing the next stage.
For both methods, managers decide whether or not to manually schedule a follow-up call if the delinquency isn't
resolved.
Define Scoring
Scoring Formulas
Scoring formulas are the foundation for your collections activities.
Scoring Formulas
Oracle Fusion Advanced Collections uses scoring in two ways:
1. Determines transaction status as current, delinquent, or predelinquent. Collections scores invoices and
debit memos from Oracle Fusion Accounts Receivables. A customer is delinquent when they have past due
transactions.
449

Oracle Fusion Cloud Financials
Implementing Receivables Credit to Cash
Chapter 13
Define Advanced Collections Configuration
2. Determines the collectability of each customer at the customer, account, or bill-to site level. Use data points
about the customer to determine collectability.
Scoring formulas consist of:
• High and low scores
• One or more weighted data points that must sum to 1
• Data point details
• Status used only in the case of scoring transactions
• A segment which enables you to run against a subset or segment of the database
• A review where you can test your formula
A Scoring formula provides you an effective way to manage your collections resources and strategies.
Collections delivers a set of scoring formulas you can apply or copy and modify to your specific business needs.
Considerations and Recommendations
Consider the following:
• You should test all data points and scoring formulas in a test environment using a portion or all of your
production data
• Once you're satisfied with the scoring results and performance, you can move your tested scoring formulas to
your production environment
Related Topics
•
What's a scoring formula status?
•
Scoring Formula Data Points
•
Edit a Scoring Formula
•
Create a Scoring Formula
Create a Scoring Formula
This examples shows you how to create a scoring formula.
Create a simple scoring formula based on the following data points:
1. Account Level Delinquency Count
2. Accounted Amount of Delinquencies
Note: If these don't exist, you must create them first before creating a scoring formula.
450
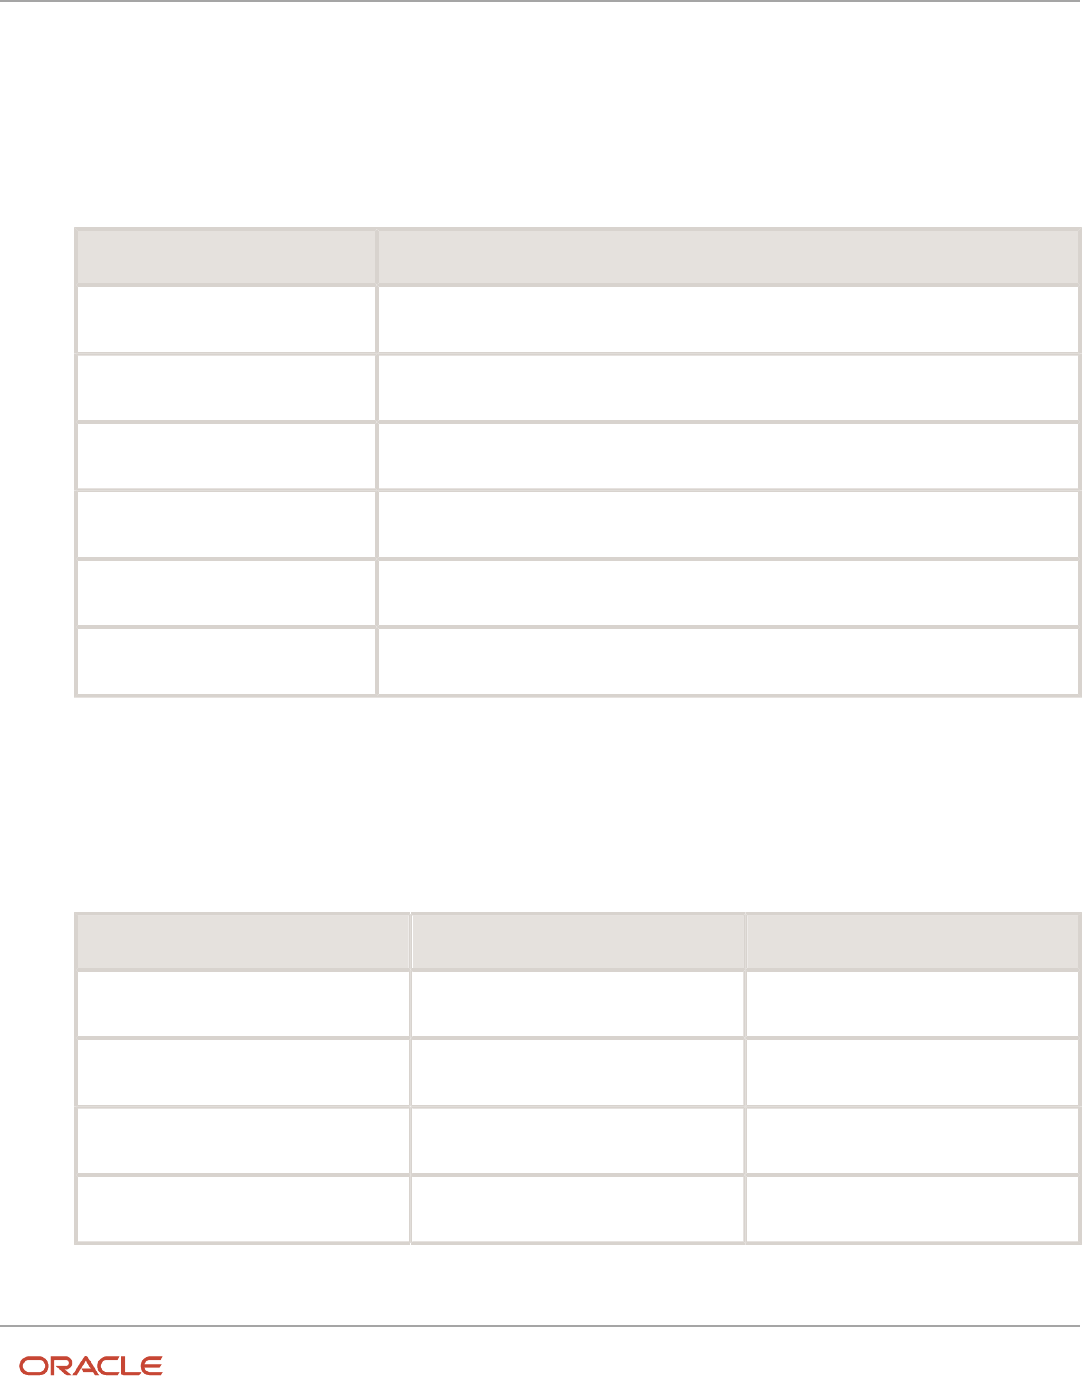
Oracle Fusion Cloud Financials
Implementing Receivables Credit to Cash
Chapter 13
Define Advanced Collections Configuration
Create a Scoring Formula
Navigation: Setup and Maintenance > All Tasks > Define Collections > Manage Collections Scoring > Go to Task icon >
Manage Scoring Formulas
1. From the Manage Scoring Formulas page, click Create icon.
2. Enter the following information using the subsequent table:
Field Value
Name: Required
Simple Scoring Formula
Type: Required
Account: Determines the type of data points can be added to the formula.
Description: Optional
Number and Amount of Delinquencies.
From Score: Required
1: The lowest possible score the formula calculates.
To Score: Required
100: The highest score the formula calculates.
Enabled: Activates the formula
Check
3. From the Data Points sections, you add data points to the formula. Each data point must be mapped across the
high and low range of the Scoring Formula.
4. Click Add Row icon.
5. In the Name field search for Account Level Delinquency Count data point.
6. Highlight the data point and click OK.
7. Enter a value of 1 in the weight field.
8. Enter the following information in the Data Point Details section populating 4 rows using the subsequent table:
From Range to Range Value
0
10
100
11
50
75
51
100
50
101
999,999,999
1
9. Click Save.
10. Click Add Row icon.
451

Oracle Fusion Cloud Financials
Implementing Receivables Credit to Cash
Chapter 13
Define Advanced Collections Configuration
11. In the Name field search for Accounted Amount of Delinquencies data point.
12. Highlight the data point and click OK.
13. Enter the following information in the Data Point Details section populating 4 rows using the subsequent table:
From Range to Range Value
0
5,000.00
100
5,000.01
25,000.00
75
25,000.01
50,000.00
50
50,000.01
999,999,999.00
1
14. Adjust the weights of the 2 data points using the following table:
Data Point Weight
Account Level Delinquency Count
0.25
Accounted Amount of Delinquencies
0.75
Total
1.00
15. Click Save button.
16. Click Next button. Enter the following information in the Scoring Formula Segment page using the subsequent
table:
Segment Value
View Name Select the grouping for
the customers, accounts, sites, or
transaction that applies to the scoring
formula.
IEX_F_ACCOUNTS_V
Identifier Select the unique attribute
identifying each customer, account, site
or transaction.
CUST_ACCOUNT_ID
17. Click Next button.
18. Click Save button.
19. Move to the Scoring Formula Review page.
452

Oracle Fusion Cloud Financials
Implementing Receivables Credit to Cash
Chapter 13
Define Advanced Collections Configuration
20. In the Sample Score section, test your formula using the information in the subsequent table:
Field Value
Account Number: Select an account
that has delinquent or current
transactions.
Valid account number
Business Unit: Select a business unit
that contains those transactions.
Valid business unit
21. Click Score button.
Scoring Formula Results
The following are displayed in the Data Points table:
1. Component Score: the actual number of delinquencies and total amount of delinquencies for the test account.
2. Mapped Component Score: how that number translates to each data point detail.
3. Weighted Score: the Mapped Component Score multiplied by the data point weight.
The total score displays the sum of the weighted scores for all data points. This is the score assigned to the
account.
Applying the Formula
Your formula is now activated and you want to apply it by submitting the Collections Scoring as Job program.
Navigation: Navigator > Scheduled Process > Collections Scoring as Job
1. Click Schedule New Process button.
2. Select from the list of values: Collections Scoring as Job.
3. Enter the Parameters according to the subsequent table:
Parameter Value
Business Unit: Required
Select a business unit that contains the account.
Scoring Formula: Required
Simple Scoring Formula
4. Click Submit button.
5. Verify by navigating to the Collections Work Area. Query for the customer, account, or bill-to site and review.
The score appears in the Customer Hierarchy task pane.
453

Oracle Fusion Cloud Financials
Implementing Receivables Credit to Cash
Chapter 13
Define Advanced Collections Configuration
Related Topics
•
Scoring Formula Data Points
•
Scoring Formulas
•
What's a scoring formula status?
•
Edit a Scoring Formula
Edit a Scoring Formula
This example shows how to take an existing formula and use the duplicate feature to make edits to the formula.
Oracle Fusion Advanced Collections delivers a set of formulas you can use to score customers. You can modify the
existing formulas to meet your business requirements by copy and modifying them.
Editing an Existing Formula
You are using the formula, Customer Scoring and want to change the weight in the existing formula to give customers
who are 91+ days overdue lower scores.
Navigation: Setup and Maintenance > All Tasks > Define Collections > Manage Collections Scoring > Go to Task icon >
Manage Scoring Formulas
1. Query the existing formula. In the Query by Example field for Name enter Customer Scoring and Enter.
2. Select the row and click Duplicate icon.
3. Edit the formula information using the subsequent table:
Field Value
Name
◦
Required
◦
Replace Copy of Customer
Scoring. This must be a unique
name
91+ Customer Scoring
Description: Optional
Modified copy of the Customer Scoring formula. Change in weighted values.
Start Date: Required
Current Date
End Date: Optional
Leave Blank: Use an end date if the formula has limited availability.
Type: Determines the type of data
points you can add to the formula.
Customer
Description
This is an optional field.
454

Oracle Fusion Cloud Financials
Implementing Receivables Credit to Cash
Chapter 13
Define Advanced Collections Configuration
Field Value
From Score: Required
1: The lowest possible score the formula calculates.
From Score: Required
100: The highest possible score the formula calculates.
Enabled: Activates the formula.
Yes
4. Alter the weights according to the following table:
Data Point Weight
The Percent of Delinquencies 1-30 Days
Overdue
0.1 Lower value to increase the other data point
The Percent of Delinquencies 31-60
Days Overdue
0.1 Lower value to increase the other data point
The Percent of Delinquencies 61-90
Days Overdue
0.1 Lower value to increase the other data point
The Percent of Delinquencies 91+ Days
Overdue
0.7 Lower value to increase the other data point
Total Must equal 1.00
1.00
5. Click Next button.
6. Keep the Customer Segments listed. Click Next button.
7. From the Create Scoring Formula: Review, click Save button.
8. In the Sample Score section test your formula using the information in the subsequent table:
Field Value
Account Number
Select an account known to have 91+ delinquent transactions.
Business Unit
Select a Business Unit that contains those transactions.
455

Oracle Fusion Cloud Financials
Implementing Receivables Credit to Cash
Chapter 13
Define Advanced Collections Configuration
9. Click Score button.
The following are displayed in the Data Points table:
a. Component Score: the actual number of delinquencies and total amount of delinquencies for the test
account.
b. Mapped Component Score: how that number translates to each data point detail.
c. Weighted Score: the Mapped Component Score multiplied by the data point weight.
The Total Score displays the sum of the weighted scores for all data points.
Assigning the Formula
Your formula is now activated and you want to apply it by doing the following:
Navigation: Navigator > Scheduled Process > Collections Scoring as Job
1. Click Schedule New Process button.
2. Select from the list of values: Collections Scoring as Job.
3. Enter the parameters according to the subsequent table:
Parameter Value
Business Unit
Select a Business Unit that contains the account you tested previously.
Scoring Formula
91+ Customer Scoring
4. Click Submit button.
5. Verify by navigating to the Collections Work Area. Query for the customer, account, or bill-to site and review.
The score appears in the Customer Hierarchy task pane.
Related Topics
•
Scoring Formulas
•
Scoring Formula Data Points
•
What's a scoring formula status?
•
Create a Scoring Formula
Scoring Formula Data Points
A data point is a component of a scoring formula.
Data Points
Data points can be one of the following two types:
1. A select statement
456

Oracle Fusion Cloud Financials
Implementing Receivables Credit to Cash
Chapter 13
Define Advanced Collections Configuration
2. A database function, an example would be asking for the total number of delinquent transactions or the total
delinquent amount of customer delinquencies
Note: You must know how to create PL/SQL statements or functions for either type.
The following are criteria for data point details:
• They must return a single numeric value
• They must be created for a certain element which is the database entity to be scored
• Can be positive or negative
• Must account for the range of numbers from -999,999,999 to 999,999,999
• Must be contiguous and don't overlap
The values calculated by a data point are weighted and used in the scoring formula. Collections deliver formulas where
a higher score indicates a better chance of collectability and a lower score indicates a lower chance of collectability. You
can configure formulas where higher scores result in lower chance of collectability and lower scores a higher chance of
collectability.
Related Topics
•
Scoring Formulas
•
What's a scoring formula status?
•
Create a Scoring Formula
•
Edit a Scoring Formula
Predefined Data Points for Collections
A data point is a single piece of credit information about a customer.
Oracle Fusion Advanced Collections uses data points to do scoring to determine the collectability of each customer at
the customer, account, or bill-to site levels. The below table lists the available predefined data points at different levels.
Data Point Description Type
Account Write Off Amount The account total write-off amount in the past
24 months in USD.
Account
Account Age of Oldest Overdue Transaction The age of the oldest overdue of an account's
delinquent transaction. This is the number of
days for which the delinquent transaction with
the largest overdue has existed for an account.
Account
Account Total Receivables Balance The total outstanding amount in USD for an
Account. On-account or unapplied cash is taken
into consideration to reduce the outstanding
amount.
Account
457

Oracle Fusion Cloud Financials
Implementing Receivables Credit to Cash
Chapter 13
Define Advanced Collections Configuration
Data Point Description Type
Account Total Amount Past Due Account total past due amount in USD
excluding disputes. On-account or unapplied
cash is not included.
Account
Account Delinquencies Count Determines how many delinquencies exist for
the Account
Account
Account Delinquency Rate 1-30 Days Account Percent Overdue 1-30 days Account
Account Delinquency Rate 31-60 Days Account Percent Overdue 31-60 days Account
Account Delinquency Rate 61-90 Days Account Percent Overdue 61-90 days Account
Account Delinquency Rate 91+ Days Account Percent Overdue 91+ days Account
Account Age of Latest Payment The number of days passed since the last
payment was made on the customer's account.
Account
Account Amount Past Due More Than 15 Days Total account amount in USD that is past due
for more than 15 days. Adjustments, Disputes,
and On-account or Unapplied cash are taken
into consideration to reduce the outstanding
amount.
Account
Account Weighted Average Days Paid Account weighted average days paid for
prior 24 months. This is the number of days
an account takes to make payments. The
average is weighted by the payment amount.
Prepayments are included in the calculation.
Account
Account Weighted Average Days Outstanding Account average days late weighted by invoice
amount.
Account
Account Percent of Outstanding 30 Days Past
Due
Percent of account balance more than 30 days
past due.
Account
Account Delinquent Amount in Past Year The total delinquent and predelinquent amount
owed by the account in the past year
Account
Customer Delinquent Amount in Past Year The total delinquent and predelinquent amount
owed by the customer in the past year
Customer
Customer Delinquencies Count Determines how many delinquencies exist for
the Customer
Customer
Party Delinquency Rate 91+ Days Customer Percent Overdue 91+ days Customer
Party Delinquency Rate 61-90 Days Customer Percent Overdue 61-90 days Customer
Party Delinquency Rate 31-60 Days Customer Percent Overdue 31-60 days Customer
Party Delinquency Rate 1-30 Days Customer Percent Overdue 1-30 days Customer
Customer Total Receivables Balance The total outstanding amount in USD for a
customer. Bills Receivables and On-account or
unapplied cash is taken into consideration to
reduce the outstanding amount.
Customer
Customer Age of Oldest Overdue Transaction The age of the oldest overdue of a customer's
delinquent transaction. This is the number of
days for which the delinquent transaction with
the largest overdue has existed for a customer.
Customer
458

Oracle Fusion Cloud Financials
Implementing Receivables Credit to Cash
Chapter 13
Define Advanced Collections Configuration
Data Point Description Type
Customer Age of Latest Payment The number of days passed since the last
payment was made by the customer.
Customer
Customer Amount Past Due More Than 15 Days Total customer amount in USD that is past due
for more than 15 days. Adjustments, Disputes,
and On-account or Unapplied cash are taken
into consideration to reduce the outstanding
amount.
Customer
Customer Weighted Average Days Paid Customer weighted average days paid for
prior 24 months. This is the number of days
a customer takes to make payments. The
average is weighted by the payment amount.
Prepayments are included in the calculation.
Customer
Customer Weighted Average Days Outstanding Customer average days late weighted by invoice
amount.
Customer
Customer Percent of Outstanding 30 Days Past
Due
Percent of customer balance more than 30 days
past due.
Customer
Customer Amount Past Due Customer total past due amount in USD
excluding disputes. On-account or unapplied
cash is not included.
Customer
Customer Write Off Amount Customer total write-off amount in the past 24
months in USD.
Customer
Site Delinquency Rate 91+ Days Site Percent Overdue 91+ days Site
Site Total Receivables Balance The total outstanding amount in USD for a
site. On-account or unapplied cash is taken
into consideration to reduce the outstanding
amount.
Site
Site Delinquency Rate 31-60 Days Site Percent Overdue 31-60 days Site
Customer Total Amount Past Due for Sites Customer total past due amount in USD
excluding disputes. On-account or unapplied
cash is taken into consideration to reduce the
past due amount.
Site
Site Delinquency Rate 61-90 Days Site Percent Overdue 61-90 days Site
Site Write Off Amount Site total write-off amount in the past 24
months in USD.
Site
Site Total Amount Past Due Site total past due amount in USD excluding
disputes. On-account or unapplied cash is not
included.
Site
Site Percent of Outstanding 30 Days Past Due Percent of site balance more than 30 days past
due.
Site
Site Weighted Average Days Outstanding Site average days late weighted by invoice
amount.
Site
Site Weighted Average Days Paid Site weighted average days paid for prior 24
months. This is the number of days a site takes
to make payments. The average is weighted
by the payment amount. Prepayments are
included in the calculation.
Site
459

Oracle Fusion Cloud Financials
Implementing Receivables Credit to Cash
Chapter 13
Define Advanced Collections Configuration
Data Point Description Type
Account Total Amount Past Due for Sites The total past due amount in USD for an
account after excluding disputes. On-account
or unapplied cash is taken into consideration to
reduce the past due amount.
This data point is the sum of the total amount
due on all transactions for all sites. The value of
this data point is therefore the same for all sites
belonging to the customer account.
Site
Site Delinquencies Count Determines how many delinquencies exist for
the Bill To Site
Site
Site Delinquent Amount in Past Year The total delinquent and predelinquent amount
owed by the site in the past year
Site
Site Age of Latest Payment The number of days passed since the last
payment was made on the site.
Site
Site Delinquency Rate 1-30 Days Site Percent Overdue 1-30 days Site
Site Age of Oldest Overdue Transaction The age of the oldest overdue of a site's
delinquent transaction. This is the number of
days for which the delinquent transaction with
the largest overdue has existed for a site.
Site
Site Amount Past Due More Than 15 Days Total site amount in USD that is past due for
more than 15 days. Adjustments, Disputes,
and On-account or Unapplied cash are taken
into consideration to reduce the outstanding
amount.
Site
Delinquency Determination Identifies whether a transaction is overdue Transaction
PreDelinquency by Segment Determines predelinquency using strategy
assignment setup
Transaction
Transaction Delinquency Check Determines if the payment schedule is
delinquent
Transaction
PreDelinquency Determination Determines if the payment schedule is
delinquent
Transaction
Perform these steps to review and disable the predefined data points:
1. In the Setup and Maintenance work area, select:
a. Offering: Financials
b. Functional Area: Collections
c. Task: Manage Collections Scoring Data Points
2. On the Manage Scoring Data Points page, click the name of the data point that you want to review.
3. On the Edit Scoring Data Point page, you can review the data point and disable if required.
4. Click Save and Close.
460

Oracle Fusion Cloud Financials
Implementing Receivables Credit to Cash
Chapter 13
Define Advanced Collections Configuration
FAQs for Define Scoring
What's a scoring formula status?
You can assign the scoring formula status only when the scoring formula type is Transaction.
Assign one of the following statuses:
• Current
• Delinquent
• Predelinquent
What's a scoring formula segment?
A segment is a subset of the objects being scored.
For example, to score customers in US based on different criteria than customers based in Japan. You can just create
two different formulas and attach two different segments to those formulas.
The segment is a database view and must be created by your Database Administrator.
Define Strategy
Processing Strategies
You must complete a series of processes before using the strategies.
Here's how you process the strategies:
• Score collections objects by running the Collections Scoring program
• Aggregate customer data by running the Update Collections Summary Data program
• Run the Strategy Management concurrent program to create a strategy for each delinquent object
• Each strategy is assigned based on the score applied to it
• This score determines how aggressively or softly the strategy treats delinquent customers
How You Process a Strategy
Let's understand how you can process a strategy with help of an example.
Say you have created delinquencies and scored collections objects, such as 30 day and 60 day past due invoices. There
are two strategies that exist with the following information:
Strategy Name Tasks
Soft
1. Send reminder letter
461

Oracle Fusion Cloud Financials
Implementing Receivables Credit to Cash
Chapter 13
Define Advanced Collections Configuration
Strategy Name Tasks
2. Make call
3. Follow-up call
4. Send dunning letter
Hard
1. Send dunning letter
2. Make call
3. Call escalation by supervisor
Results
The following scores result after the Strategy Management program runs:
Score Results
50
Higher Score results in a softer strategy
30
Lower score results in a harder strategy
Analysis
• If the program can't find a strategy to match the exact score, it assigns a more aggressive strategy.
• If the delinquency score returned by the scoring engine is 35, then the selection module in the program looks
for strategies ranked 35, and if not found, looks for 34, then 33, until a valid score is found. Like in this example,
the program assigns the Hard Strategy to the delinquent object.
Related Topics
•
Collections Strategies
•
Create a Task
•
Create a Collections Strategy
•
How can I assign a strategy to a customer?
Collections Strategies
Oracle Fusion Advanced Collections strategies are a series of manual or automated activities, known as tasks. These
tasks are linked together in the order they're to be executed.
You can use these tasks to collect from your delinquent customers. Here are some examples of these tasks:
• Call the customer
• Send a letter, fax, or email
• Escalate to a supervisor
If you escalate a task. A notification is sent to your manager automatically.
462

Oracle Fusion Cloud Financials
Implementing Receivables Credit to Cash
Chapter 13
Define Advanced Collections Configuration
Note: You can create several tasks and reuse them in many strategies.
Collections strategies support activities based on the following:
• Your business requirements
• Scoring rules
• Alternative to dunning plans
• To collect on delinquent transactions
• Simple to complex collection activities
Note: You can use either strategies or dunning plans to manage your delinquencies, but not both methods.
Use strategies in the following way:
• Associate with customers, accounts, or bill-sites depending on the data level you do business.
• Leverage information from the Advanced Collections scoring engines that identifies delinquent transactions
and score delinquent objects.
Setting Up Strategies
Setup your strategies in the following order:
1. Create collections tasks.
2. Create collections strategies.
3. Assign collections method name.
4. Assign task to strategies.
Strategy Processing and Results
To assign appropriate strategies to the collections objects, run the Strategy Management concurrent program for all the
business units at once.
The strategies are based on the scoring engine results. The concurrent program results in the following:
• Oracle SOA BPEL initiates and manages tasks and sends notifications to the designated person
• Oracle BI Publisher sends correspondence
Related Topics
•
Processing Strategies
•
Create a Collections Strategy
•
Create a Task
•
How can I assign a strategy to a customer?
•
How do scoring engines and strategies work together?
Create a Collections Strategy
This exercise show you how to create a strategy, assign tasks, and assign them sequentially.
463

Oracle Fusion Cloud Financials
Implementing Receivables Credit to Cash
Chapter 13
Define Advanced Collections Configuration
Strategies are a series of manual or automated tasks and linked together in the order they're to be executed. A strategy
consists of the following:
• Create Strategy Template Group: Used to define your general information about the strategy
• Customer Segment: Identifies the grouping and unique attribute for this strategy
• Strategies: Lists the various stages and scores for your strategy
• Tasks: Lists the tasks in sequential order and defines the details for each
Create a Strategy
Navigation: Setup and Maintenance > All Tasks > Manage Collections Strategies> Go to Task icon > Manage Strategies
1. From the Manage Collections Strategies section click Create icon.
2. Enter the following information:
Create Strategy Template Group page:
Field Value
Group Name
US Customers
Strategy Level
Account
Change Strategy per Tolerance
No
Enabled
Yes
Start Date
Select the current date.
End Date
Blank
Customer Segment section
Field Value
View Name
Account
Identifier ID
464

Oracle Fusion Cloud Financials
Implementing Receivables Credit to Cash
Chapter 13
Define Advanced Collections Configuration
Field Value
Strategies section
Field Value
Method Name
USA Strategy Good
Lowest Applicable Score
50
Method Name (Add row icon)
USA Strategy Bad
Lowest Applicable Score
0
Tasks section: Select the USA Good Strategy
Field Value
Order
10
Name
Friendly Phone Call
Order
20
Name
Friendly Phone Call
Order
30
Name
Friendly Phone Call
3. Click Save and Close button
465

Oracle Fusion Cloud Financials
Implementing Receivables Credit to Cash
Chapter 13
Define Advanced Collections Configuration
Related Topics
•
Collections Strategies
•
Processing Strategies
•
Create a Task
•
How can I assign a strategy to a customer?
Create a Task
This example shows you how to create a manual task.
Each strategy is made up of one or more tasks. A workflow helps drive the task that is performed manually or
automatically. The workflow notifies the collector to perform a task or initiates the automated process. Every task has an
associated workflow.
Tasks are grouped by one of two work types:
1. Manual: A collector or specialist performs the task. When you complete the task, it's closed from the queue.
Manual tasks examples are a personal visit, phone call, or contact salesperson.
2. Automatic: An automated process performs the task. This includes tasks such as sending emails, faxes, or
sending documents to be printed.
Create a Manual Task
Navigation: Setup and Maintenance > All Tasks > Manage Collections Strategy Tasks > Go to Task icon > Manage
Strategy Tasks
1. From the Strategy Tasks section, click Create icon.
2. Enter the following information:
Field Value
Enabled
Selected
Name
Friendly phone call
Description
Customer is slightly past due; make friendly call
Type
Manual
Category
Phone Call
How long will strategy wait until it
executes this task?
0 days
466

Oracle Fusion Cloud Financials
Implementing Receivables Credit to Cash
Chapter 13
Define Advanced Collections Configuration
Field Value
How long will strategy wait after it
executes this task?
0 days
Optional
Y
Days
1 day
3. Click Save and Close.
Set Up Wait Time for Strategies Based on Transaction Type
You can define the tasks having execution wait times for strategies based on the transaction type. Designate pre-
execution and post-execution wait times on transaction-level strategy tasks assigned to transaction types when the
transaction condition is set to Not Applicable. Ensure that the following features are enabled:
•
◦
Collections Scoring and Strategy Assignments by Segment
◦
Automatically Initiate or Fulfill Collections Tasks in Third Party Systems
◦
Collections Strategies for Individual Transactions
Perform the following steps:
Navigation: Setup and Maintenance > All Tasks > Manage Collections Strategy Tasks > Go to Task icon > Manage
Strategy Tasks
1. From the Strategy Tasks section, click Create icon.
2. Enter the following information:
Field Value
Enabled
Selected
Name
Enter an appropriate name
Description
Enter a brief description of the task.
Type
Manual or Automatic
Category
Select an appropriate category.
How long will strategy wait until it
executes this task?
Select a value equal to or greater than 0
467

Oracle Fusion Cloud Financials
Implementing Receivables Credit to Cash
Chapter 13
Define Advanced Collections Configuration
Field Value
How long will strategy wait after it
executes this task?
Select a value equal to or greater than 0
Transaction Level
Select the condition as Not Applicable
Note: If you configure the Days Late condition for Transaction Level, you cannot set the pre-execution and
post-execution wait times.
3. Click Save and Close.
Related Topics
•
Collections Strategies
•
Processing Strategies
•
Create a Collections Strategy
•
How can I assign a strategy to a customer?
Enable Collections Strategy for Individual Transactions
Generally, you can assign collections strategies at a client level. However, you might have business requirements to
assign these strategies for individual transactions.
To assign collections strategies for individual transactions, you must enable the Collections Strategies for Individual
Transactions feature.
To enable this feature:
1. Click Navigator > My Enterprise > Offerings.
2. On the Offerings page, select Financials.
3. Click Opt In Features.
4. On the Opt In: Financials page, click the Features icon for Collections. A list of Collections features is
displayed.
5. Select the Enable checkbox for the Collections Strategies for Individual Transactions feature and save the
changes.
Note: Before you enable this feature, you must enable these prerequisite features:
• Collections Scoring and Strategy Assignments by Segment
• Automatically Initiate or Fulfill Collections Tasks in Third Party Systems
468

Oracle Fusion Cloud Financials
Implementing Receivables Credit to Cash
Chapter 13
Define Advanced Collections Configuration
Manage Collections Scoring and Strategy Assignments
Scoring and Strategy Assignments by Segment
Using Advanced Collections Scoring and Strategy Assignments by Segment feature you can do the following:
• Manage the scoring and strategy assignments of your customers.
• Increase your collections efficiency.
• Improve the cash flow.
As a collector, you can categorize your customers based on various segments such as business unit, profile class, and
remaining amount due. You can assign different scoring formulas and delinquent strategy groups to the customers,
and collectors can define the pre-delinquency options. You can also assign the predelinquent strategy groups to the
customers.
You can manage this feature from your work area and the Customer page. For example, you can view the multiple
strategies running against the same customer under the Strategies tab on the Customer page. If the setup process is
complete, the predelinquent strategies are also displayed on the landing page.
The assignments are defined as the default scoring formula. The delinquent strategy group assignments are defined at
each business level. The scoring formulas and delinquent strategy groups are displayed automatically. You can change
the groups to any scoring formulas or strategy groups that are defined based on your business requirements.
You can display credit score information for customers on the corresponding Collections Customer Profile page to
improve collections efficiency. Credit score information is available on the Collections Customer Profile page at both the
customer and account level. The Latest Credit Score field displays the score from the customer's most recent credit case
folder in the Approved status.
Complete these prerequisite steps to use this feature.
1. Click Navigator > Setup and Maintenance > Manage Standard Lookups.
2. Define the lookup code with below details:
◦
Lookup type: IEX_FEATURES
◦
Lookup code: IEX_DISPLAY_CREDIT_ATTRIBUTES
Related Topics
•
Overview of Advanced Collections Work Area
Define Scoring Formula and Delinquent Strategy Assignments by
Segment
You can use the Manage Collections Scoring and Strategy Assignments task to define the scoring formula and
delinquent strategy assignments.
You must specify the segments and enter the detailed assignments in the Delinquent Strategy Assignments by Segment
region under the Manage Collections Scoring and Strategy Assignments task. A segment is defined as a set or subset of
469

Oracle Fusion Cloud Financials
Implementing Receivables Credit to Cash
Chapter 13
Define Advanced Collections Configuration
various objects identified for scoring. The segmentation is implemented through each business unit and profile class,
and define the segmentation for the Customer, Account, or Site business levels. For example, define the segment name
Business Level + BU + Profile + High / Low Amount, for each segment including the default values.
Define the Amount Due Lower or Upper Threshold and the corresponding delinquent strategy groups to use when
the amount due is below the lower threshold or above the upper threshold. You can define one, both, or none of the
thresholds.
• Amount Overdue Lower Threshold: The lower threshold for the customer's amount overdue below which the
Below Threshold Strategy Group is used.
• Below Threshold Strategy Group: The strategy group assignment when the customer's amount overdue is less
than the Amount Overdue Lower Threshold.
• Amount Overdue Upper Threshold: The upper threshold for the customer's amount overdue above which the
Above Threshold Strategy Group is used.
• Above Threshold Strategy Group: The strategy group assignment when the customer's amount overdue is
more than the Amount Overdue Upper Threshold.
Here are the various scenarios to specify default scoring and strategy assignments:
1. Scoring and strategy assignments for various business levels: You can set up the default scoring formula
and strategy group for all the three business levels. The scores are calculated based on the default scoring
formula for the business level of customers, and delinquent strategies which are assigned based on the default
strategy group for each business level.
2. Scoring and strategy assignments by business unit: The scoring formula is different based on your business
unit. You can use different scoring formulas and strategy groups for the selected business units, and you can
use one scoring formula and strategy group for the remaining business units.
3. Scoring and strategy assignments by profile class: The delinquent customers who belong to the different
profile classes, and their scores are calculated based on the different scoring formulas and the strategies are
assigned based on the different strategy groups.
4. Scoring and strategy assignments by amount overdue lower threshold: You can specify the amount
overdue lower threshold for each business unit and the strategy groups for the below threshold. If a customer's
amount remaining due is less than the amount overdue lower threshold, then the strategy group specified
for the below threshold is assigned. Otherwise, by default the delinquent strategy group defined in the
assignments is assigned.
5. Scoring and strategy assignments by business unit and profile class: The scores are calculated based on the
various scoring formula for that specific business unit and profile class, and the strategies are assigned based
on the various strategy groups.
6. Scoring and strategy assignments by amount overdue lower and upper thresholds:
◦
If a customer's amount remaining due is less than the amount overdue lower threshold, then the strategy
group specified for the below threshold is assigned.
◦
If a customer's amount remaining due is more than the amount overdue upper threshold, then the
strategy group specified for the above threshold is assigned. Otherwise, the delinquent strategy group
defined in the assignments is assigned.
Related Topics
•
Scoring and Strategy Assignments by Segment
•
Overview of Advanced Collections Work Area
470

Oracle Fusion Cloud Financials
Implementing Receivables Credit to Cash
Chapter 13
Define Advanced Collections Configuration
Define Predelinquent Strategy Assignments by Segment
Using the Collections Delinquency Management process you can identify the delinquency and pre-delinquency statuses
for your customers, customer transactions, accounts, and sites based on the business level and pre-delinquency
options.
Collections Scoring and Strategy Assignments Scheduled Process
After the Collections Delinquency Management process is successfully completed, run the second process Collections
Scoring and Strategy Assignments. This process assigns the scoring formula based on the segmentation, calculate the
scores, and then assign strategies also based on the segmentation.
To run the Scoring and Strategy Assignments Scheduled Process:
1. Navigate to Scheduled Process.
2. Click Schedule New Process.
3. Enter or select the required parameters.
4. Click Submit.
Note: You must enable the Manage Collections Scoring and Strategy Assignments before you run the process.
To run the Update Collections Summary Data:
This process refreshes the data on the Collections landing page that contains the details about delinquent customers
and strategy tasks.
1. Navigate to the Collections work area.
2. The Collections work area is displayed with all the four infotiles information. Select the delinquent customer or
account infotile:
◦
The delinquent customers and the corresponding details of the customers are displayed by default.
◦
The scores are calculated and delinquent strategies are assigned based on the Manage Scoring and
Strategy Assignments by Segment setup data.
◦
In addition, a predelinquent strategy is assigned to the customers that are predelinquent based on the
setup information.
◦
Run the Delinquent strategies and predelinquent strategies at the same time, since one customer may be
delinquent and predelinquent at the same time.
3. Select the Strategies tab to view the details of the strategies. In this case, both the strategies are running, and it
displays the strategy type, and the name of the strategy assignment for reference.
Related Topics
•
Scoring and Strategy Assignments by Segment
•
Define Scoring Formula and Delinquent Strategy Assignments by Segment
•
Overview of Advanced Collections Work Area
471

Oracle Fusion Cloud Financials
Implementing Receivables Credit to Cash
Chapter 13
Define Advanced Collections Configuration
472

Oracle Fusion Cloud Financials
Implementing Receivables Credit to Cash
Chapter 14
Define Bill Management
14 Define Bill Management
Set Up Bill Management
Using Oracle Fusion Bill Management, you can set up bill management to enable the various bills receivables processes
such as reviewing outstanding transactions, credit memos, monitoring disputes, and making online payments.
After you configure bill management you can define the system options to register the external users, customer
accounts, and process various payment options.
Here's how you can set up bill management:
1. Provide data access to the internal users.
2. Manage system options to enable preferences.
After you complete the set-up, these are the key features enabled for the users:
• Analyze open and closed transactions
• Download transactions
• Monitor disputes
• Process payments options
Provide Data Access to Internal Users
Assign a job role to the users. You can provide the users the permission to access data and transactions belonging to a
business unit.
Here are the steps to provide data access to the internal users:
1. In the Setup and Maintenance work area, select the Offering as Financials, Functional Area as Users and
Security, and Task as Manage Data Access for Users.
2. On the Manage Data Access for Users page, select the user name, role, security context and security context
value, to create the data access for the user.
3. Save the changes.
Manage System Options
You can use the system options to set up external user role assignments, transaction and payment processing
conditions, enable preferences, and setup email notifications for the external users.
Here's how you can manage bill management system options for the external users:
1. In the Setup and Maintenance work area, select the Offering as Financials, Functional Area as Bill Management,
and Task as Manage Bill Management System Options.
2. In the Registration section, select Customer Accounts Payable Specialist to assign the role for external user.
3. In the Transaction and Payment Processing section, select transactions history in months, aging method, and
maximum future payment days allowed.
4. In the Preferences section, set up the required preferences. Here's the list of preference items that you can
configure for each Business Unit:
473

Oracle Fusion Cloud Financials
Implementing Receivables Credit to Cash
Chapter 14
Define Bill Management
◦
Bank Payment: Restrict or allow payment through bank.
◦
Credit Card Payment: Restrict or allow payment through credit card.
Note: redit card processing is currently available only in the Oracle data centers where Oracle
Payments is certified by the latest PCI Data Security Standard (PCI DSS v3.2.1).
◦
Credit Card Payment Limit: Restrict payments based on credit card limit value. If the limit is less than total
payment amount, it restricts the payment.
◦
Ledger Currency Only: Restrict or allow payment using ledger currency only.
◦
Print Invoice: Restrict or allow to print the invoice.
5. In the Notifications section, configure the email notifications for the user registration process. Select All for
Business Unit and enter the required email addresses.
6. Save the changes.
Related Topics
•
How Bank, Branch, and Account Components Work Together
•
Overview of Cash Management Rapid Implementation
•
Remittance Bank Accounts on Receipt Methods
•
Guidelines for Applying Receipts and On-Account Credit Memos
•
Register External Users
474
