
Page 1 of 38
PageUp User Guide
Contents
Description ............................................................................................................................................................................ 4
Website information ............................................................................................................................................................. 4
Employee Login ................................................................................................................................................................. 4
Login information .............................................................................................................................................................. 4
Careers websites (Job Postings) ........................................................................................................................................ 4
Permissions ....................................................................................................................................................................... 4
General guidelines for using PageUp .................................................................................................................................... 4
Logging In………………………………………………………………………………………………………………………………………………………………………..5
Dashboard ............................................................................................................................................................................. 6
Field types ............................................................................................................................................................................. 6
Mandatory fields ............................................................................................................................................................... 6
Lookup or Binoculars fields ............................................................................................................................................... 6
Lists of information ........................................................................................................................................................... 6
Navigation ............................................................................................................................................................................. 7
Navigation functions at a glance ....................................................................................................................................... 7
Navigation between pages ................................................................................................................................................ 7
Showing all records ........................................................................................................................................................... 7
Recruitment........................................................................................................................................................................... 8
Recruit for a position ......................................................................................................................................................... 8
Creating a Requisition for posting ..................................................................................................................................... 8
Selecting a Posting Template……………………………………………………………………………………………………………………………………… 8
Department and Posting Number………………………………………………………………………………………………………………………………. 9
Recruit for Multiple Positions with the same job description ......................................................................................... 10
Position Background and Working Title …………………………………………………………………………………………………………………. 12
Position Details ................................................................................................................................................................ 12
Funding Source, Percentage and Speedtype .................................................................................................................. 13
Page 2 of 38
Search Committee ........................................................................................................................................................... 13
Posting Details ................................................................................................................................................................. 15
Users and Approvers ........... ………………………………………………………………………………………………………………………………………16
Adding Documents …………………………………………………………………………………………………………………………………………………..17
Saving and Submitting the Requisition ........................................................................................................................... 19
Approving a job ............................................................................................................................................................... 20
Declining a job ................................................................................................................................................................. 21
Restart an approval process ............................................................................................................................................ 21
Assigning a different approver ........................................................................................................................................ 21
Job Requisitions – Searching and Managing ....................................................................................................................... 21
Searching for jobs via manage jobs ................................................................................................................................. 21
Sorting jobs ...................................................................................................................................................................... 22
Manage Applicants .............................................................................................................................................................. 22
Navigating to the applicants ........................................................................................................................................... 22
Viewing an applicant’s resume and application form ..................................................................................................... 23
Viewing an applicant card ............................................................................................................................................... 23
Applicant history section ................................................................................................................................................. 23
Changing the Applicant Status ........................................................................................................................................ 24
Managing applications - Bulk activities ............................................................................................................................... 25
Bulk communicate ........................................................................................................................................................... 26
Bulk compile and send .................................................................................................................................................... 26
Bulk move ........................................................................................................................................................................ 26
Bulk move and send ........................................................................................................................................................ 26
Communicating with candidates ......................................................................................................................................... 27
Submission of candidates selected for interview…………………………………………………………………………………………………………..27
Applicant Details Report……………………………………………………………………………………………………………………………………………28
Making an offer ................................................................................................................................................................... 31
Application status move .................................................................................................................................................. 31
Complete offer details ..................................................................................................................................................... 33
Approving offers .................................................................................................................................................................. 35
Approving an offer .......................................................................................................................................................... 35
Declining an offer ............................................................................................................................................................ 35
Page 3 of 38
Restart an approval process ............................................................................................................................................ 35
Closing out a Search ……………………………………………………………………………………………………………………………………………………..36
Key Terms and Roles within PageUp ................................................................................................................................... 37
Key Terms ........................................................................................................................................................................ 37
Requisition field roles ...................................................................................................................................................... 37
Other PageUp roles ......................................................................................................................................................... 38
Offer Card field roles…………………………………………………………………………………………………………………………………………………38

Page 4 of 38
Description
PageUp is an online Applicant Tracking System for managing the recruiting process for benefitted, non-benefitted, and
graduate student employee hires within UMass Boston. Should you have any questions regarding the recruitment
henry.paquin@umb.edu.
Website information
Login information
o http://umass.pageuppeople.com
.
o From the login screen, enter your campus ID and password.
o Select Boston for your campus from the dropdown list.
o Select to login.
Careers websites (Job Postings)
o UMass Boston: https://hr.umb.edu/jobs
o System Site: http://careers.massachusetts.edu
Permissions
Based on the permissions that you have been granted in PageUp, not all features/functions described in this
document may be available to you. Please email [email protected] or [email protected] if any questions.
General guidelines for using PageUp
o Do not use the Back button in your browser to go back to the previous page, as your session will be
interrupted and you may lose your changes.
o Your session will timeout after 120 minutes of inactivity.
o Do not share your login details with any other person.
o Clean cache if unable to login or unable to view stacked menu options
Page 5 of 38
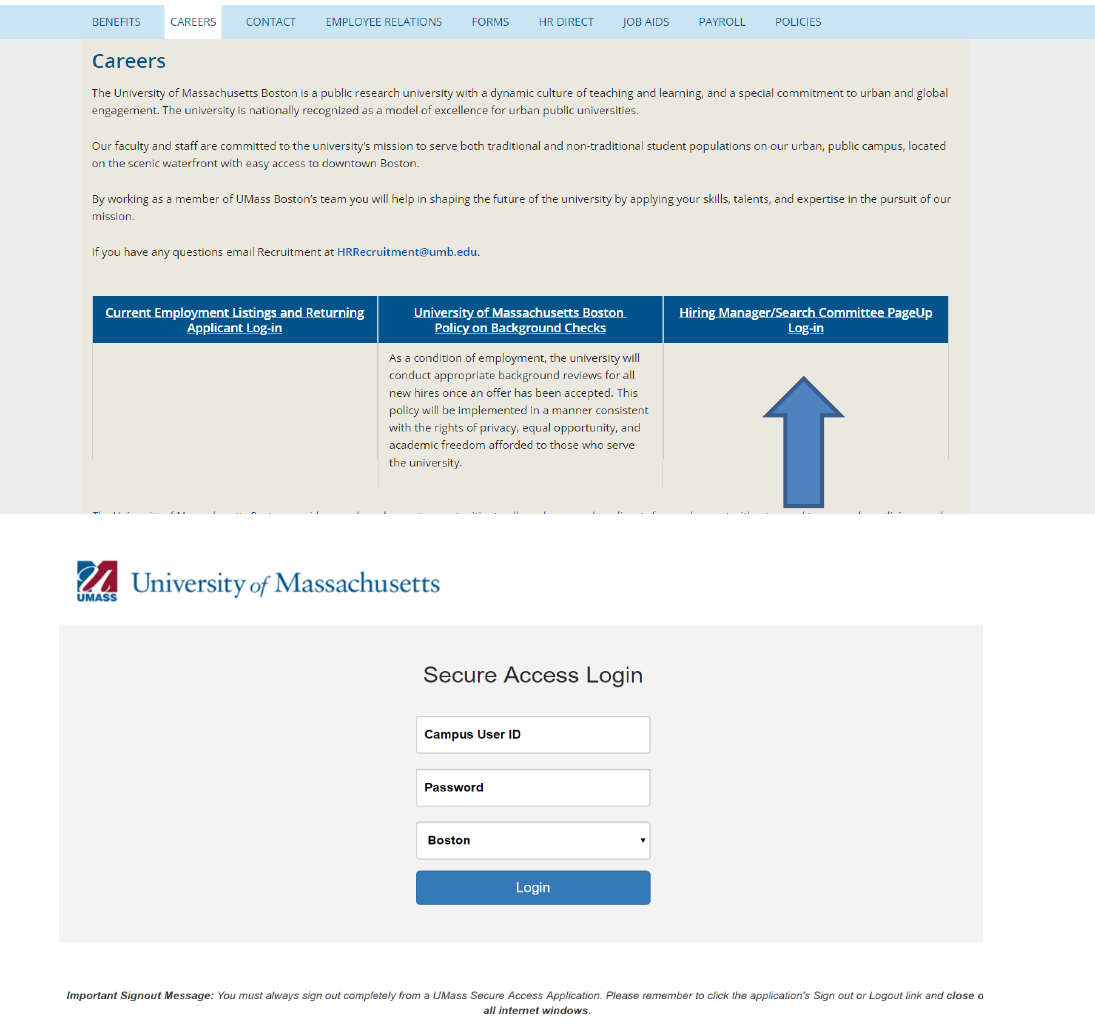
Logging In
The link to log into PageUp can be found on the Human Resources website, under Careers. You will click on “Hiring
Manager/Search Committee PageUp Log-in.” You will be prompted with the login screen, enter your campus ID and
password. Select Boston for your campus from the dropdown list. Select to login.

Page 6 of 38
Dashboard
This dashboard is the landing page for the hiring manager permission group within the system.
A Permission Group determines what level access a PageUp user has within the system. There are different
roles within the recruitment and hiring process and therefore the need for various levels of permission.
Human Resources assigns users their permission group based on the needs of the department. The
permission group with the most powerful role for each search will be the Hiring Manager. They will be
responsible for creating requisitions, the day-to-day management of the search, applicant management,
and will be the main point of contact with HR. Hiring Managers will have access to applicants and the
submission of first round applicants.
This dashboard provides a summary of their current work and the ability to access jobs and applicants from
the homepage. Jobs you have created will appear on your dashboard. Click Dashboard in the left side menu
to view available options. You will see your jobs in the Current jobs column grouped by job status. The job
statuses can be expanded/collapsed to view your job details.
Hiring Manager Information– access to the job
Each job on the Hiring Manager dashboard will contain the information icon. This icon provides a
summary of the job and the applicants that have applied for the job. From this icon, you can click on the job
title which will take you to the requisition or open a specific applicant card.
Field types
Fields in PageUp are filled in by entering data directly on the screen or selecting from drop down or lookup lists.
Described here are some common field types and how to fill them in.
Mandatory fields
Mandatory fields are flagged with a star. These must be completed when filling in a screen.

Page 7 of 38
Lookup or Binoculars fields
Binocular fields are used to allow users to select from a large set of data e.g. users or departments. To populate
binocular fields, click on the binocular icon to view a pop up window which will allow you to search through the
data. Select the data you would like to enter by clicking on the appropriate row, then click OK.
Lists of information
All lists of information throughout the system support the following functions:
o Enhanced navigation between pages of information.
o Show or hide columns.
o Change the number of records displayed per page.
o Show all records.
Navigation
Navigating between pages of information
When too many results are returned to display on a single page, PageUp provides a number of navigation options (see
below)
Navigation functions at a glance
Navigate between pages
Click on the appropriate navigation icon, or enter a page number into the Jump to page field and click the button. You

Page 8 of 38
will be taken to the page you selected.
Showing all records
Note: A maximum of 500 records will be displayed using this function
1. Click the Show all records link at the bottom of the list. If there are more than 500 records in your list, a
warning message will be displayed confirming that only the first 500 records will be returned.
2. The screen will re-load will all records displayed. Note: Depending on the amount of information being
returned, this may take up to a few minutes to complete.
3. To return to your standard list of information, click the Return to standard list link at the bottom of the list.
Recruitment
Recruit for a position
Before recruiting for an approved position, you should familiarize yourself with certain Roles found within the
Requisition. PageUp Roles and Terms are found at the end of this document.
Creating a Requisition for posting
Each new Requisition must contain an approved job description, evaluation memo and the position number that
corresponds to the position being filled. To confirm the correct approved job description, please contact Tom Kelly at
thomas.kelly@umb.edu. To confirm the correct position number, please contact Gerald Ellis at
gerald.ellis@umb.edu. To ensure data integrity with HR Direct and PageUp reporting, position number data must
correspond exactly with the position being filled.
Selecting a Posting Template
Team Link will default to the department you have been assigned to in HR Direct. If you have any questions regarding
this team access, please contact Human Resources.
Enter the position number. Select UMass Boston from the Campus drop-down menu. Select the Posting Template
that corresponds with the

Page 9 of 38
position being filled.
Select Next to open the Requisition.
Department and Position Number
Select your department from the Department drop-down menu.
In the Position No search field you should enter the Position Number that corresponds to the position being filled, if
not previously entered, then hit tab. A Blue Box under the Position No will populate and the information should mirror
the Blue Box below. Please note that the position number entered must be an approved budgeted position number
and all data must match the position being filled.

Page 10 of 38
The Position Type you select is dependent upon whether or not there is an incumbent in the position you are hiring for.
If there is no current or former incumbent and the position is a new Headcount for your department, you should select
New. If there is not a new Headcount for your department you should select Replacement.
Recruit for Multiple Positions with the same job description
To recruit for multiple positions enter the number of Positions in as a new position or as a Replacement position.
Once you enter the amount of Positions you are hiring against for the Position Description, you must click Add.
You are able to recruit for multiple positions for the same Job Description, however, every position requires a position
number. For example, if there are 3 position numbers that need to be filled for one Job Requisition, you can enter the
number 2 and the system will open two more job slots. You will need to assign an approved Position Number to each
opening. As applicants are hired, the system will attach the appropriate Position Number and populate the applicant
name and offer status. Once the final position is filled, the system will prevent additional applicants from being hired.

Page 11 of 38

Page 12 of 38
Position Background and Working Title
All requisitions must have the correct Working Title/ Posting Title for the job description being filled.
If the requisition is backfilling a previous incumbent, details of that incumbent must be included in this section as well.
Position Details
Complete the fields in the Position Details section. If you are filling a union position, Pay Grade is a required field.

Page 13 of 38
Funding Source, Percentage and Speedtype
You should indicate whether this position is funded via State Funds or Grants, the primary percentage of salary
dedicated to the payroll and your department’s payroll Speedtype.
Search Committee
Search committees are not required. If you are choosing to, select “Yes” that you would like to utilize a Search
Committee and identify your Search Committee Chair. Using the magnifying glass will help you easily search for UMass
employees. Please remember to allow pop-ups within your browser.
To add search committee members, select Add Search Committee Member. Find the Committee Member and select
Add. Continue to add members until done. Click the done button when finished to verify that all committee members
have been added.

Page 14 of 38

Page 15 of 38
Posting Details
In this section, indicate if an external advertisement is needed for your posting and the speed type for recharge
purposes. HR will confirm final advertising costs prior with hiring departments prior to placement.
Posting Location should always be UMass Boston.
Posting Summary is introductory text that will appear on the University’s Employment Opportunities website,
advertising the job. The text should be descriptive enough to make an applicant interested in the position.
Page 16 of 38
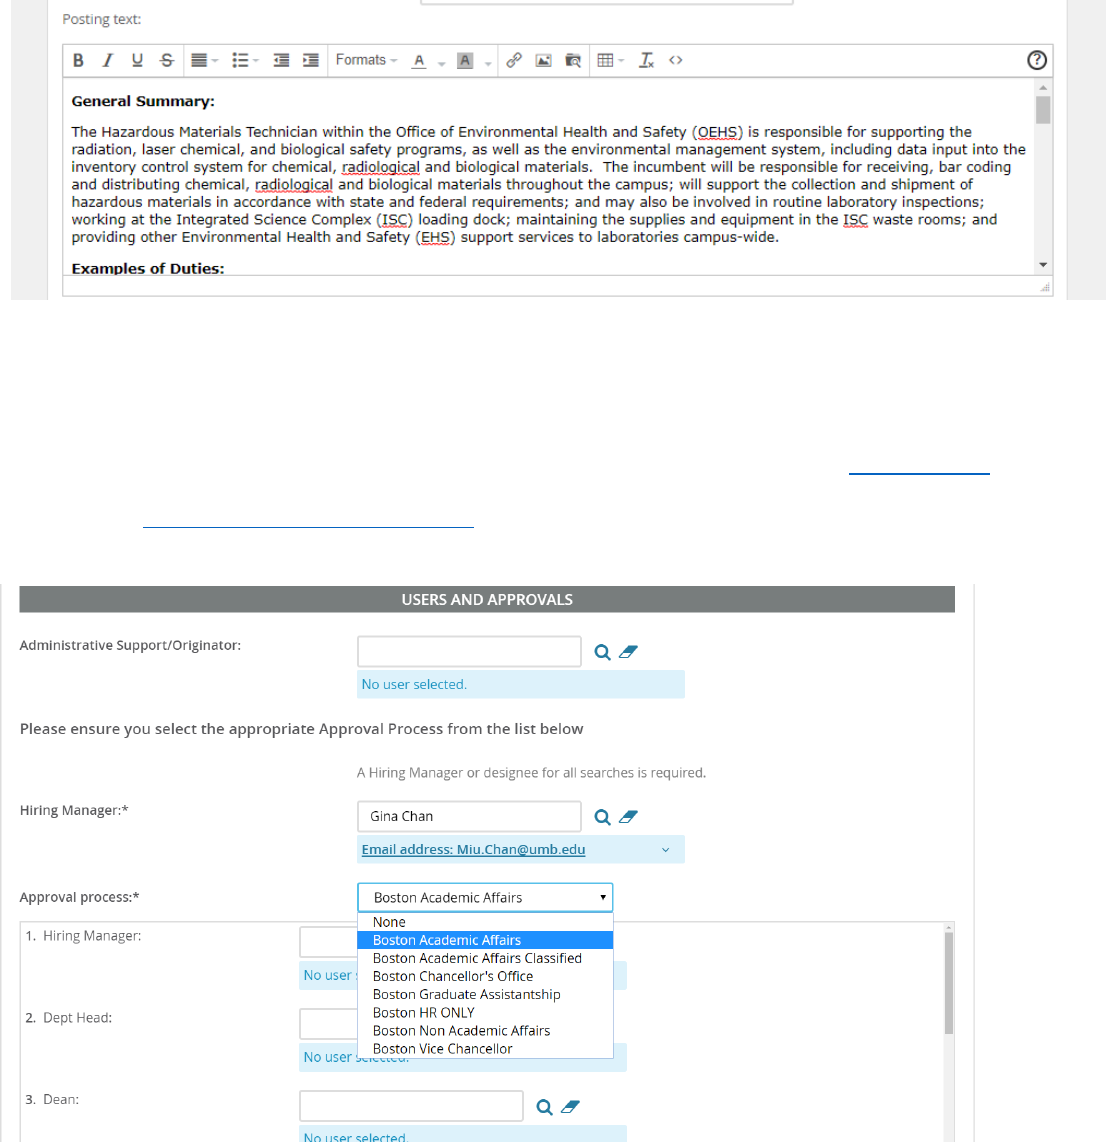
The Posting Text must be copied and pasted directly from the HR approved Position Description.
Users and Approvers
In the Users and Approvers section, you will identify the appropriate Approval Process and ensure that a Hiring
Manager has been assigned to the requisition.
Whomever initiated the recruitment process, their name will automatically populate into the Hiring Manager field.
The Administrative Support/Originator should put in the correct Hiring Manager’s name in that field and add their
name into the Administrative Support/Originator’s field. The appropriate approval process for the department
should be selected from the Approval Process drop down list.
After selecting an approval process, names may prepopulate into the approval process, however the user will have the
ability to change names within the approval process. Human Resources advises you not to change the names that

Page 17 of 38
prepopulate unless you are aware that an individual is on vacation or a name is incorrect. Should names need to be
updated after submission, please contact Human Resources. Names within the sections below will all receive emails at
different stages of the process. The Hiring Manager and Administrative Support/ Originator will receive an email
when the Requisition has been fully approved. Approvers will receive email notifications sequentially. Once a
requisition is fully approved, Human Resources will post the job.
An HR recruitment team member will need to be indicated on the requisition. Please refer to the departmental
distribution list for your representative.
Adding Documents
Before saving and submitting the Requisition, the approved Job Description and Evaluation Memo must be attached to
the Documents tab of the Requisition.
Select Boston Compensation Memo from the Document category drop-down menu. Once the document is uploaded,
select Save and Add Another to add the position description.

Page 18 of 38
Select Position Description from the Document category drop-down menu. Once document is uploaded, select Submit
and Close.
Note: If you are requesting a Posting Waiver, the memo that explains the reason for a waiver, position description, and
evaluation memo must be attached to the Requisition before saving and submitting.

Page 19 of 38
Saving and Submitting the Requisition
Selecting Save a Draft can be used when you need to save the Requisition you are working on without
starting the approval process.
Submit will save and begin the approval process on your Requisition.
Submit and Exit will save and begin the approval process and exit your screen back to the home screen.
Cancel will exit the Requisition without saving.
Hiring Managers and Administrative Support/Originators will receive an email when the requisition has been approved
and is with HR.

Page 20 of 38
Approving a job
Users will receive an email notifying them to review and approve/decline a job. This email will have instructions on
how to approve the job; you can do this either by replying to the email with the word Approve or you can login and
approve the Requisition. DO NOT FORWARD APPROVAL EMAILS TO OTHER USERS.
You can access these jobs by clicking the Approvals tile on your dashboard. The number of positions to approve will be
included there and you will click View to see the job you are approving and review the details.

Page 21 of 38
You can click through the tabs of the requisition to view attached documents and notes, if any. You can also look at
History and Revision at the top of the page to see if any changes were made throughout the approval process.
If you scroll down to the bottom of the position information tab of the requisition, you will see approve and decline
buttons. You will see your name as well as the names of the remaining approvers. Click Approve.
Declining a job
Scroll down to the bottom of the position information tab of the requisition, click Decline. A pop-up requesting a
reason for your decline will be displayed – this is mandatory. Save.
Restart an approval process
In the approval section of the requisition, click Cancel. A pop-up will appear requesting a reason for cancelling and
restarting the approval process. Fill this in and select a new approval process.
Assigning a different approver
Depending on your permission group you may be able to assign a different approver for a particular point of the
approval process. Back in the approval section of the requisition, click Edit. A pop-up will appear showing the
approvers for this job. If you have permission you will be able to clear a name from any box where the approver
has not yet approved and add a different user.
Job Requisitions – Searching and Managing
Searching for jobs via manage jobs
Select Manage jobs in the left side dropdown menu or select Jobs from the top left of the screen to view and search
for jobs in the system (both open and closed jobs). Access to jobs from this area is based on your permission and team
settings (e.g., some users can only see their jobs; others can see team member jobs, etc).
Please note that you will only see jobs in which you have been assigned to as a Hiring Manager or Administrative
Support/Originator, or Search Committee.

Page 22 of 38
Sorting jobs
Click column headings on the Manage jobs screen to sort on the column you have selected.
Manage Applicants
Navigating to the applicants
Depending on the role you have in the recruitment process, you will have access to review applicants to the positions
you are recruiting.
To navigate to the applicants, there are several options.
Once open to the job list, the number of applications is displayed and can be selected.
Click on Title to be directed to the Requisition Information page. Next, click on View applications to be directed to the
applicants who have applied to the position.

Page 23 of 38
The applicants will display in the following format. Columns contain pertinent information.
Viewing an applicant’s resume and application form
On the same line as the applicants name, on the far right you will see three icons and the words View application.
● If you click View Resume this will open the resume in HTML.
● Clicking on Download Resume will download the resume in the format is was uploaded.
● Click on View Answers to view the application form answers.
● Clicking on View application will open the applicant card to view all the applicants’ details.
Viewing an applicant card
Hiring Managers have access to view the applicant card which includes the applicant’s personal details, job application
information, previous history and communications, resumes and application forms, etc. Choose an applicant in the
system. Search for them via Manage applications in the left side menu. Search by your job and view your applicant.
Click View Application to see the applicant card.
The Applicant card (under Applications) contains the Position being reviewed, the status of the applicant, offer status,
and any additional Actions. Actions may be accessed with the down arrow.
The Status lets the reviewer know where in the recruitment process an applicant stands. This may include interviews
in process, designation of the success or rejection of an applicant, and recommendation for hire.
From the Actions drop down menu, action can be initiated to impact the applicant. However, it is best practice to
review all applicants prior to taking any specific action. Bulk actions will be explained in the next step.
Applicant history section
On the applicant card, there is a section called Applicant History where you can view the history of an
applicant and filter by item (e.g. documents, communications, notes) and/or by job (e.g. you can view ALL
documents attached to an applicant or filter by job and view documents only for a particular job).

Page 24 of 38
Changing the Applicant Status
Hiring Managers are permissioned to change the Status of an applicant. This is a critical point in the applicant review
process, since a Status change may trigger other actions within the PageUp system. A status change can also happen
when viewing all applicants on the Manage Applicants Page.
Permissioned users should only move applicants when the Search Committee has finalized their
review and/or the candidates approved by Human Resources (or Provost Office if a Faculty
search). Applicants should not bounce through different statuses.
Once you make the selection and click on Next, you are taken to the Confirm status change screen. Near the
bottom of the page, you will see the Status which the person has been moved to.
Once you have made the appropriate selection, click Move Now.
Human Resources will notify applicants not selected for interview. Once applicants are notified, hiring departments
will no longer have access to those candidates.

Page 25 of 38
Additionally, Hiring Managers have the ability to send customized or template emails to
the applicant, indicating their status during the process.
Managing applications - Bulk activities
Note: Bulk activities can be used throughout your recruitment process to process multiple applicants at the
same time. Certain actions may not pertain to all users.
Page 26 of 38
Bulk communicate
From Manage applicants, select a number of applications and click on Bulk communicate in the top toolbar.
Choose the correct communication template to preview the template and click next when ready. From this
next page, you can make updates to the template if required before clicking send. You can also export the
person out to an excel file to perform a mail merge. If this has been selected, an excel document will open.
A yellow information bar will confirm the action. To verify, open an applicant card and verify the
communication was sent via the applicant history area.
Bulk compile and send
From Manage applicants, select a number of applications and click on Bulk compile and send in the top
toolbar. Check Application form as the application document you wish to print and click on Create PDF.
When the process is complete and the Download document dialogue is displayed, complete the user details
you would like to send the documents to and click OK. Then click on the Done button to return to Manage
applications.
Bulk move
From Manage applicants, select a number of applications and click on Bulk move in the top toolbar. Choose
the applicant status you wish to move the applicants to. You have the option of communicating with the
applicants at this point if you wish as well as assign to a talent pool and make a note. Click move now.
Bulk move and send
From Manage applicants, select a number of applications and click on Bulk move and send in the top
toolbar. Select the information you wish to send to a user. Once you click next, the user will receive an
email with URL’s containing the details you have compiled. The next page will perform a standard bulk
move.

Page 27 of 38
Communicating with candidates
Hiring Manager permissions can select the Actions toolbar and then select Communicate.
Then you may select a communication template. If you wish to communicate with the applicant / candidate
free form, select No template.
Submission of candidates selected for interview
Hiring Managers will download the Applicant Details report following their review of candidates and indicate
a disposition reason for each applicant under the Application Status Reason column. First round candidates
will be indicated with “First Round”, all other applicants will be indicated as “Does not meet job
requirements” or “Other candidates more suitable.”
Note: These are the only disposition reasons to be listed on the report.

Page 28 of 38
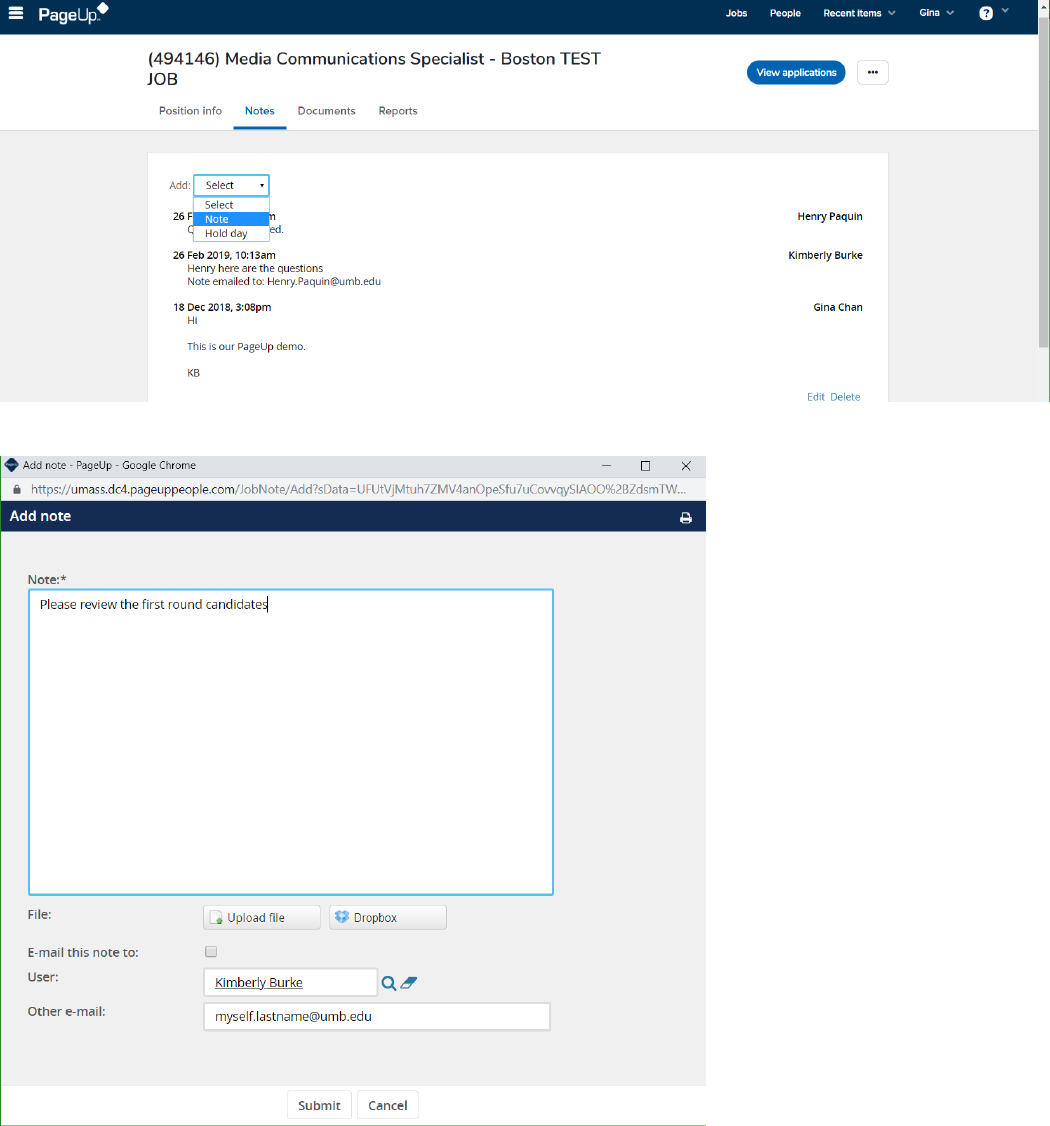
The Applicant Details Report can be found on the Reports tab of the requisition.
Disposition reasons will be added to the column below on the report, saved, and uploaded.
The completed report will be attached to the Notes tab for HR review of the first round candidates. Select your HR
Recruitment contact to notify HR.
For faculty searches: The Applicant Details Report will be sent directly to the Provost’s Office once candidates have been
identified for interview and dispositions have been listed for each applicant. The Provost’s Office will upload the
spreadsheet to PageUp notes for HR Diversity review. HR will notify the academic department and the Provost’s Office via
the notes upon final approval.
Page 29 of 38
Please include a brief note indicating what action is needed by HR and the recipient. An additional user can be selected.
The document will be available to HR and all users listed on the Requisition.

Page 30 of 38

Page 31 of 38
Making an offer
Application status move
Once you have interviewed your candidates and are ready to make a recommendation for hire, the Hiring
Manager will be required to change the status of the applicant. First, open the requisition, and then select
View Application. Click on the Status of the applicant you want to extend an offer to and change their
status to Offer Proposal-Selected Candidate. Click next to continue.
Click Yes to update the Job status at the same time you are updating the applicant status.

Page 32 of 38
Confirm Status Change:
After clicking Move Now the Offer card (offer details page) will be displayed. Do not elect to send an email to the
Applicant.
Fields from the Requisition and the Applicant Card will be pre-populate certain fields on the Offer Card.
The initial display of the Offer Card pulls forward personal details, job details and offer details contained in
the PageUp applicant tracking system.
In the Offer details section, you will see the Position Number and Applicant’s name. In most situations, the
Position number will already be marked for the individual. However, if there are several position numbers
listed on the job requisition, you may need to change the position number to match the applicant. To do
this, select the appropriate position number and proceed with the offer card.

Page 33 of 38
Selected Candidate Offer Card:
Complete offer details
From the Offer details page, enter details into all fields ensuring all mandatory fields are completed. The proposed
salary must be listed.
You must attach the Data Selection Form to the Offer Card indicating the finalists and their reasons for selection or
non-selection.

Page 34 of 38
You must then select an Approval Process. Enter the appropriate names, if names did not default, and then select
Submit and Close. This will start the approval process. Human Resources is last in the approval workflow and will be
responsible for sending the offer letter out to the candidate for staff searches. Hiring Managers will be notified via the
system once the offer details are approved by Human Resources and a verbal offer can be extended.

Page 35 of 38
Approving offers
Approving an offer
Click the Offers tile on the dashboard and click View next to the offer you are an approver for and review
the details. If you scroll down to the bottom of the Offer Card you will see approve/decline buttons. You will
also see your name listed as an approver as well as the names of the remaining approvers. Click Approve.
On the Manage offer approvals page, the information panel displays that the job has been approved.
Declining an offer
Select Manage offer approvals on the right hand menu again. Click View next to the job you are an
approver for and scroll down to the bottom of the page. Click Decline. A pop-up requested a reason for
your decline will be displayed and this is mandatory. Save.
Restart an approval process
In the approval section of the offer card, click Cancel. A pop-up will appear requesting a reason for
cancelling. You will then need to select Restart to create a new approval process. Fill this in and select a new
approval process.

Page 36 of 38
Closing out a Search
Under limited circumstances, a search can be closed out for lack of a viable candidate. To indicate that you
would like to close out the search, add a Note to the requisition and upload the Close Out Search Form.
Page 37 of 38
Key Terms and Roles within PageUp
Key Terms
• Job Card: PageUp form used to submit a requisition to recruit
• Offer Card: PageUp form used to select a candidate for an offer of employment.
• Requisition: Online request to post for a vacant, or soon to be vacant, position.
• Approval Process: The sequence of approvers needed to post a vacancy or select a candidate for an offer.
• Application Status: The different steps an applicant goes through during the recruitment process.
• Applicant Card: Individual application details and history (Hiring Manager and Vice Chancellor permissions).
• Permission Groups: Access level assigned to each user; HR assigns permissions in consultation with department
needs.
• Administrative Support/Originator: Enters requisition on behalf of department/hiring manager; no access to
applicants; optional.
• Hiring Manager: Will coordinate the full hiring process for the search, including submission of Offer Card, first
round candidates, and interview questions; serves as point of contact with HR.
• Search Committee and Search Chair: Reviews all applicants and makes recommendations for first round
interviews.
• Vice Chancellors: Can view all requisitions and applicants within assigned “Teams”; can also submit an Offer
Card for selected candidate
Requisition field roles
Hiring Manager (required field):
On the requisition, this field will always default to the person who is creating the requisition. If
the individual creating the requisition is not a true hiring manager for this position, you should
replace the name.
Responsible for day-to-day applicant and search management on a requisition that they are
assigned to.
Most powerful role with most visibility on requisitions. Has the ability to create and submit a
requisition, move applicants into the correct application statuses throughout the hiring process.
Will see all requisition statuses (open, filled, draft, approved etc). Is able to communicate to
applicants via PageUp.
Can view jobs assigned to them by selecting the jobs link at the top of their dashboard. Can view
approvals of the Requisition throughout the job approval process.
If no search committee, will submit Applicant Details Report of applicant pool via PageUp Notes.
Only one Hiring Manager can be assigned to a Requisition.
Administrative Support/Originator (optional field):
Individual who is completing the Requisition on behalf of hiring department.
Will attach approved job description and compensation memo to requisition.
No access to applicants.
Will see status of the requisition through approval.
Search Committee Chair (optional field):
Someone who will oversee the applicant review process.
Only able to see jobs that they are assigned to.
Page 38 of 38
Search Chair is able to view applicant documents.
Will be able to view search committee members’ feedback.
Should oversee search committee meetings and make recommendations to Hiring Manager. Will
submit Applicant Details Report of applicant pool via PageUp Notes.
Search Chair may be the Hiring Manager.
Able to view the original requisition, but cannot edit it.
Responsible for working with the Hiring manager, Administrative Support/Originator to move an
applicant into the correct disposition status.
Search Committee Member (optional field):
Can view applicants and is able to evaluate an applicant based on the selection criteria. Unable to
comment on an applicant.
Only able to see jobs that they are assigned to.
Able to view the original requisition, but cannot edit it.
Other PageUp Roles
Vice Chancellor/Vice Provost:
Senior administrators will have access to job requisitions and applicants for multiple Teams (departments)
within their division.
Access to applicants similar to Hiring Manager. Has ability to change application statuses and initiate or approve
an Offer Card.
Can approve a requisition.
OBFP:
Office of Budget and Financial Planning access to review and approve requisitions.
No Access to applicants
Offer Card field roles
Reports to Manager (required field by HR):
Who this individual will report to. Will receive notices (future rollouts) in relation to onboarding responsibilities and
provisioning.
Originator (required field):
Individual completing the Offer Card, typically the Hiring Manager.
